How to Implement A/B Tests in GODOT

A/B tests are a powerful technique to optimize user experience and maximize player engagement in games. They allow for informed, data-driven decisions, ensuring that game developers can regularly refine and enhance gameplay mechanics, visuals, and other aspects of the game, ultimately leading to higher player satisfaction and increased success in the gaming industry.
Let's see how to execute such a test in a game created with Godot, using ConfigCat for feature flag management and Amplitude for analytics.
How do A/B tests work in game development?
A/B tests involve creating two versions of a game feature and presenting each version to a subset of players. By tracking engagement and comparing the performance of each version, developers can identify the more successful variation and implement it as the standard in the game.
Introducing the Island Escape game
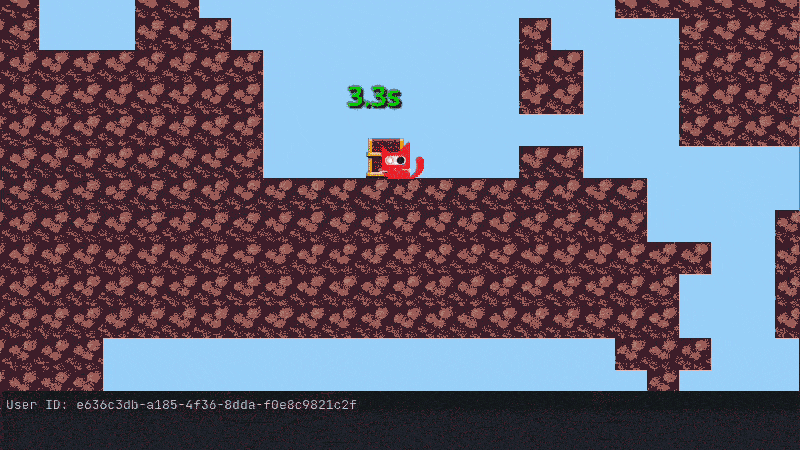
To demonstrate an A/B test, I created a 2D game called "Island Escape." In this game, players control ConfigCat's mascot to collect treasure chests and coins in a maze world. Their main goal is to find the exit before time runs out, while avoiding capture by the Godot mascot. The A/B test we're conducting centers on two distinct variants of collecting treasure chests in this game.
- Variant A: Requires players to stand in front of the chest for 4 seconds to collect it.
- Variant B: Requires the player to stand in front of the chest and press the 'Q' key three times to collect it.
The game is created using C# with the Godot v4.0.3 engine. As we focus on the A/B test implementation, non-related game features, settings, and code blocks will be filtered out. However, you are welcome to dive deeper into the details and functionalities of the project by accessing the repository on GitHub.

An overview of the game's A/B test structure
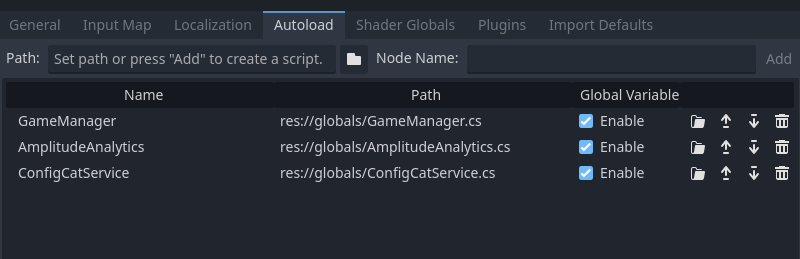
The game's A/B testing logic revolves around three global scripts, along with the Chest prefab, which is spawned across the game world. The global scripts are GameManager.cs, ConfigCatService.cs, and AmplitudeAnalytics.cs. Each script is configured as a Godot node at the top of the scene hierarchy tree using the Godot Autoloader. By doing so, game data and feature flag values remain available as a single source of truth at all times.
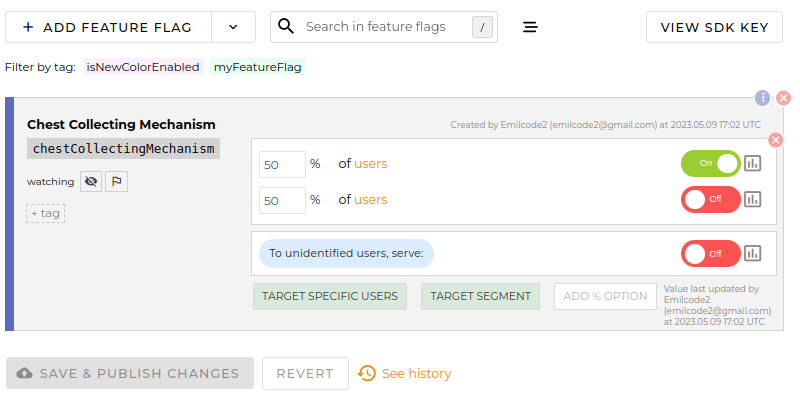
Setting up the A/B Test on the ConfigCat dashboard
To set up the test, we'll first integrate ConfigCat's user targeting system into the game, and then measure the results using Amplitude. We can start by creating the A/B test flag in ConfigCat's dashboard.
- Create a feature flag called
chestCollectingMechanism. - Set a 50-50 split between the players by enabling the
TARGET % OF USERSoption on the feature flag. This configuration will ensure that 50% of users have the flag turned off (4 seconds wait time for chest collection) and the other 50% have the flag turned on (players must tap the Q key to collect the chest).
The GameManager's inner workings
The GameManager script functions as the central hub for managing game states, player information and executing the AmplitudeAnalytics script.
First, let's focus on the variables and the _Ready() method. The GameManager connects to AmplitudeAnalytics, and a globally unique identifier (GUID) is generated. This identifier is used to simulate a distinct player each time the game is launched to compensate the lack of a player base problem in this demonstration. This identifier is sent to both the ConfigCatService and AmplitudeAnalytics as a userId. ConfigCat uses the identifier to determine whether to enable or disable the feature flag for the specific player, while Amplitude records chest collection events for that player.
private AmplitudeAnalytics amplitude;
private string userId;
private int chestsCollected = 0;

public override void _Ready()
{
    Instance = this;
    amplitude = GetNode<AmplitudeAnalytics>("/root/Amplitude");
    userId = System.Guid.NewGuid().ToString();
    ConfigCatService.Instance.SetUserObject(userId);
}
The ChestCollected method is called each time a player collects a chest. This method identifies the chest type, updates the number of chests collected accordingly, and sends an event to AmplitudeAnalytics containing the chest type message with the user identifier.
public void ChestCollected(string chestType)
{
    if (chestType == "OnTapChestCollect")
    {
        chestsCollected++;
        amplitude.SendAmplitudeEvent("OnTap Chests Collected", userId);
    }
    else if (chestType == "OnTimerCollectChest")
    {
        chestsCollected++;
        amplitude.SendAmplitudeEvent("OnTimer Chests Collected", userId);
    }
}
The ConfigCatService script mechanics
The main purpose of the script is to provide the value of the feature flag. It obtains user information from the GameManager and establishes a connection with the ConfigCat network to retrieve the value of a feature flag. This value is assigned to a global variable called isTapMechanismEnabled, which controls the behavior of the chest prefab.
public bool isTapMechanismEnabled { get; private set; } = false;
To ensure that there is only one instance of the ConfigCatService when the game is launched, the _EnterTree() method implements the Singleton pattern.
public override void _EnterTree()
{
    if (Instance == null)
    {
        Instance = this;
    }
    else
    {
        GD.PrintErr("More than one instance of ConfigCatService detected. Only one instance should exist.");
        QueueFree();
    }
}
The SetUserObject method is used to set the user identifier for ConfigCat. It then calls the FetchisTapMechanismEnabled method, which communicates with ConfigCat to determine the value of the feature flag for the user.
public void SetUserObject(string userId)
{
    _userObject = new { identifier = userId };
    FetchisTapMechanismEnabled();
}

private void FetchisTapMechanismEnabled()
{
    try
    {
        var user = new ConfigCat.Client.User(_userObject.ToString());
        isTapMechanismEnabled = configCatClient.GetValue(ConfigCatFlagName, false, user);
    }
    catch (Exception e)
    {
        GD.PrintErr("Error fetching feature flag: " + e.Message);
    }
}
Chest collection mechanism
To fully understand the chest implementation, I recommend examining the complete chest code. The core of this implementation lies in the ChestMechanism abstract class. This class serves as a common base for both chest collection mechanisms (tap-based and timer-based), ensuring a consistent interface. The abstract class defines four interaction methods that concrete classes must implement:
public abstract void OnBodyEntered(Node body);
public abstract void OnBodyExited(Node body);
public abstract void Process(double delta);
public abstract void UpdateLabel();
If you're not familiar with how Godot handles interactions between game objects, it employs a system known as collision detection, which is managed through signals. Signals are effectively a set of events that your game code can respond to. In this case, the OnBodyEntered and OnBodyExited methods are examples of such signals. They get triggered when a specific object (the player) collides with another (the chest), enabling you to script unique responses to these interactions. You can learn more about this from Godot's documentation on collision detection.
Let's see how we can switch between the mechanisms required for collecting the chest.
Choosing the mechanism
In the Chest class's _Ready method, the mechanism is chosen with the use of the ternary operator. If the isTapMechanismEnabled flag is on, the game creates an instance of the TapMechanism class; otherwise, an instance of the TimerMechanism class is created. This allows for easy switching between mechanisms, enabling the A/B test.
public override void _Ready()
{
    isTapMechanismEnabled = ConfigCatService.Instance.isTapMechanismEnabled;
    chestMechanism = isTapMechanismEnabled ? (ChestMechanism)new TapMechanism(this) : new TimerMechanism(this);
}
Creating the TapMechanism and TimerMechanism classes
Each class implements the required abstract methods and manages the specific logic for their respective collection mechanisms.
In the TapMechanism class, the Process method is responsible for checking if the 'Q' key is pressed (This key is manually added to the ui_select built-in action of the input map). If the 'Q' key is pressed, the number of remaining taps is reduced. When the remainingTaps value reaches 0, the chest.CollectChest("OnTapChestCollect") method is called to collect the chest.
public override void Process(double delta)
{
    if (Input.IsActionJustPressed("ui_select"))
    {
        remainingTaps--;

        if (remainingTaps == 0)
        {
            chest.CollectChest("OnTapChestCollect");
        }
    }
}
In the TimerMechanism class, we define the OnTimerCollectChest method, which is called when the timer times out. This method collects the chest using the chest.CollectChest("OnTimerCollectChest") method.
private void OnTimerCollectChest()
{
    chest.CollectChest("OnTimerCollectChest");
}
Finally, when the collection conditions are met, the CollectChest method forwards the chest type argument to the ChestCollected method in the GameManager, removing the chest and completing the interaction.
public void CollectChest(string collectionMethod)
{
    GameManager.Instance.ChestCollected(collectionMethod);
    QueueFree();
}
Sending data with Amplitude
The AmplitudeAnalytics script is a critical part of the data pipeline, transmitting events to the Amplitude platform via their HTTP V2 API. It serializes the event data into JSON format using the Newtonsoft.Json library. To add this library, execute:
dotnet add package Newtonsoft.Json
To utilize this code, ensure that the game is connected to your Amplitude dashboard. Replace the placeholder SDK key with your Amplitude SDK key. You can find the SDK key at: Settings / Projects / [Your Project Name].
public class AmplitudeAnalytics : Node
{
    private const string AmplitudeApiKey = "YOUR-AMPLITUDE-KEY";
}
The core of the entire script is the SendAmplitudeEvent method, where an HttpClient instance is created, and the Amplitude payload is assembled using the input parameters: eventType and userId. The method then sends the HTTP request, processes the response, and logs the outcome.
public async void SendAmplitudeEvent(string eventType, string userId)
{
    // Create an HttpClient instance
    using (var httpClient = new System.Net.Http.HttpClient())
    {
        // Create the Amplitude payload with the provided event type
        var payload = CreateAmplitudePayload(eventType, userId);

        // Create the Amplitude request with the created payload
        var request = CreateAmplitudeRequest(payload);

        // Send the request and process the response
        try
        {
            HttpResponseMessage response = await httpClient.SendAsync(request);
            response.EnsureSuccessStatusCode();
            string responseBody = await response.Content.ReadAsStringAsync();
            GD.Print("Amplitude event sent successfully: " + responseBody);
        }
        catch (HttpRequestException e)
        {
            GD.PrintErr("Error sending Amplitude event: " + e.Message);
        }
    }
}
Within the SendAmplitudeEvent method, two additional helper methods are used to break up the code for readability:
- The
CreateAmplitudeRequestmethod receives a payload string and returns a configuredHttpRequestMessageobject for the Amplitude API.
private static HttpRequestMessage CreateAmplitudeRequest(string payload)
{
    var request = new HttpRequestMessage(HttpMethod.Post, "https://api2.amplitude.com/2/httpapi");
    request.Headers.Accept.Add(new MediaTypeWithQualityHeaderValue("application/json"));
    request.Content = new StringContent(payload, Encoding.UTF8, "application/json");
    return request;
}
- The
CreateAmplitudePayloadmethod, using the providedeventTypeanduserId, constructs a JSON-formatted payload appropriate for the Amplitude API.
private string CreateAmplitudePayload(string eventType, string userId)
{
    // Create the event data dictionary
    var eventData = new Dictionary<string, object>
    {
        { "event_type", eventType },
        { "user_id", userId }
    };

    // Create the payload dictionary
    var payload = new Dictionary<string, object>
    {
        { "api_key", AmplitudeApiKey },
        { "events", new List<object> { eventData } }
    };

    return JsonConvert.SerializeObject(payload);
}
Analyzing the A/B Test Results
After generating a bit of in-game data by collecting the chests, the analytics setup is composed of a few simple steps:
-
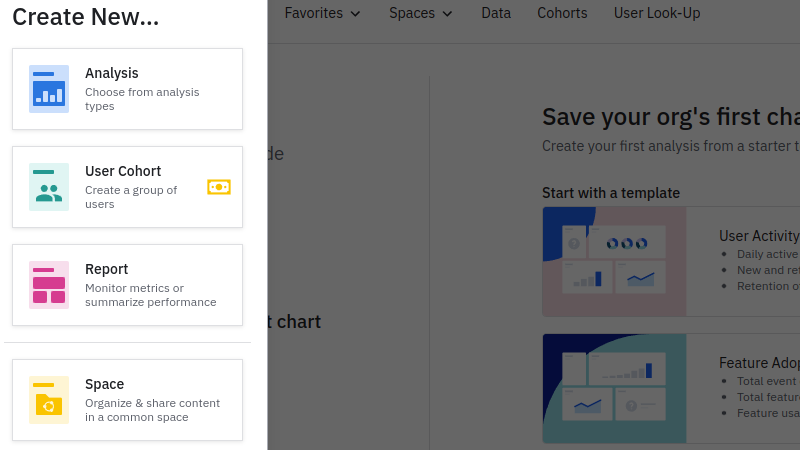
Head back to Amplitude, and click on the "Create New" button on the navbar.
-
In the left sidebar, click on "Analysis".
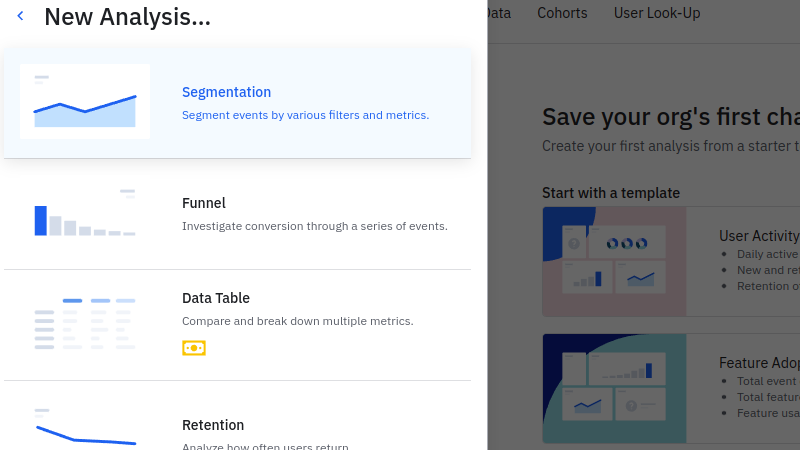
- Click on the "Segmentation" button
-
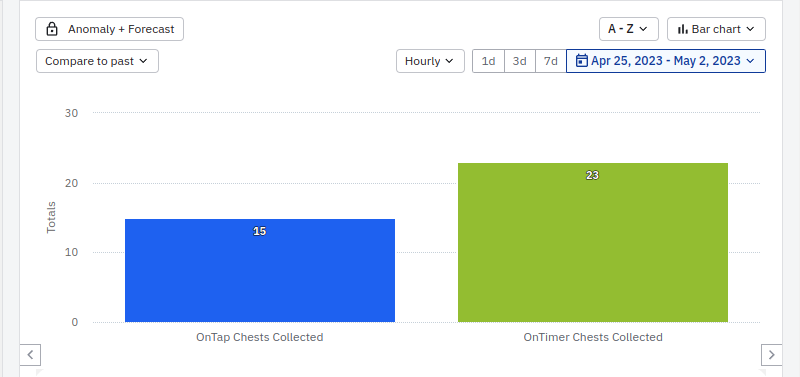
In the "Event Segmentation" section, select the events you want to analyze (e.g., "OnTap Chests Collected" and "OnTimer Chests Collected").
-
Select the "Total Events" metric and change the chart type to "Bar chart". You can see the total number of chests collected in the game by type.
Measurement and Data Collection
Although this A/B test is an effective method for comparing player engagement between the two chest collection mechanisms, you can further refine the test and data collection process. Simply comparing the amounts of chests collected may not be the most accurate A/B test. Here are some suggestions to consider adding to the A/B test:
-
Player engagement: Measure the time spent in the game or the number of levels played for each mechanism. This can help you determine which mechanism keeps players more engaged.
-
Retention: Track the number of players who return to the game after their first session for each mechanism. Higher retention rates indicate a better player experience.
-
Completion rates: Observe the percentage of players who complete the levels for each mechanism. This can provide insight into which mechanism encourages players to persevere through challenges.
-
Player feedback: Collect feedback from players on their preferences and experiences with each collection mechanism. Qualitative data can provide valuable context for understanding quantitative metrics.
By considering a range of metrics, you can more accurately evaluate the A/B test and recognise the better collection mechanism.
Conclusion
A/B testing is a powerful tool, allowing you to optimize and enhance the player experience. By integrating ConfigCat and Amplitude into your Godot game, you can effectively execute A/B tests and make informed decisions based on the data collected.
While the example used a simple game feature, the concept can be applied to any aspect of game development. Make sure you have a clear, measurable goal for your A/B test. Having a well-defined goal helps you focus on the most relevant metrics and interpret test results more effectively. With continuous testing and improvements, your game is sure to reach new heights of success.
For more posts and other announcements, follow ConfigCat on Facebook, x, Linkedin, and GitHub.