How to Use Feature Flags with Flask

Feature flags benefit our continuous integration and continuous deployment (CI/CD) workflows. As developers, we can quickly roll out and test new features without re-deploying or changing the application's code. Due to its simplicity, feature flagging can be incorporated into both new and existing applications. Let me walk you through how to use feature flags in a Flask application to help you better understand this concept.

How do feature flags work?
Feature flags are also called feature switches or feature toggles. They are boolean values that can be added to conditional statements in our code to control what features are rendered. In brief, feature flags are used to control which features users are allowed to view or interact with.
Flask integration
Following our discussion about feature flags, how can we put them to good use in a Flask application? This will be accomplished by installing and configuring our Flask application to use ConfigCat's feature flag services.
ConfigCat allows us to manage feature flags from a central dashboard. Additionally, users can be segmented and targeted based on their characteristics. This will allow you to release features only to specific segments. For instance, we might enable certain features or a set of features for users who are between 30 and 40 years of age.
Sample application
Let's develop a newsletter subscription feature for a fictional magazine website using Flask. We'll control the visibility of the subscription form using a feature flag. When the feature flag is off, an error message will be displayed instead. Now let's put this all together.
You can find the code for this sample app here.
Visit the ConfigCat labs organization on GitHub for other code samples for a variety of languages, frameworks, and topics.
Prerequisites
- A code editor (eg. Visual Studio Code)
- virtualenv - a tool for creating a virtual environment for Python
- Python 3.7 or higher
- Basic Python and Flask knowledge
Creating the Flask website
-
Launch your favorite code editor and a terminal window in the root of the application's folder. If you do not have an existing app, we'll create one together. The first thing you need to do is create a new folder on your computer. Name the folder whatever you like, for example, flask_app.
-
You'll need to create a Python virtual environment. This creates an isolated space for the Flask app and prevents packages that it depends on from conflicting with those installed at the system level. To create a new virtual environment, run the following command:
virtualenv venv
-
Create a new file called
requirements.txtin the app root folder with content from here. -
Activate the virtual environment and install the Python packages from the
requirements.txtfile into the virtual environment with these commands:
source venv/bin/activate
pip install -r requirements.txt
-
Create a folder called
static, then create a file inside calledstyles.csswith this content, or feel free to use whatever styling you like. -
Create a folder called templates in the root folder of the app. Add the following files to the folder.
-
base.html - This is the base HTML template for the Flask app. Other files can extend this file.
-
home.html - This template extends the base template and appears as the home or index page.
-
not-available.html - This extends the base template, and it would only be shown if the feature flag is turned off. It indicates to the user that the feature is not available.
-
subscribe.html - This also extends the base template and appears as the feature page. It will only be shown if the feature flag is turned on.
Creating a feature flag
Have you noticed that I didn't create an app.py file just yet? I'll get to this after creating a feature flag.
-
To continue, you'll need to sign up for a free account on ConfigCat if you don't have one.
-
Navigate to the dashboard and create a feature flag with the following data:
| Field | Value |
|---|---|
| name | canShowSubscriptionPage |
| key | canshowsubscriptionpage |
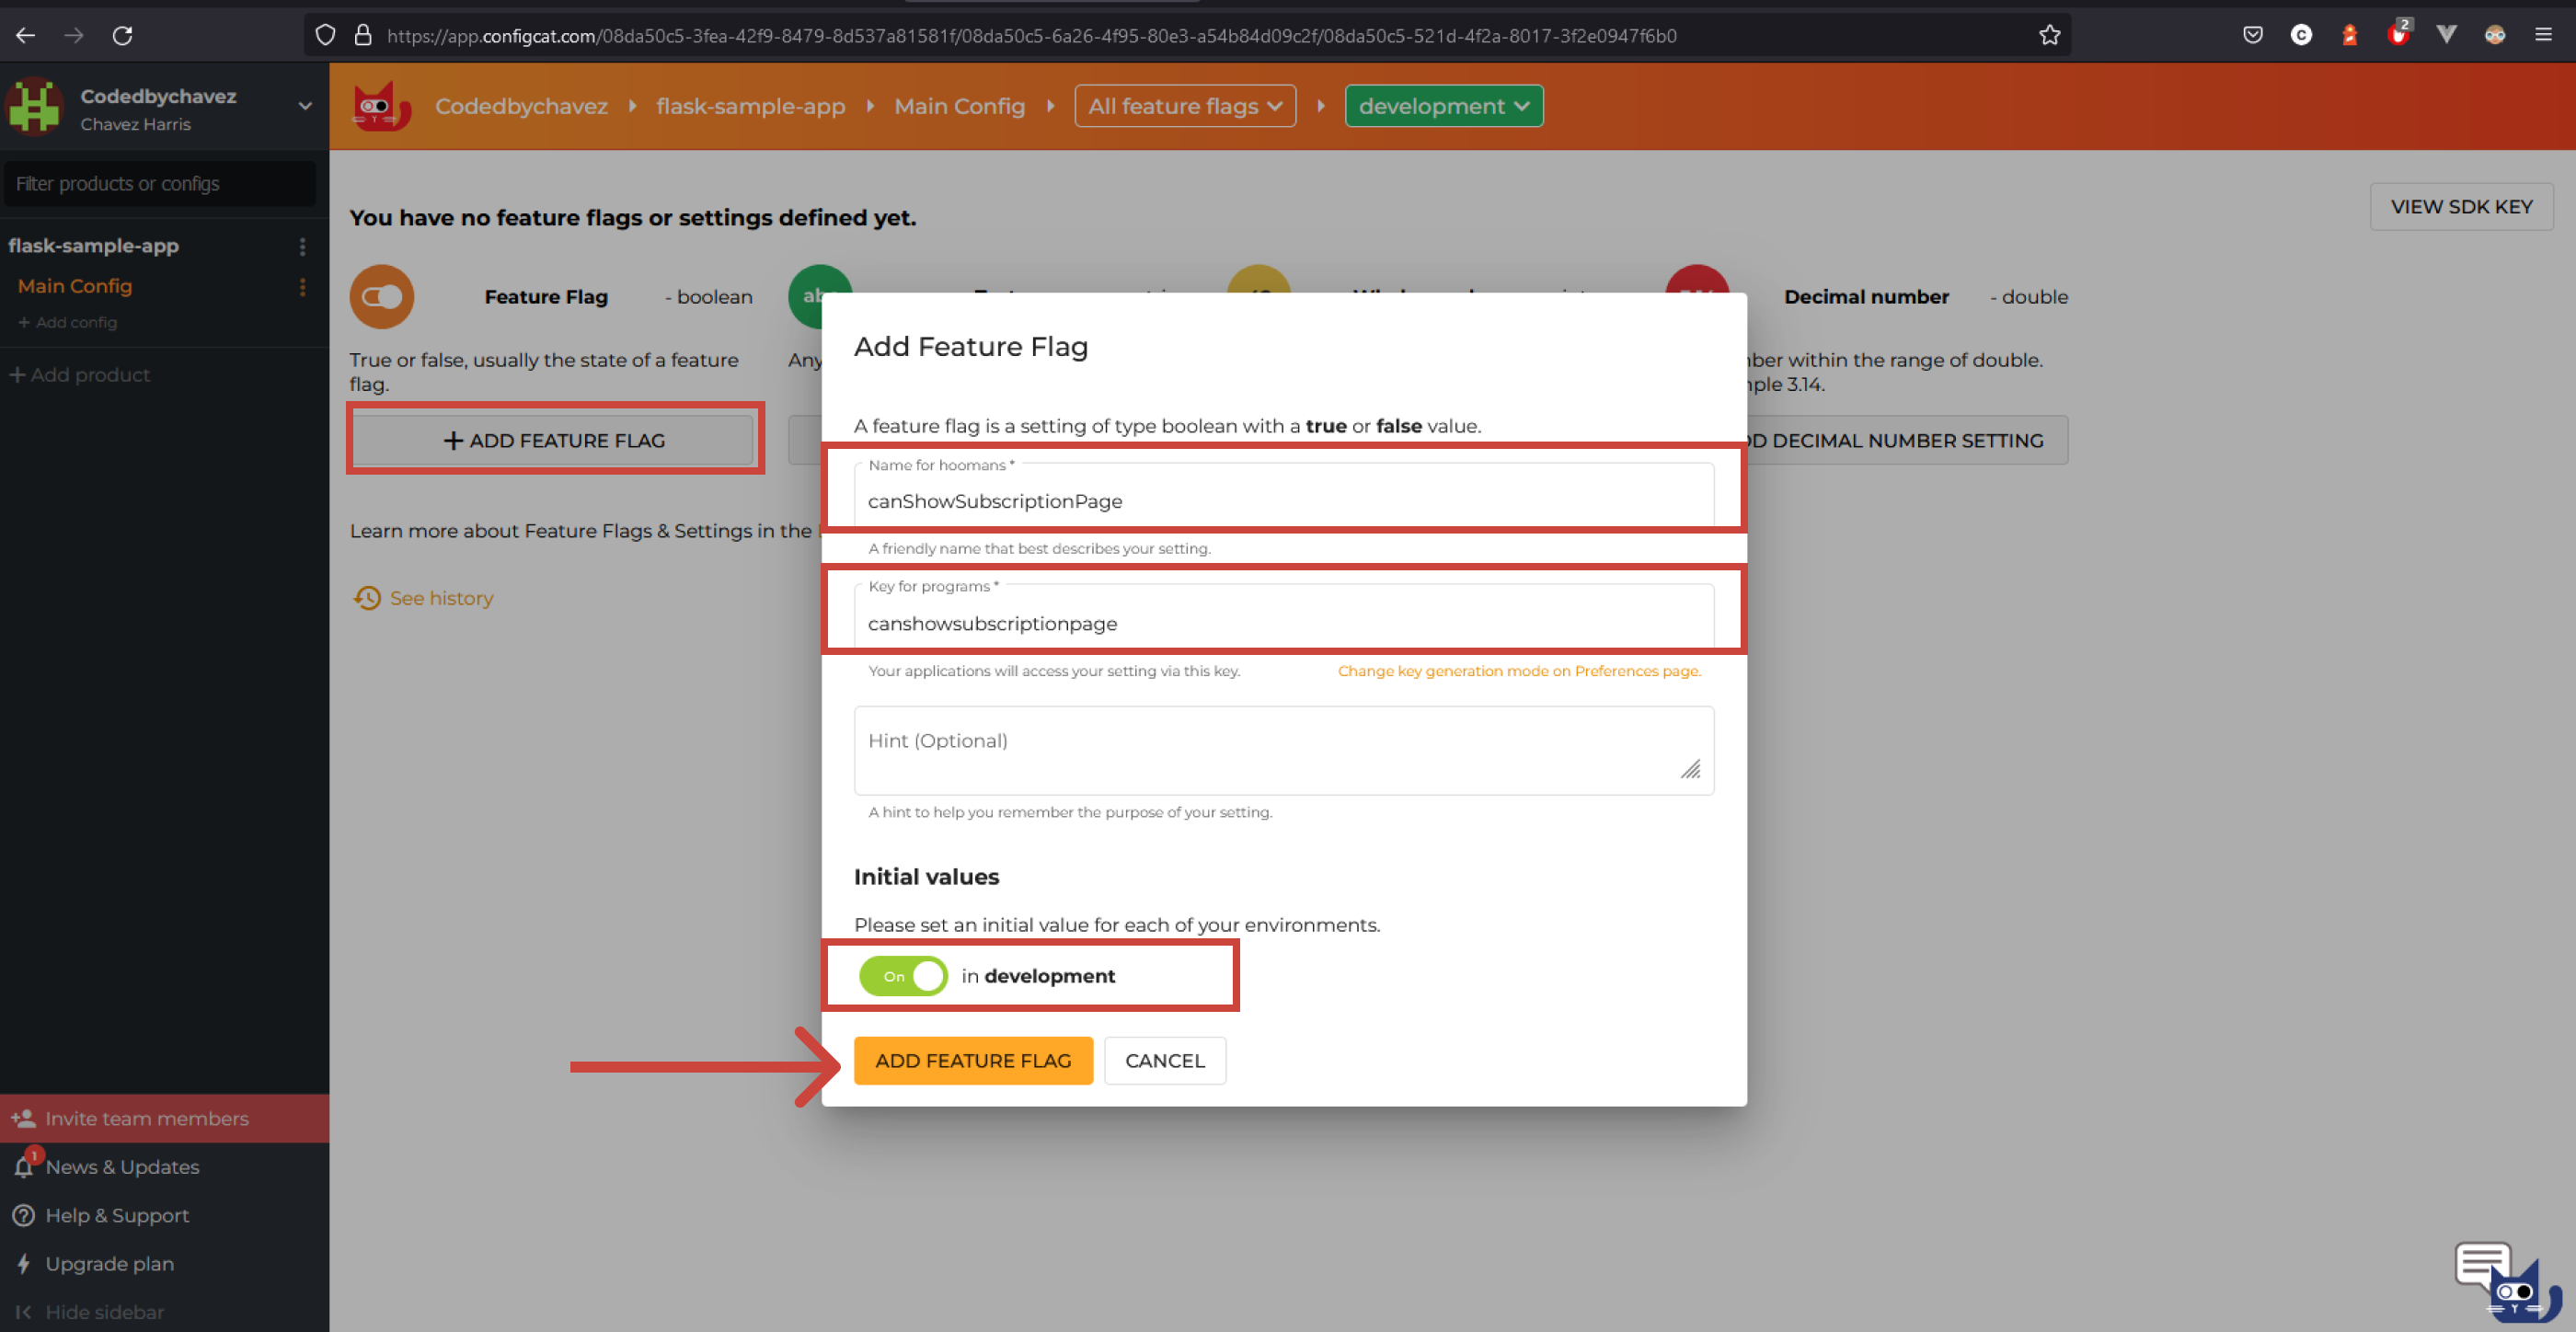
- Click the switcher on the right to enable this feature:
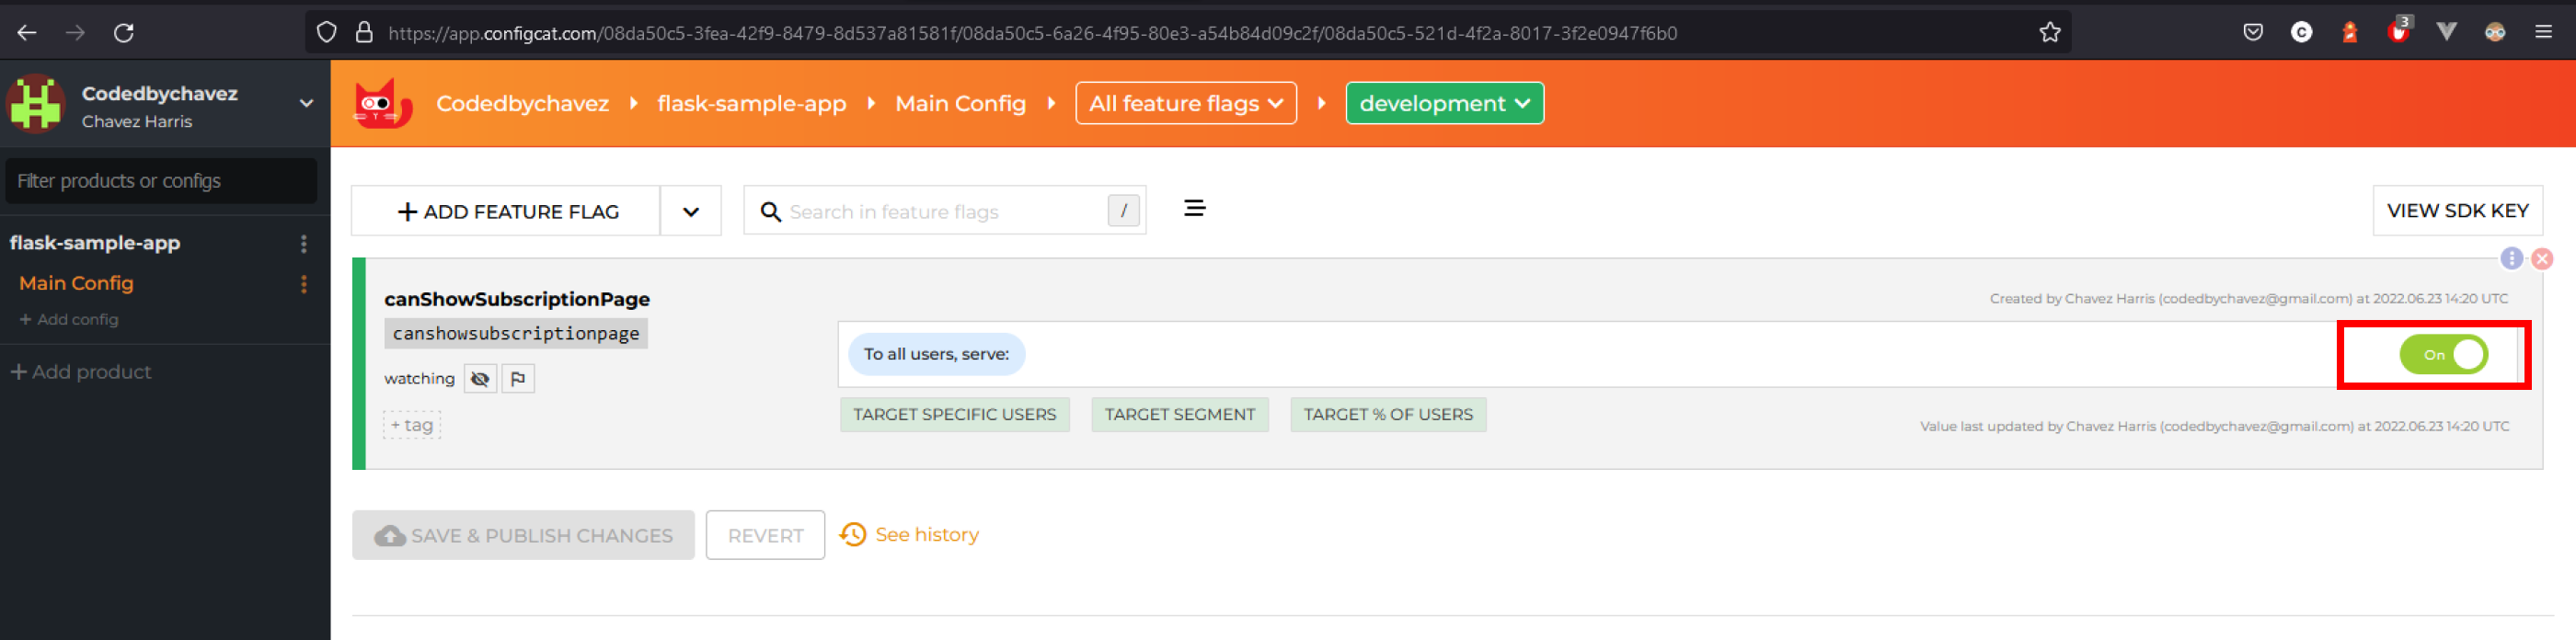
Now that the feature flag is created and switched on, let's integrate the feature flag with the Flask website.
Integrating with ConfigCat
It is strongly recommended using the ConfigCat Client as a Singleton object in production.
- Activate your Python virtual environment with:
source venv/bin/activate
- Install the ConfigCat client Python SDK by running:
pip install configcat-client
- In the root folder, create an app.py file with the following contents. I've added comments in the code to explain what some logic does.
# ...

# Imports the ConfigCat client SDK Python package we've installed
import configcatclient

# Initialize the client using your SDK key:
configcat_client = configcatclient.create_client('YOUR_CONFIGCAT_SDK_KEY')
# Create a variable to store the state of the feature flag from ConfigCat.
# This variable will be automatically updated every 60 seconds by default.
isCanShowSubscriptionPageEnabled = configcat_client.get_value('canshowsubscriptionpage', False)
# ...

# When the user navigates to the /subscribe route
@app.route('/subscribe')
def subscribe():
    if isCanShowSubscriptionPageEnabled:
        # If the feature flag is on, show the subscribe page
        return render_template('subscribe.html')
    else:
        # If the feature flag is off, show the not-available page
        return render_template('not-available.html')
Let's see if it works
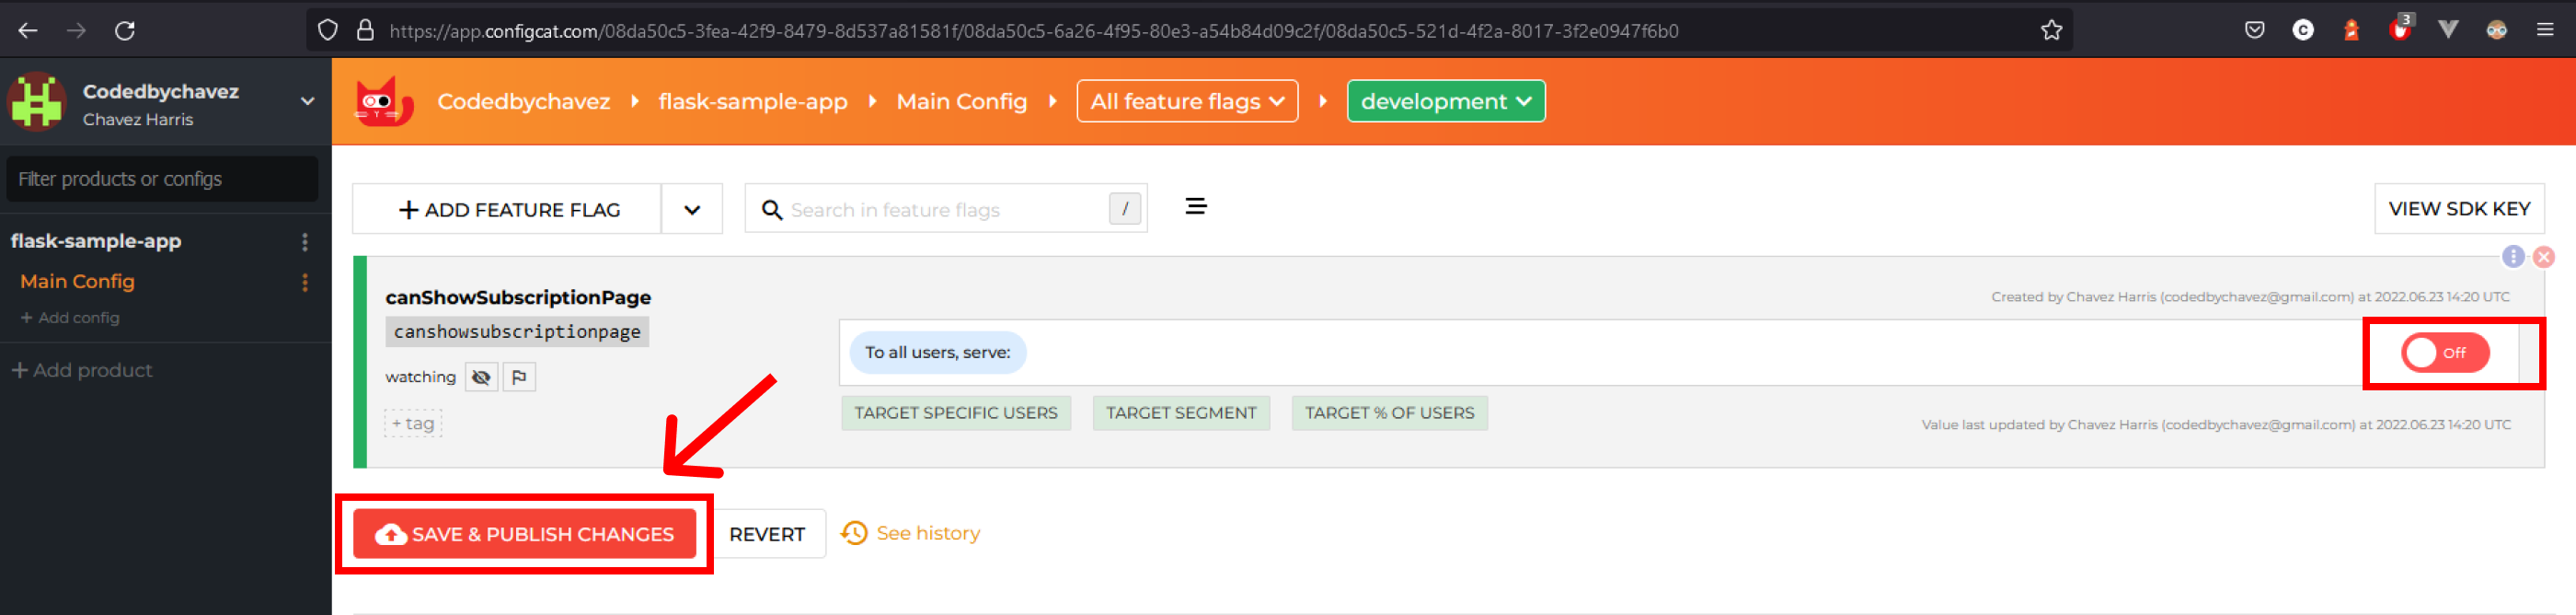
- Head over to the ConfigCat dashboard and turn the feature flag off:
- Restart the flask app. You should now see this alert:
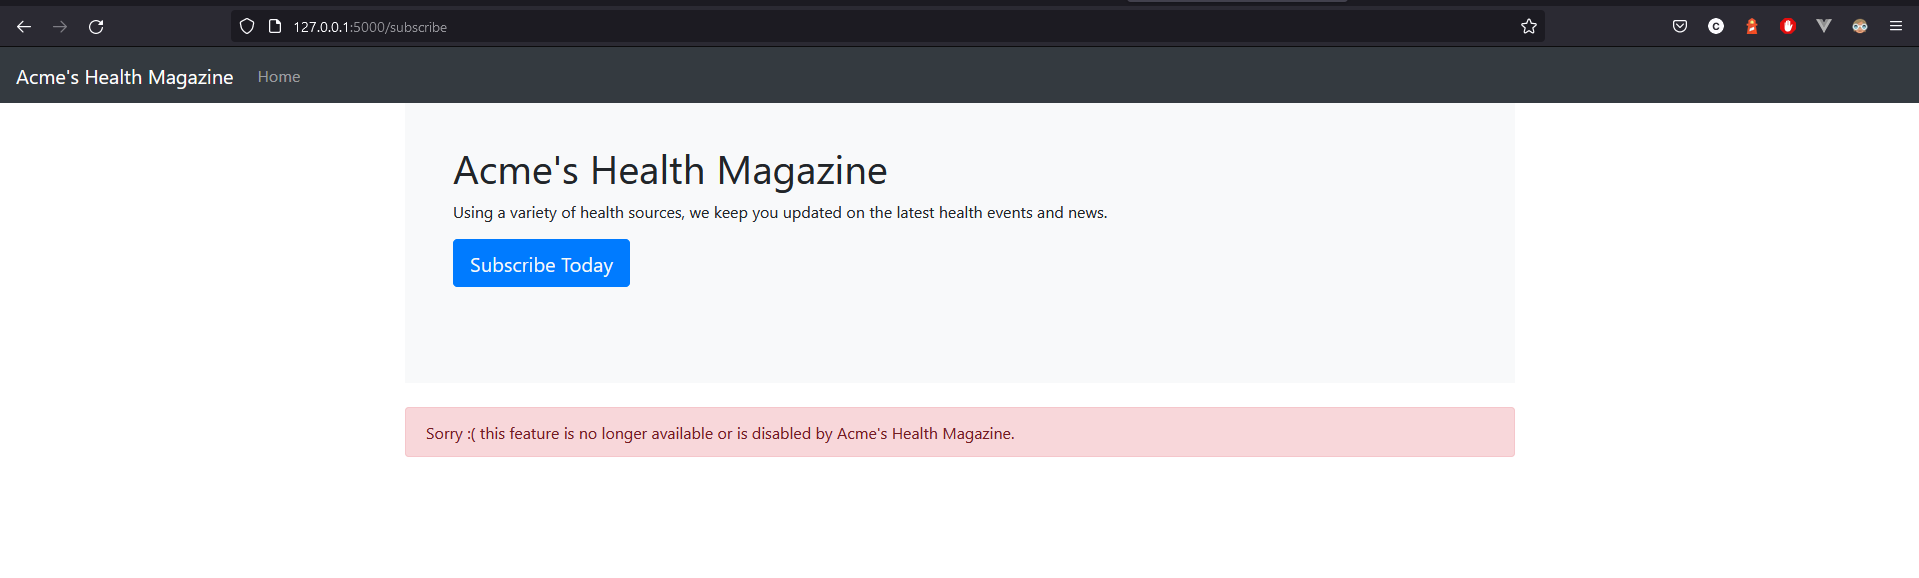
Keep in mind that you don't have to restart the app's server when you toggle a feature flag on or off. The app would pull the updated feature flag value automatically every 60 seconds by default and just reloading the page would be enough to see the changes. ConfigCat also gives you the ability to increase or decrease the polling interval period. You can read more about that here.
Conclusion
As you can see, integrating feature flags into your apps is simple, and it doesn't take much effort to start using them. Feature flagging is ideal for development workflows with steady feature rollouts.
ConfigCat's documentation is well explained, making it super simple for you or your team to get up and running fast. Other frameworks and languages are also supported. Check out the full list of supported SDKs here.
Stay tuned to ConfigCat for more awesome content on Twitter, Facebook, LinkedIn, and GitHub. The most lovable feature flag service... ever.