A/B Testing in Nest.js with ConfigCat and Amplitude

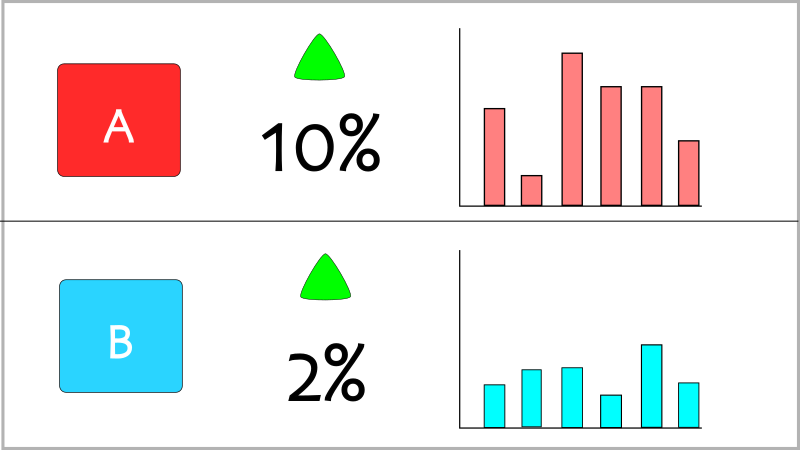
A/B testing answers the question: "Which of these versions will bring me better results, A or B?". It allows you to test two variations of a page to see which has a more positive impact. This could mean increased sign-ups for a landing page, more purchases on an e-commerce store, or even smoother user processes in an app. It all depends on what you want to improve. How does A/B testing work though?
The A/B Testing Process
A/B testing starts off with some analysis. After analyzing data from your site, you notice a page or a component that you can improve. After you figure out a way to improve it, you implement the changes, but you don't immediately release it to everyone because you're not sure how they will respond to it. To limit the risk of poor reception, you release the change to a percentage of your users.
One group of users will see the current version of the page, called the control. The other group will see the new version, called the variant. Whichever version makes the most positive impact will become the default version for all users.
ConfigCat's feature flag service makes A/B testing easier with percentage-based targeting. Percentage-based targeting allows you to split your users into groups and turn features on/off for the groups you want.
Quick refresher: Feature flags let you launch new features and change your software configuration without (re)deploying code.
I'll walk you through setting up an A/B test in a Nest.js app with ConfigCat and analyze the results in the Amplitude analytics platform. Let's take a look at the app we'll be testing.
Sample app
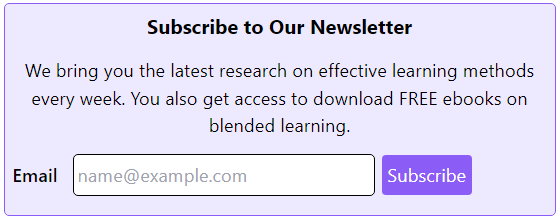
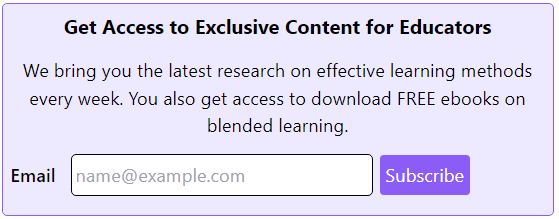
I'll run this A/B test on a fictional student management SaaS(Software as a Service) platform. The platform has a newsletter that offers helpful resources for educators, but the sign-up conversion rate is low. From my analytics dashboard, I notice I receive about 1000 visitors per month, but only about 20 people sign up. So I decide to run an A/B test on the newsletter section's heading. Specifically, I want to change the heading "Subscribe to Our Newsletter" to "Get Exclusive Access to Content for Educators" to see if that will capture their interest and get them to sign up.
Prerequisites
If you want to code along, you'll need:
- Node.js v16 or above
- Some knowledge of Nest.js and TypeScript or JavaScript
- A Nest.js app connected to ConfigCat.
If you don't have a ConfigCat account, create one here, then follow the steps in this tutorial to connect ConfigCat to Nest.js.
The site runs on a Nest.js backend and a React frontend. I'll focus on the Nest.js part because that's where most of the logic will live. You can see the complete source code of the app on Github. Let's see how to set up.
Splitting users in ConfigCat
For this A/B test, I want to do a 50-50 split. To do this, I'll log on to my dashboard and do the following:
- Click the
TARGET % OF USERSoption on the feature flag. - Type 50% into any of the boxes.
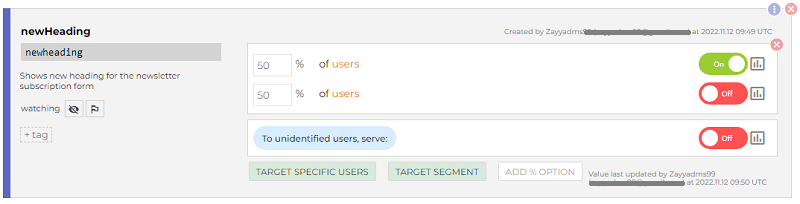
- Save.
On the code side, we'll need to add a unique user ID to the getValueAsync call. ConfigCat requires an ID for each user, so it can uniquely identify them during percentage-based targeting.
import { Injectable } from '@nestjs/common';
import * as configcat from 'configcat-node';

@Injectable()
export class ConfigcatService {
  private readonly configcatClient = configcat.createClient('YOUR-SDK-KEY');

  // I'm using a random userID to keep things simple. Use login IDs, and other unique values in production
  private userID = '343467';

  getFlagStatus() {
    return this.configcatClient.getValueAsync('newheading', false, {
      identifier: this.userID
    });
  }
  // I'll use this later in the controller file
  getUserID() {
  	return this.userID;
  }
}
That's all we'll need for both versions to go live. Let's hook up the app to Amplitude, so we can track the number of clicks the "Subscribe" button gets and then analyze the results.
Setting up Amplitude
To connect the app to Amplitude you'll need an Amplitude account. If you don't have an account, you can create one here.
When creating a new account or a new Amplitude project, you'll need to select an SDK and log a test event. Amplitude guides new users through this step while signing up. However, if you're an existing user, you'll have to create a new project to access the SDK selection screen. In your dashboard, navigate to Settings >> Projects and click the "Create Project" button.

Since this is a Nest.js app, we'll need the Node SDK. Select the NodeJS SDK and follow these steps:
- Install the Amplitude Node SDK.
npm install @amplitude/node
- Copy the code from the instructions page and paste it in the
main.tsfile to quickly log the test event. Remove the code from the file after Amplitude receives the event.
Sending Event Data to Amplitude
With the test event out of the way, we can create our custom event:
- Create an Amplitude service file in your project folder.
nest generate service Amplitude
This command will create an amplitude folder with an amplitude.service.ts file in it. It will also add the file to the providers array in app.module.ts.
- Open
amplitude.service.tsand add the following code:
import { Injectable } from '@nestjs/common';
import * as amplitude from '@amplitude/node';

@Injectable()
export class AmplitudeService {
    private readonly client = amplitude.init('YOUR-API-KEY');

    sendClickEvent(userID: string, flagValue: boolean) {

        this.client.logEvent(
            {
                event_type: 'Click Subscribe', // event name
                user_id: userID,
                event_properties: {
                    newHeadingEnabled: flagValue
                }
            }
        );
    }
}
In the snippet above, I created the event "Click Subscribe" and gave it an event property newHeadingEnabled, which will hold the value of the feature flag. Whenever someone clicks the button that triggers this event, it will send the value of the feature flag to Amplitude.
Every Amplitude project has an API key, which you can find under Settings >> Projects >> [Your Project Name]. Be careful not to use one project's API key for another.
For the final step, I'll import the Amplitude service in the app.controller.ts file and call the sendClickEvent method when the frontend sends a POST request.
import { Controller, Get, Post } from '@nestjs/common';
import { ConfigcatService } from './configcat/configcat.service';
import { AmplitudeService } from './amplitude/amplitude.service';

@Controller()
export class AppController {
  constructor(private readonly configcatService: ConfigcatService, private readonly amplitudeService: AmplitudeService) {}

  @Get('/flag')
  async getFlagStatus(): Promise<boolean> {
    const flagStatus = await this.configcatService.getFlagStatus();
    return flagStatus;
  }
  // New code
  @Post('/send')
  async handleClick() {
    const flagStatus = await this.configcatService.getFlagStatus();
    const userID = this.configcatService.getUserId();

    try {
      this.amplitudeService.sendClickEvent(userID, flagStatus);
    } catch (error) {
      console.error(error);
    }
  }
}
The backend is fully set up. Let's briefly take a look at the frontend code that triggers the event so we can see how it all comes together.
// other code...
function submitForm(event) {
    event.preventDefault();
    const formData = new FormData();
    formData.append('email', email);

    try {
    // call to the '/send' route in the controller
      fetch('http://localhost:3000/api/send', {
        method: 'POST',
        body: formData
      });
    } catch(err) {
      console.log(err);
    }
}
// remaining code here
That's all the code we'll need for the A/B test. Let's create a chart in Amplitude and see the results.
Analyzing the Results
Creating an Event Segmentation Chart
I'll use an event segmentation chart to see how many users have clicked the sign up button. On your Amplitude dashboard, do the following:
- Click
+ Newon the left sidebar. - Select "Analysis".
- Select "Segmentation".
You should now see an area with input fields:

I'm going to add the "Click Subscribe" event and filter it by the newHeadingEnabled property.
Take the following steps to add the event to the chart:
- Click the "Select Event" button and pick "Click Subscribe" from the dropdown.
- Click
+ whereand selectnewHeadingEnabled. - Select a value there, either
TrueorFalse. If you see only one of the two values there, you can manually add the other one.
- Repeat steps 1 - 3 for event B, the second event on the list.

Once you're done setting up the events, the results will appear in the chart area below. Scroll down to the chart area to see the results.
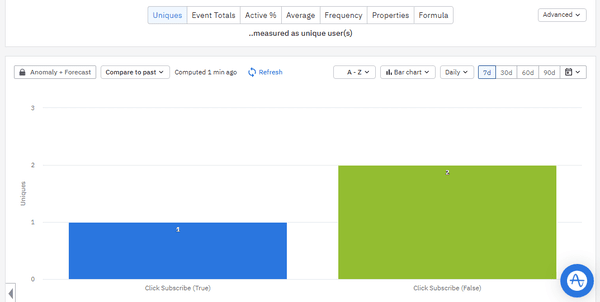
You can see the number of clicks for the event when the new heading is enabled and when it's disabled. Click the "Uniques" button to see the number of unique users that triggered the event. You can also change the view to bar chart and compare the results to the past.
Picking the winning variation
The data just started rolling in, so I'll need more time to see how both versions perform before I make my decision. For a more high-level look at A/B testing and its best practices, check out this article.
Conclusion
As the drive for growth and improvement increases, A/B testing is a handy tool to have in your belt. Whether the results of your tests are positive or not, you can easily toggle them with ConfigCat's feature flags. Iterate, experiment, and learn more about your users' preferences. ConfigCat supports simple feature toggles, user segmentation, and A/B testing and has a generous free tier for low-volume use cases or those just starting out.
Here's a quick recap of how I set up the A/B test:
- split users into two groups in the ConfigCat dashboard
- set up the Amplitude SDK
- set up an Amplitude event with custom properties for the feature flag
- created an Event Segmentation chart
- filtered the event with its custom properties
Resources
- Sample app source code
- ConfigCat Percentage-based Targeting Docs
- Amplitude Node SDK
- Amplitude Event Segmentation Charts
- A/B Testing with Feature Flags
- Feature Flags in Nest.js
- Nest.js Docs
You can stay up to date with ConfigCat on Twitter, Facebook, Github, and LinkedIn.