How to Use Feature Flags in a .NET MAUI Application

In the ever-changing world of programming, it can be difficult to keep up to date with all the latest technologies and frameworks. There's always something newer and cooler that you simply must try.
In this article, I'll guide you through the process of dipping your toes into the .NET MAUI framework and incorporating feature flags along the way. If you're already a seasoned .NET developer, this tutorial might reveal a couple of things you didn't know about feature flags, so don't hesitate to read on.
What is .NET MAUI?
.NET Multi-platform App UI, or .NET MAUI for short, is a framework that allows you to create desktop apps and native mobile apps by using C# and XAML. Basically, you can develop applications for Android or iOS devices, macOS, or Windows.
By using a shared code-base, the code you once wrote can be deployed on all these devices without any changes, giving you the opportunity to code once and deliver your product to all popular devices without any hassle.
What are feature flags?
Feature flags are essentially boolean variables that can be controlled remotely. It may appear simple, and it is in fact, but these flags are extremely versatile and can be used for a variety of purposes.
By incorporating a feature flag in your application, you are laying the groundwork for future updates and feature releases, which means that by planning ahead, you can avoid redeploying your code. You can also conduct A/B testing to determine what works best or target your users based on subscription type, location, or any other criteria you want.
When it comes to actually using these flags, you'll need a feature flag management system, such as ConfigCat. Then you simply connect to the system and handle the logic of your flag. If it still sounds abstract, just keep reading.
The Sample App
It's time to get to the core of our tutorial and discuss the sample app. I've decided to create a very simple app example in which you can toggle an image on or off. By completing this simple task, you will be able to see the power of feature flags as well as the utility of .NET MAUI. So let's get started.
If you want to take a look at the finished app, you can find it here.
Prerequisites
- C# knowledge
- Visual Studio with the .NET Multi-platform App UI development workload
- Android or iOS emulator (optional)
Creating the Flag
Before we get to the application, I'll walk you through the process of creating a feature flag. For this tutorial, I'm going to use the ConfigCat feature flag management system, which is very simple to use.
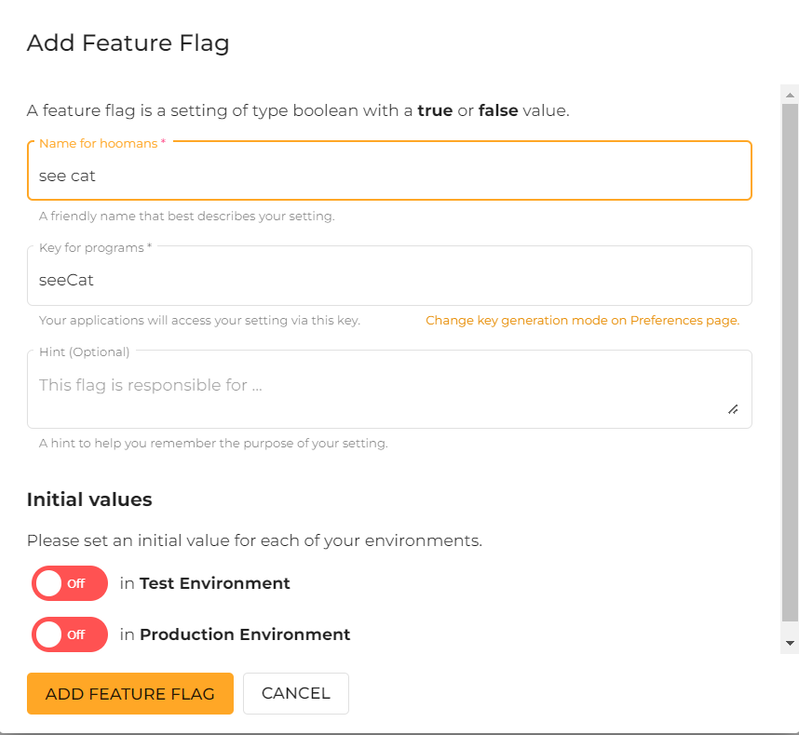
Go to ConfigCat and follow the steps to create a free account. Then, log in and navigate to your dashboard. You can create your flag by clicking the "Add Feature Flag" button on the left side of the page. The flag is set to off by default.
Once your flag has been created, locate the "View SDK Key" button in the top right corner. You'll need this unique key later in the tutorial to connect the app to your own dashboard and flag.
Creating the .NET MAUI App
It's now time to start working on the .NET project. To begin, launch Visual Studio and start a new project. Select the appropriate framework in the next window, as shown in the image below.

Name your project, choose your framework version (.NET6 is recommended), and then click Create to complete the process.
After that, you should see the files open. Take a moment to become acquainted with the project. For the purposes of this tutorial, we will focus on MainPage.xampl.cs and MainPage.xampl files.
Using the ConfigCat SDK
Now, we’re ready to start coding.
Before we dive in, we must first download the ConfigCat SDK package. To do so, open a terminal in your project folder and run the command below.
dotnet add ConfigCat.Client —version 6.5.3
After that, go to MainPage.xampl.cs and import the library at the top of the file.
using ConfigCat.Client;
Editing your code
Now, it's time to create the ConfigCat client, which you can do by pasting the following code in the MainPage() method. For now, you can delete the onClick() method that was auto-generated.
Remember the SDK key I was telling you about before? You need to include your own key here. If you check your ConfigCat dashboard, you'll see that this code block is automatically generated for you as well.
var client = new ConfigCatClient("YOUR-SDK-KEY");
var seeCat = client.GetValue("seeCat", false);
To customize the UI of the app, you need to edit the MainPage.xampl file. You can delete the default generated code that contains a few labels and a button and replace with the following:
<?xml version="1.0" encoding="utf-8" ?>
<ContentPage xmlns="http://schemas.microsoft.com/dotnet/2021/maui"
             xmlns:x="http://schemas.microsoft.com/winfx/2009/xaml"
             x:Class="netMAUIExample.MainPage">

    <ScrollView>
        <VerticalStackLayout
            Spacing="25"
            Padding="30,0"
            VerticalOptions="Center">

            <Image
                x:Name="mainImage"
                Source="cat_red.png"
                SemanticProperties.Description="A cute cat - or not"
                HeightRequest="200"
                HorizontalOptions="Center" />


            <Label
                x:Name="mainLabel"
                Text="Here's the cute ConfigCat"
                SemanticProperties.HeadingLevel="Level1"
                FontSize="32"
                HorizontalOptions="Center" />

        </VerticalStackLayout>
    </ScrollView>

</ContentPage>
This code block adds a label and an image to the page. Notice how each of these has a name, which we'll use in the C# code to dynamically change their content based on the flag value.
I've added my own picture by giving the source and adding the picture to the Resources file in the project. You can add your own or stick to the preexisting "dotnet_bot.png".
Returning to the C# script, it is now time to add the logic that will propagate changes in the UI. Create a second method called flagLogic() to determine the image and label's contents.
bool seeCat = false;
    public MainPage()
    {
        ...
    }

    private void flagLogic()
    {
        if (seeCat == true)
        {
            mainLabel.Text = $"Here's the cute ConfigCat!";
            mainImage.Source = ImageSource.FromFile("cat_red.png");
        }
        else
        {
            mainLabel.Text = $"Sorry, the cat is sleeping :(";
            mainImage.Source = ImageSource.FromFile(null);
        }
    }
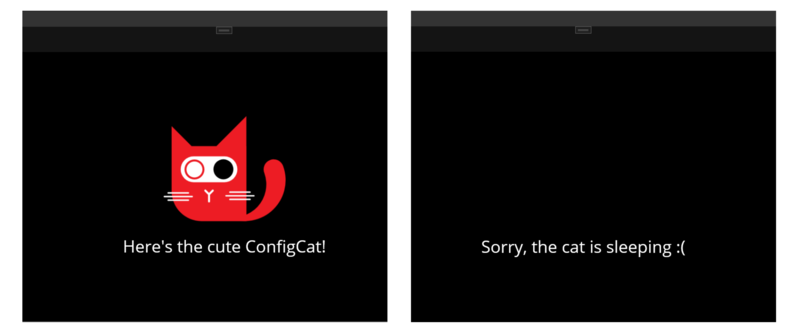
This changes the label text to correspond to the flag value. The cat image will appear if the flag is enabled. When turned off, the image will vanish, which I've accomplished by providing a null source to the image.
Toggling the Flag
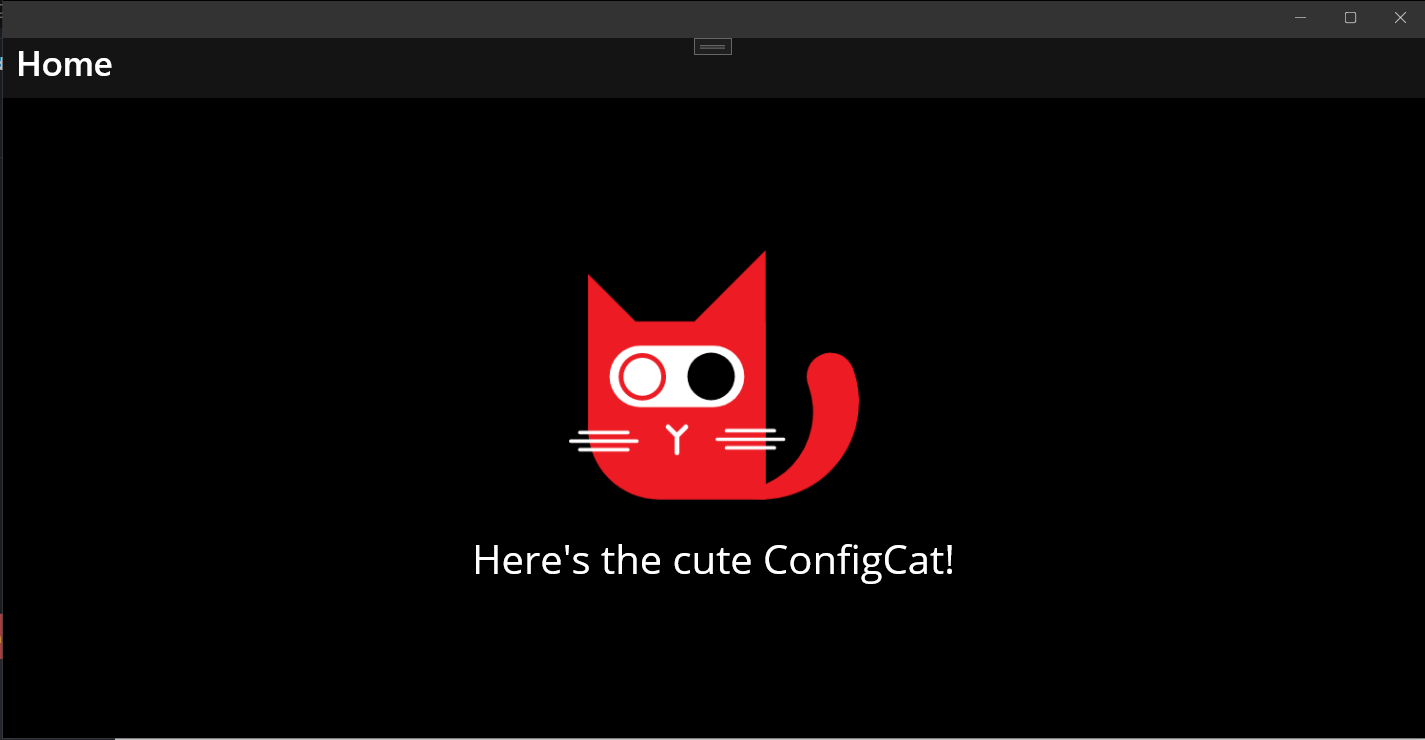
You can now run your application by clicking the "Window Machine" button in the upper right corner of the screen. When you open the application, the flag should be turned off.
To turn it on and view the cat, return to the ConfigCat Dashboard, toggle the flag on and save the changes. Reloading the app will now display the image.
So, by pressing a button on the dashboard, you can choose between two different types of UI. This mechanism continues to function even as the application becomes more complex. Simply wrap your code in an if statement around the flag value to produce changes in both the application's "backend" and user interface.
Key Takeaways
In this tutorial I've walked you through a very simple use case for feature flags in a .NET MAUI app. Let's recap what you need to do to replicate this example:
- Sign up for a ConfigCat account and login
- Add a new flag in your dashboard
- Create a .NET MAUI project using Visual Studio
- Add the ConfigCat SDK to your project
- Add your SDK key and create a ConfigCat client
- Add the logic that wraps the flag
- Toggle the flag on and off to see the results
Feature flags are a fantastic mechanism that can truly transform your development process by allowing you to produce change with minimal effort. Using a feature flag service, such as the one provided by ConfigCat, can help you streamline your process and reach your audience faster and more precisely than ever before. Aside from feature releases, these flags can aid in A/B testing, canary releases, and even bug testing.
If you'd like to learn more checkout ConfigCat on Linkedin, Facebook, Twitter, and Github.