How to Implement A/B Testing in .NET?

It has become very common to use e-commerce websites to conduct shopping. Today, e-commerce is a large and competitive market with many options for consumers to choose from. Because of this, E-Commerce companies need to find ways to differentiate themselves and retain customers. One popular method that companies use to improve their website's performance and drive up sales is to conduct A/B testing.
By doing A/B tests, businesses can test different versions of their web pages and app features to see which ones perform best with their audience.
What is A/B testing?
A/B testing is a way to compare two versions of something, such as a website or a product, to see which one performs better. It's called A/B testing because there are typically two versions being compared, referred to as the A version (the original) and the B version (the variant). A/B testing is commonly used in marketing to determine which version of an ad or website is more effective at converting customers. It's a way of experimenting to see which version of something works best, without having to make a blind guess or rely on intuition.
Creating the A/B testing app
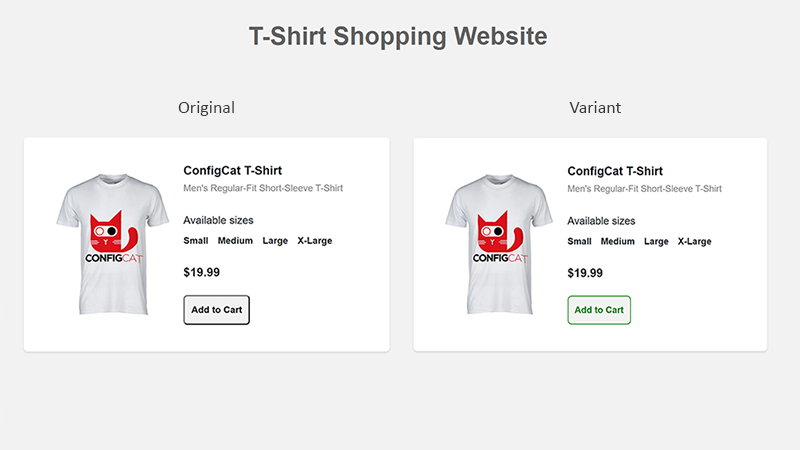
An e-commerce company could use A/B testing to compare two versions of their product card. One version might have a clean, simple black-and-white design, while the other might change slightly by adding a third color to make the "Add to Cart" button more noticeable. By testing these two versions against each other, the company can determine which is more effective at getting customers to complete their purchases. I'll be showing you how to create an E-Commerce A/B test using Amplitude and ConfigCat.
For this application, I am using the ASP.NET CORE Web App (Model-View-Controller) template. You can see the source code of the completed app on GitHub.
Adding a Feature Flag
First of all, create an account with ConfigCat or simply log in.
To begin, let's start with creating and configuring the flag in the ConfigCat dashboard.
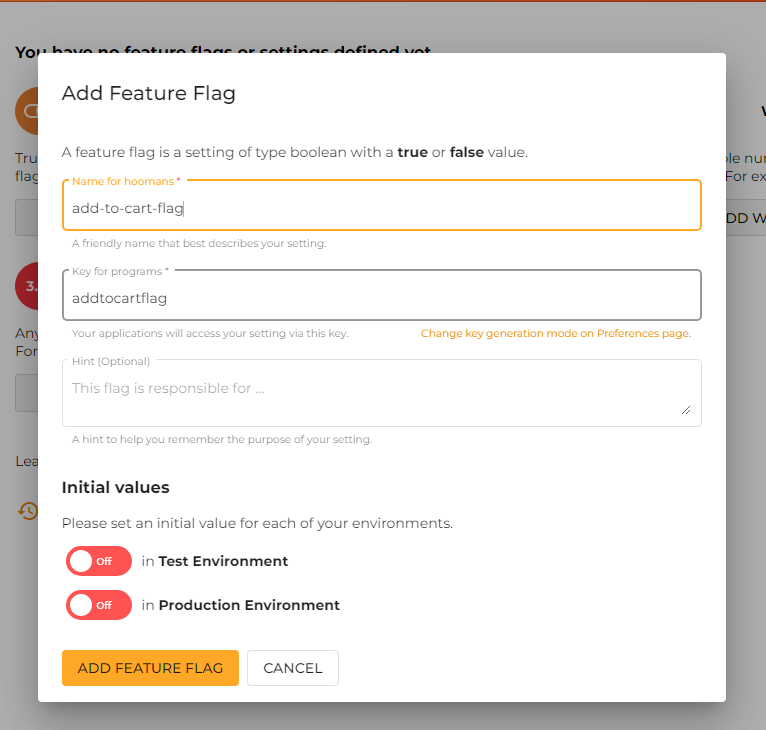
To do this, click on the ADD FEATURE FLAG button, and fill in the flag name in the opened modal. Then, click on the ADD FEATURE FLAG button. I named my flag: add-to-cart-flag.
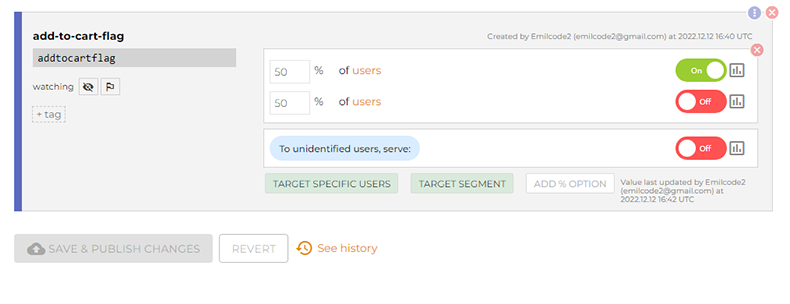
The next step is to configure the flag in the ConfigCat dashboard. Select the TARGET % OF USERS option, set the showing to 50%, and save the changes.
Importing the ConfigCat.Client and setting up the flag
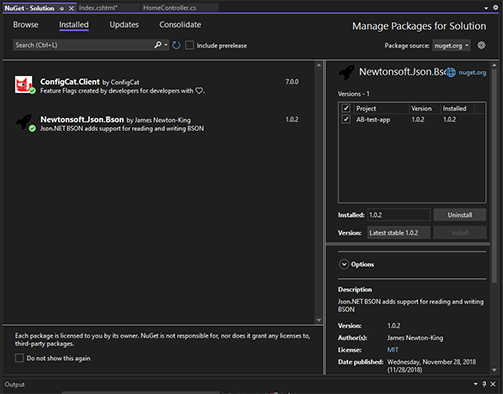
I Installed the ConfigCat SDK via the NuGet package manager and registered ConfigCat as a singleton in my web application.
builder.Services.AddSingleton<IConfigCatClient>(sp =>
{
    var client = ConfigCatClient.Get("YOUR-CONFIGCAT-KEY",options =>
    {
        options.PollingMode = PollingModes.AutoPoll(pollInterval: TimeSpan.FromSeconds(3600));
    });
    return client;
});
It is important to note that ConfigCat updates the Config.json every hour by the PollingMode option set in the code. If you want to play and experiment with the code, I suggest you lower this time to a few seconds so that your flag changes get reflected quicker.
Creating the card behavior
Setting up the card is super simple, all I do is get the flag value from ConfigCat and set the style of the card based on that value.
To start, I'll hardcode a user, as I need some user information to help ConfigCat identify different users correctly and to divide individual users 50% to 50% as set in the dashboard.
readonly User userObject = new User("uid-1234-12-55");
This value normally should be set from a device id or other unique data stored in the user device or server.
The next block of code uses the GetValue method which returns a boolean value indicating whether the "addtocartflag" feature is on or off for the specified user.
This returned value is then assigned to a variable isFlagOn which is then passed to a private method GetStyle(isFlagOn).
In the private method GetStyle, it checks whether the isFlagOn is true or false. If it's true, it returns a string containing CSS styles, which changes the appearance of the add-to-cart form button. If false, it returns an empty string, which will not change the appearance of the button.
Finally, the method adds the returned string from GetStyle method to the ViewBag.Style which can be accessed by the view.
 public IActionResult Index(){
  // assigning the flag value to a boolean so it can be used in a conditional statement, thus changing the appearance of the app
  bool isFlagOn = this.configCatClient.GetValue("addtocartflag", false, userObject);

  ViewBag.Style = GetStyle(isFlagOn);
  return View();
}

private string GetStyle(bool isFlagOn) {
  if (isFlagOn) {
    // setting the new style of the add-to-chart submit form
    return "border: 1px solid green; color:green";
  } else {
    return "";
  }
}
Creating the product card
The form is mostly composed of basic HTML and CSS, but the two key elements are the @ViewBag.Style which changes the color of the add-to-cart button, and the form handler, which will call the AddToCartForm function.
<div class="tshirt-info">
    <h3>ConfigCat T-Shirt</h3>
    <p>Men's Regular-Fit Short-Sleeve T-Shirt</p>
    @using (Html.BeginForm("AddToCartForm", "Home", FormMethod.Post))
    {
        <div class="tshirt-size">
            <h6> Available sizes</h6>
            <input type="radio" name="size" id="small" value="Small">
            // code -> other form inputs....
        </div>
        <div>
            <p class="price">$19.99</p>
            <input type="submit" value="Add to Cart" class="add-to-cart" style="@ViewBag.Style">
        </div>
    }
</div>
Handling the form submission and sending the data to Amplitude
To make a post request to Amplitude, I used the Newtonsoft.Json.Bson package from NuGet to help me stringify user data so it can be sent to Amplitude in JSON format.
I created a simple post request script to handle the form and send data to Amplitude.
public async Task < IActionResult > AddToCartForm() {
  // assigning the flag value depending on the ConfigCat response
  bool isFlagOn = this.configCatClient.GetValue("addtocartflag", false, userObject);

  await LogEventToAmplitude(isFlagOn, userObject);

  // Redirect back to the same page
  return RedirectToAction("Index");
}
And here is the method called LogEventToAmplitude that logs an event to Amplitude using the Amplitude HTTP API.
private async Task LogEventToAmplitude(bool isFlagOn, User userObject) {
  // HTTP POST request body:
  var data = new {
    api_key = "YOUR-AMPLITUDE-API-KEY",
      events = new [] {
        new {
          user_id = userObject.Identifier,
            event_type = isFlagOn ? "Variant Cart Button" : "Original Cart Button",
        }
      }
  };

  // Create an HttpClient
  var client = new HttpClient();

  // Send POST request to Amplitude
  var response = await client.PostAsync(
    "https://api.amplitude.com/2/httpapi",
    new StringContent(JsonConvert.SerializeObject(data), Encoding.UTF8 "application/json")
  );

  if (!response.IsSuccessStatusCode) {
    throw new Exception("Response failed while logging to amplitude");
  }

  Console.WriteLine("Event logged successfully");
}
This method takes in two arguments: a boolean value isFlagOn and an object of User.
The first thing the method does is construct a JSON object representing the request body for an HTTP POST request to the Amplitude API endpoint. The JSON object contains the Amplitude API key, and an array of events, containing one event in this case. The event contains the user ID of the user that is currently interacting with the system. The event also contains the type of event, which is either "Variant Cart Button" if the isFlagOn is true, otherwise "Original Cart Button" if isFlagOn is false.
Then, it creates an instance of the HttpClient class. This class allows the code to send HTTP requests.
Then, it sends a POST request to the Amplitude API endpoint with the JSON object serialized as the request body, and the "application/json" as the content type. The response is then awaited, and assigned to the response variable.
If the status code of the response is not successful, it throws an exception with a message indicating that the response failed while logging to Amplitude. Otherwise, it will print "Event logged successfully" using Console.WriteLine
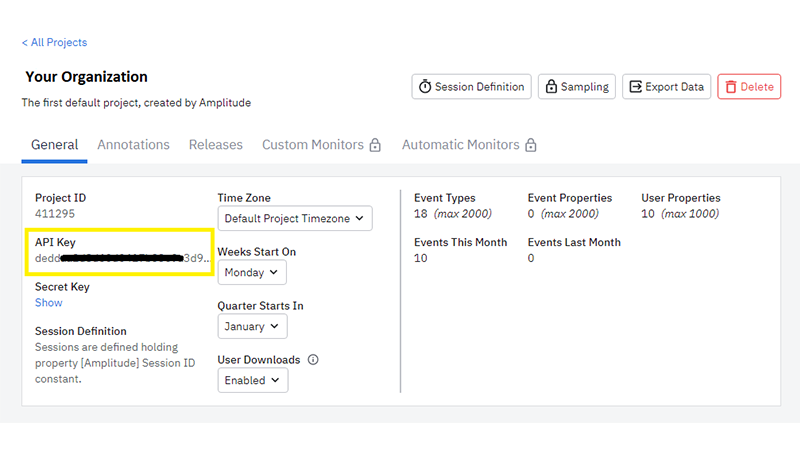
It should be noted that this code will not work as is. You will have to replace "YOUR-AMPLITUDE-API-KEY" with the actual API key. Also, the userObject.Identifier must be unique for each user so that the event is logged correctly.
Setting up Amplitude
This part is composed of a few steps:
- Create or login to Amplitude here.
- Click on the "Create New" button on the navbar.
- A sidebar should pop up, then select the
Analysis - Select
Segmentation - Click on your organization name and select
View Project Settings - Grab the API key
- Add the key to the
LogEventToAmplitudefunction.
Sending an Event to Amplitude
To send an event to Amplitude, run the project and click on the add-to-chart button. If everything is working correctly, the page will refresh after the successful submission to Amplitude. In the terminal, you will see a message Event logged successfully.
You can change the user's identifier a few times and see how the page responds.
readonly User userObject = new User("uid-CHANGE-THESE-NUMBERS");
Viewing Events in Amplitude
To view the events, first, you must add them to the display panel.
Adding is simple, you just have to:
- Select Event => Original Cart Button
- Select Event => Variant Cart Button

Analyzing the data
Now that you added the events to the display panel, a chart should appear at the bottom of the page. Switch the chart to the Bar chart to see the total activity of clicks.
With this chart, you can easily measure and conclude the performance of the add-to-chart event. Let the test run for some time and make a final decision. Later, you can try some other colors or UI layout changes to see how the users respond.

Summary
- I explained the concepts of A/B testing and its usage in business.
- I showed you how to create a feature flag using ConfigCat.
- Added an event handler to the code, to measure the users' click action.
- For data analysis, I used an Amplitude account.
- Created a post method to send data to amplitude.
- Explained how to send and track click events.
- Created an analysis chart to view the click events on the two product cards.
- Finally, I compared the two cards to see their performance.
Conclusion
In short, A/B testing is an important tool for e-commerce companies because it helps them understand their customers and make informed decisions about improving their online presence. With A/B testing, businesses can optimize their website and marketing efforts to increase conversions and drive more sales.
If you are interested to learn more about using ConfigCat in various environments and programming languages, check out the ConfigCat SDKs and the ConfigCat Docs.
Check out ConfigCat Labs to see how ConfigCat is integrated with other applications/programming languages.
For more similar posts and announcements, follow ConfigCat on Twitter, Facebook, LinkedIn, and GitHub.