How to use feature flags in a FaaS application
With the rise of cloud computing, Function as a Service (FaaS) services are becoming quite popular in the software industry. This is in part due to them not requiring the setup and implementation of a backend server to process and respond to data requests. This allows developers to focus on doing what they do best, writing better code.
By integrating such a service with feature flags, you can expand the way your functions work by toggling functionalities on or off and even rolling them back if anything goes wrong. Added to that, there is no limit on the number of feature flags you can implement, and they can be integrated into just about any language and framework out there.
What are feature flags
Feature flags, or feature switches as they are sometimes called, are boolean values that can be used to turn on or off various features, components, or functionalities in your application. Typically, they are used in conditional "if" statements to control which features users will see.
Feature flagging can be used in many programming languages and the cloud is no exception. Let's dive in and explore how to use them in a FaaS application.
Before getting started let's take a look at the prerequisites to get up and running:
Prerequisites
- Google Cloud account
- Basic Node.js and Google Cloud knowledge
Using feature flags in a FaaS app
Traditionally, a full-stack web application required two major components. Frontend - What the user sees and interacts with. Backend - a server that processes requests from the frontend.
With FaaS, a backend server is no longer required when building applications. Instead, you create functions that can be invoked from your frontend to perform single or multiple tasks. That's it!
Up and running with Google Cloud Functions
While there are many cloud service providers in the market today offering FaaS, Let's narrow our attention to a popular one from Google, Cloud Functions. I'll use it to build a simple weather app to return JSON data about the weather in a particular country, let’s say France for example. To get up and running with Google Cloud Functions, you'll need to do the following:
1. Sign up for a Free tier Google Cloud account
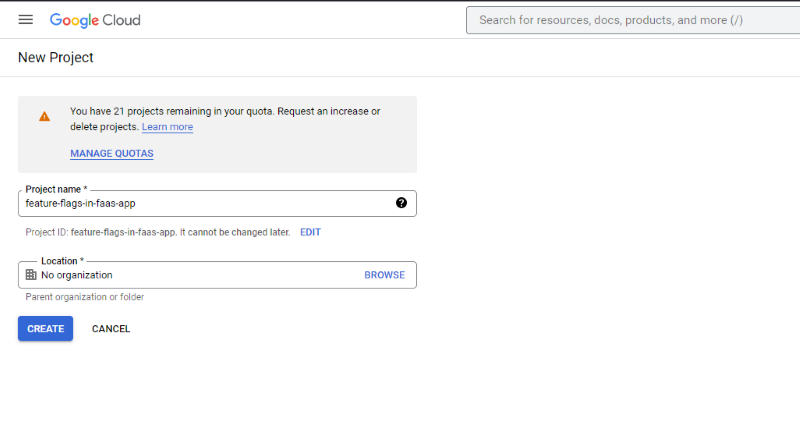
2. In the console, create a new project:
3. Create a new function with the following details:
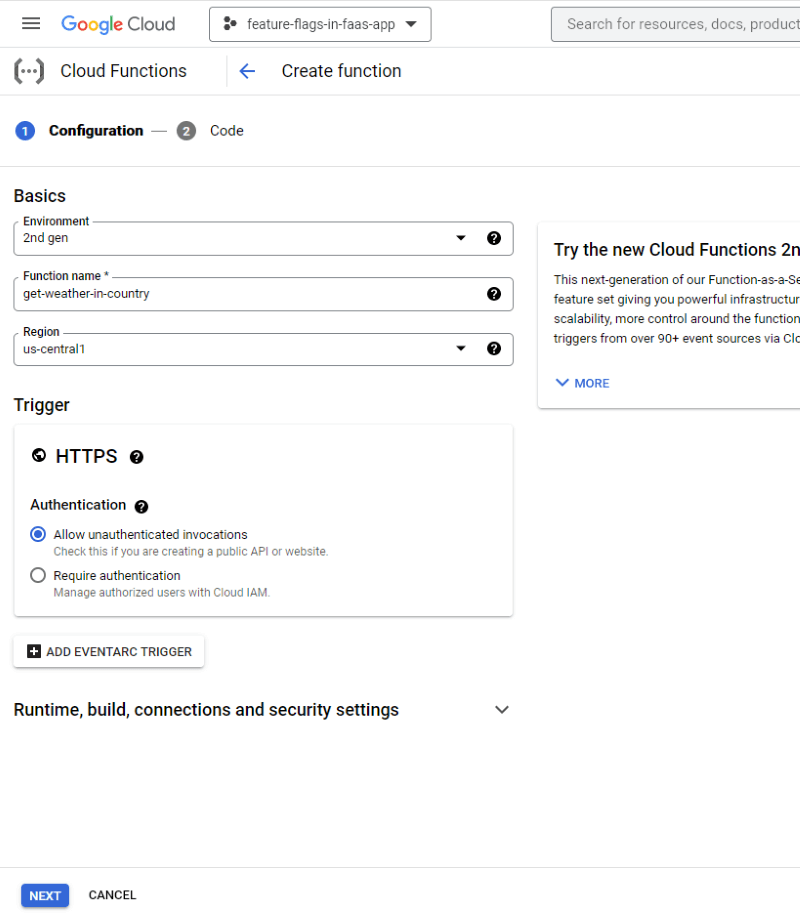
4. Select the runtime environment for executing the function. I'll be selecting node 16 in this case. This will result in two files being generated. An index.js file and a package.json file.
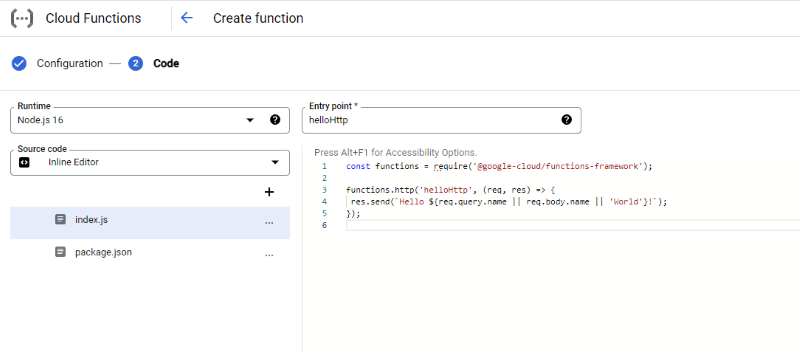
Using a feature flag, I will control how the app responds. When the feature flag is on, it will return the weather information in France as JSON and when it's off the response will be "Sorry this service is unavailable. Try again later". To do this, I'll use ConfigCat's feature flag service.
Integrating with ConfigCat
1. To use ConfigCat, you'll need to sign up for a free account.
2. In the dashboard, create a feature flag with the following details.
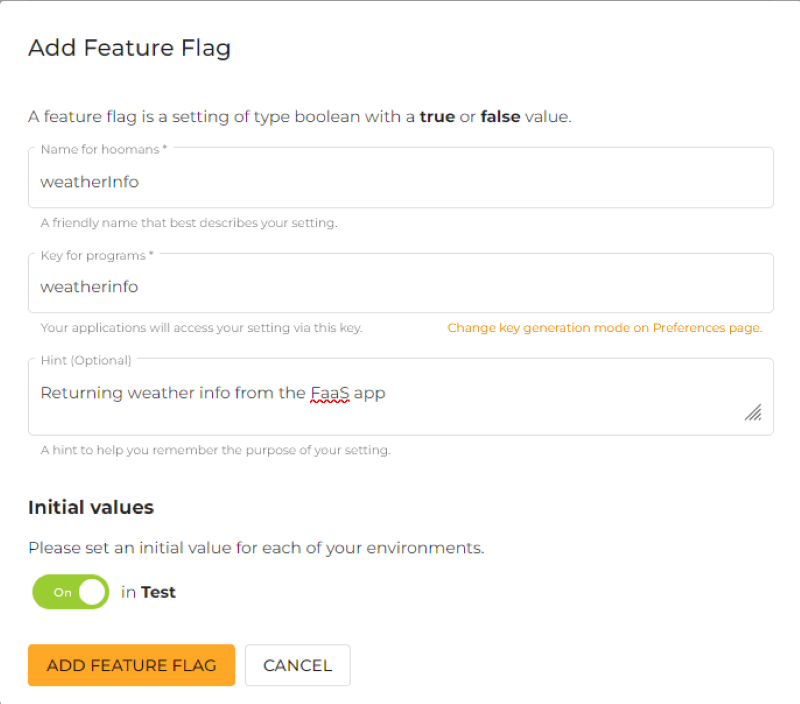
3. Because my function will be executed in a node runtime environment, I will add ConfigCat's Node SDK as a dependency. With this SDK, the app will be able to access your ConfigCat dashboard and probe the feature flag status. While I'm here I'll also add the node-fetch package as a dependency that I'll use later on to make a fetch request.
{
  "dependencies": {
    "@google-cloud/functions-framework": "^3.0.0",
    "configcat-node": "^8.0.1",
    "node-fetch": "^2.6.7"
  }
}
4. Include the SDK client in the index.js file:
const configcat = require('configcat-node');
5. Create the client using your SDK key. As a general rule, this key should be kept private and away from your codebase.
let configCatClient = configcat.createClient('YOUR_SDK_KEY');
6. In the entry point function, I'll use the client above to call the probe the status of the feature flag:
const isWeatherInfoFeatureFlagEnabled = await configCatClient.getValueAsync(
  'weatherinfo',
  false,
);
7. I'll use it in an if statement. If the value returned is true, the function will return the weather info for France fetched from the Open Weather API.
if (isWeatherInfoFeatureFlagEnabled) {
  const myData = await fetch(
    'http://api.openweathermap.org/data/2.5/weather?q=france&appid=YOUR-OPENWEATHER-API-KEY',
  );
  const myDataAsJson = await myData.json();
  res.send(myDataAsJson);
} else {
  // This response is returned when the feature flag is switched off
  res.send('Sorry, this service is unavailable. Try again later.');
}
You can find the complete code for the index.js file here.
8. Deploy the function:
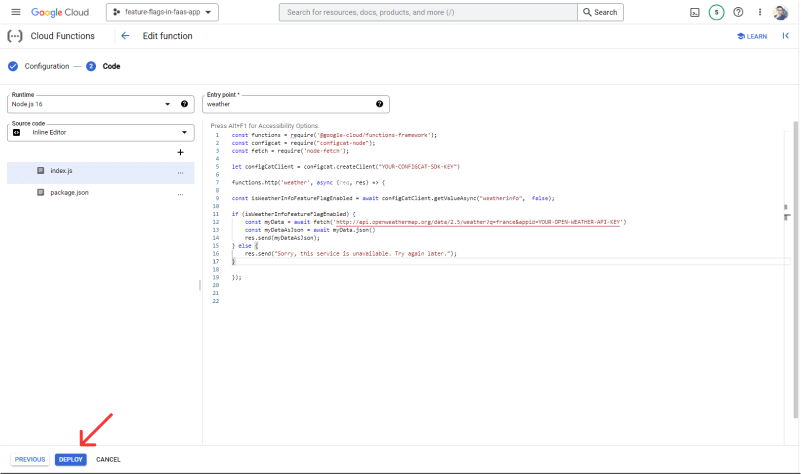
By visiting the deployed app in your browser you should get the following response:

Test drive
1. Head over to the ConfigCat dashboard and turn off the feature flag.

2. Refresh the page, and you should now see the custom error string we set earlier.
3. That's it!
If you need to target a specific user group based on demographics and personal characteristics, you can do this right on your ConfigCat dashboard by creating a user segment. As a result, when the feature flag is enabled, only users belonging to that segment will be able to see it. For example, you could release a feature only to London users.
Conclusion
We've discussed how to integrate feature flags into FaaS applications without any difficulties. By combining your cloud functions with feature flags, you can extend your cloud functions' capabilities, and Google is not the only one supported. Because feature flags are platform-agnostic you can use them in many languages and frameworks.
The dashboard of ConfigCat is really simple to use. Apart from adding feature flags, having the ability to set up user segmentation for targeting feature releases to specific user groups is helpful when doing A/B testing. With an account, you get a generous free tier for low-volume use cases which is ideal for getting started with feature flags.
Stay connected
For more awesome posts and other announcements, follow ConfigCat on Twitter, Facebook, LinkedIn, and GitHub. The most lovable feature flag service, ever.
