How To use Feature Flags in an ExpressJS application
As the world continues to change rapidly, software applications must be constantly updated. This forces software developers to release new features quickly. It is, however, a challenge to keep bugs and other software issues to a minimum. I have always found that feature flagging saves the day in these situations.
Using Feature Flags in ExpressJS
We can apply feature flagging to almost any programming language that exists today. Using ConfigCat's feature flagging software, we can create and manage feature flags from a central dashboard. Having said that, I'll demonstrate how feature flagging can be used in an ExpressJS application.
But what exactly are Feature Flags?
Feature flags are a piece of code that conditionally hides and displays functionality. By flagging features, you can control which features users can see and interact with. You can also target feature releases to specific user segments based on demographics, which simplifies the process of canary releases and feature rollouts.
About the sample application
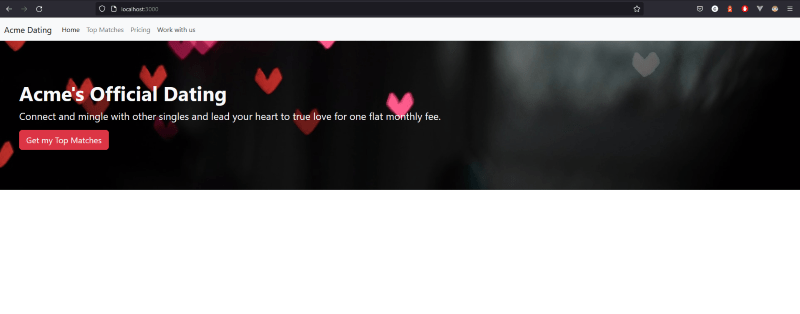
This sample application is a fictional dating web application called Acme Dating. It has three pages: Home, Top Matches, and Not Available. My aim here is to "feature flag" the Top Matches page. This means the page would be visible to the user if the feature flag is turned on. Here's an image of what the app looks like:

You can access the code repository for this sample app here.
Prerequisites
- A code editor (eg. visual studio code)
- NodeJS (version 16 or higher)
- Basic JavaScript and ExpressJS knowledge
Creating the ExpressJS App
-
Launch your favorite code editor and a terminal window in the root of the app's folder. If you do not have an existing app, we'll create one together. The first thing you need to do is create a new folder on your computer. Name the folder whatever you like, for example, expressjs_app.
-
Initialize a blank npm project by running the following command. Press your enter key on each prompt to accept all the defaults. This will generate a package.json file at the end, which will keep track of the app's dependencies.
npm init
- Install express by running:
npm install express
-
Create two folders at the root location of the app called public and pages.
-
Create a styles.css file in the public folder with the content here, or feel free to use any styling you prefer.
-
In the pages folder, add the following files:
-
index.html - This page will appear as the home or index page.
-
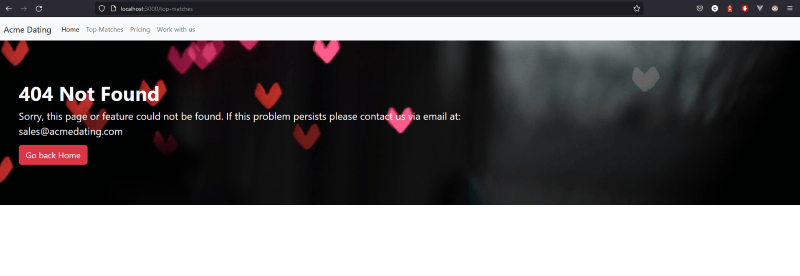
not-available.html - This page will only show if the feature flag is turned off. It indicates to the user that the feature is not available.
-
top-matches.html - This page will appear as the feature page. It would only be shown if the feature flag is turned on.
The content for each file listed above can be found in the pages directory of the sample app.
Creating a feature flag
In case you haven't noticed, I've deliberately skipped creating the most crucial file necessary to run the application. I'll get to it soon.
-
To use ConfigCat's feature flag services, you'll have to sign up for a free account.
-
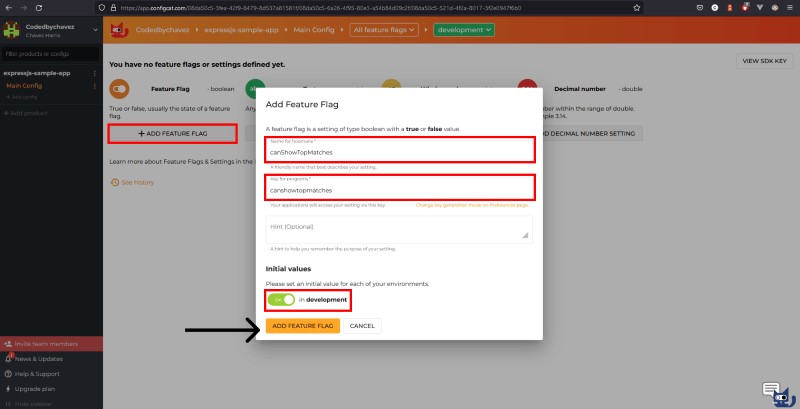
Navigate to the dashboard and create a feature flag with the following data:
| Field | Value |
|---|---|
| name | canShowSubscriptionPage |
| key | canshowsubscriptionpage |

- As shown in the image below, you can toggle this feature on by clicking the switch on the right.

Now that the feature flag is created and switched on, let's add it to our app.
Integrating with ConfigCat
NOTE: Using the ConfigCat client as a singleton object in production is strongly recommended.
- Install the ConfigCat NodeJS client SDK with the command below:
npm i configcat-node
- To use the feature flag in our app, let's create the file we skipped earlier.
In the root folder create a server.js file with the following content. I've added comments in the code snippets below to explain what some of the logic does.
...
// Require the ConfigCat NodeJS client SDK package we've installed
const configcat = require("configcat-node");

// Initialize the client using your SDK key:
let configCatClient = configcat.createClient("YOUR_CONFIGCAT_SDK_KEY");
...
// Top matches route
app.get('/top-matches', async(req, res) => {

  // Create a variable to store the state of the feature flag from ConfigCat.
  // This variable will be automatically updated every 60 seconds by default.
  const canshowtopmatches = await configCatClient.getValueAsync("canshowtopmatches",  false);

  if (canshowtopmatches) {
    // If the feature flag is on, show the top matches page
    res.sendFile(path.join(__dirname, 'pages/top-matches.html'));
  } else {
    // If the feature flag is off, show the not-available page
    res.sendFile(path.join(__dirname, 'pages/not-available.html'));
  }
})
...
Let's see if it works
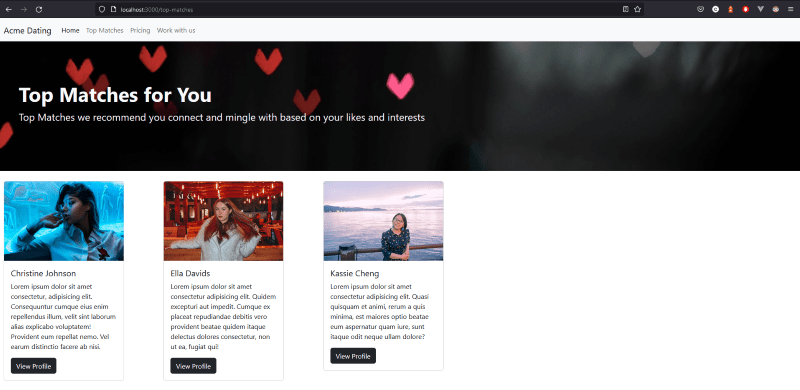
When the feature flag is switched on, the Top Matches page would appear as shown below:

- Let's see what happens if the feature flag is switched off. Head over to the ConfigCat dashboard and turn the feature flag off:

- Restart the app. You should see the not available page when you navigate to the top matches route:

Code
You can find the completed code for the sample app here.
There are many more code samples for various languages, frameworks, and topics in the ConfigCat labs organization on GitHub.
Conclusion
There are a number of benefits to feature flagging that I haven't even scratched the surface of. My favorite one is the ability to target specific user segments. Processes like canary deployments thrive and development workflows with steady feature rollouts are more effective because of this technology. With ConfigCat's 10 minutes trainable interface, implementing feature flags will be a breeze!
There are also tons of other frameworks and languages supported! Check out the full list of supported SDKs here.
Get more awesome content from ConfigCat on Twitter, Facebook, LinkedIn, and GitHub.
