Boost Web Dev with Qwik and Feature Flags - Complete Guide

In software development, being quick is always an asset. In a world where everything moves at a nauseating speed, you can’t afford to waste time. This means every second counts, especially when it comes to loading a website! Fortunately, frameworks are constantly evolving and becoming faster and lighter every day. In this written piece, we'll look at development in Qwik with the help of feature flags.
Coding (in) Qwik
Qwik is a relatively newer frontend framework that enables you to create web applications with faster page load times, by eliminating hydration, introducing resumability, and utilizing lazy-loading. The entire process is completed flawlessly on the server using JavaScript. In short, Qwick allows you to code with less effort and create websites that load with lightning-speed.
What are Feature Flags?
Feature flags are a mechanism that allow developers to dynamically decide which parts of the code will be executed at runtime. In other words, by wrapping code in a feature flag, you can decide remotely, at any time, which features you want to enable and which features remain hidden for the time being.
This makes changes in already-deployed apps a breeze because all you need to do is change the flag’s value for the change to take effect. Moreover, feature toggles have a bunch of different uses, such as complex user targeting, canary releases, and A/B testing.
The Sample App
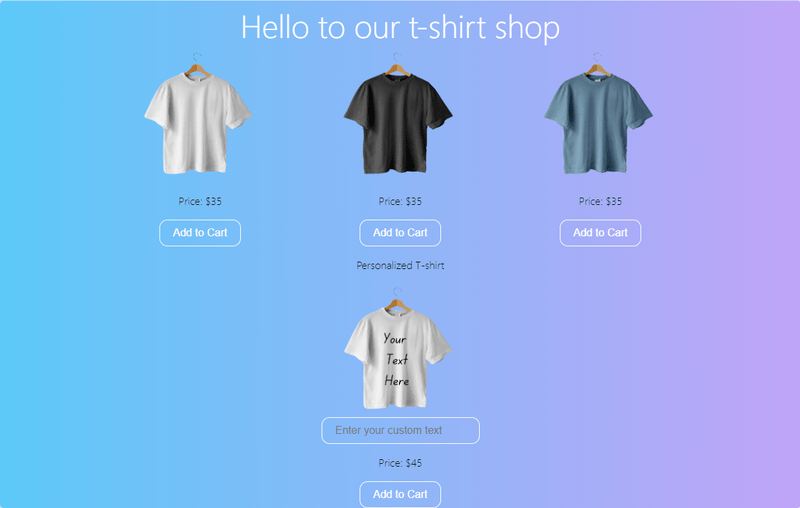
To illustrate a simple use case of feature flags in a Qwik application, I’ve created a demo website that consists of an e-commerce website selling t-shirts. I’ve added a feature that allows users to request a personalized message on their t-shirt.
However, I am concerned that I will be unable to process all the requests because each one must be checked manually. As a result, I’d like to be able to remove the feature from the app when I need to catch up on orders. To do that, I’ve wrapped the personalized feature in a flag that gives me full control over it.
Prerequisites:
- Node.js ≥v16.8
- An IDE (VS Code is my preferred choice)
- JavaScript knowledge
Creating the Qwik Application
The first step is creating the Qwik app by using the following command in a cmd:
npm create qwik@latest
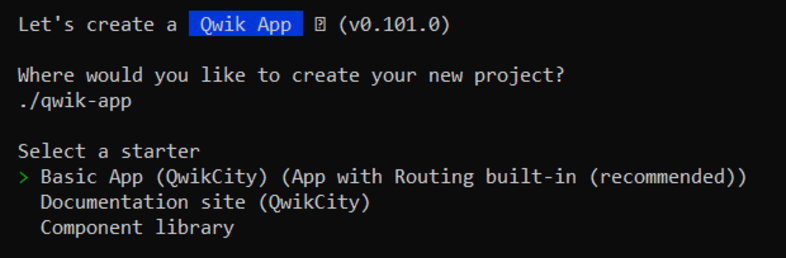
Then, the command will install the necessary packages and ask you where you want to save the app. You will also be prompted to select a starter basic app. Go ahead and select "Basic App (QwikCity)".
Next, run your application:
cd qwik-app
npm start
If this is your first time working with Qwik, I highly recommend checking out the official docs and tutorials as they are complex, but easy to understand. The project's structure may appear complicated at first, but I'll guide you through exactly what needs to be changed.
Because the sample app contains some example code, we must first do some "clean up." Replace the component in routes -> layout.tsx with:
export default component$(() => {
  return (
    <div class="page">
      <Slot />
    </div>
  );
});
Now, into routes -> index.tsx, remove the boilerplate code, and replace it with the following code. You’ll need a few local pictures of t-shirts (or anything, really!).
export default component$(() => {
  return (
    <>
      <div class="centered">
        <h1>Hello to our t-shirt shop</h1>
      </div>
      <div class="tshirt layout">
        <div>
          <img src="/tshirt1.png" alt="T-shirt 1" />
          <p>Price: $35</p>
          <button>Add to Cart</button>
        </div>
        <div>
          <img src="/tshirt2.png" alt="T-shirt 2" />
          <p>Price: $35</p>
          <button>Add to Cart</button>
        </div>
        <div>
          <img src="/tshirt3.png" alt="T-shirt 3" />
          <p>Price: $35</p>
          <button>Add to Cart</button>
        </div>
      </div>
    </>
  );
});
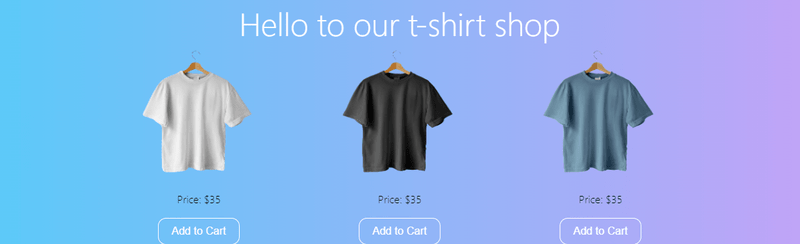
By now, your website should have refreshed and should look like this:
Creating the feature Flag
To begin, go to ConfigCat and create a free account. Log into your new account and go to the dashboard. This is where you can create and control your flags.
Click on the Add New Flag button and create a flag called personalizedTshirt.

Then, on the right-hand side, locate your SDK key, which you will need shortly.
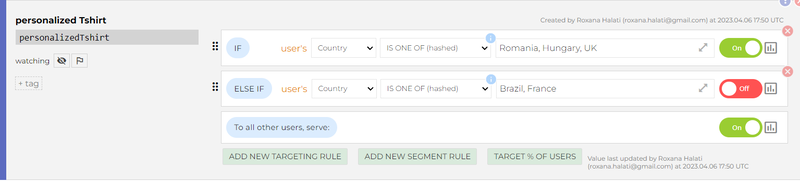
You can see how easy it is to toggle your flag’s value. Plus, you can view other options for using the flags, such as user targeting or targeting % of your population. I won't go into detail in this article, but I strongly encourage you to experiment with flags to see how much you can achieve.
Connecting the Feature Flag
We have the flag, we have the app - it’s time to connect them.
First, you need to install the JavaScript Server-Side SDK for ConfigCat, using:
npm i configcat-js-ssr
Next, import configcat in index.tsx:
import * as configcat from 'configcat-js-ssr';
To create the ConfigCat client and the flag variable, I’m making use of two of the most popular Qwik flags, useSignal and useTasks.
UseSignal stores a value, whereas useTasks$ is executed before the component is rendered, making it the ideal place to create the client and retrieve the flag's value.
index.tsx
  const flag = useSignal<boolean>();

  useTask$(async () => {
    const configCatClient = configcat.getClient(
      "YOUR-SDK-KEY"
    );

    flag.value = await configCatClient.getValueAsync(
      "personalizedTshirt",
      false
    );

    console.log(flag.value);
  });
global.css
...

.tshirt.layout {
  display: flex;
  justify-content: center;
    align-items: center;
}


.tshirt.layout > div {
  display: flex;
  flex-direction: column;
  justify-content: center;
  align-items: center;
}


.centered {
  display: flex;
  flex-direction: column;
  justify-content: center;
  align-items: center;
}
You should see a message in the console telling you the value of your flag. Toggle your flag from the ConfigCat dashboard and reload the server to check if the flag is properly connected.
Tip: You can easily reload the server by pressing r in the command line.
In order to actually utilize the flag, I’ve added a fourth div whose contents are rendered based on the flag.
{
  flag.value ? (
    <div>
      <p>Personalized T-shirt:</p>
      <img src="/tshirt4.png" alt="T-shirt 3" />
      <input type="text" placeholder="Enter your custom text" />
      <p>Price: $45</p>
      <button>Add to Cart</button>
    </div>
  ) : null;
}
Toggling the flag and refreshing the server should show you the two versions of the finished application. Congratulations, you've just used a feature flag in Qwik!
Key Takeaway
Qwik can be a fun and efficient framework to try and streamline your development process when looking to use server-side JavaScript. The framework is aiming to have “instant-on applications”, regardless of the size and complexity of your website.
ConfigCat supports simple feature toggles, user segmentation, and A/B testing and has a generous free tier for low-volume use cases or those just starting out. With feature flags, adding and removing a feature from Qwik can be done at a moment’s notice, allowing you full control over your app. With an increasingly competitive IT market, it's only natural to look for new and improved ways to achieve your goals.
There’s plenty more you can do with feature flags, so be sure to take a look at ConfigCat's Facebook, Twitter, Linkedin and GitHub to stay up to date on the latest feature flag releases.