ADFS Identity Provider
Connect ConfigCat with Active Directory Federation Services (ADFS) via SAML.
Introduction
Each SSO Identity Provider requires specific information to configure a SAML integration. The following guide will walk you through how you can connect ConfigCat with ADFS as a SAML Identity Provider.
1. Collect SAML Metadata from ConfigCat
-
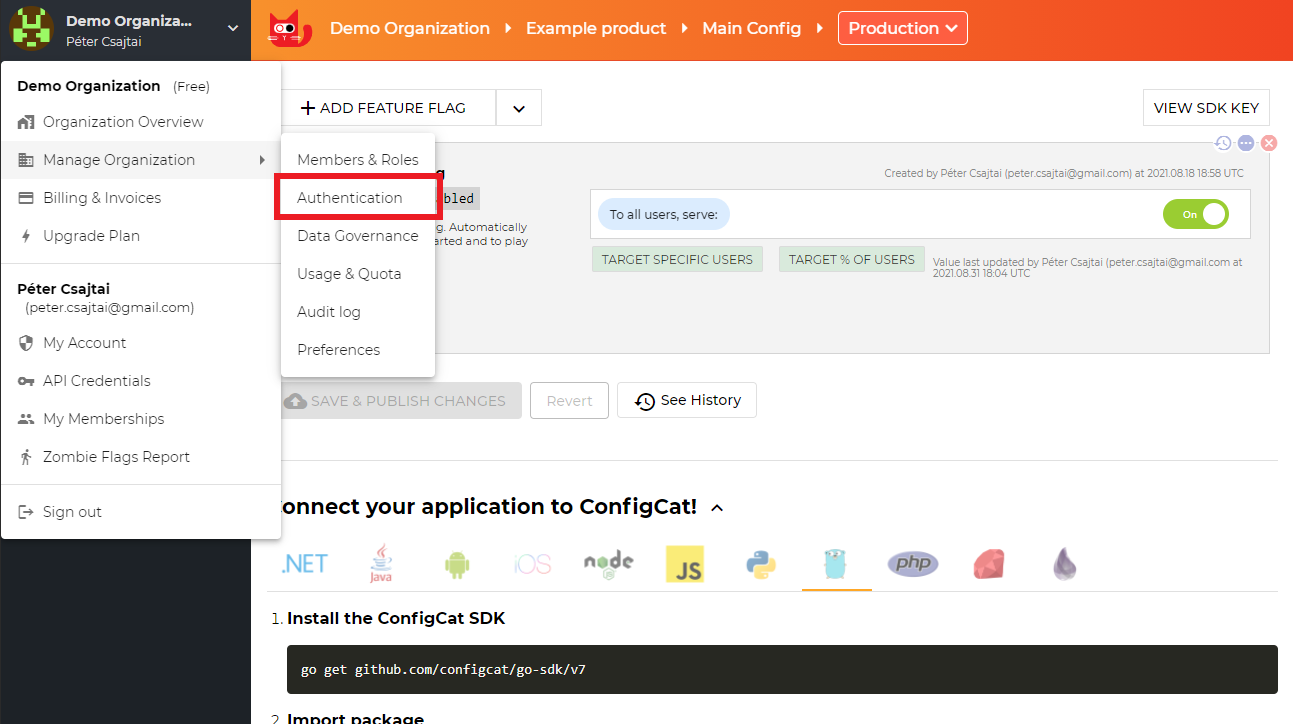
Open your organization's authentication settings on the ConfigCat Dashboard.
-
Click
ADD SAML IDENTITY PROVIDER.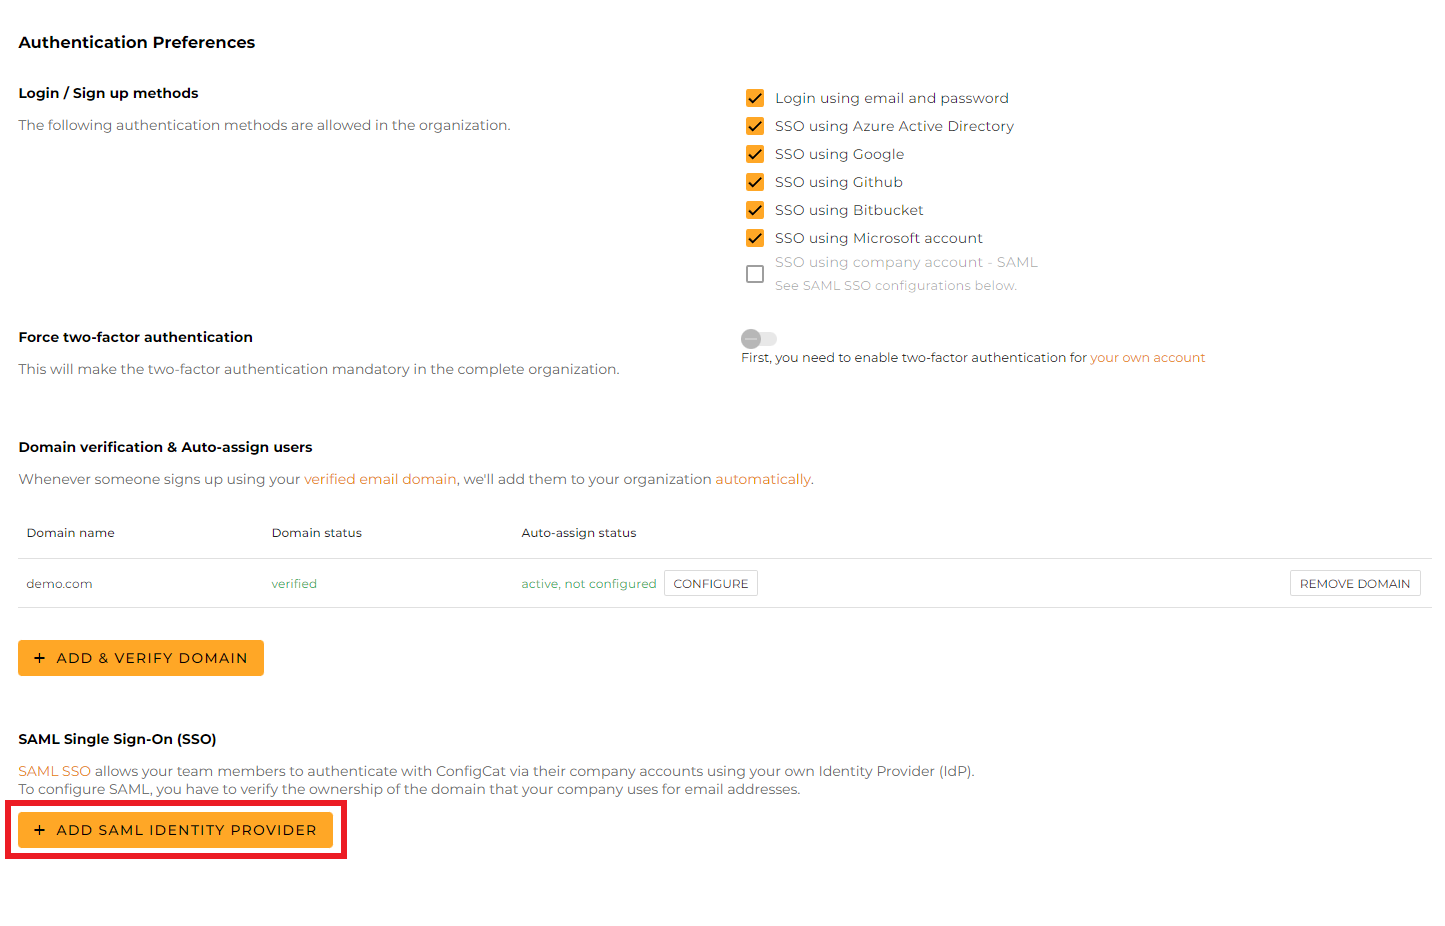
-
Give a name for your Identity Provider, and click
Create.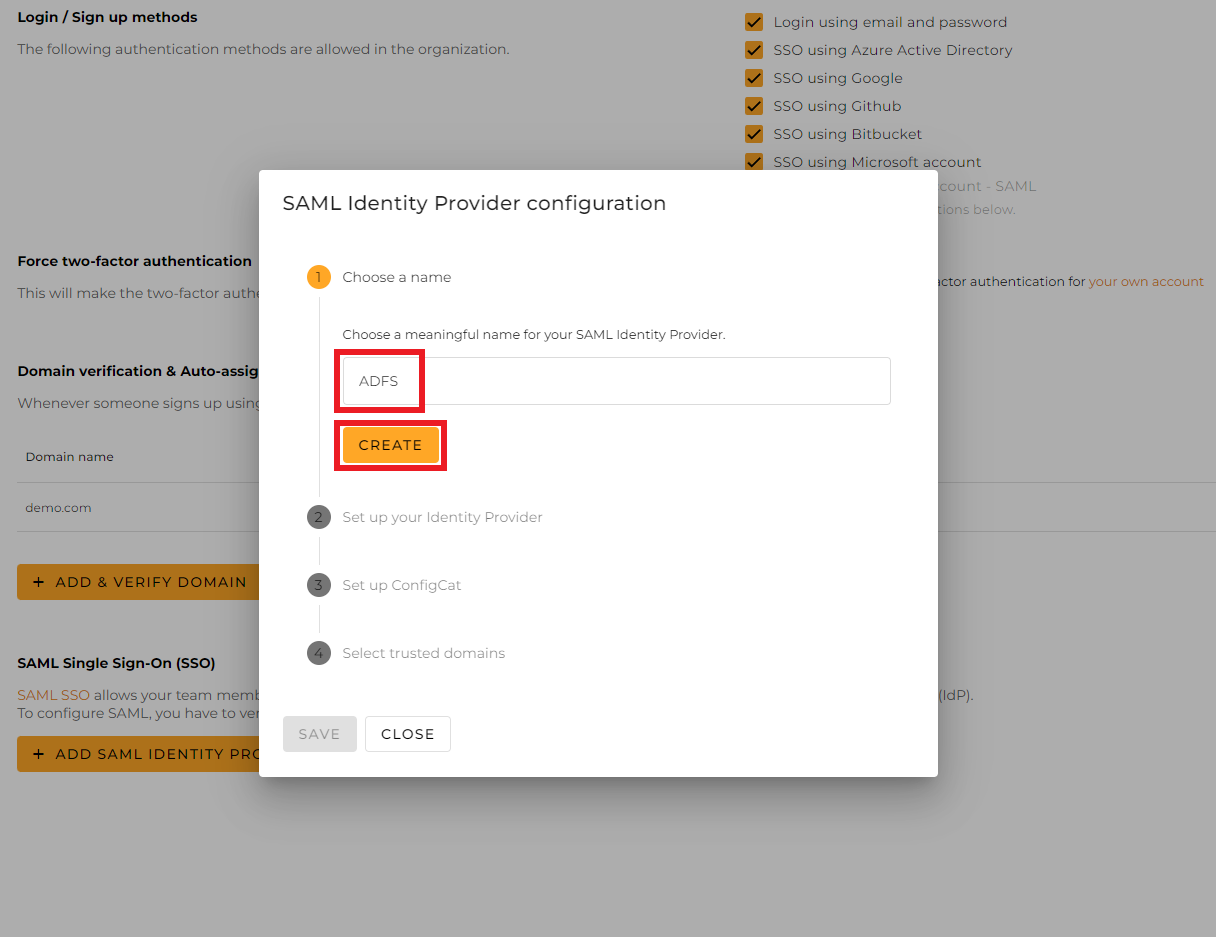
-
From the next section of the dialog, copy the following values and save them for further use.
-
Entity ID -
Assertion Consumer Service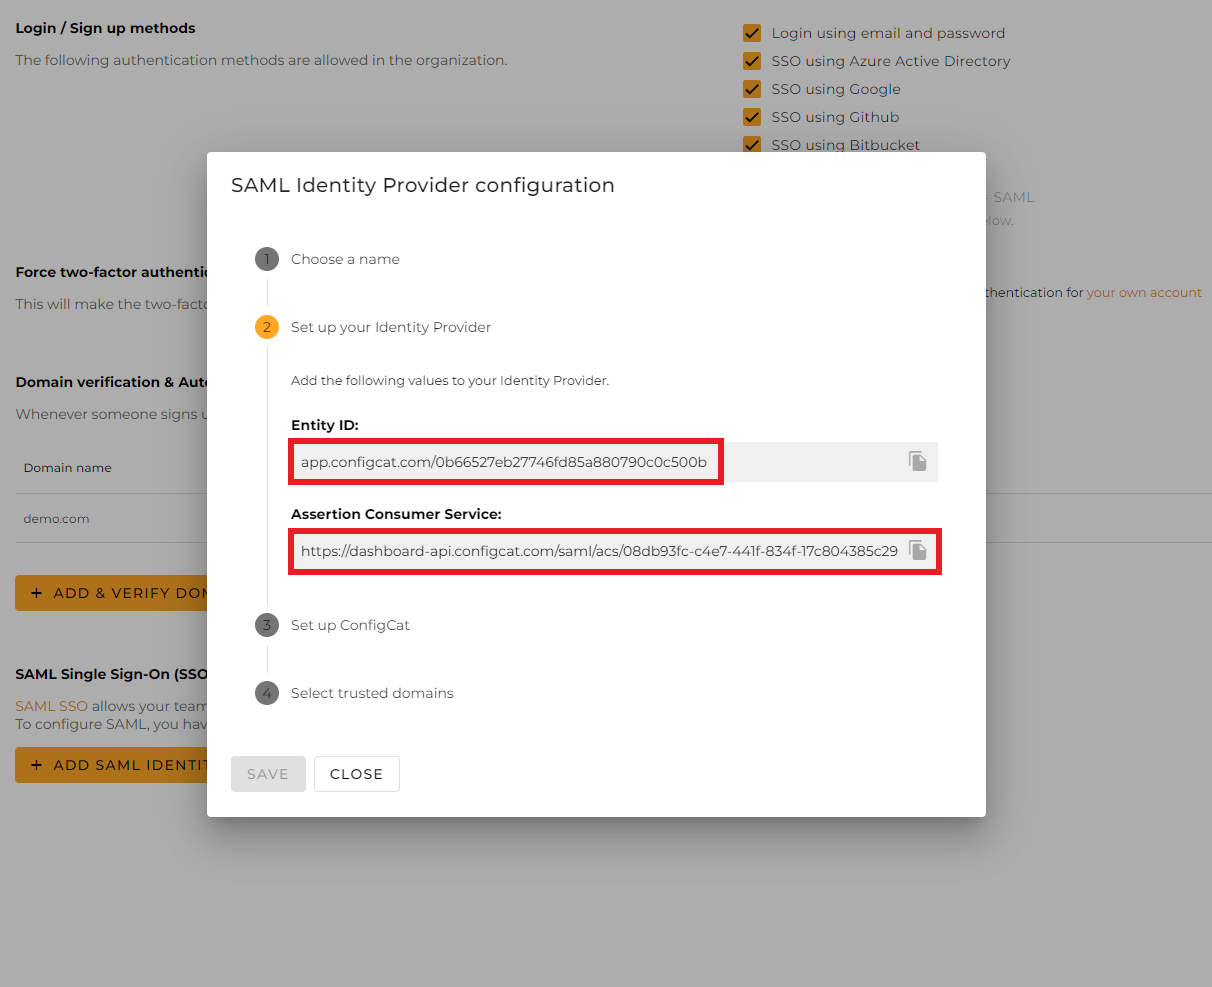
-
2. Configure a Relying Party Trust
-
Open the ADFS Management console, and click
Add Relying Party Trust.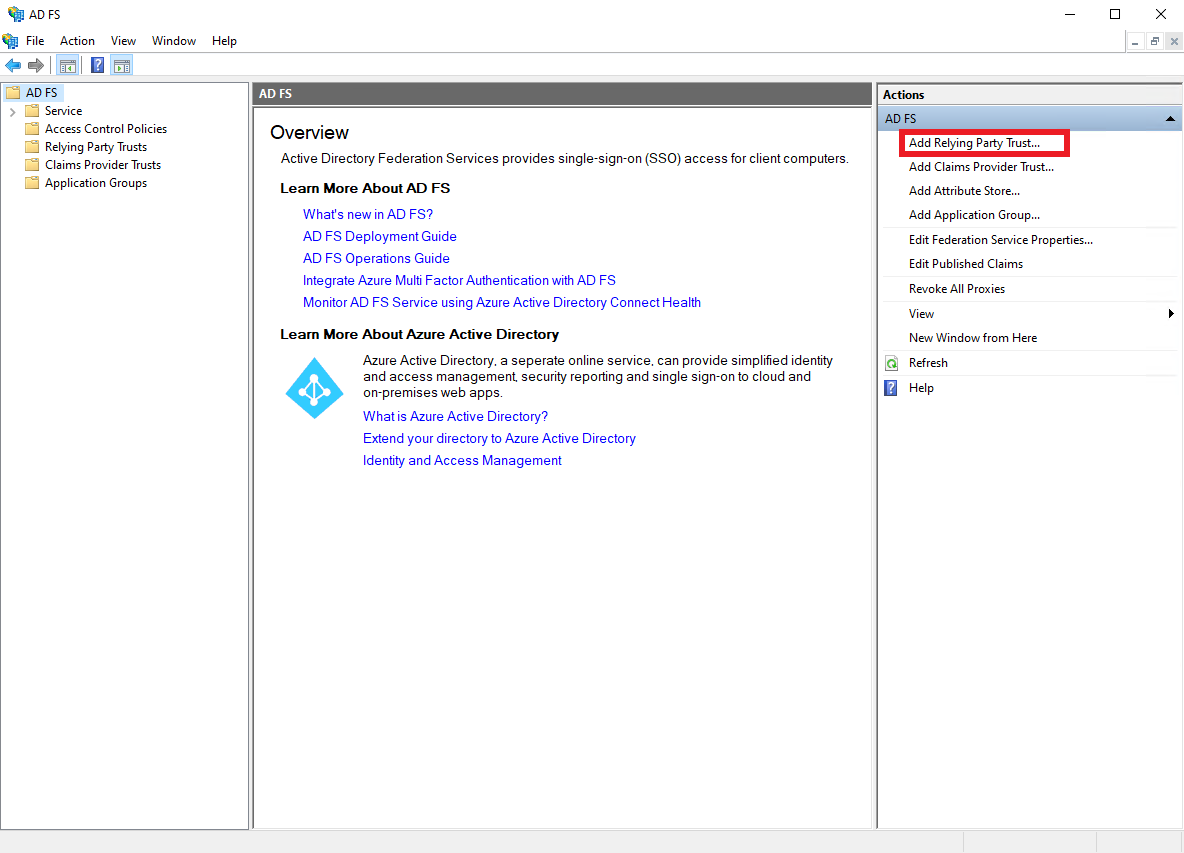
-
Make sure the
Claims awareoption is selected, and clickStart.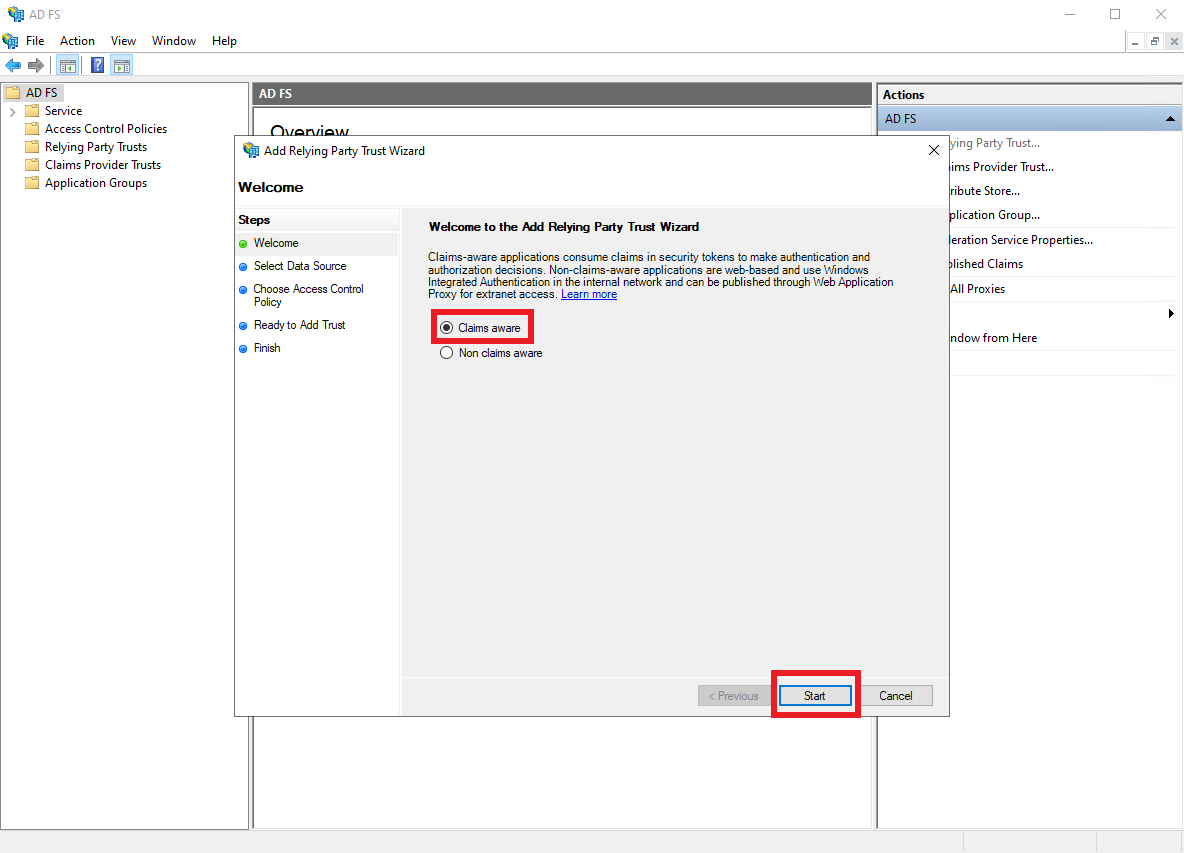
-
Select the
Enter data about this relying party manuallyoption, and clickNext.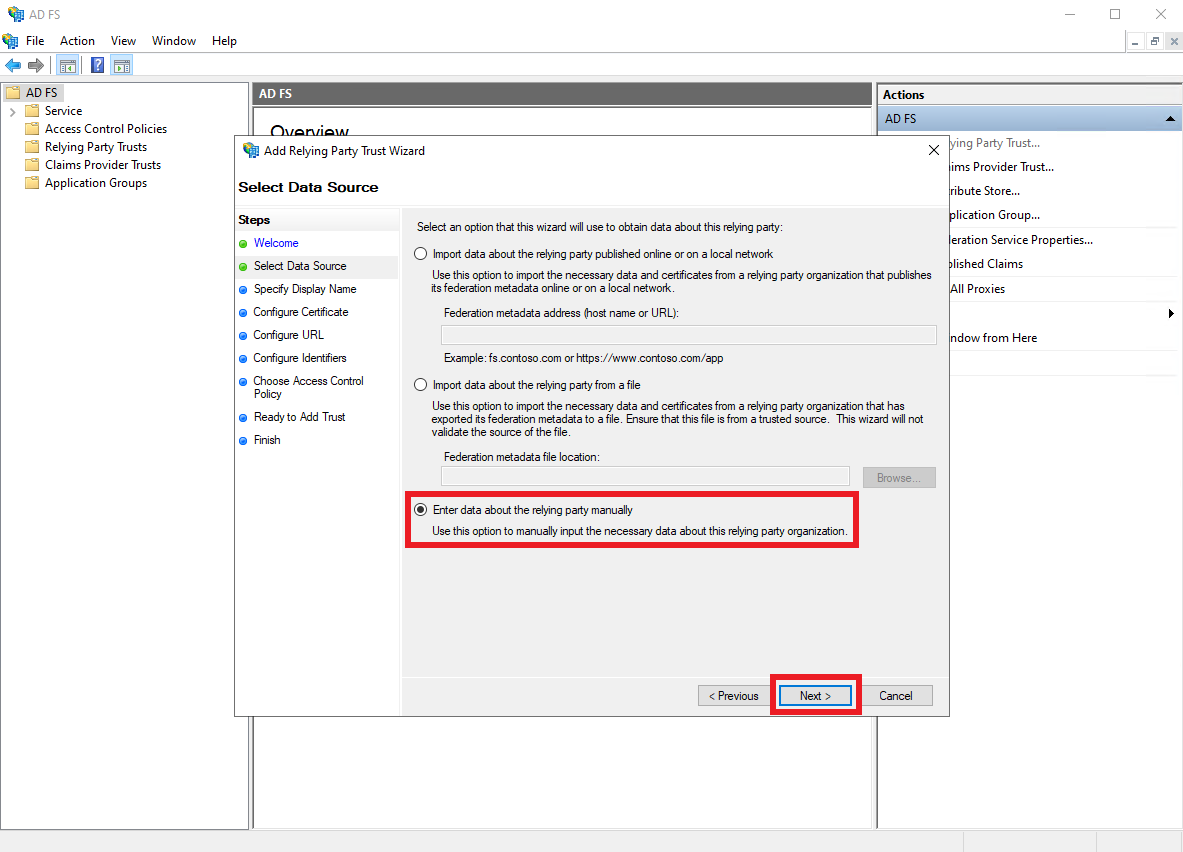
-
Type a descriptive
Display name, and clickNext.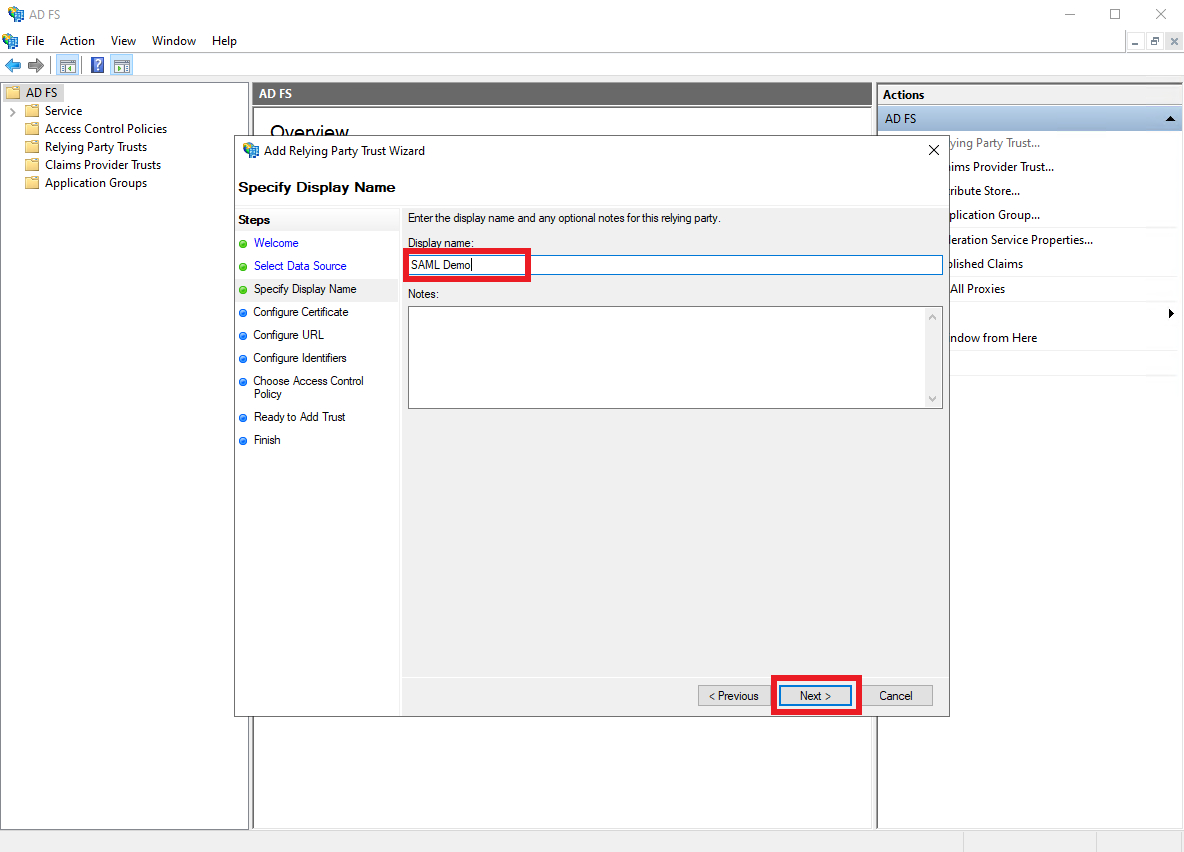
-
No action required on the
Configure Certificatepane, clickNext.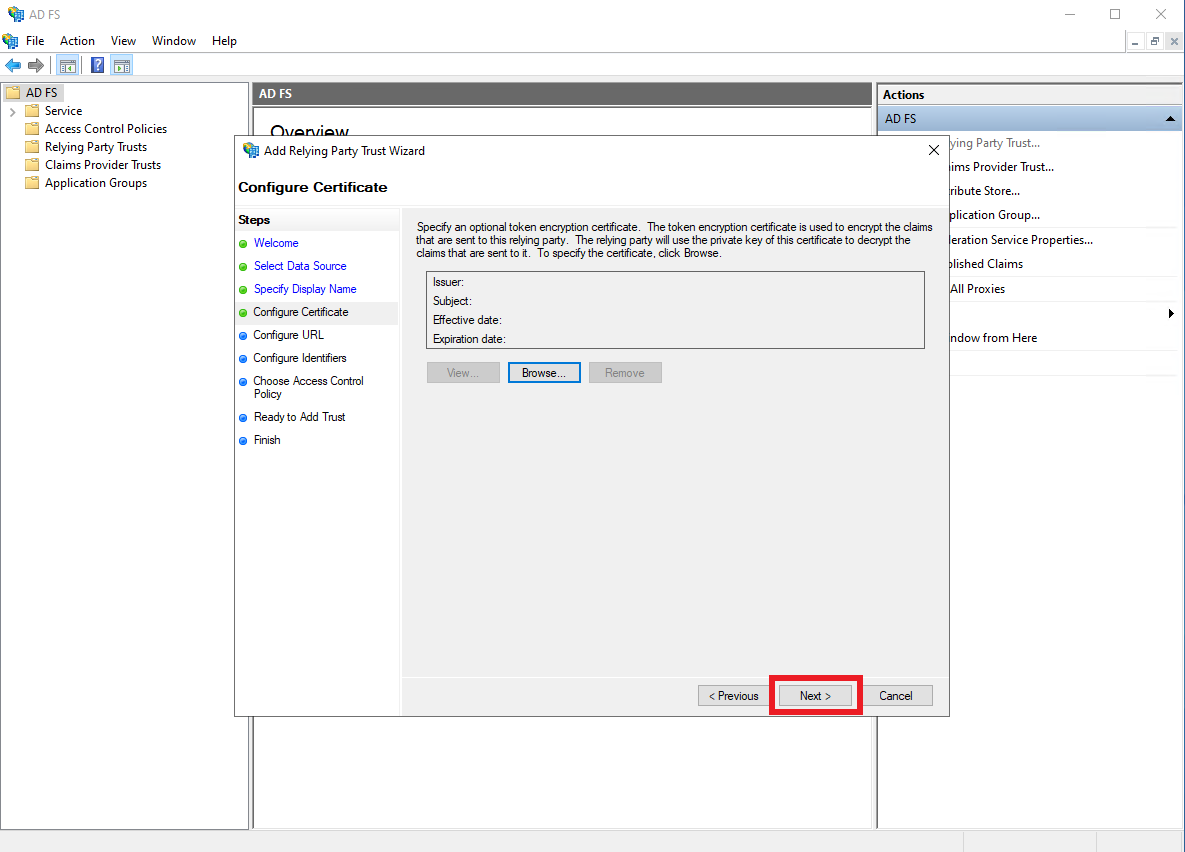
-
Select the
Enable support for the SAML 2.0 WebSSO protocoloption, and paste the value ofAssertion Consumer Servicefrom Step 1 into theRelying party SAML 2.0 SSO service URLfield.
Then, ClickNext.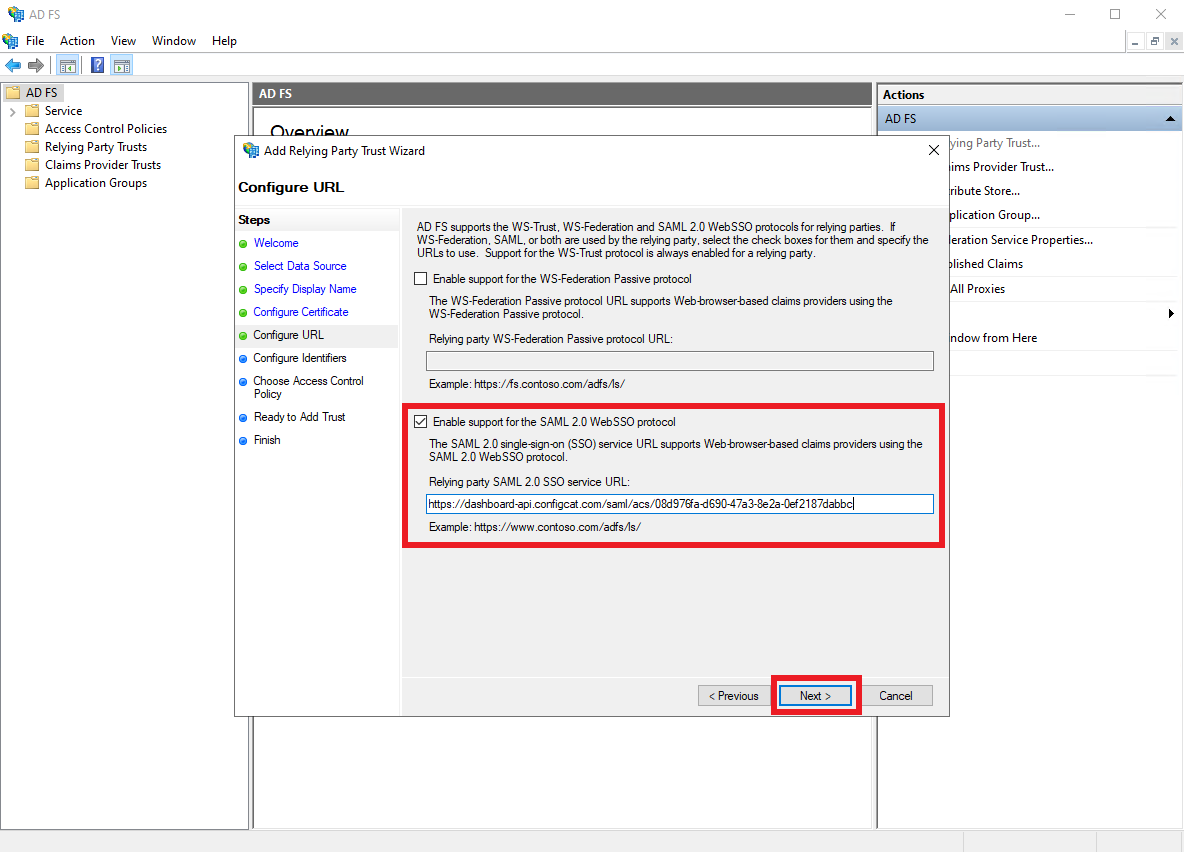
-
Paste the value of
Entity IDfrom Step 1 into theRelying party trust identifierfield, and clickAdd.
Then, clickNext.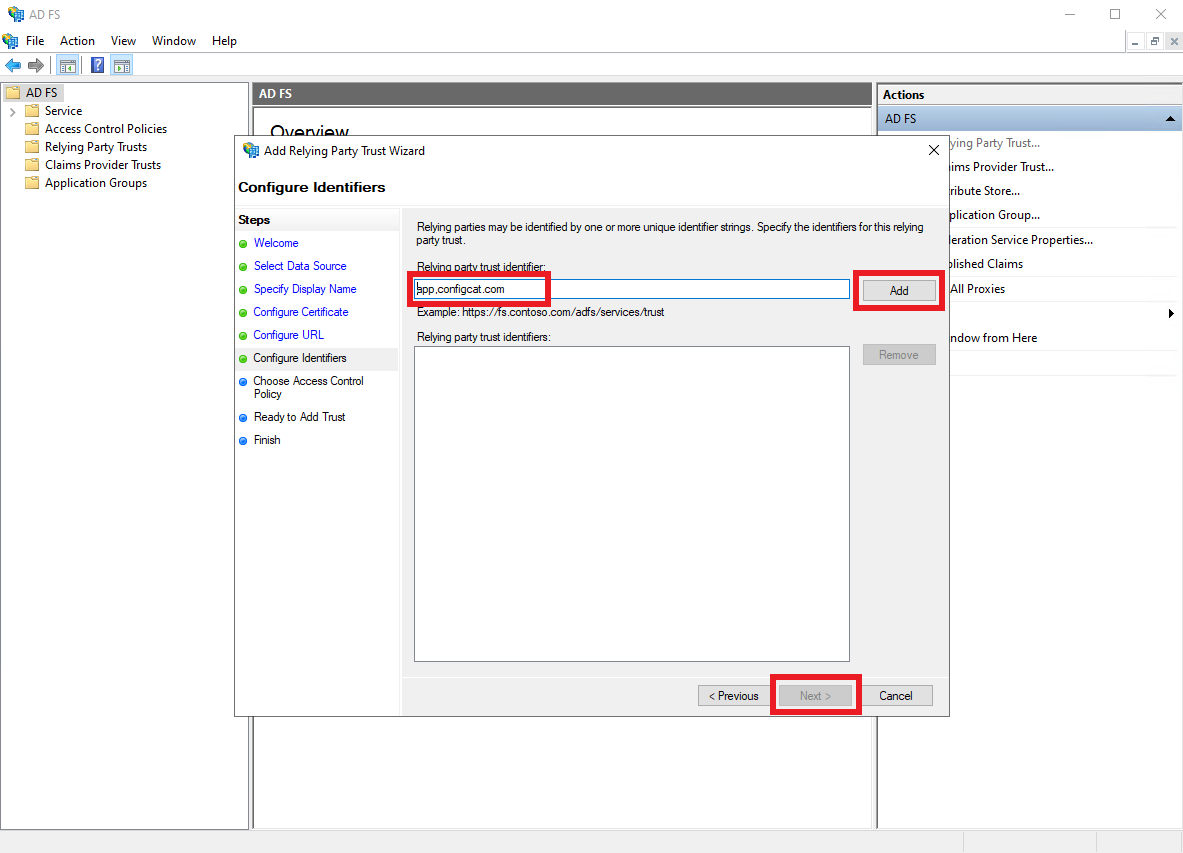
-
No action required on the
Choose Access Control Policypane, clickNext.
-
Review the changes, then click
Next.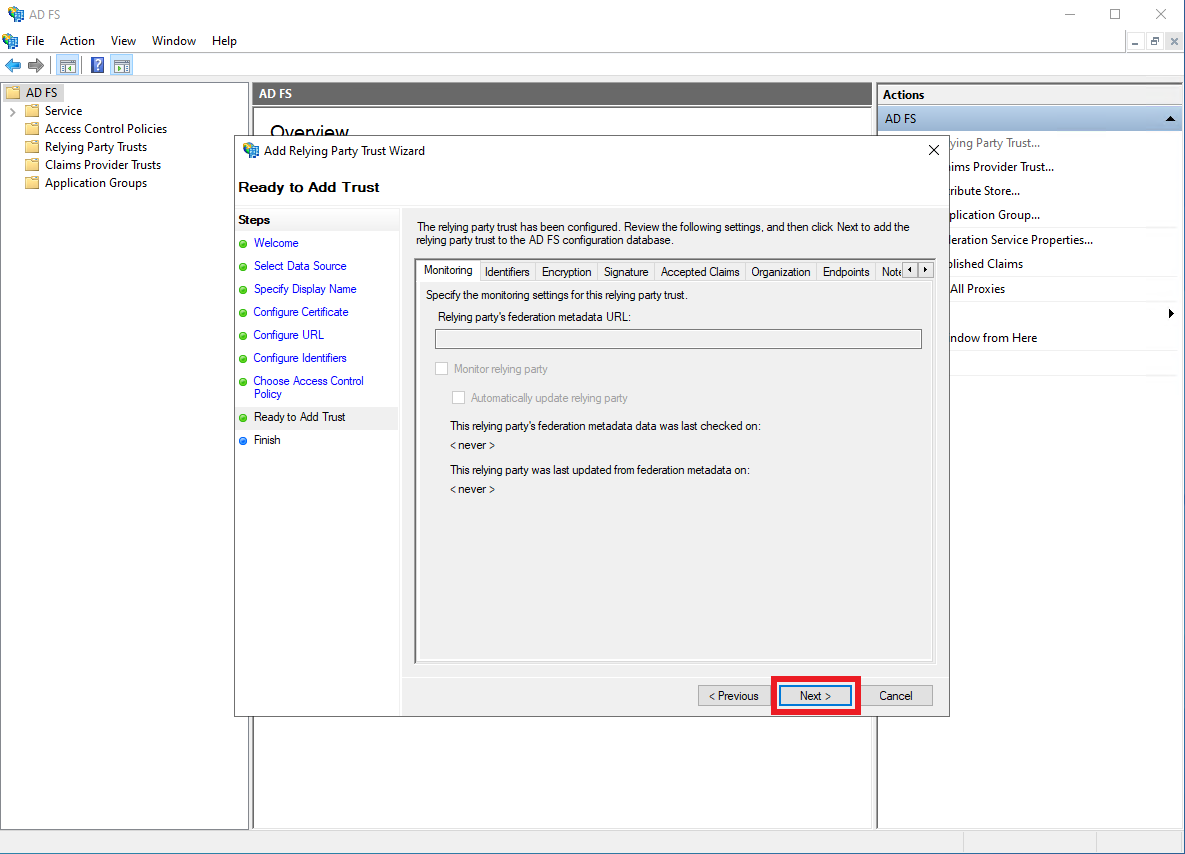
-
The Relying Party Trust is now successfully added, make sure the
Configure claims issuance policy for this applicationoption is checked, and clickClose.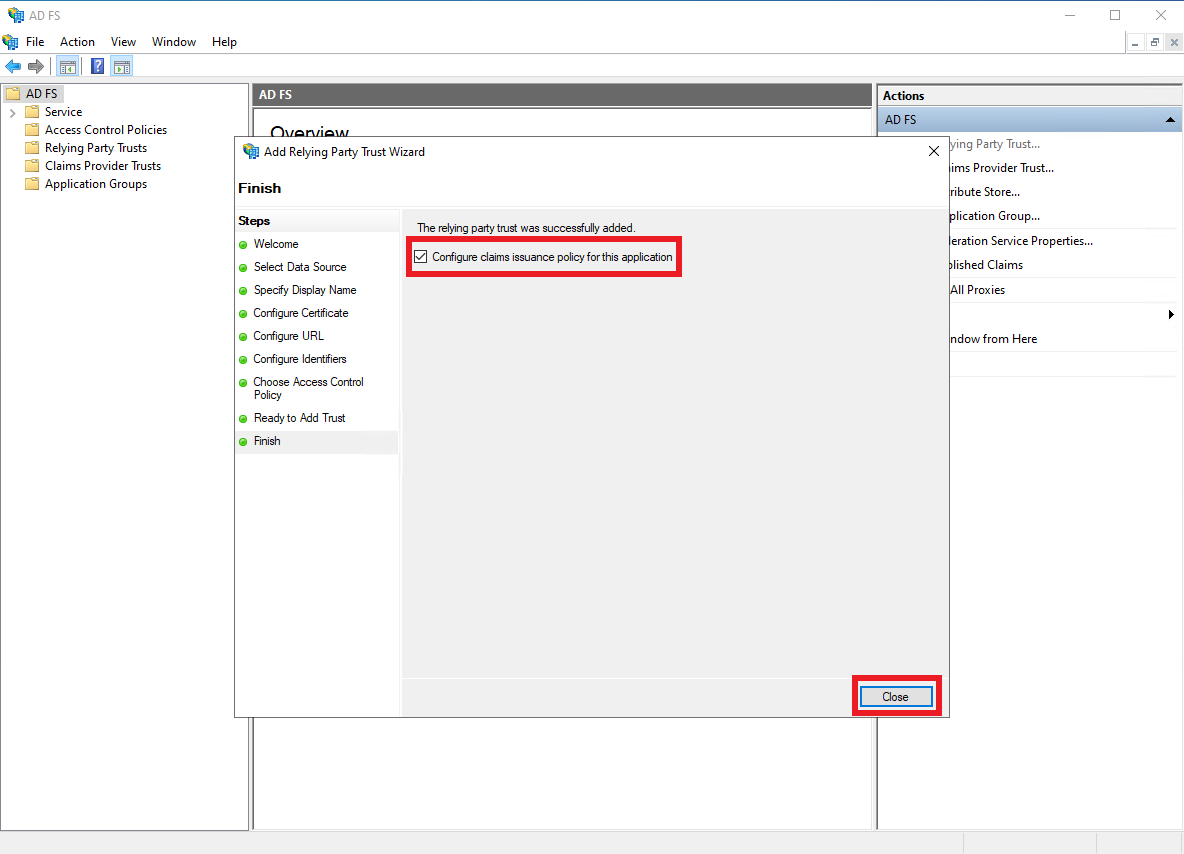
3. Configure Claims Issuance Policy
-
After adding the Relying Party Trust, the following dialog should appear.
ClickAdd rule.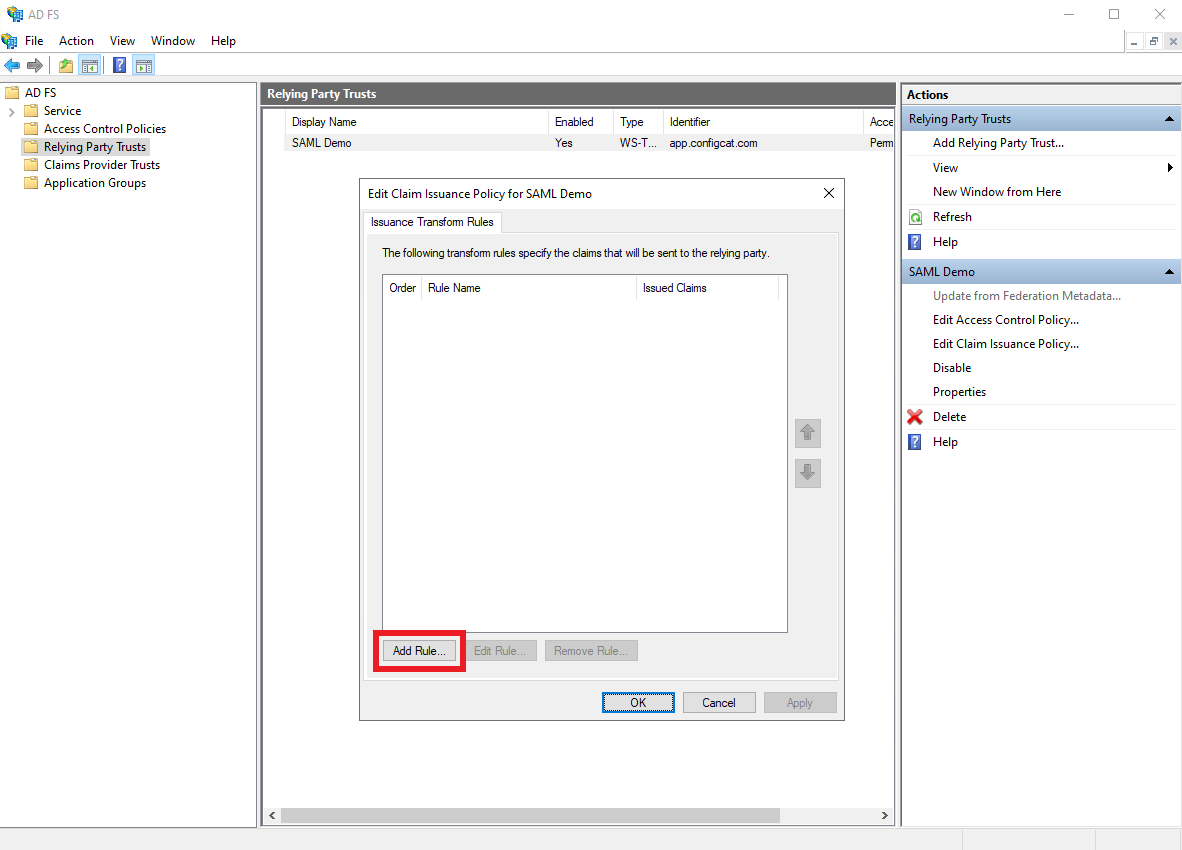
-
Select
Send LDAP Attributes as Claimsas theClaim rule template, and clickNext.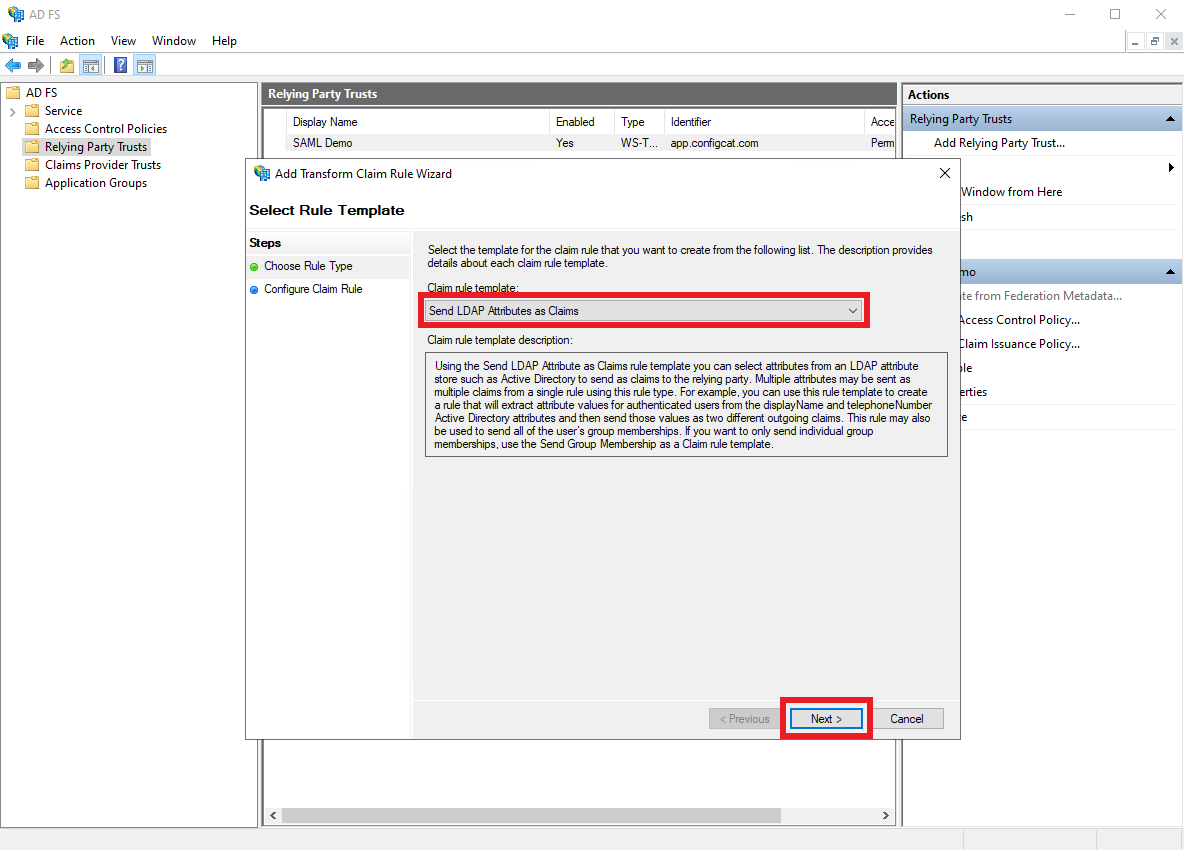
-
Apply the following, and click
Finish.- Add a descriptive
Claim rule name. - Select
Active DirectoryasAttribute store. - Select
User-Principal-NameasLDAP Attribute. - Select
Name IDasOutgoing Claim Type.
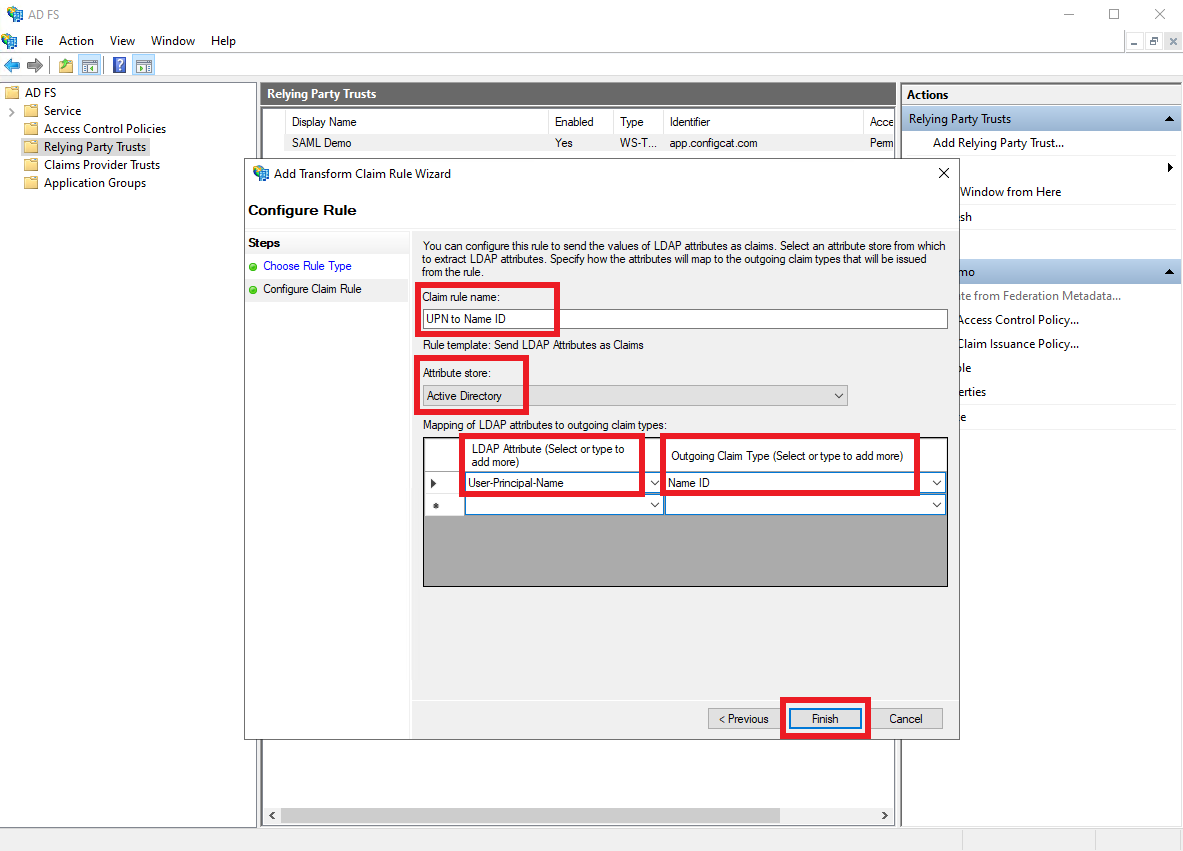
- Add a descriptive
-
Click
OK.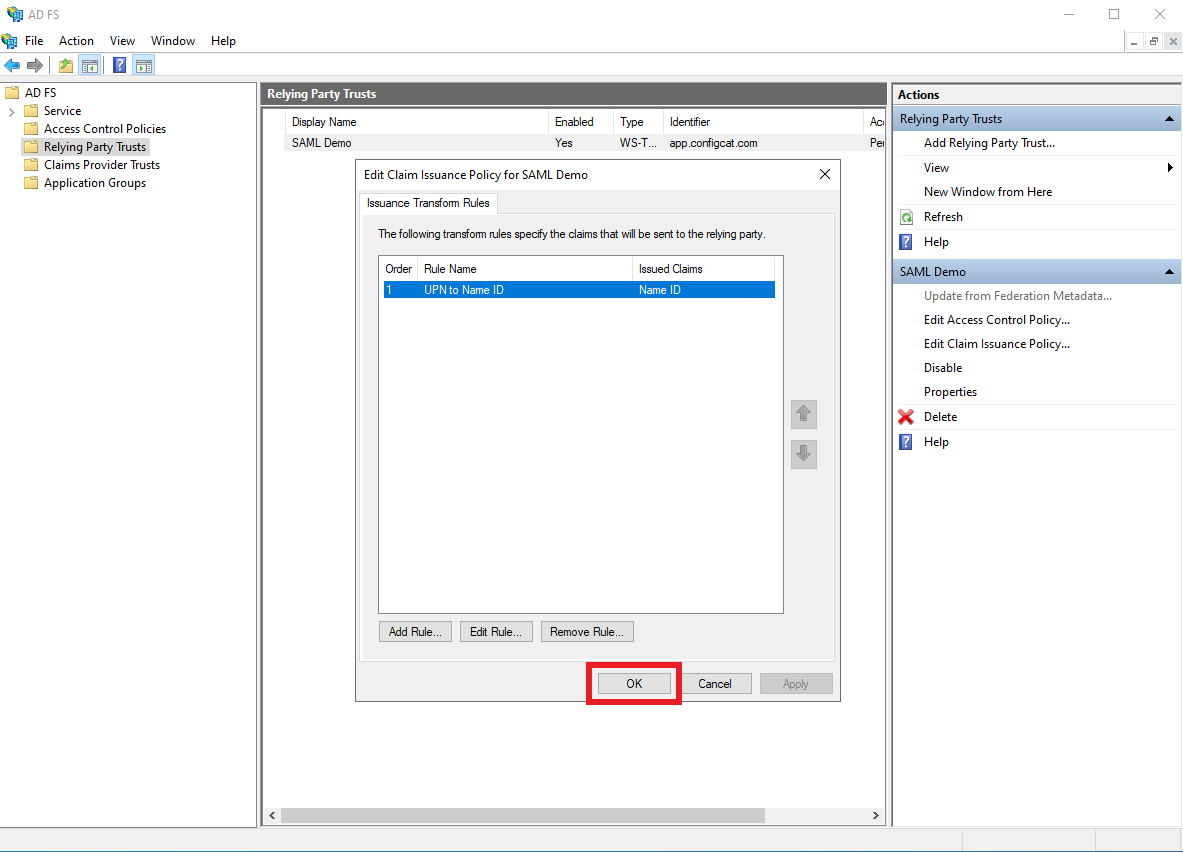
4. Configure ConfigCat with SAML Details from ADFS
You can choose one of the following options to configure ConfigCat with SAML Identity Provider metadata.
- Metadata URL
- Manual Configuration
Select
Endpoints, and copy the URL Path of theFederation Metadataendpoint.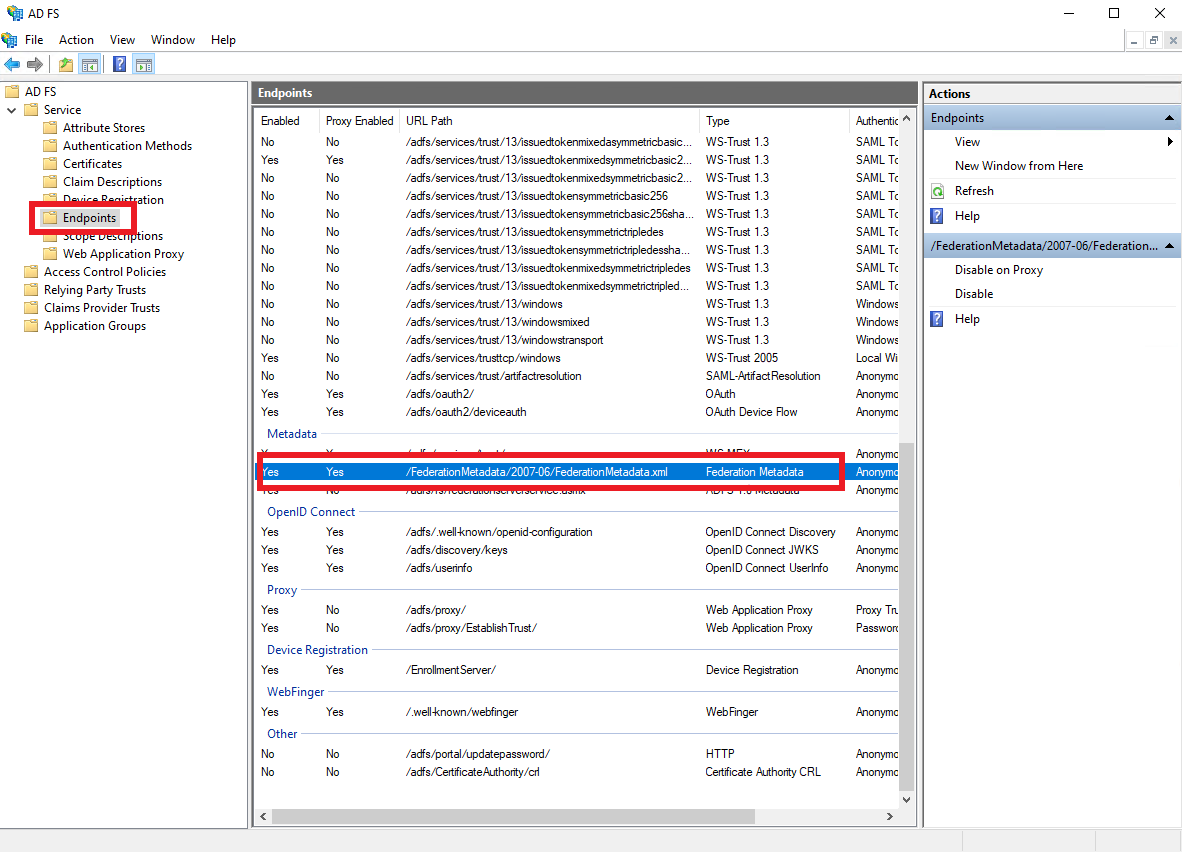
Type the URL into the
Metadata URLfield at ConfigCat in the following format:https://[ADFS-DOMAIN]/[FEDERATION-METADATA-URL-PATH].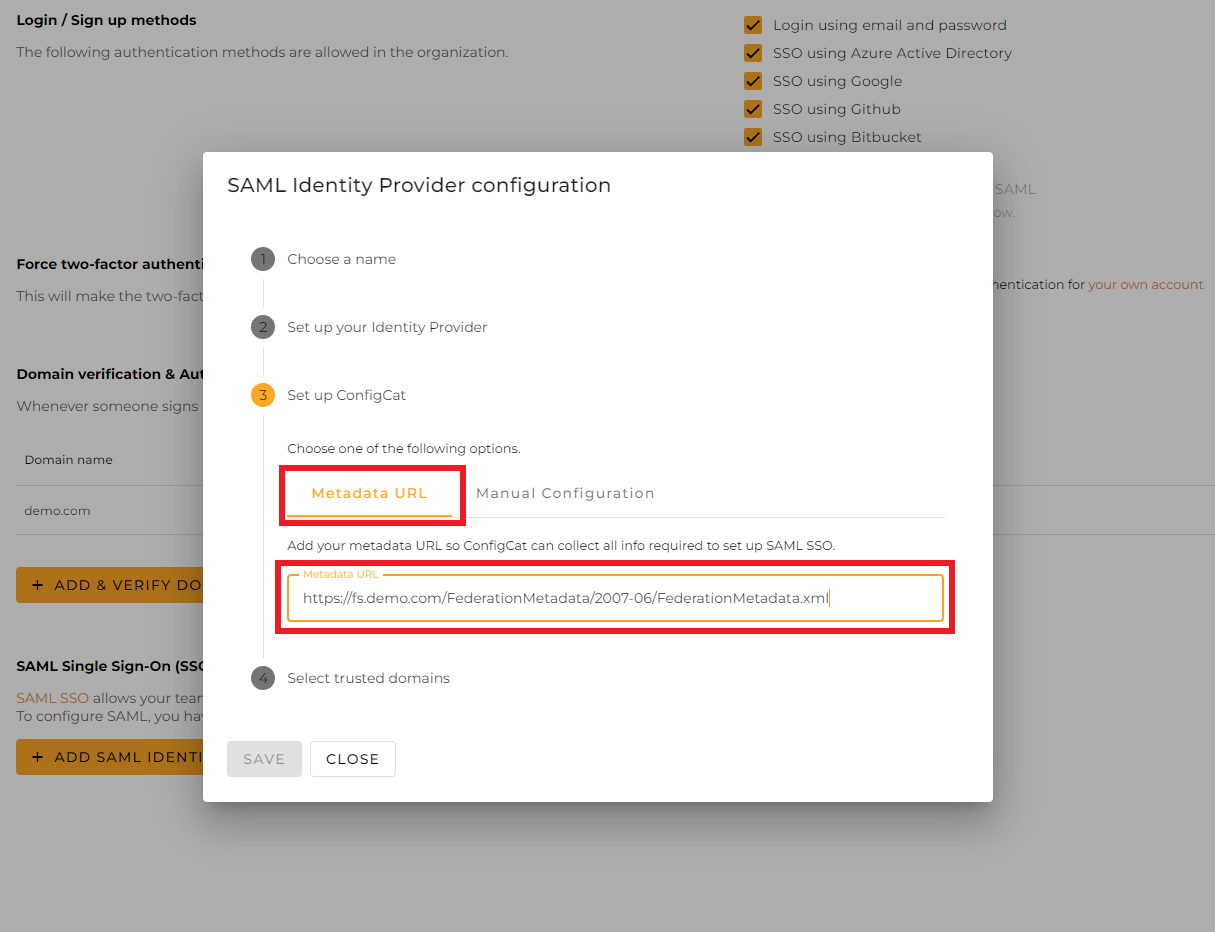
Select the trusted domains. Only user accounts from trusted domains can login with SAML SSO. You can bind multiple verified domains to a SAML Identity Provider.
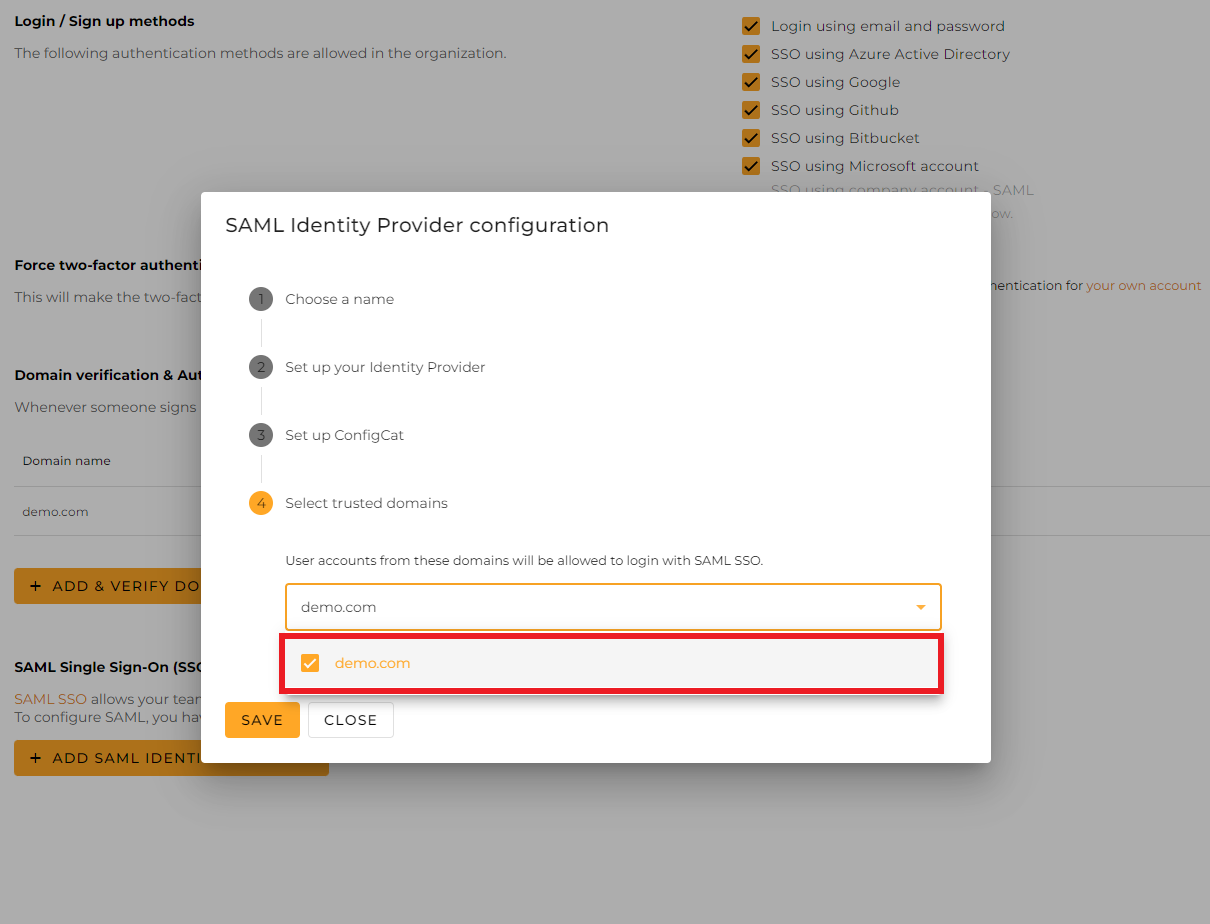
Click on
Save.
Select
Endpoints, and save the URL Path of theSAML 2.0/WS-Federationendpoint.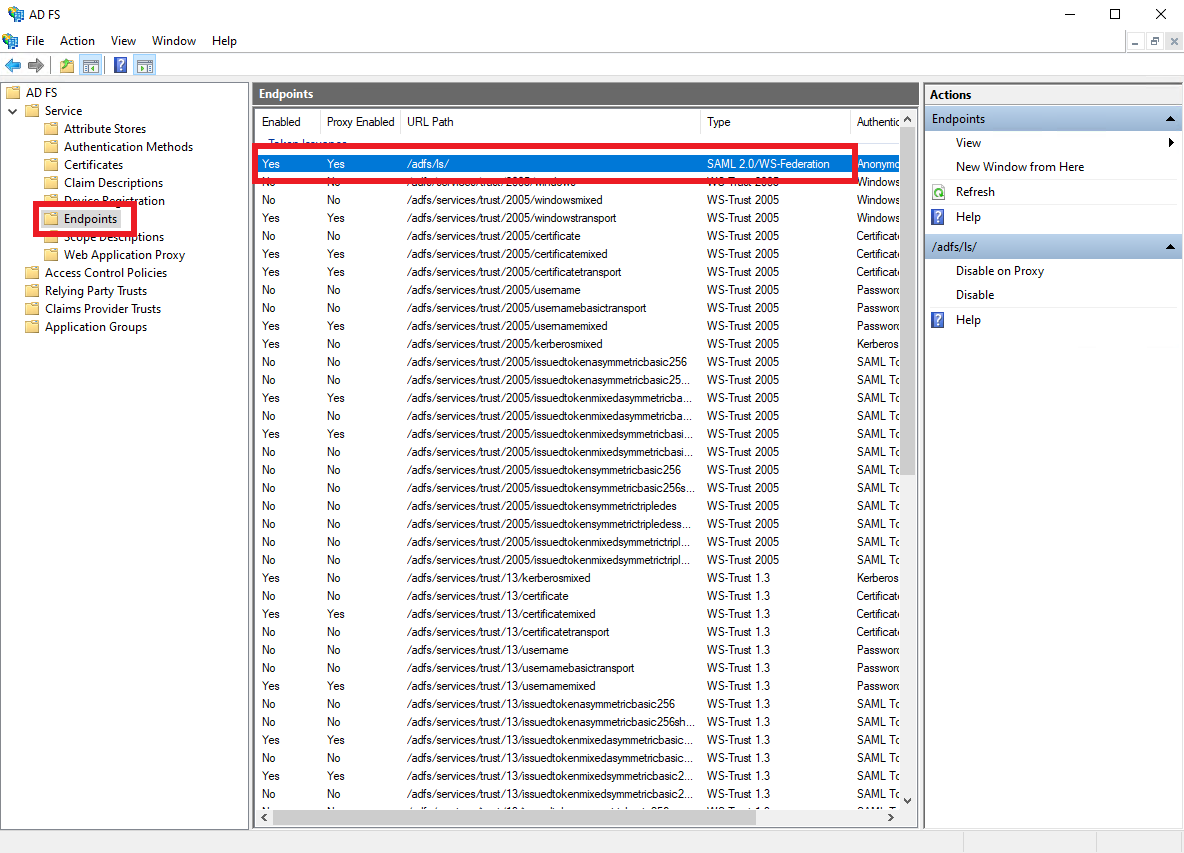
Select
Certificates, then select theToken Signingcertificate, and clickView Certificate.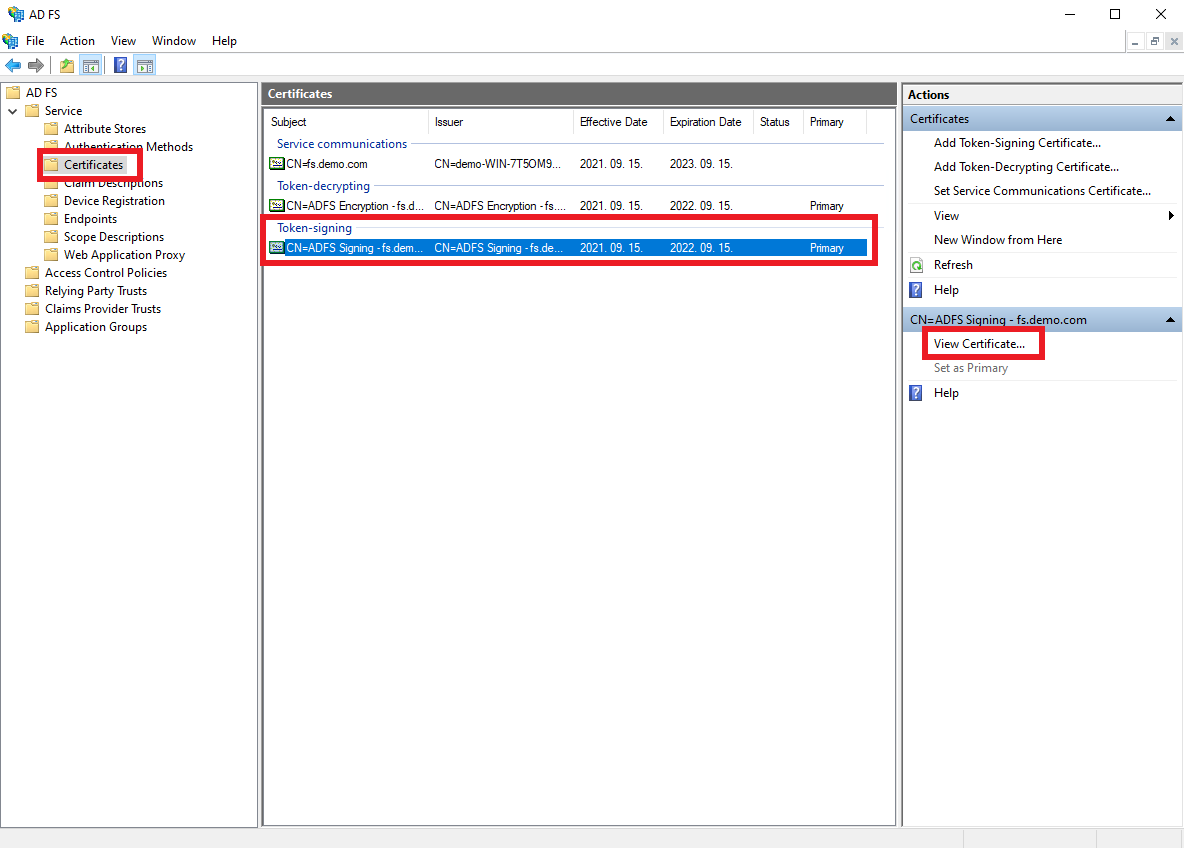
On the
Detailstab clickCopy to File.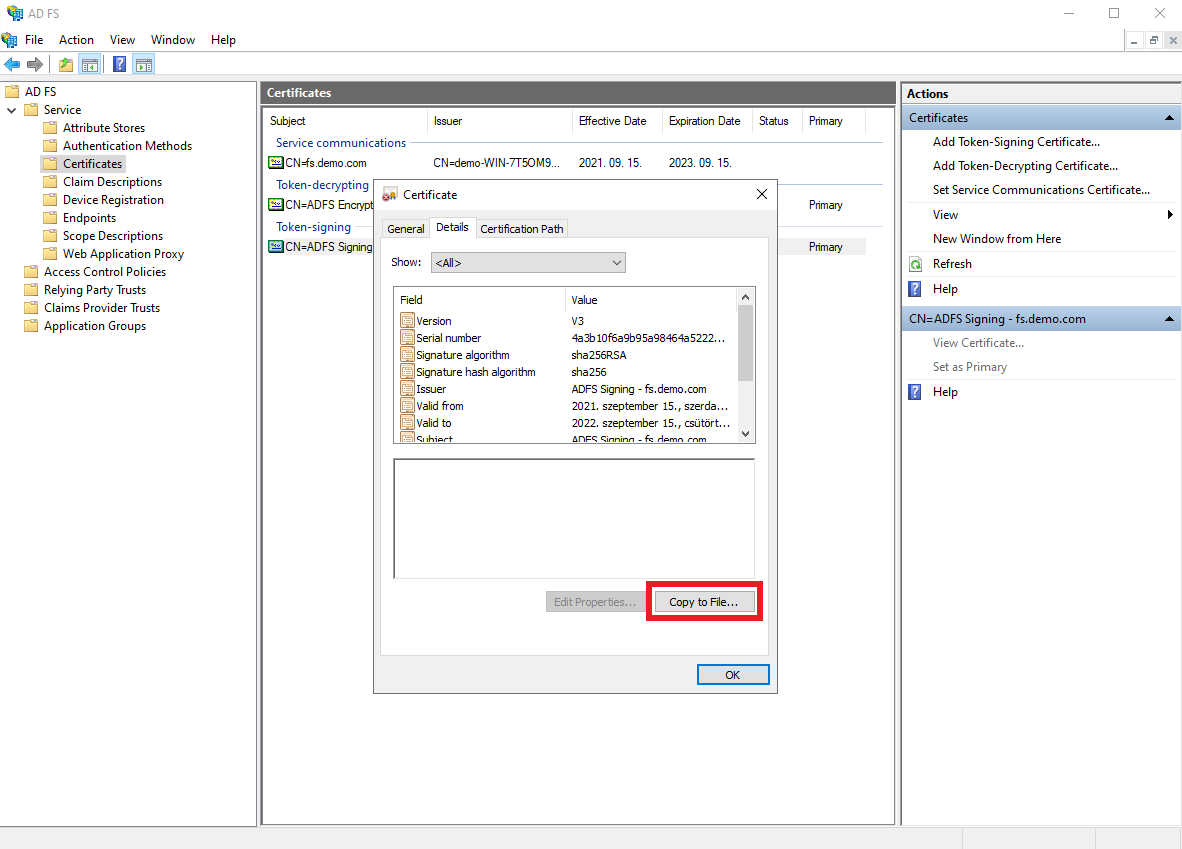
Click
Next.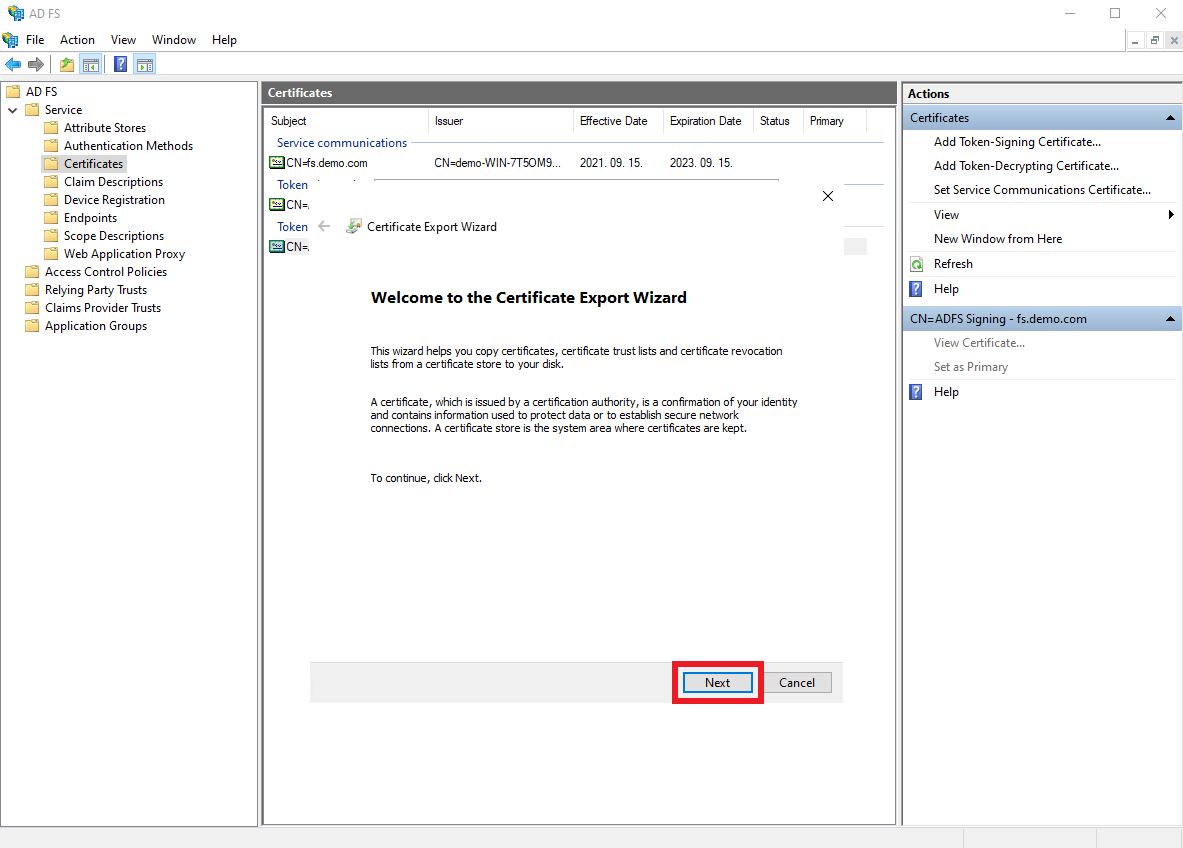
Select the
Base-64 encoded X.509 (.CER)option, and clickNext.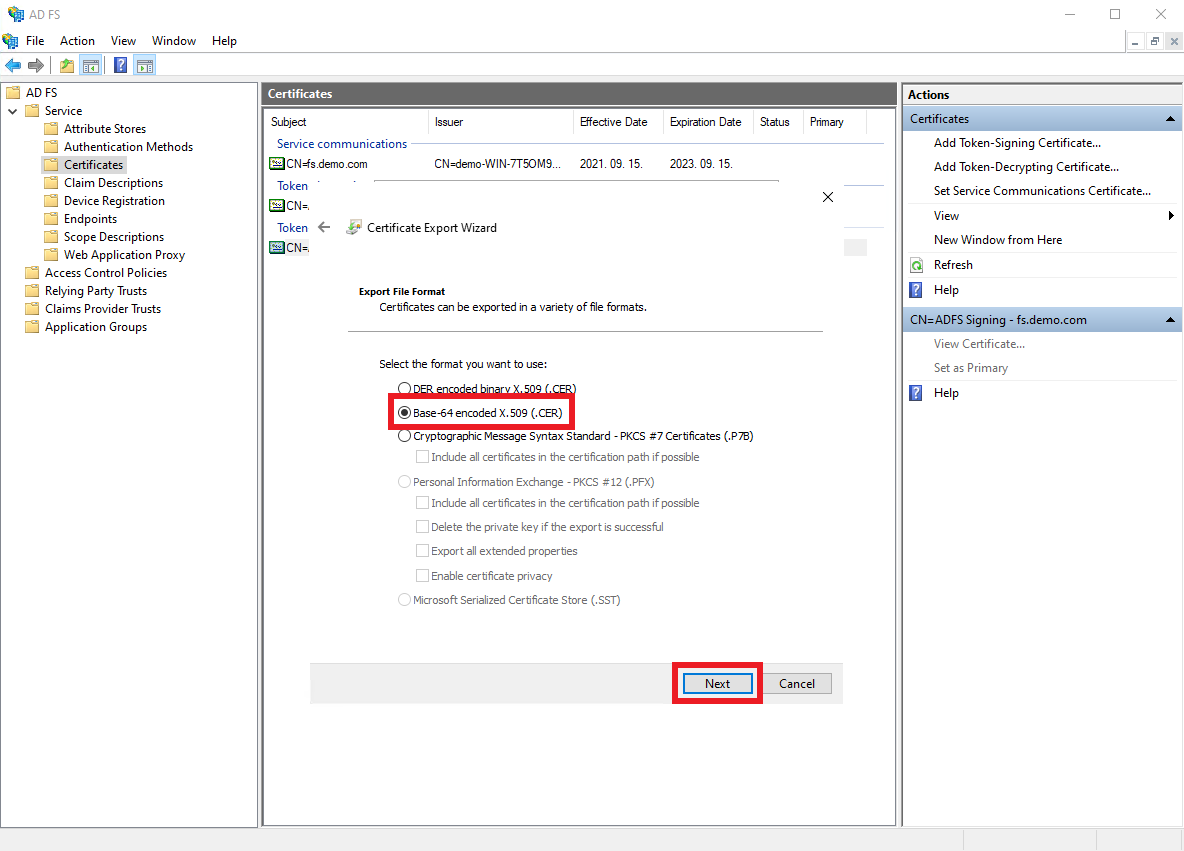
Browse the location where the certificate should be exported, and click
Next.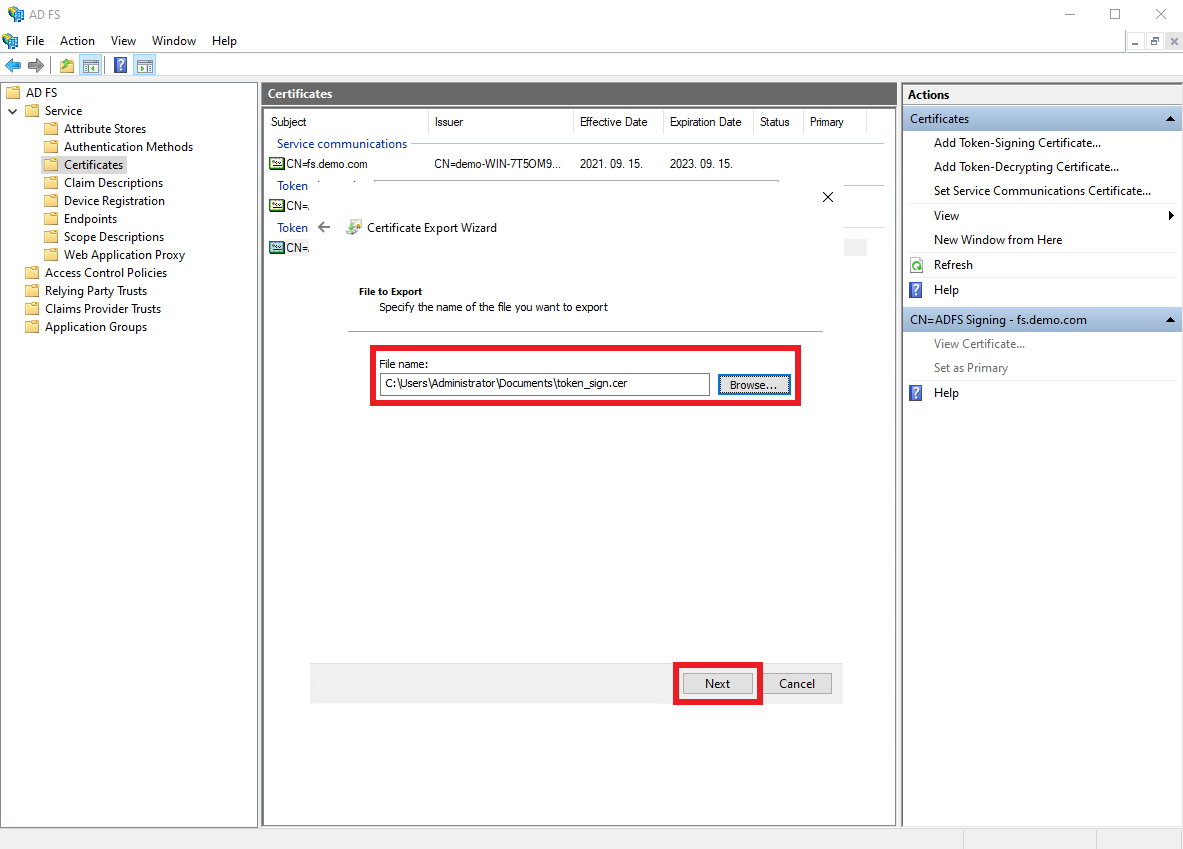
Click
Finish.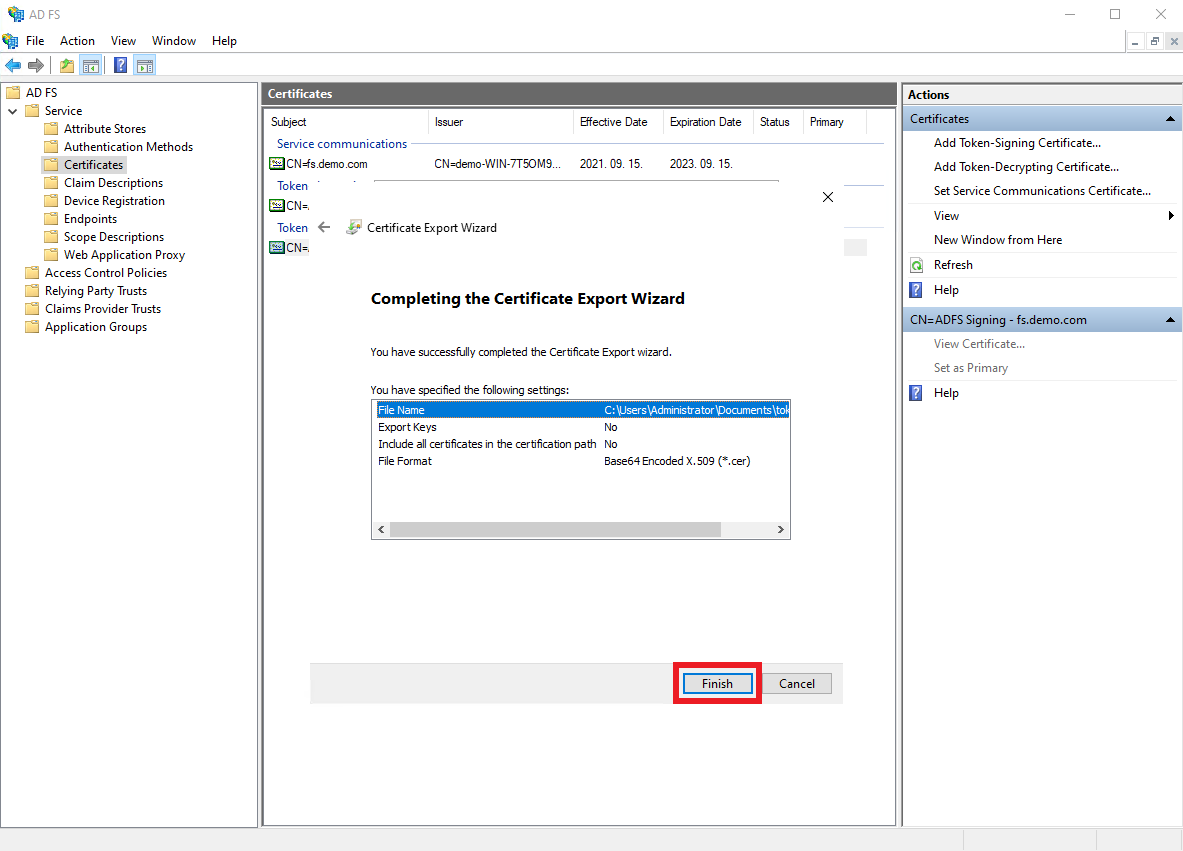
Click
OK.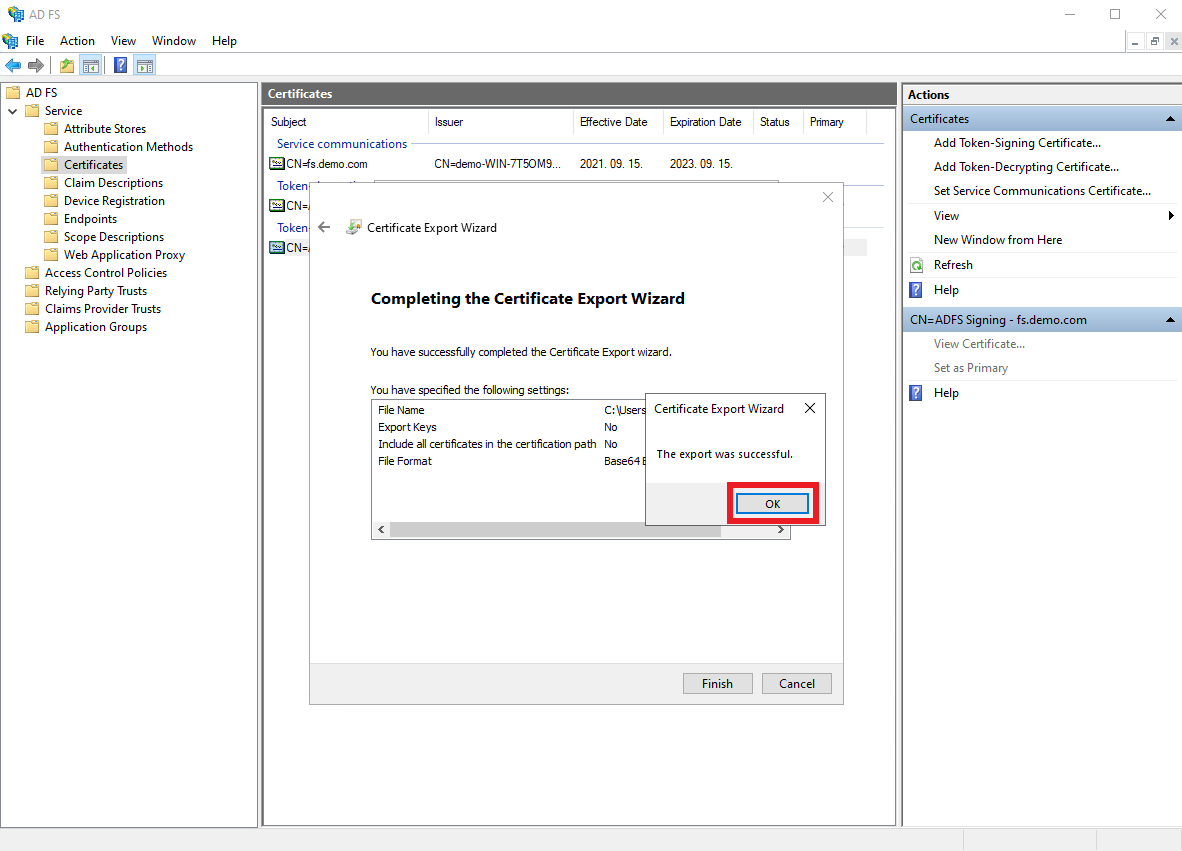
Type the
SAML 2.0/WS-Federationendpoint into theSign-on URLfield in the following format:https://[ADFS-DOMAIN]/[WS-FEDERATION-URL-PATH]. Then, paste the exportedToken Signingcertificate into theX.509 Certificatefield.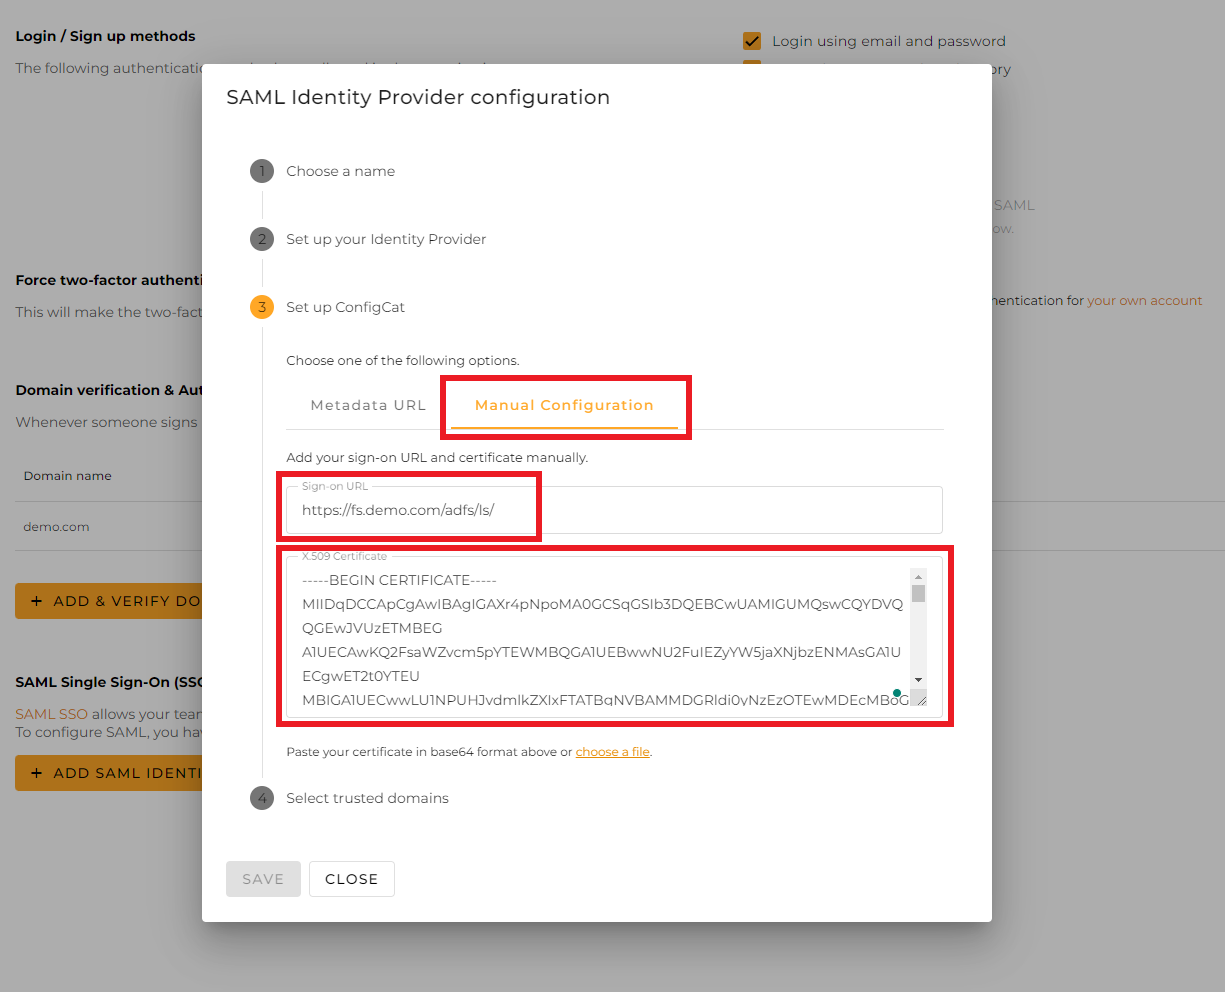
Select the trusted domains. Only user accounts from trusted domains can login with SAML SSO. You can bind multiple verified domains to a SAML Identity Provider.
Click on
Save.
5. Sign In
-
Go to the ConfigCat Log In page, and click
COMPANY ACCOUNT - SAML.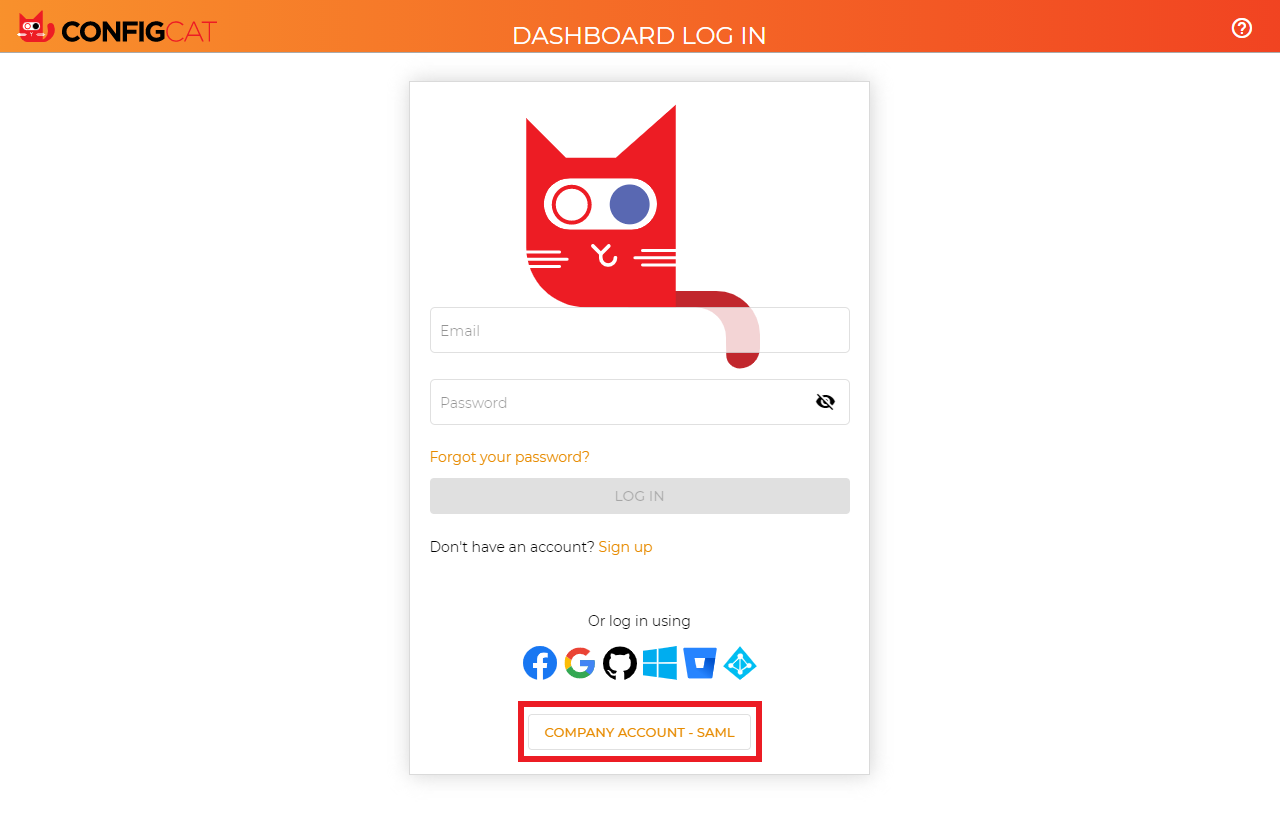
-
Sign in with your company email address.
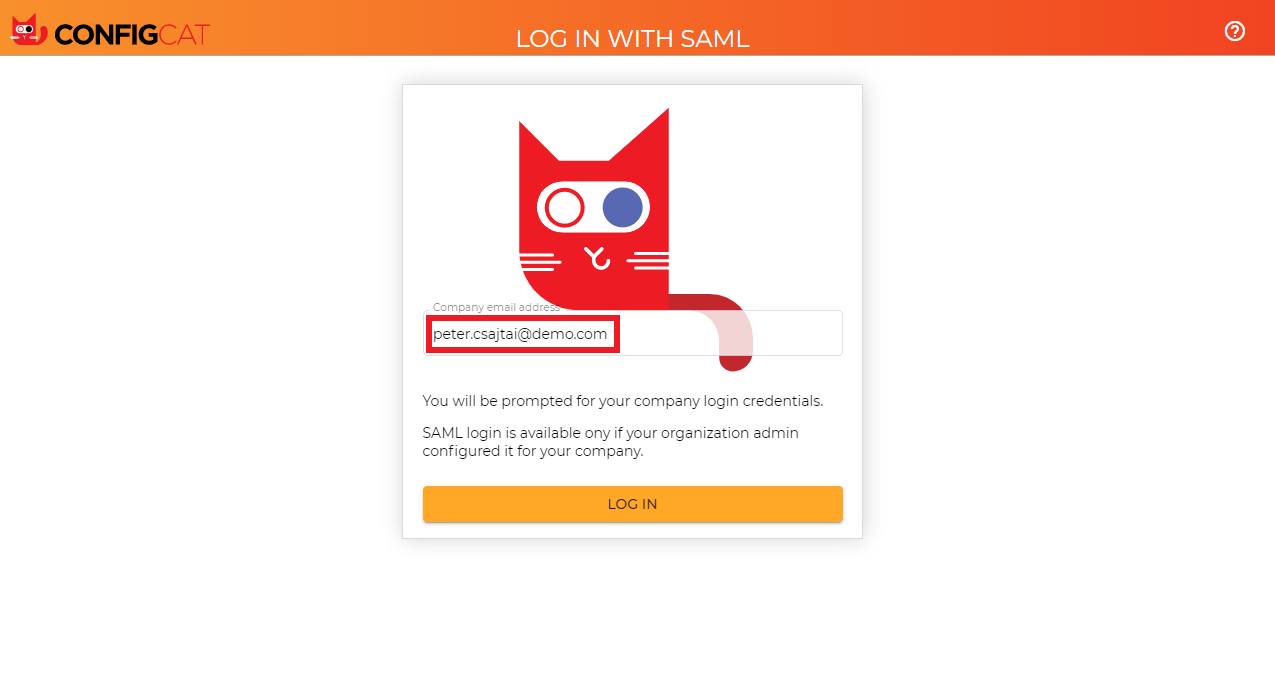
-
ConfigCat will redirect you to the ADFS sign in page. Type your credentials, and click
Sign in.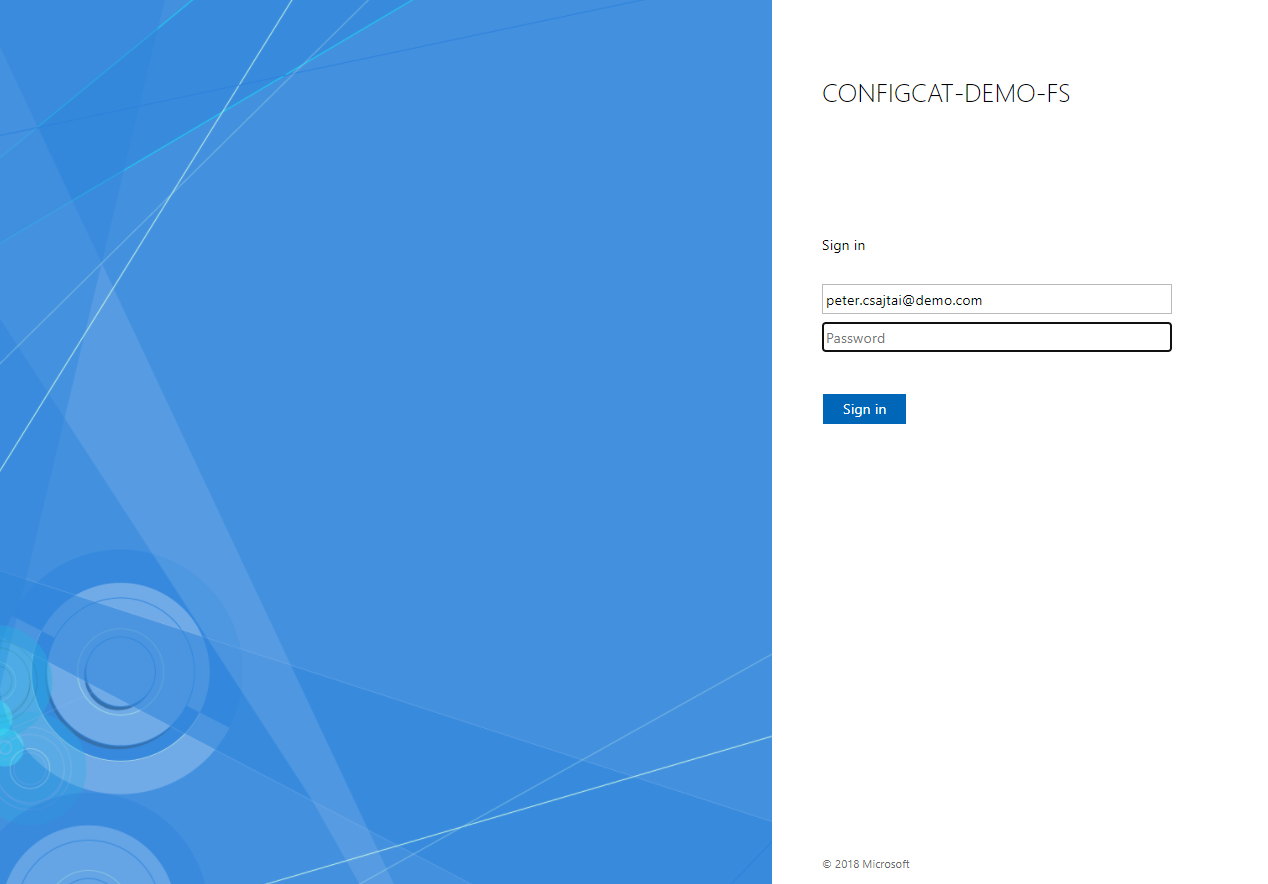
-
You should be redirected to ConfigCat signed in with your company account.
6. Next Steps
- Configure the auto-assignment of users.