User Provisioning (SCIM) with Okta
Introduction
Each Identity Provider requires specific information to configure a SCIM integration. The following guide will walk you through how you can connect ConfigCat with Okta via SCIM.
1. Create an Application in Okta
-
Log in to Okta, go to the admin Dashboard, select
Applications, and click onCreate App Integration.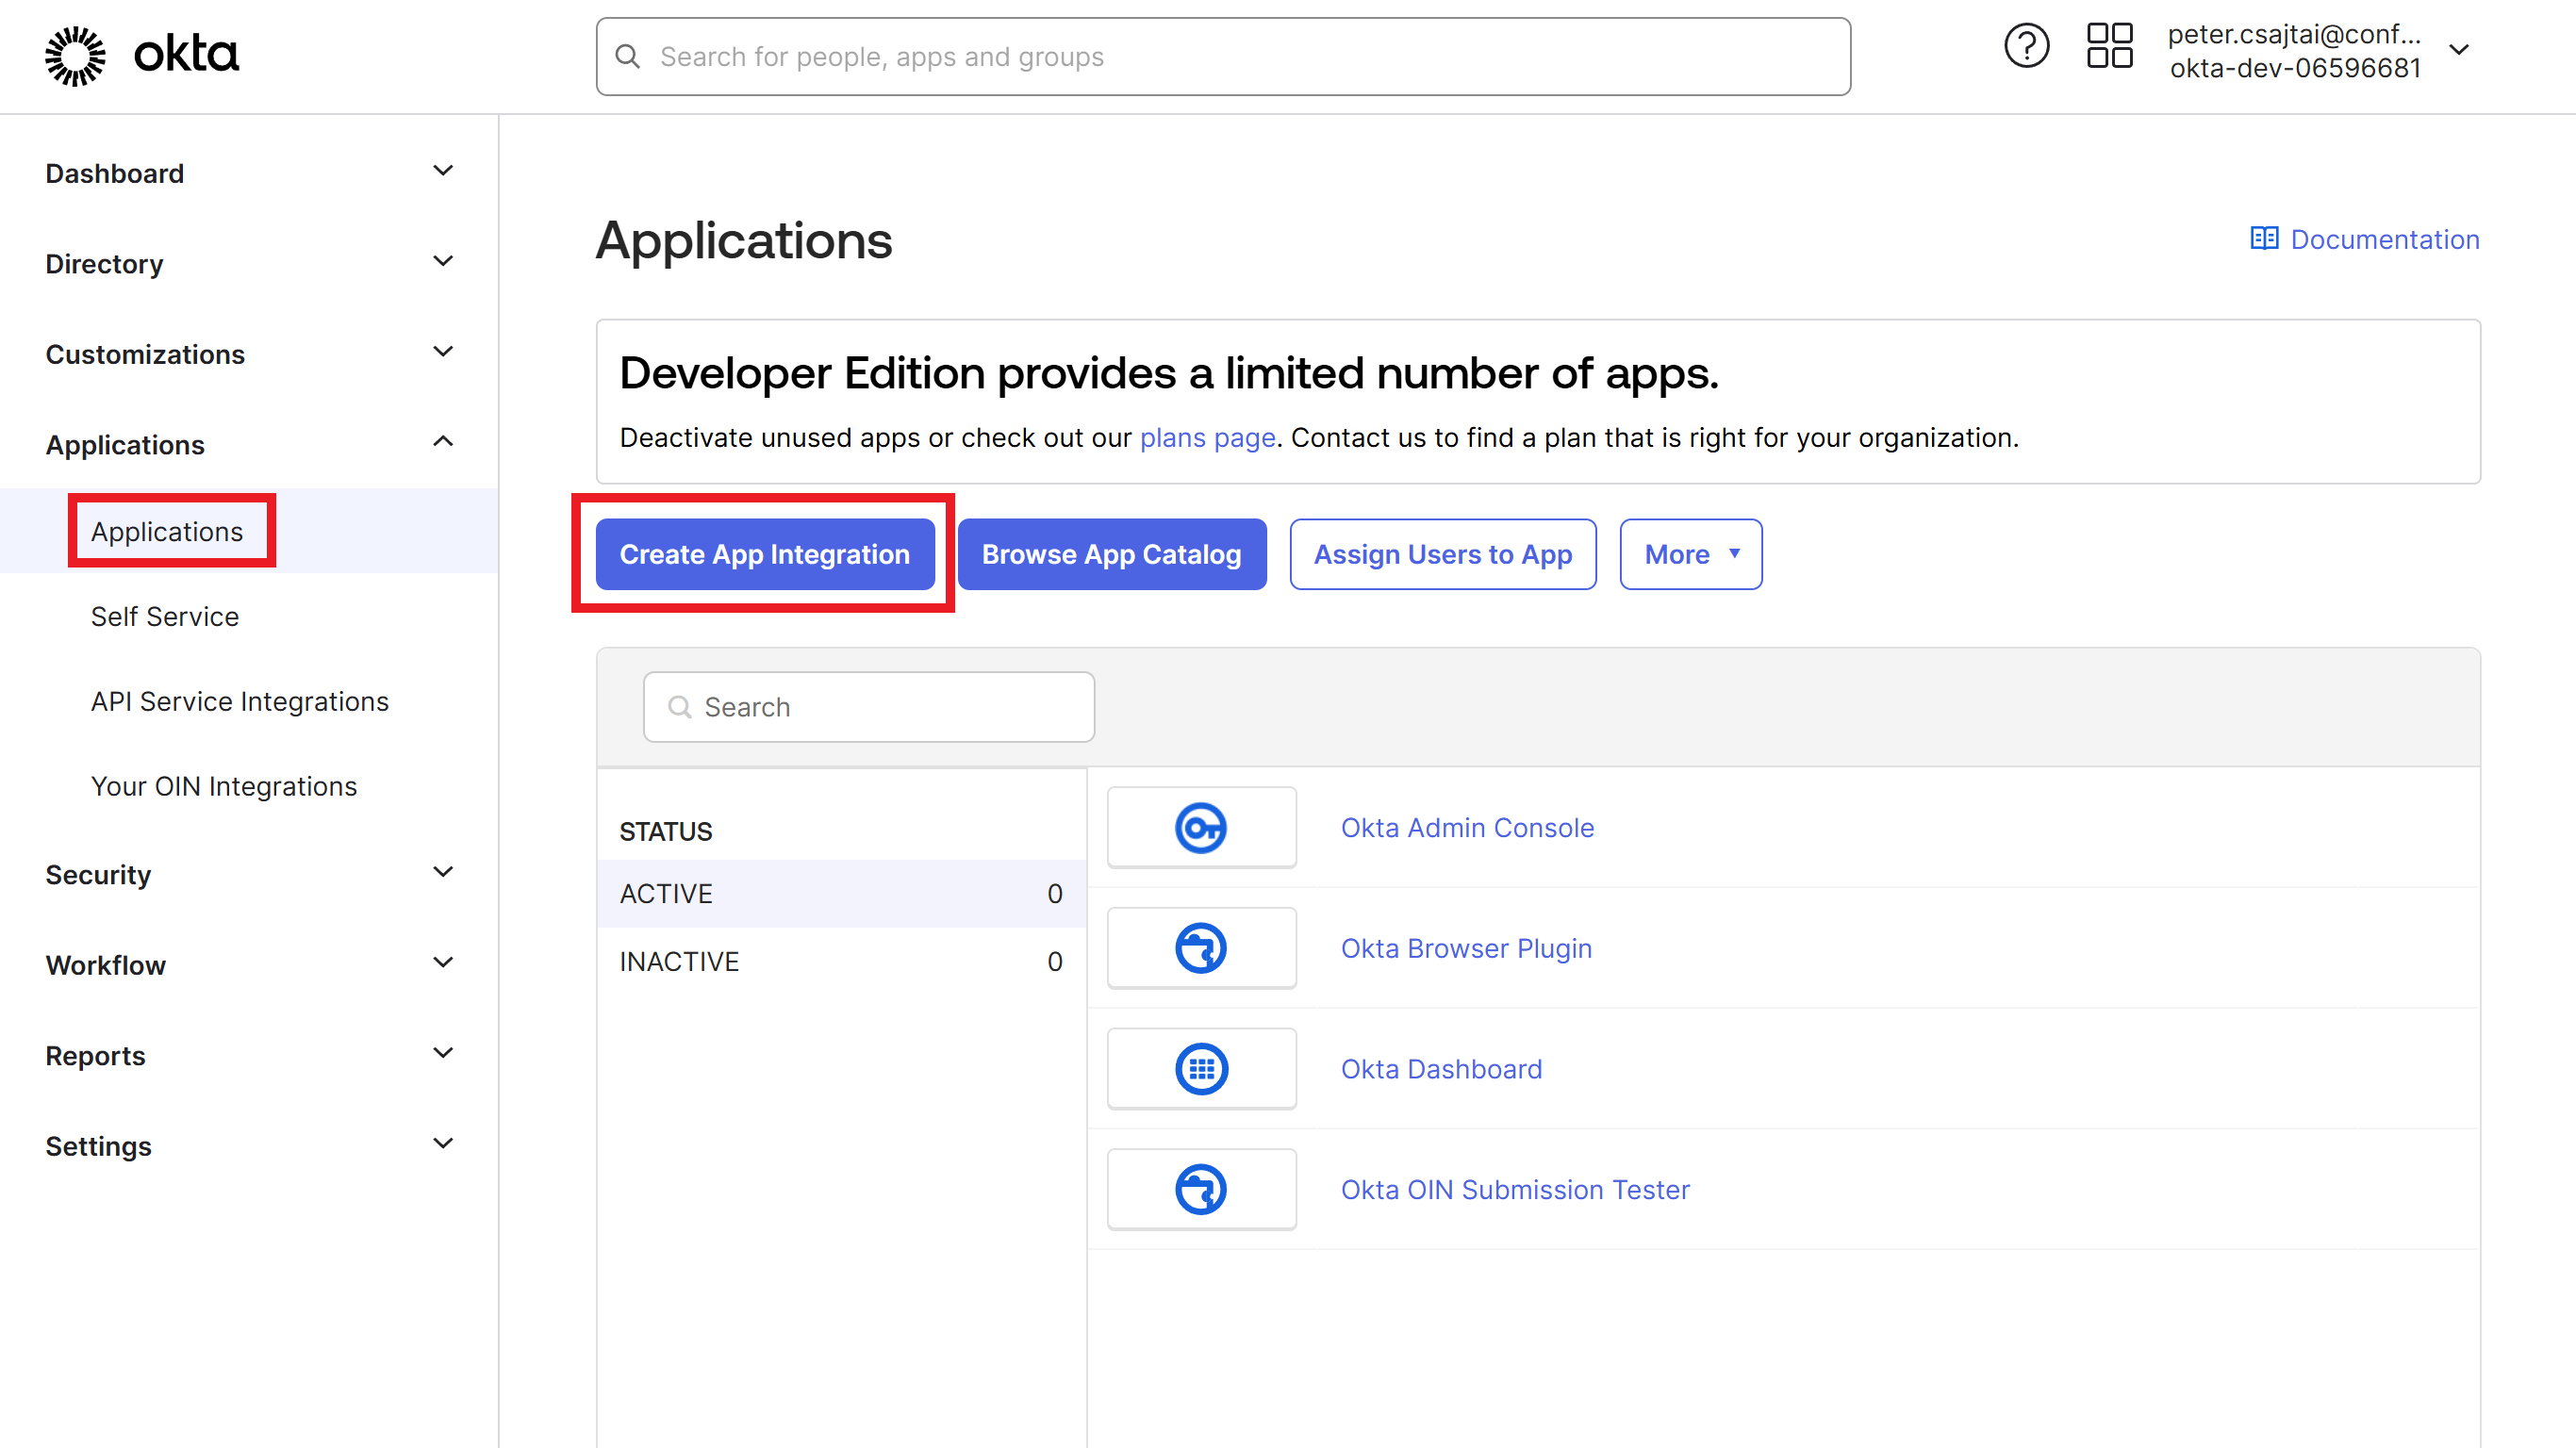
-
Select
SAML 2.0as the Sign-in method.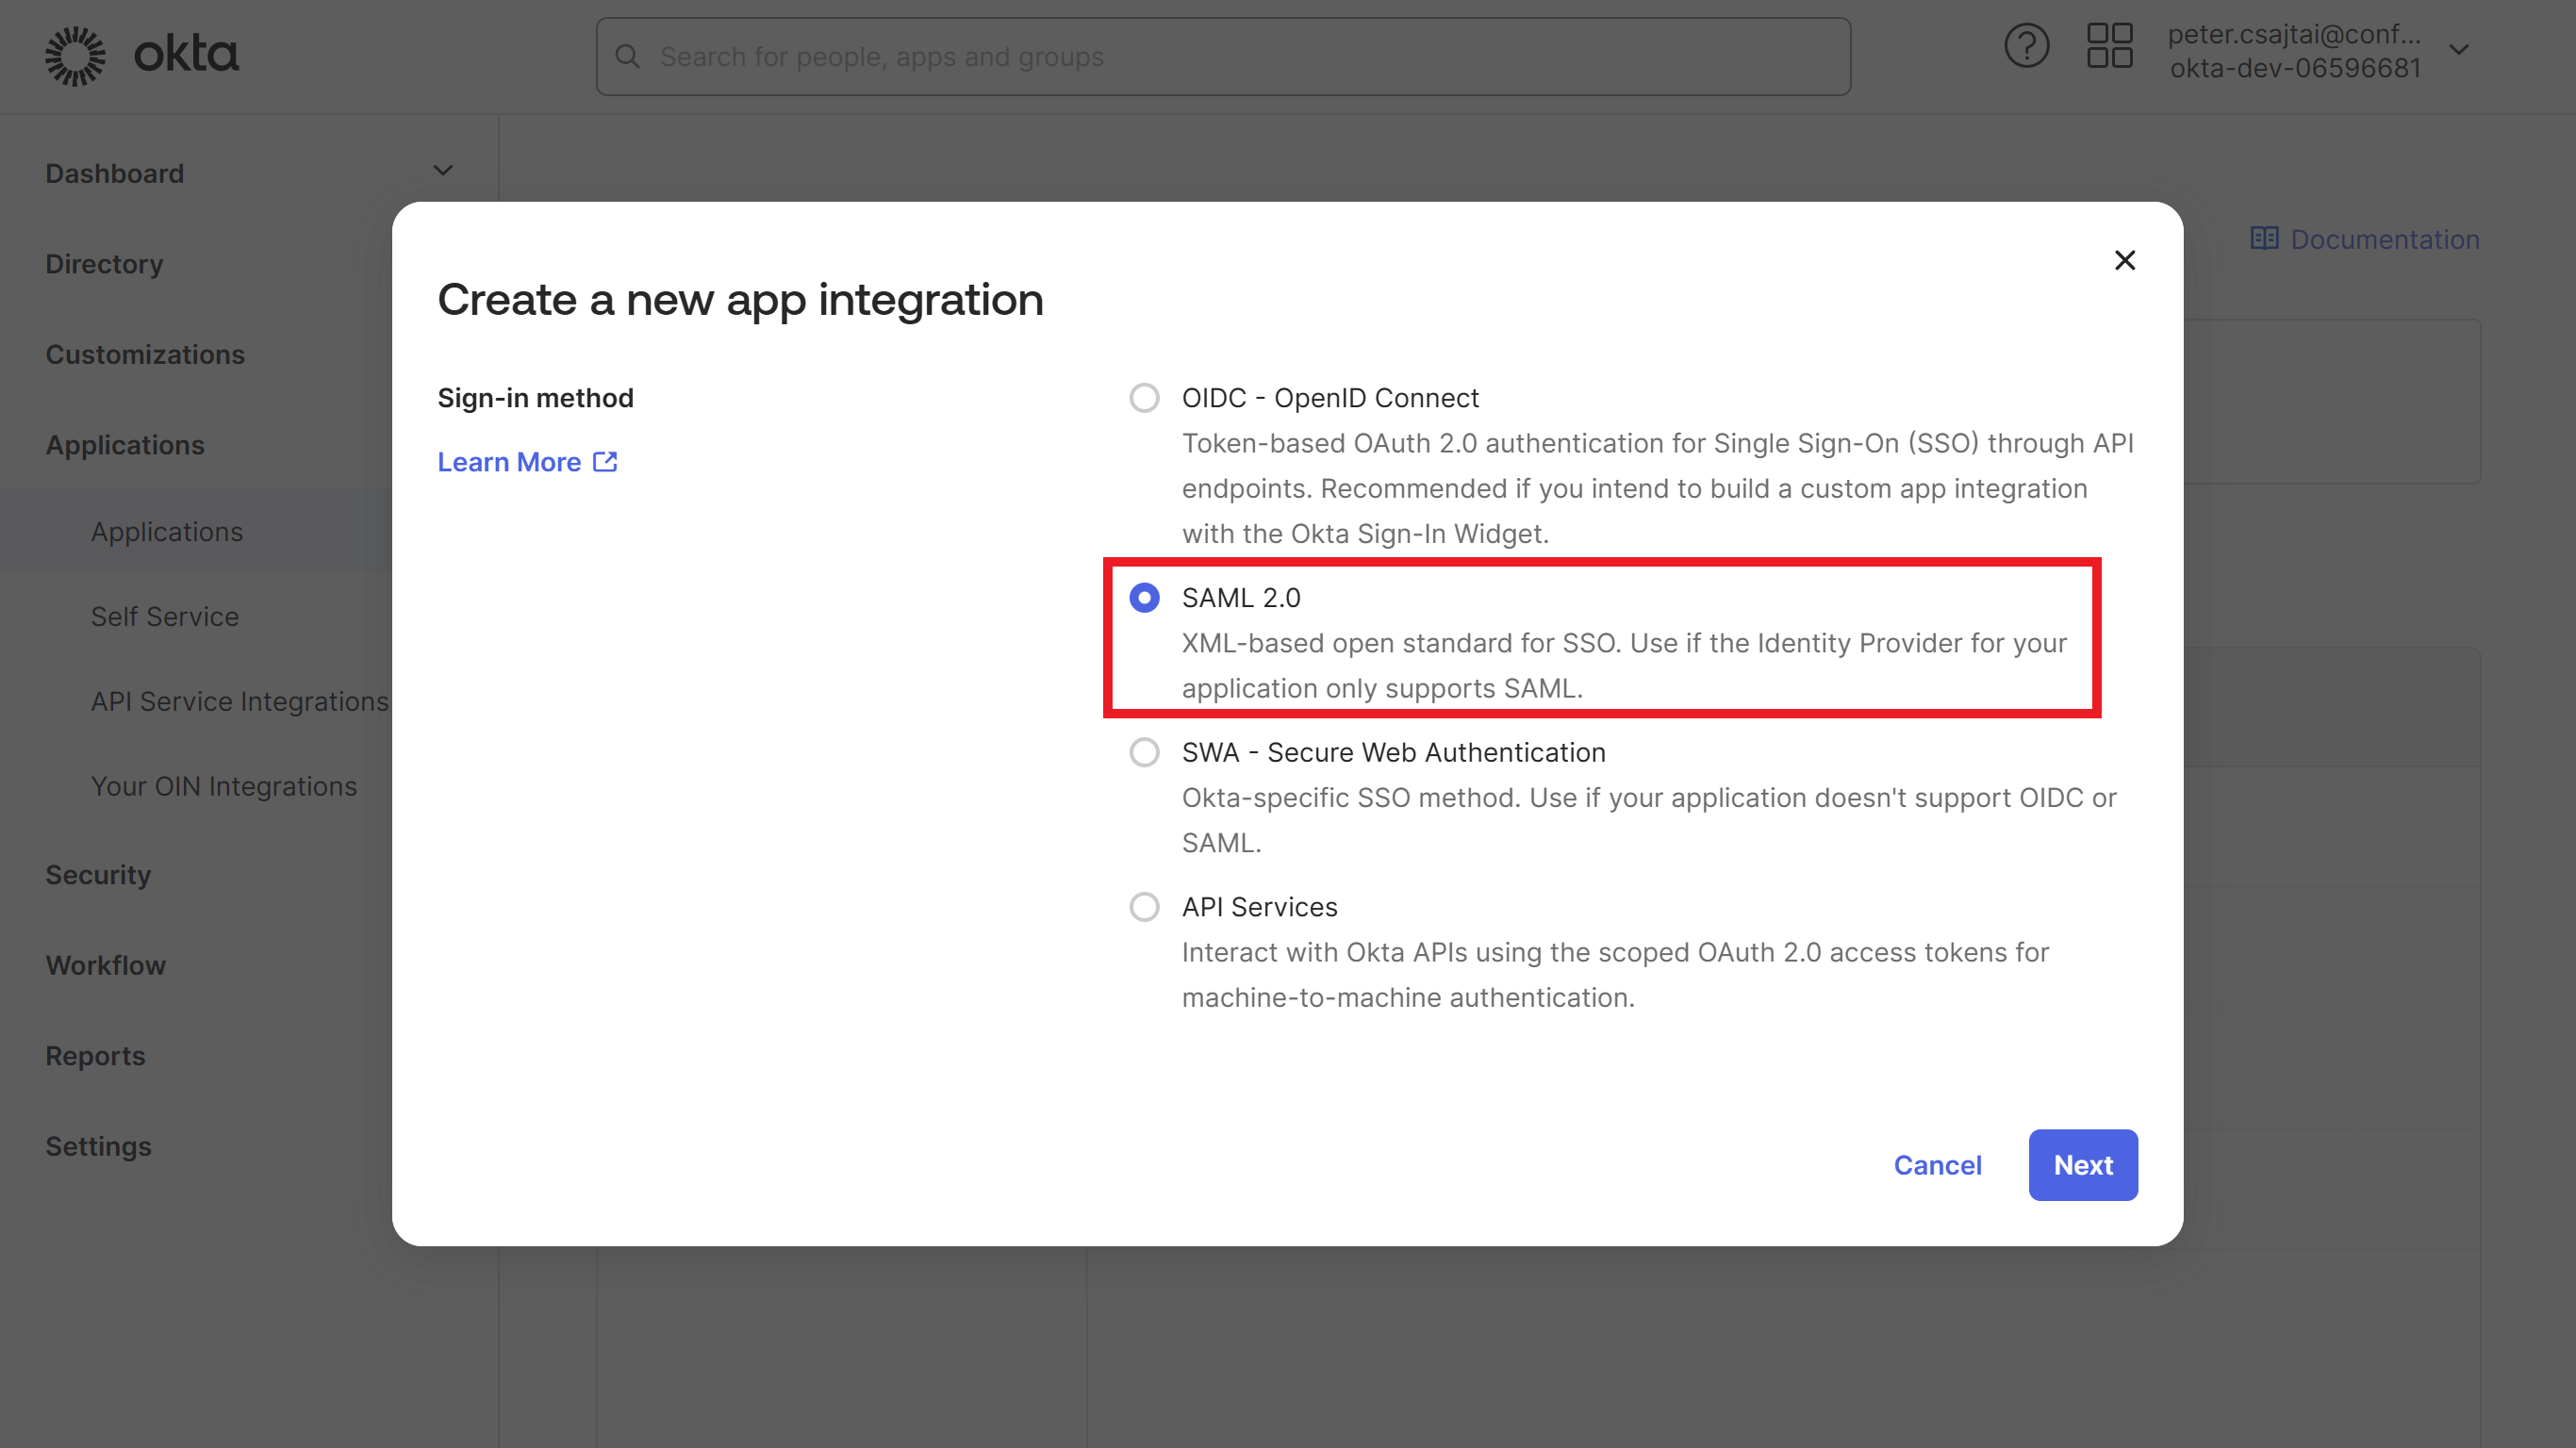
-
Enter a descriptive
App name, then clickNext.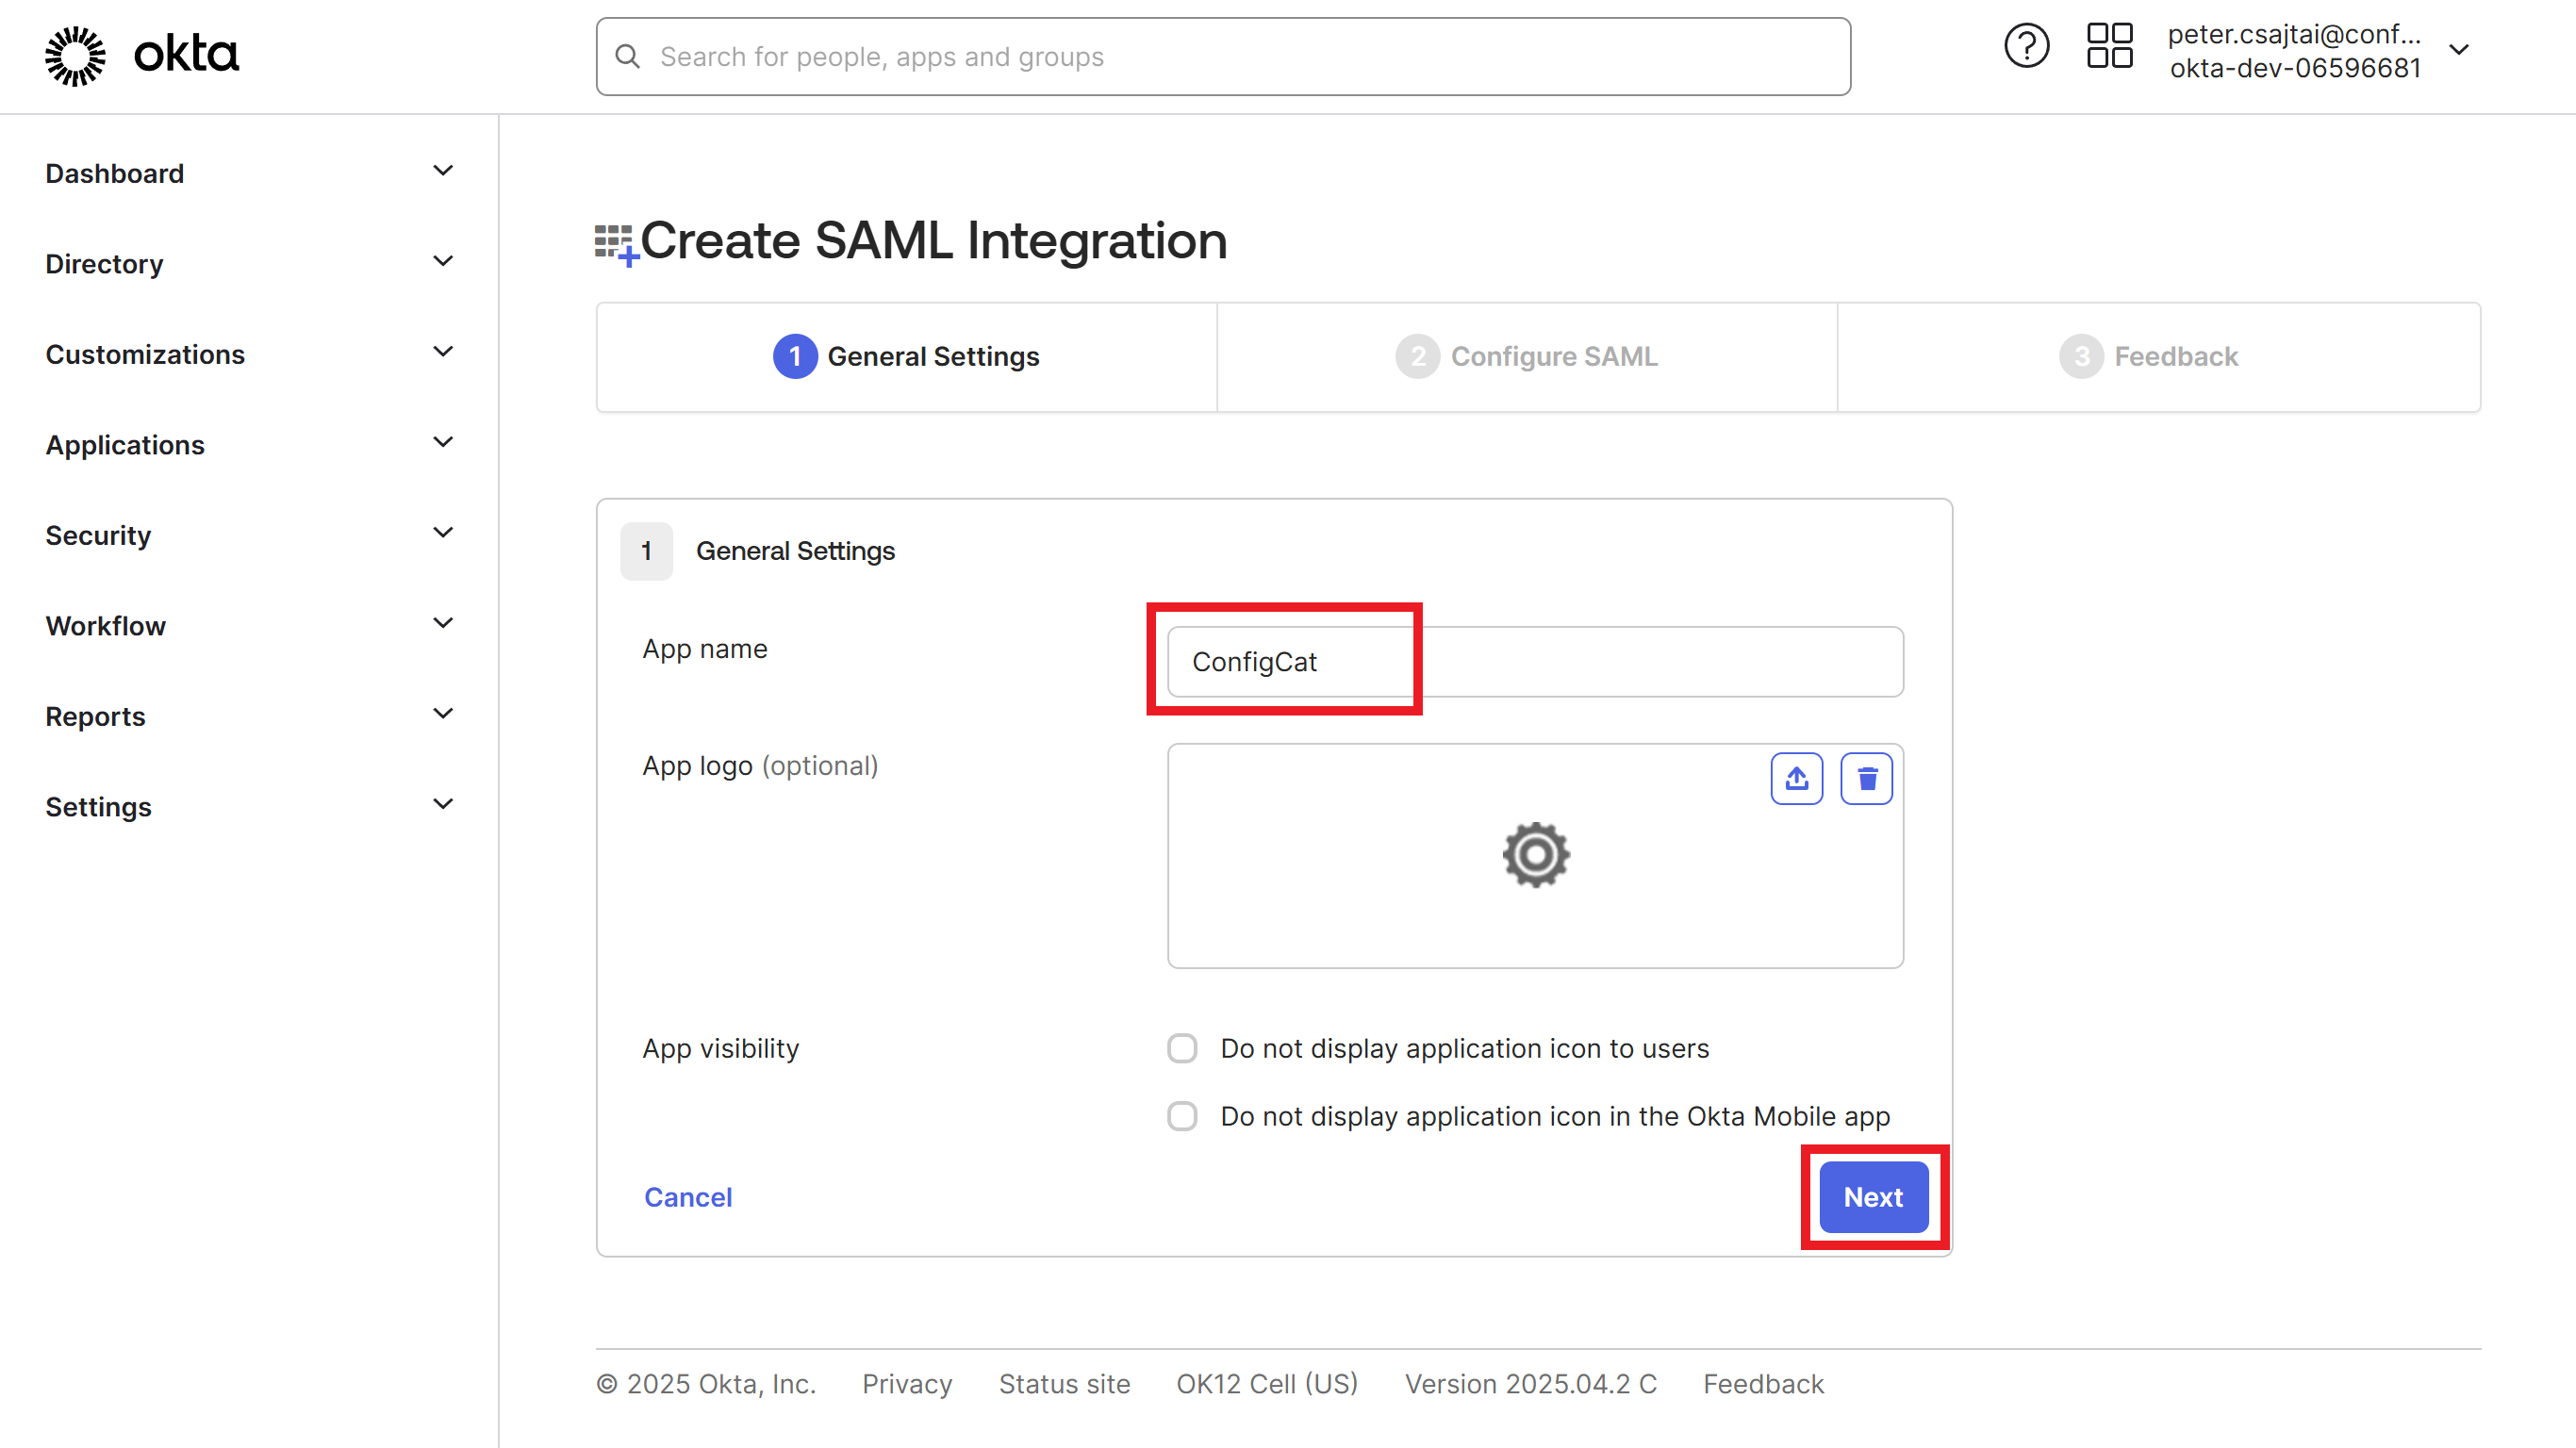
The next step will guide you on how to collect the information required for the appearing Configure SAML section.
2. Configure SAML authentication for the Okta Application
- Follow our SAML configuration guide for Okta.
3. Configure Provisioning (SCIM) for the Okta Application
-
Click on
Editat theApp Settings.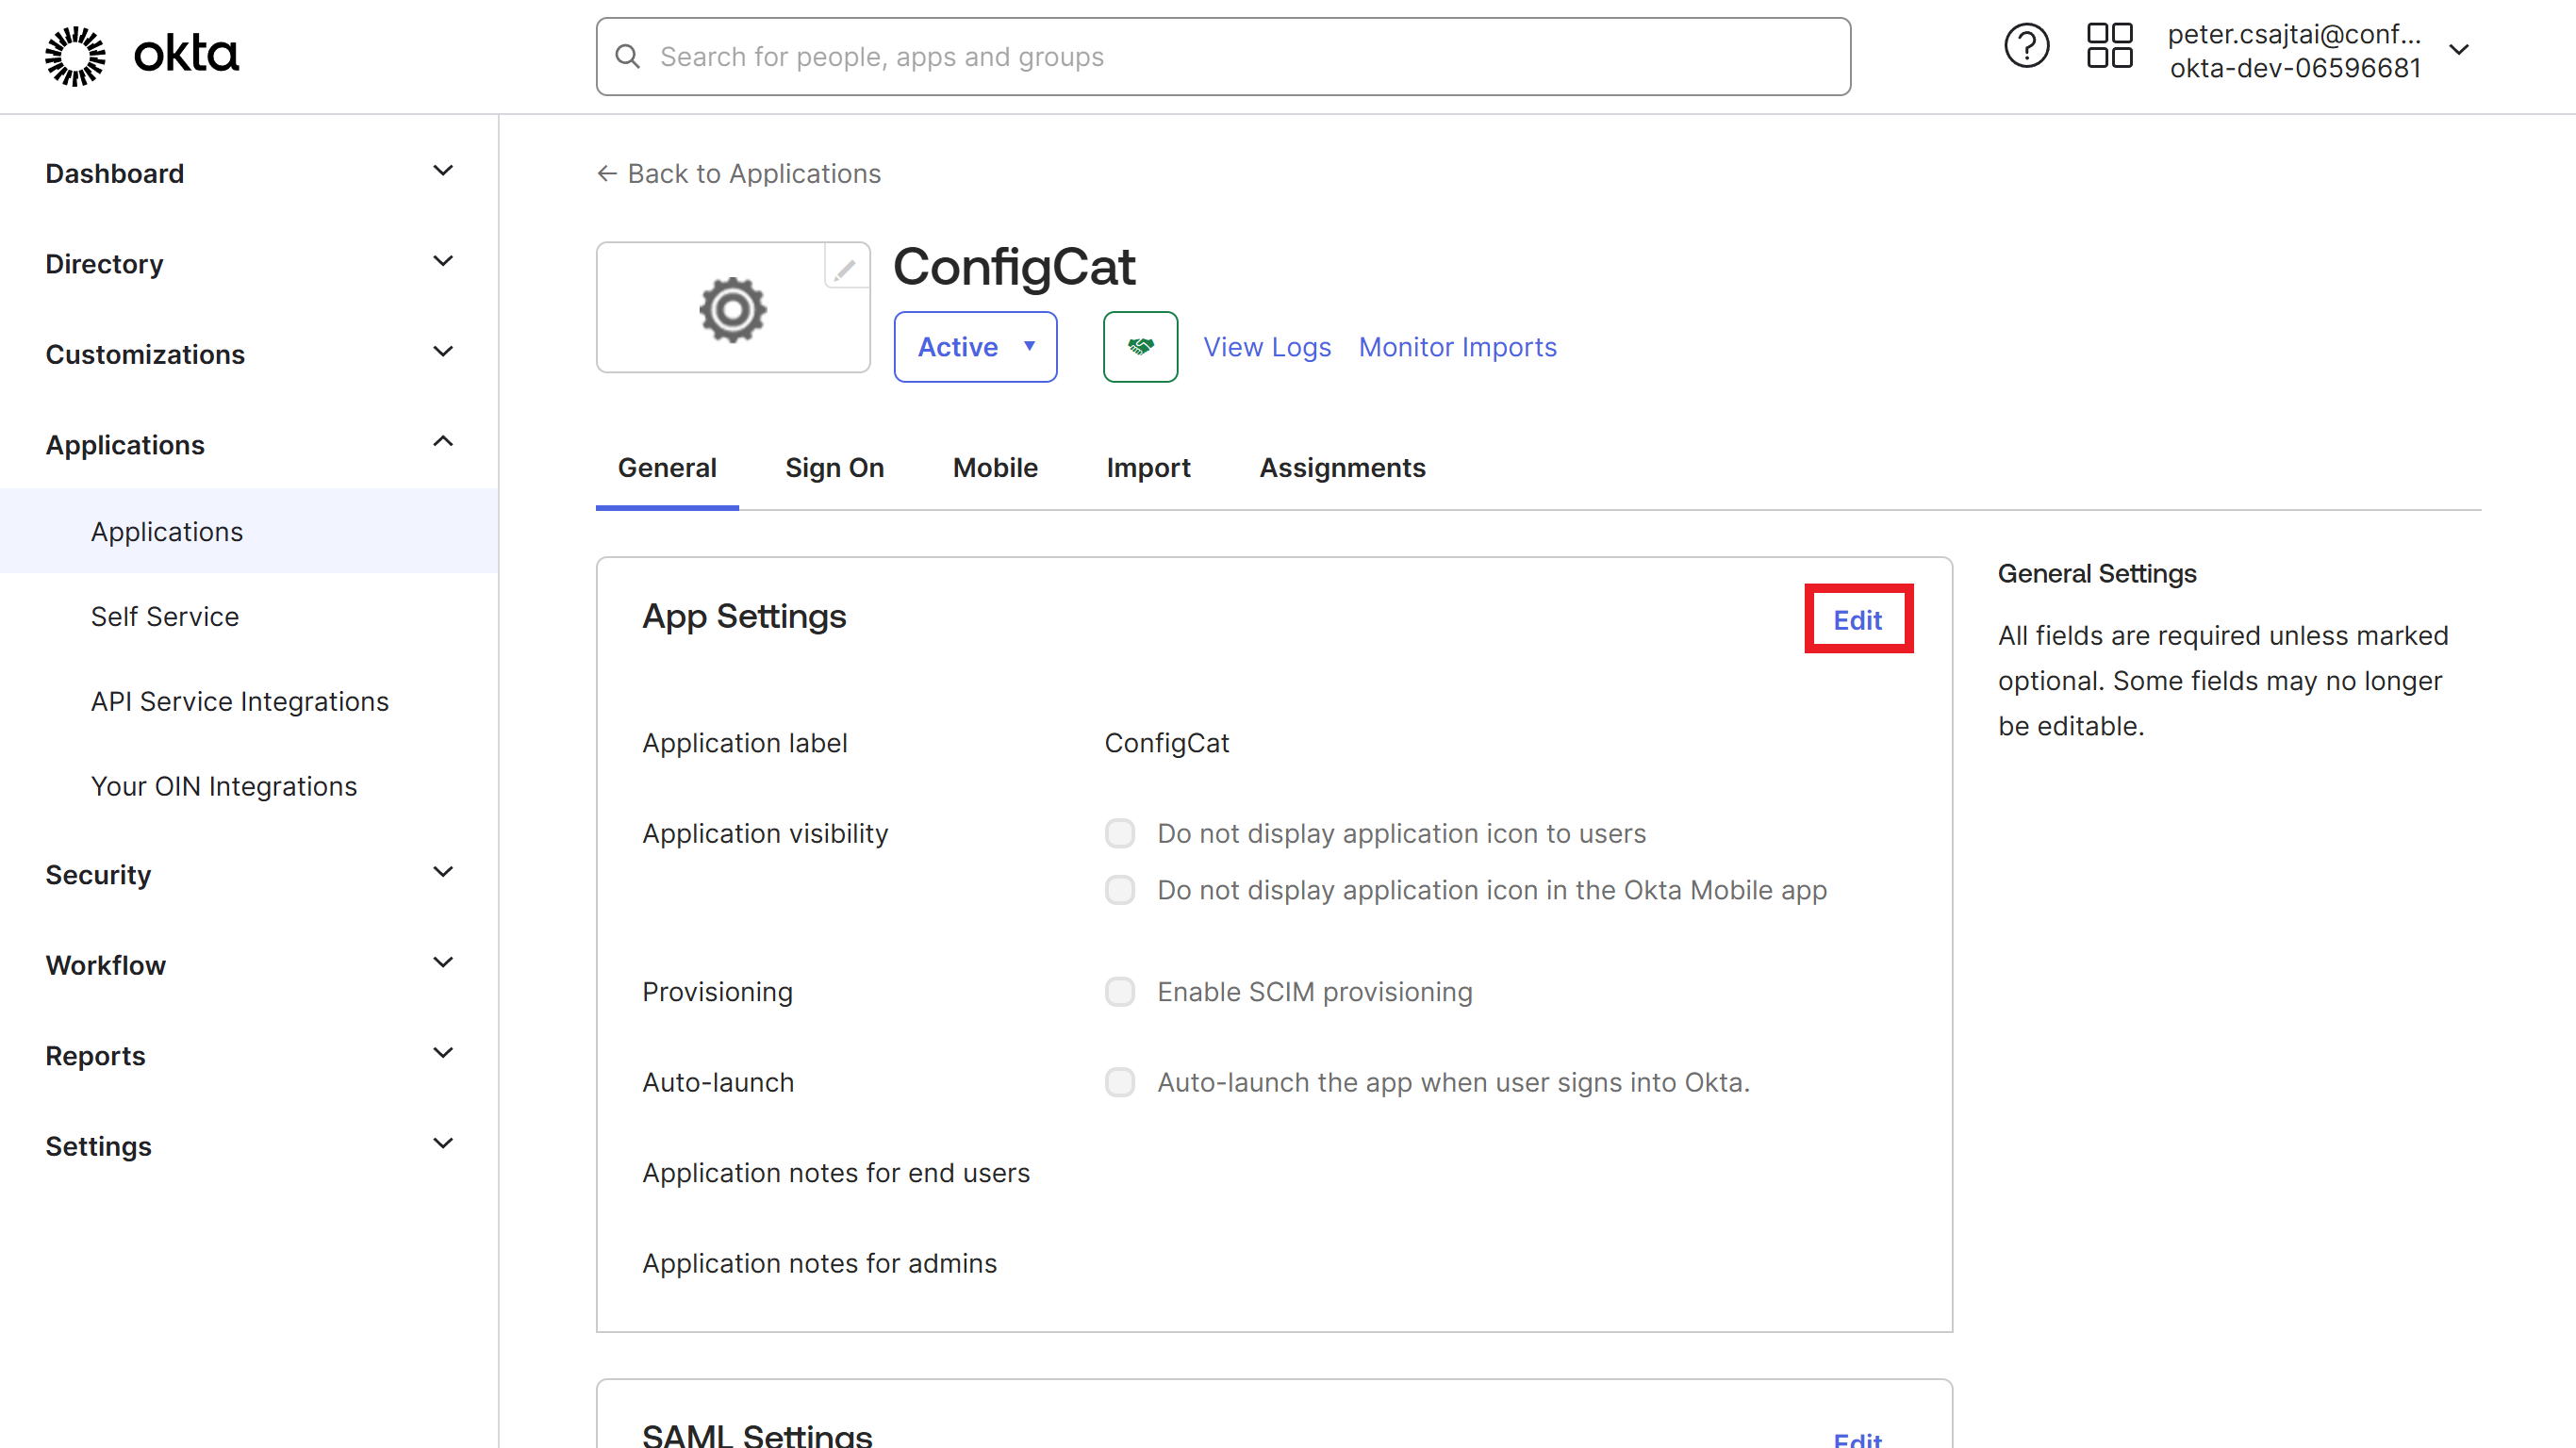
-
Check the
Enable SCIM provisioningcheckbox, and hitSave.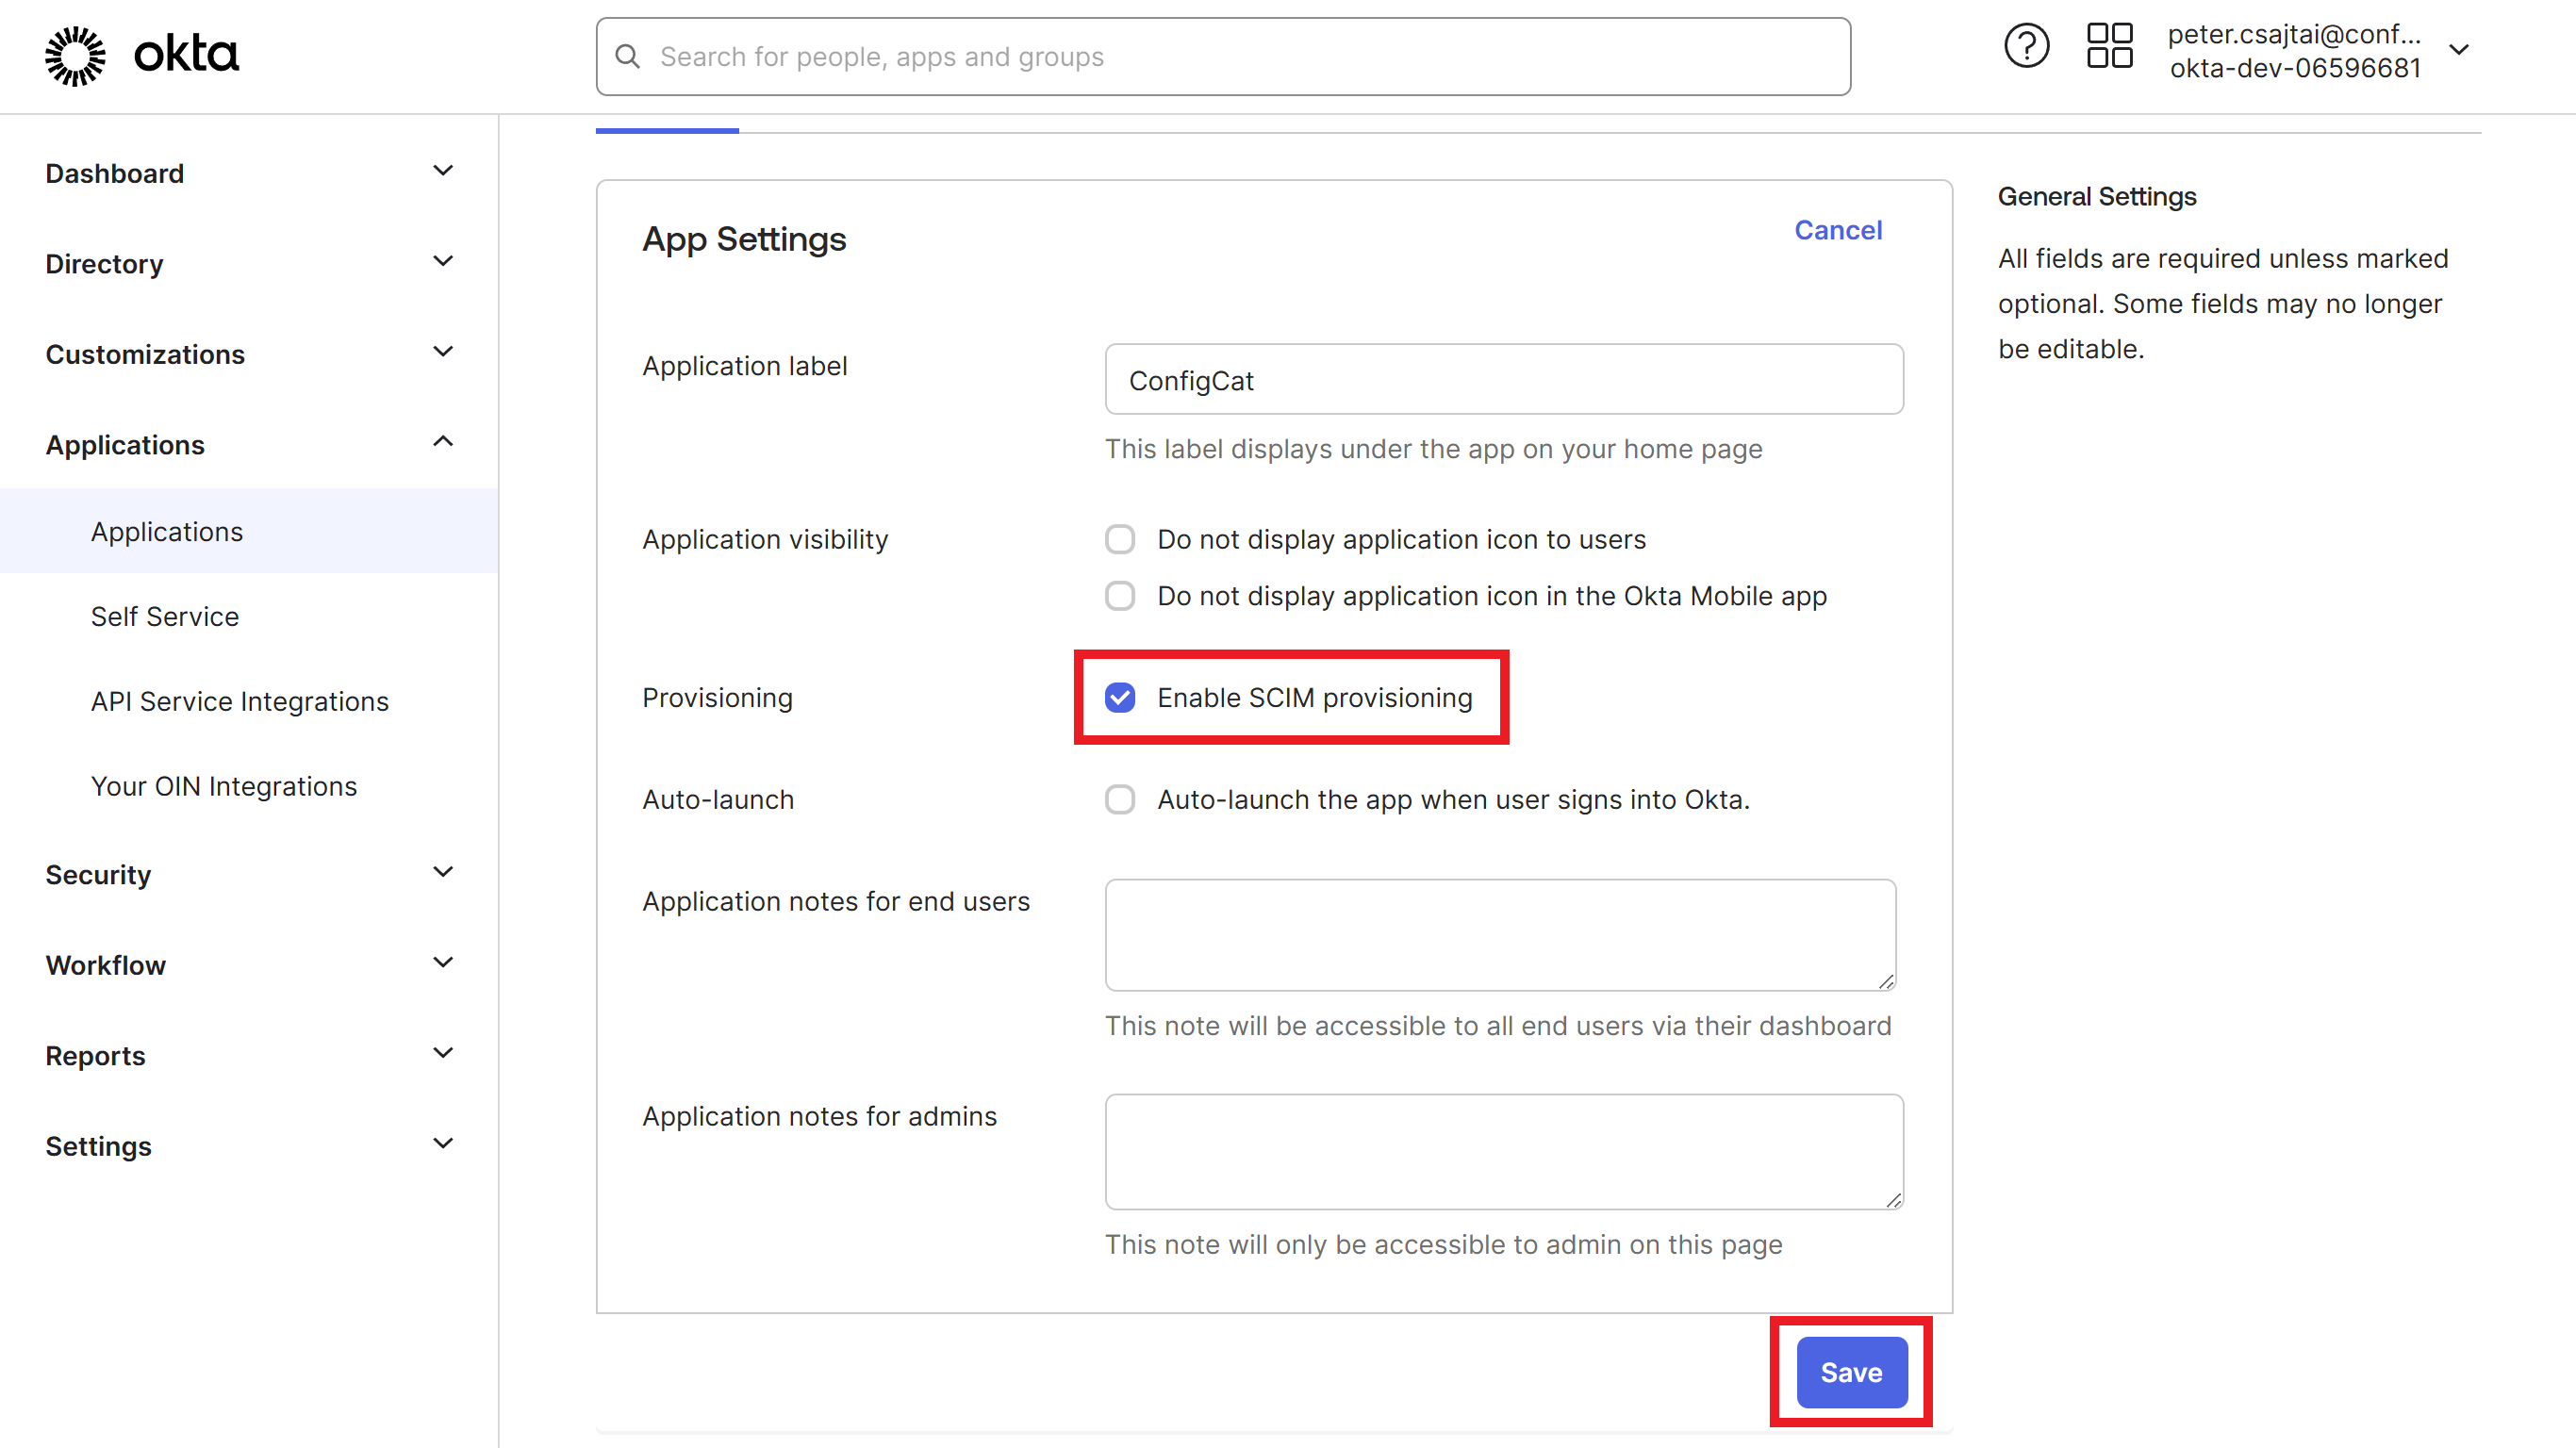
-
Gather the
SCIM URLand theTokenfrom the Authentication & Provisioning page in ConfigCat.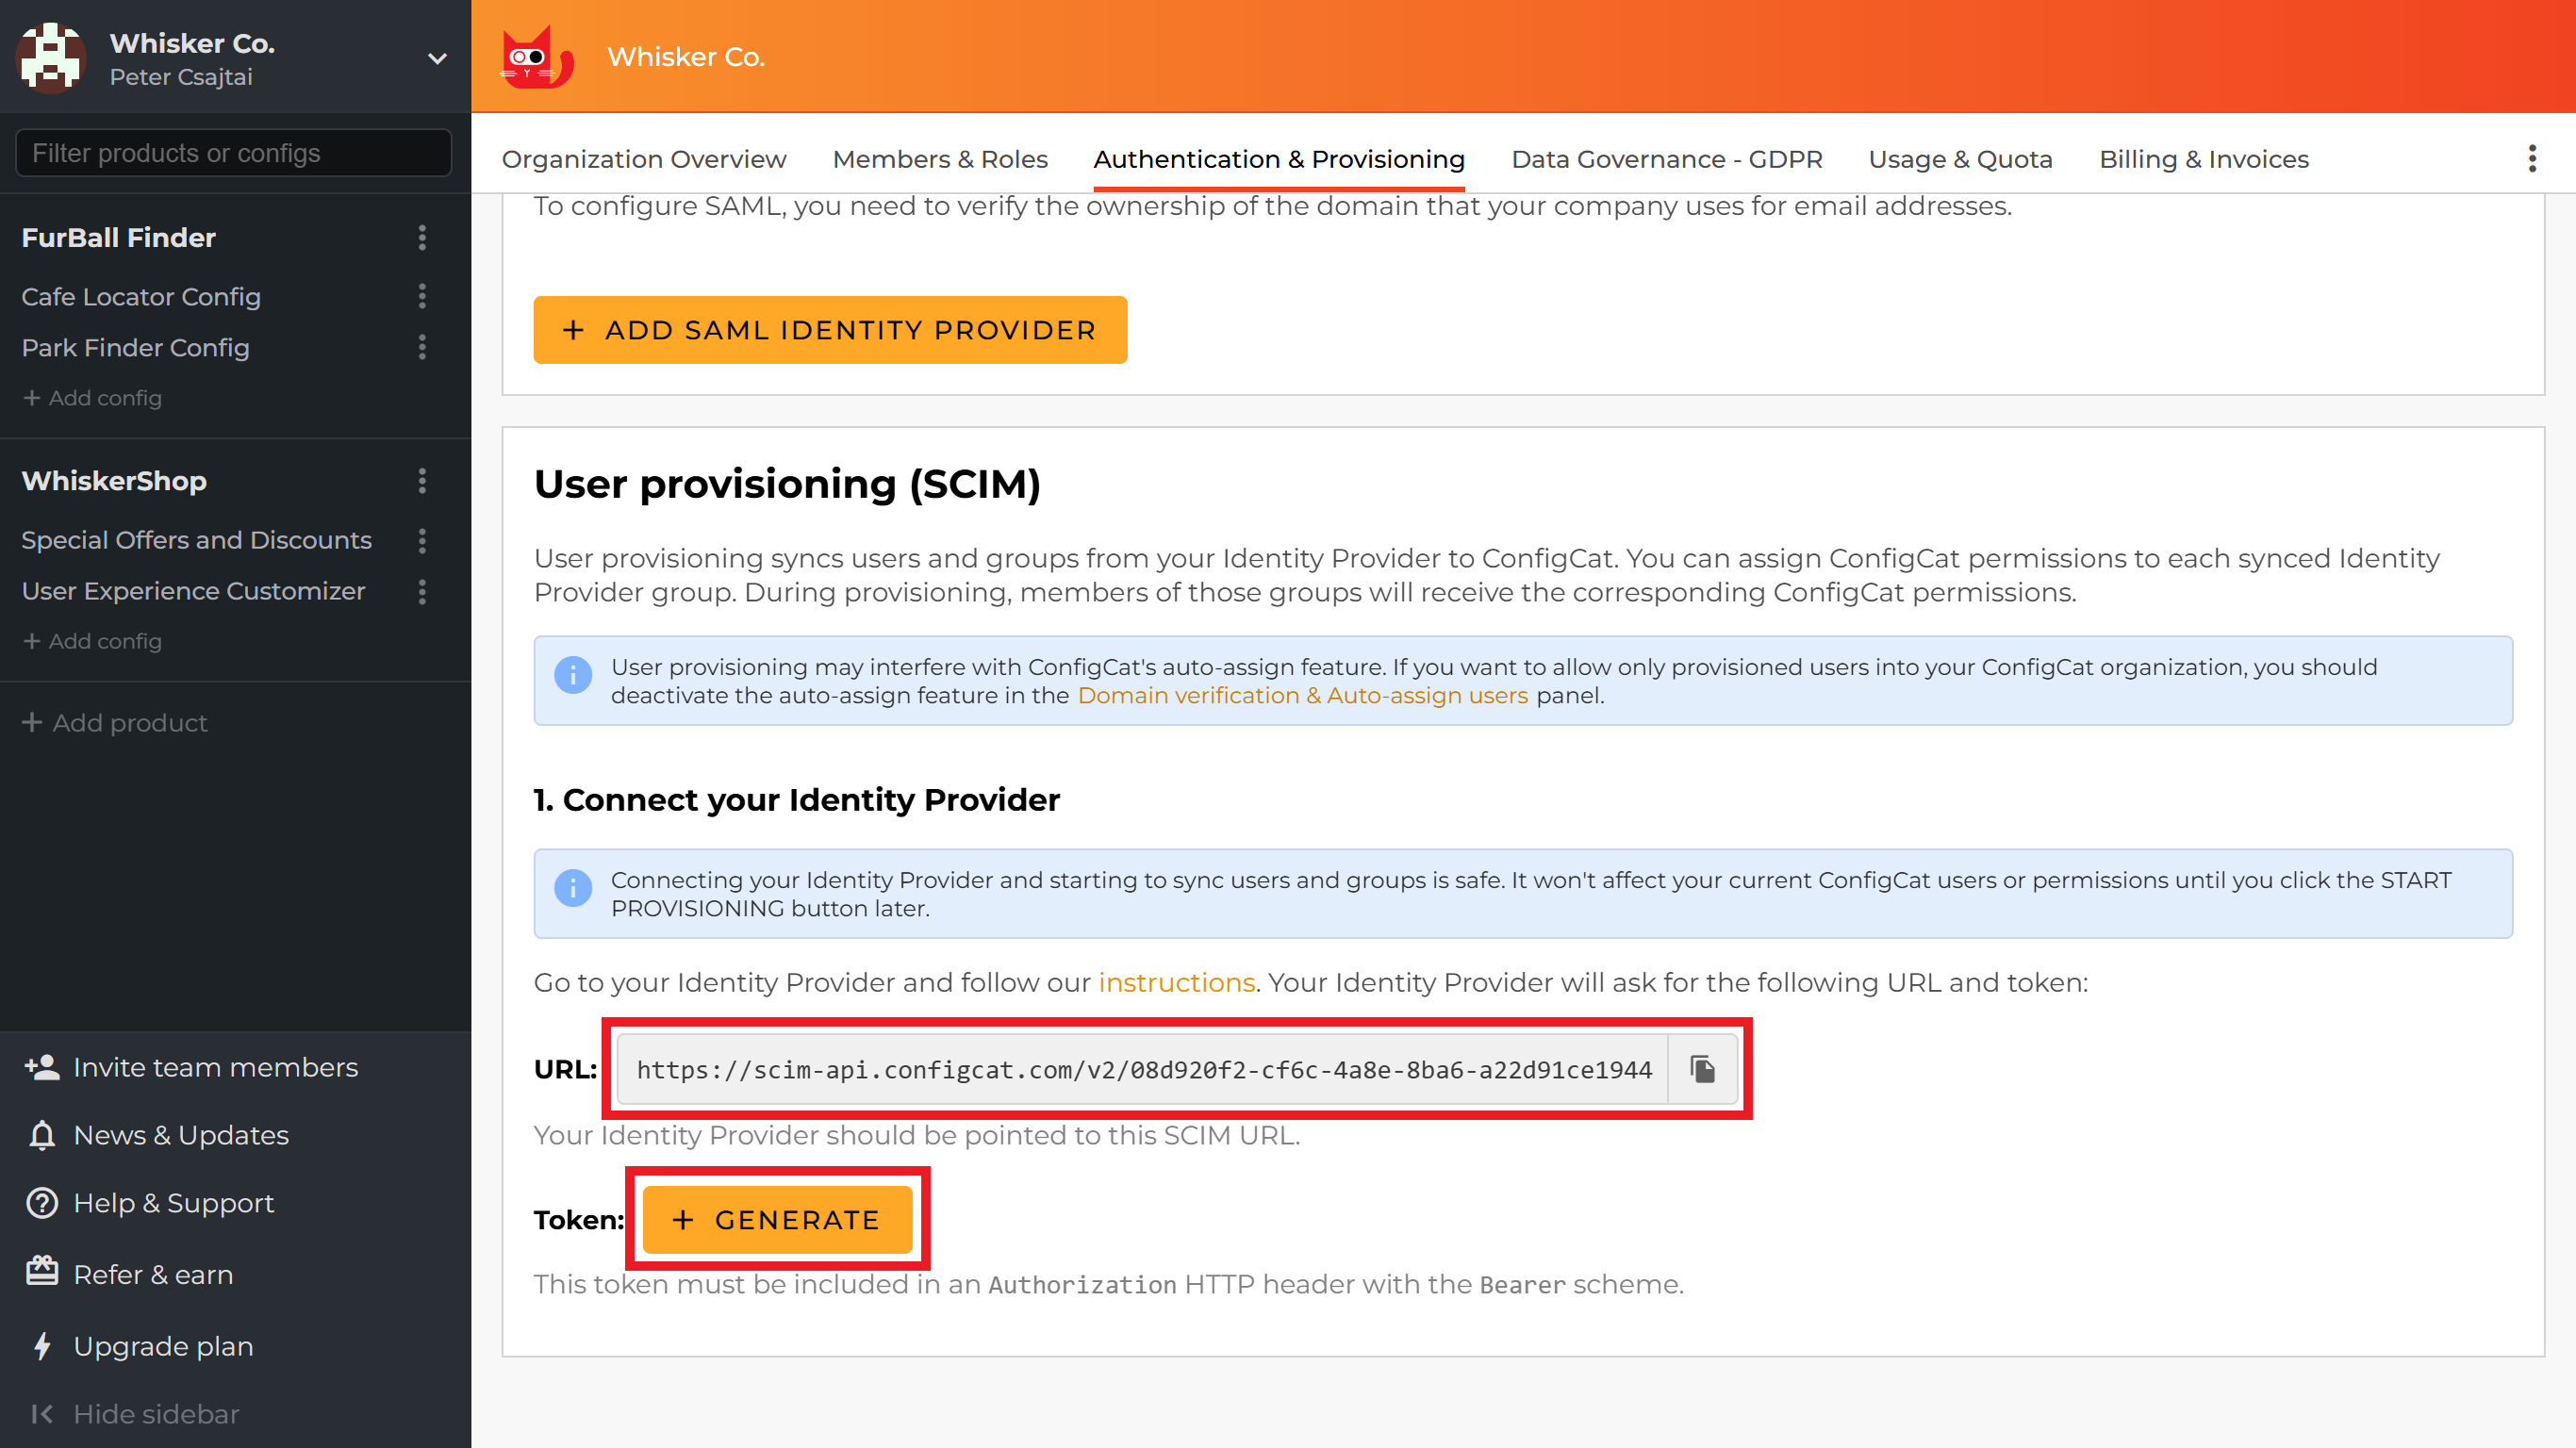

-
Select the
Provisioningtab and click on theEditbutton.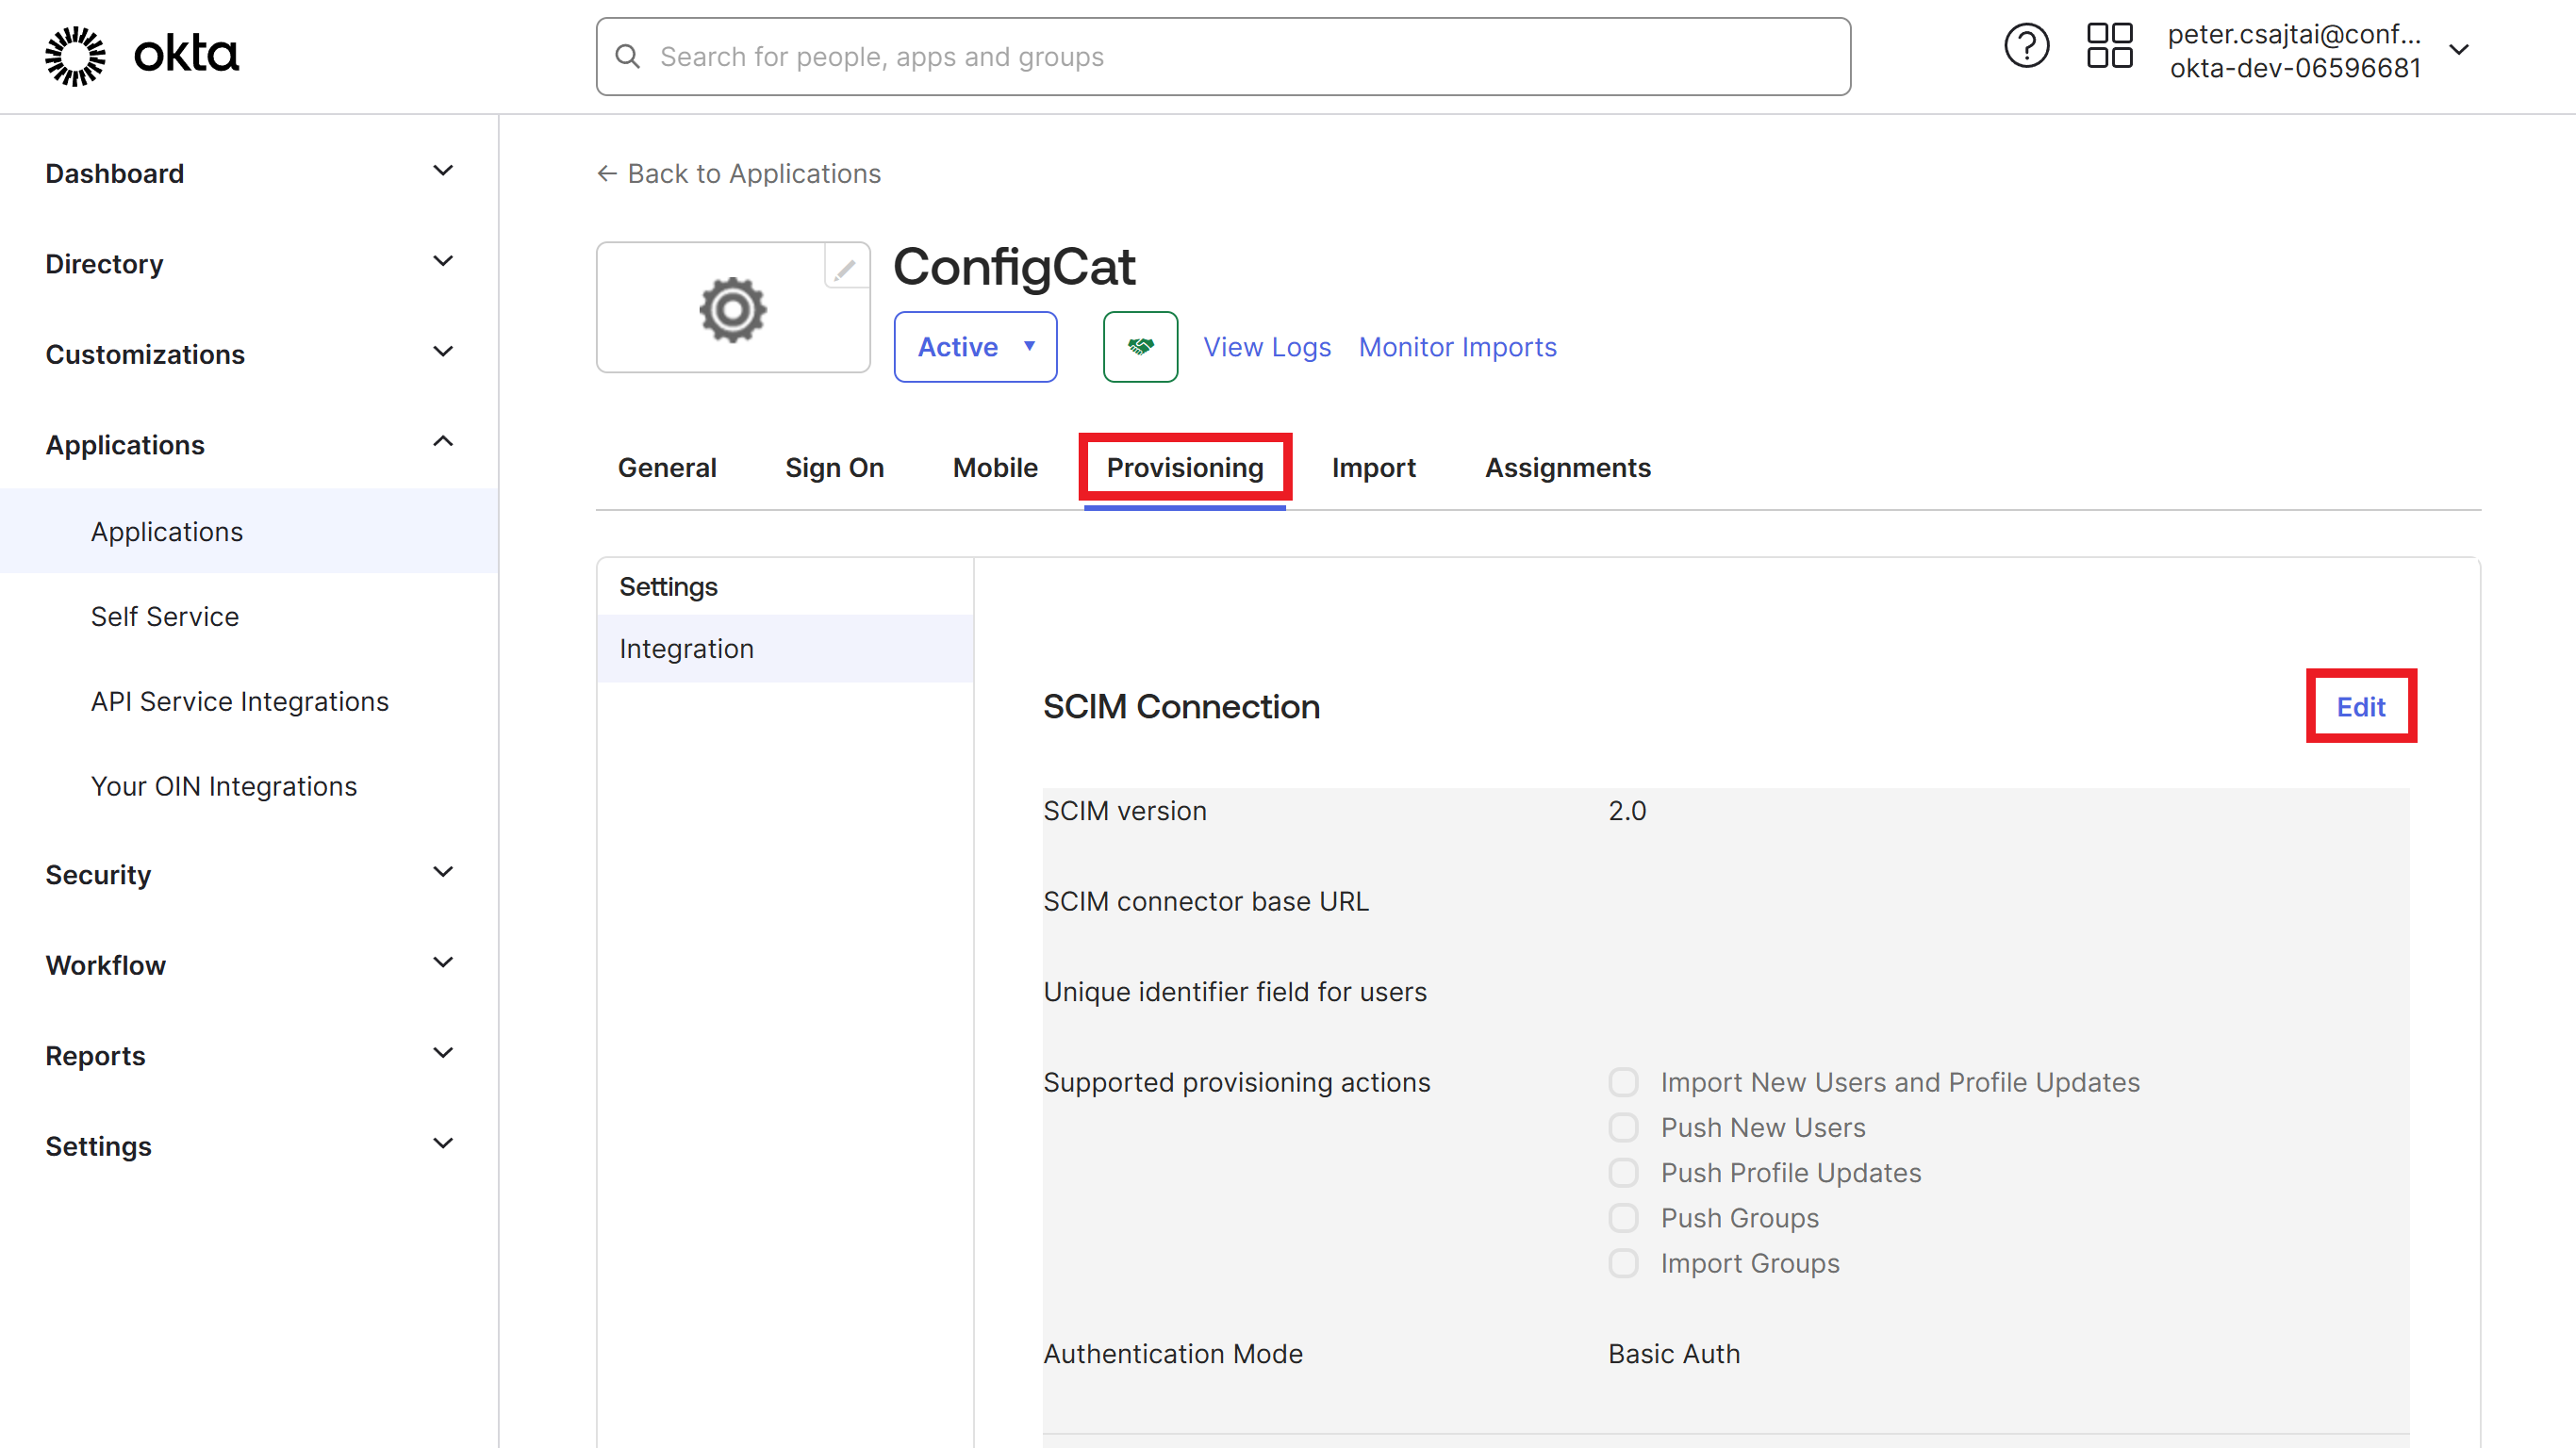
-
On the
SCIM Connectionsection configure the following:- Add the
SCIM URLfrom the ConfigCat Dashboard as theSCIM connector base URL. - Set the
Unique identifier field for usersfield toemail. - Check the following
Supported provisioning actions:Push New UsersPush Profile UpdatesPush Groups
- Select the
HTTP Headeras theAuthentication Mode. - Set the
Tokenfrom the ConfigCat Dashboard as theHTTP Header Authorization. - Click on
Save.
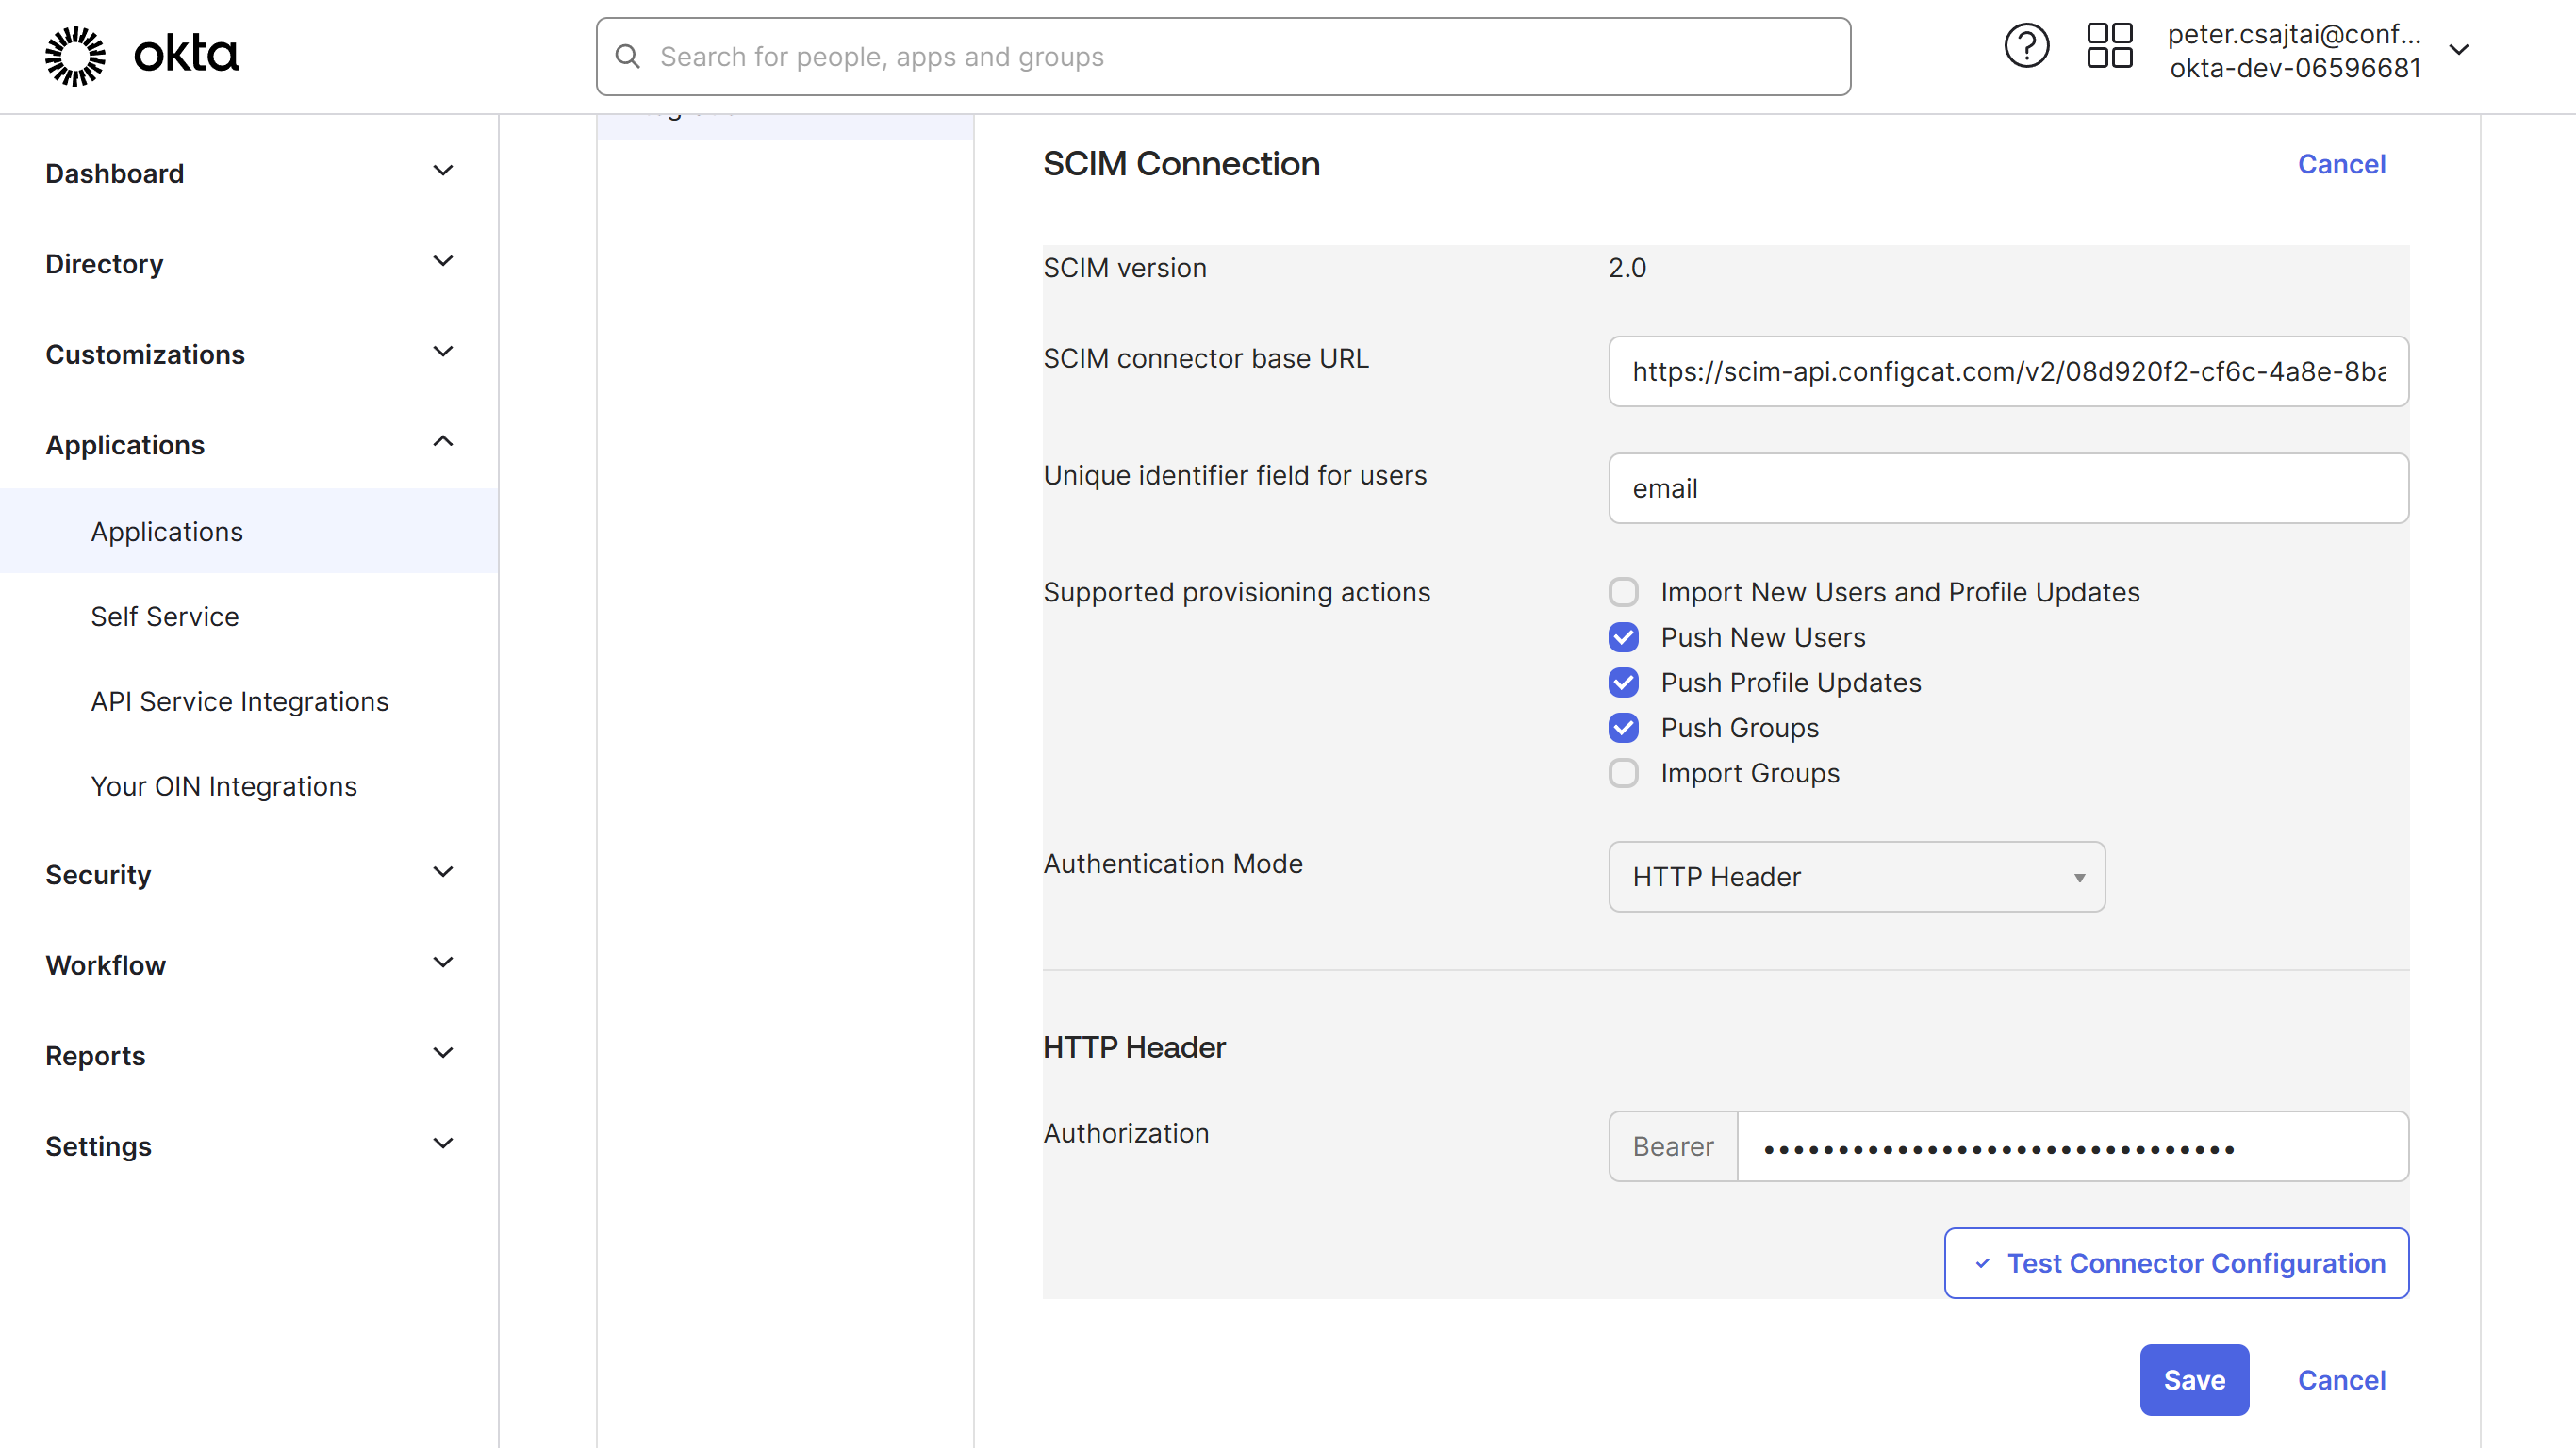
- Add the
-
Select the
To Appmenu item and click onEdit.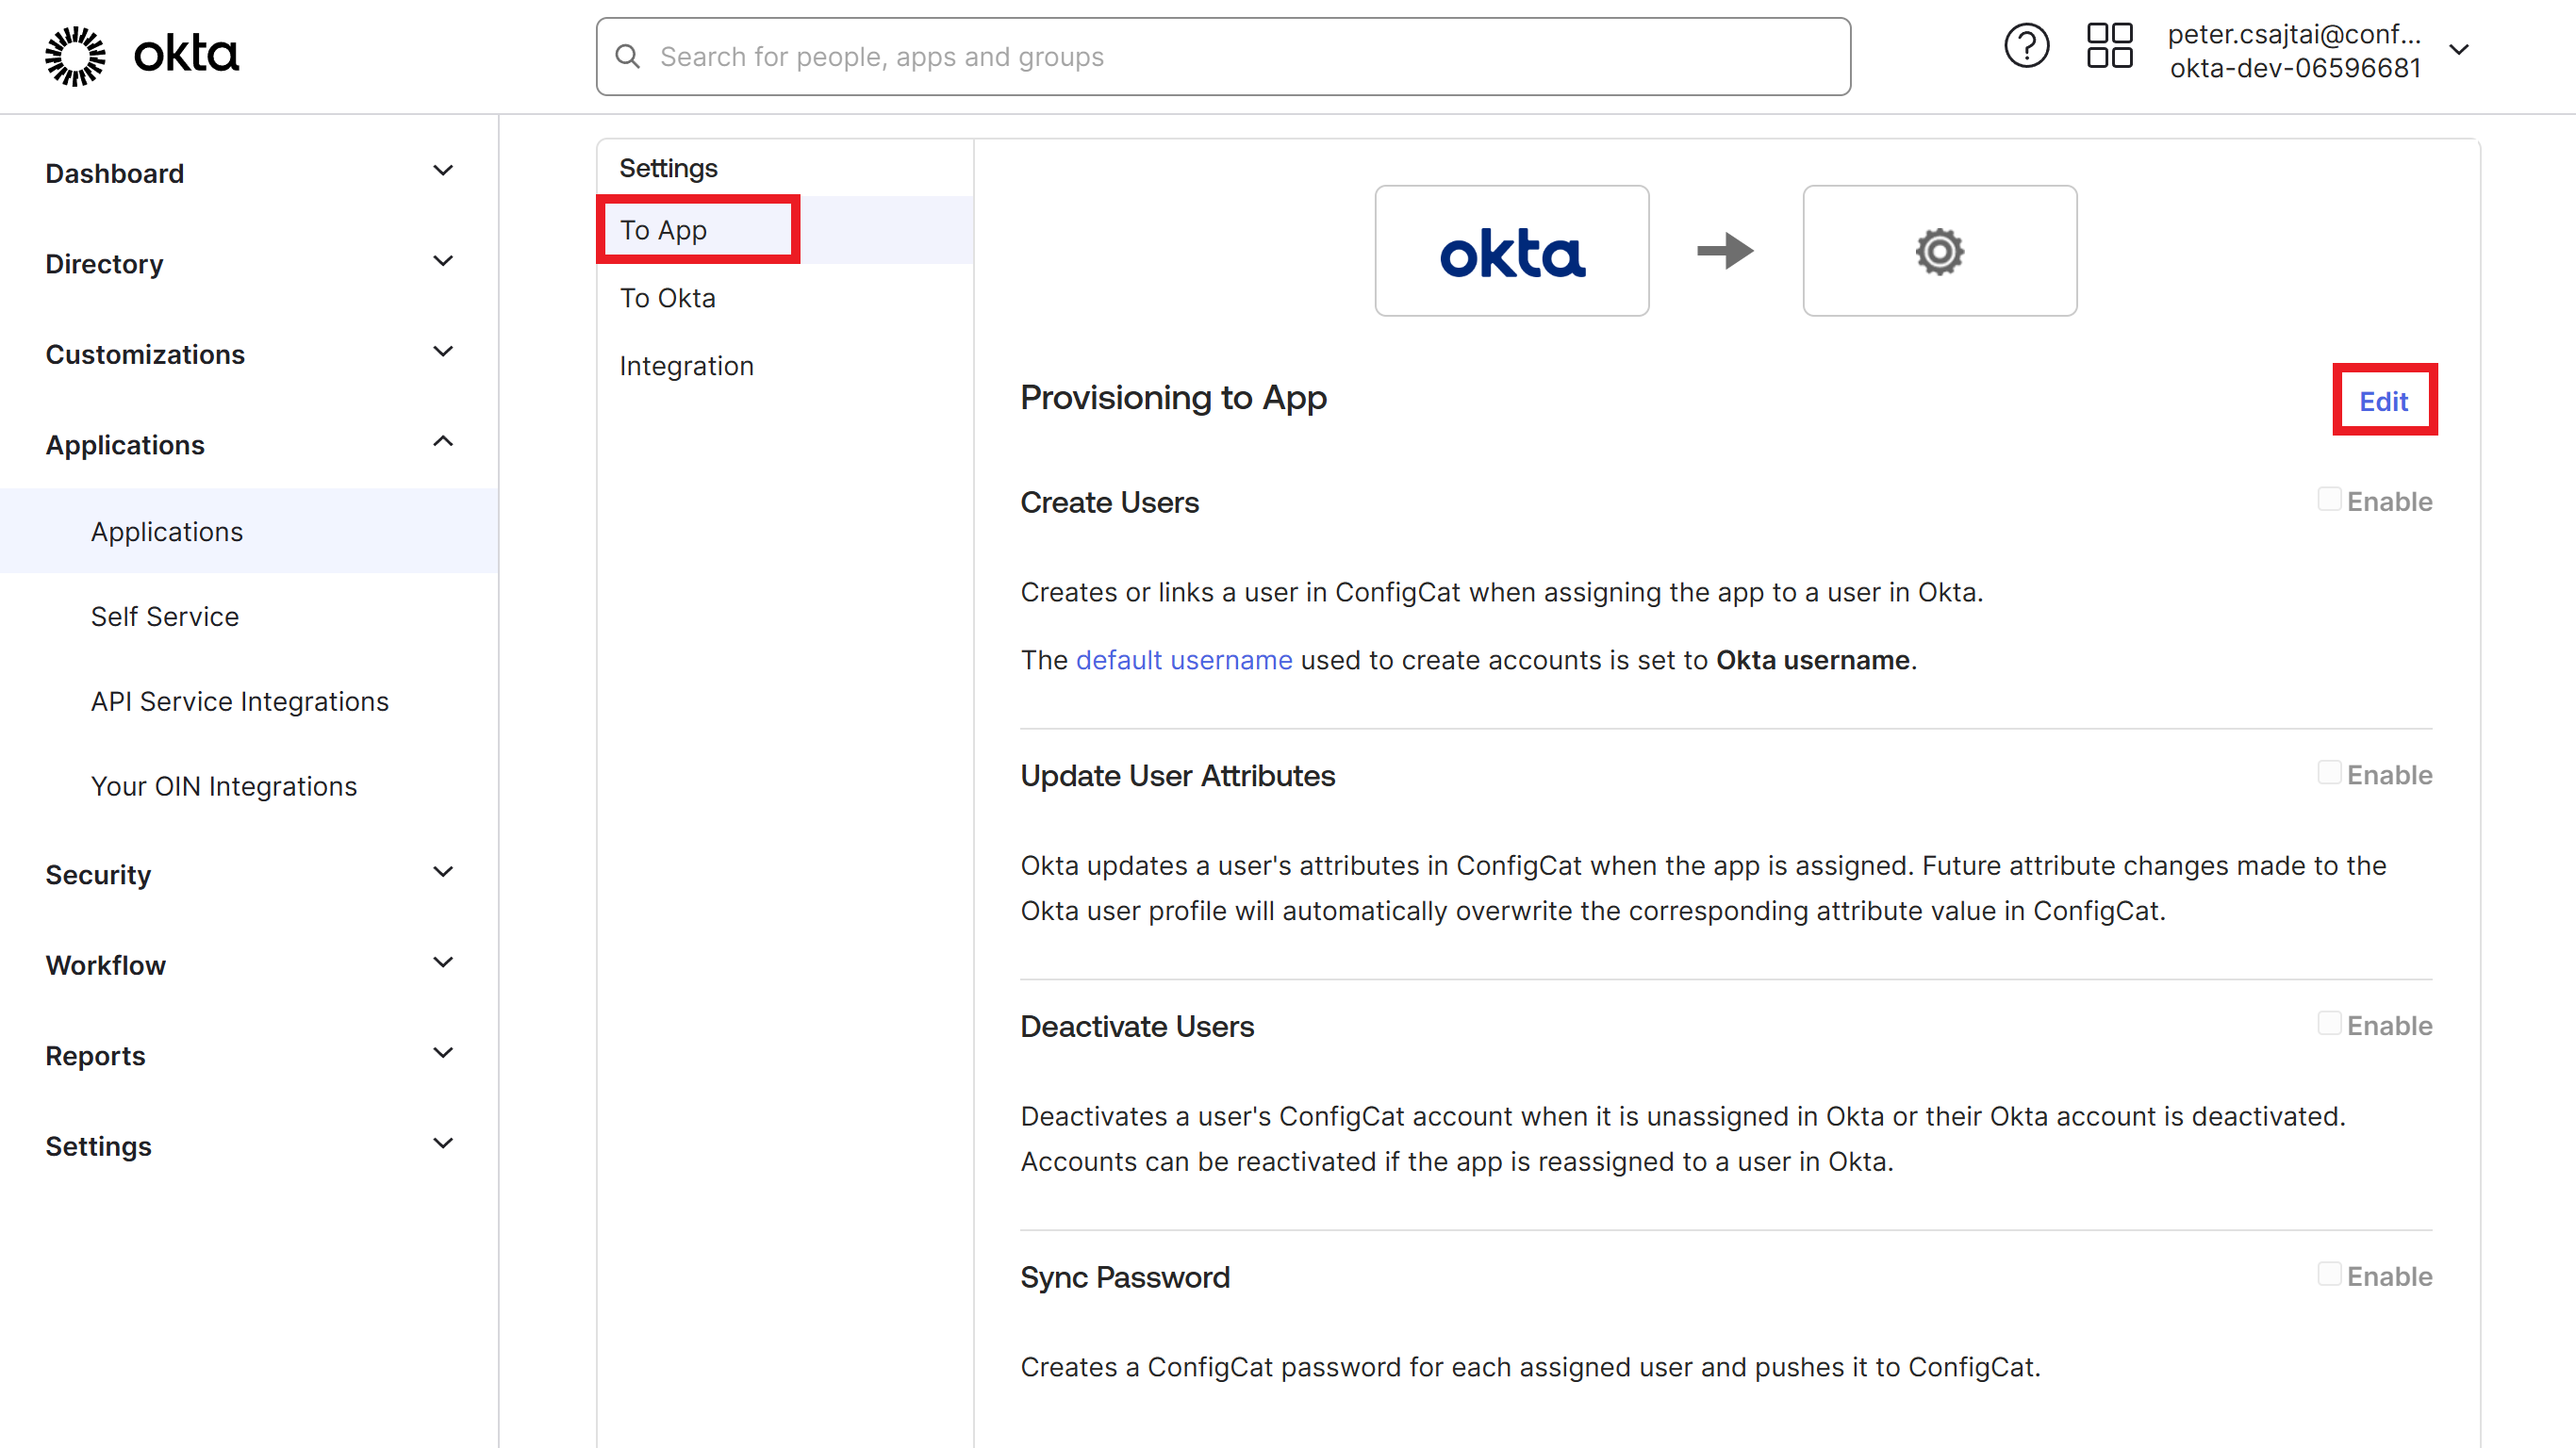
-
Check the
Create Users,Update User Attributes, andDeactivate Userscheckboxes, and hitSave.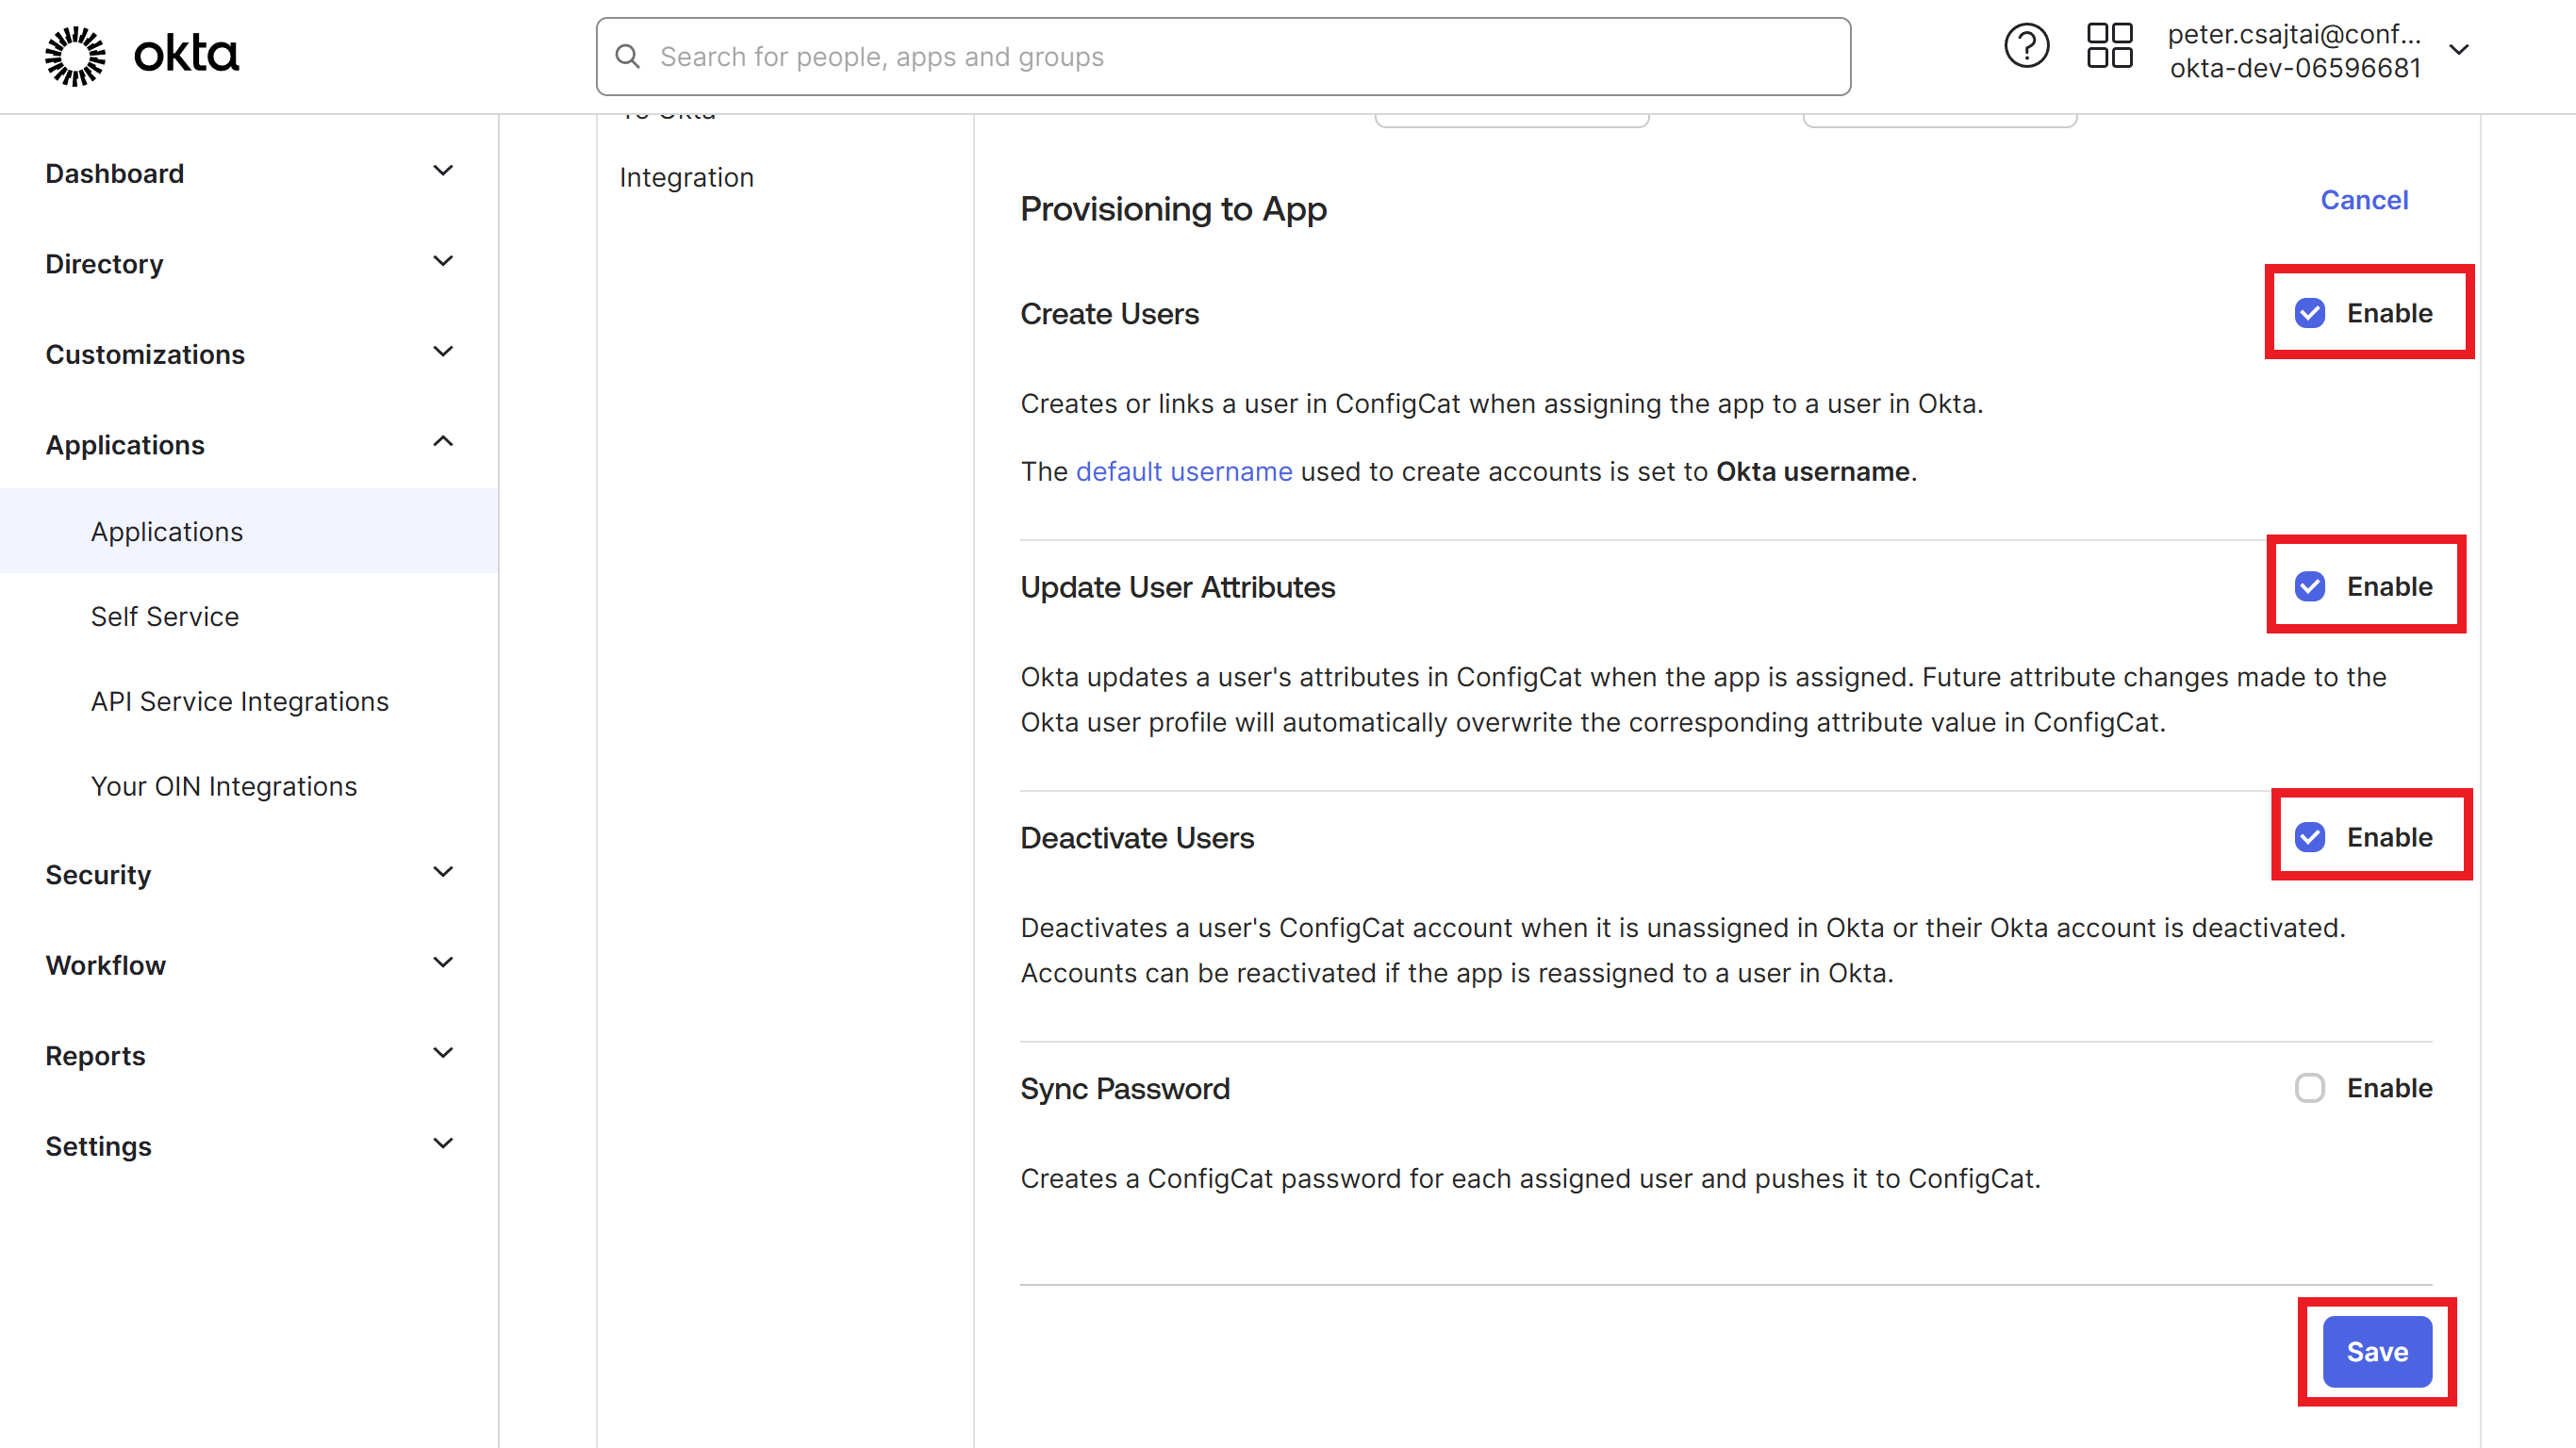
4. Assign Users/Groups to Okta Application
To select users for synchronization into ConfigCat, you have to assign their Okta group to the Application.
-
Select the
Assignmentstab, click on theAssigndropdown, and selectAssign to Groups.
-
Click the
Assignbutton on those groups whose members you want to sync to ConfigCat.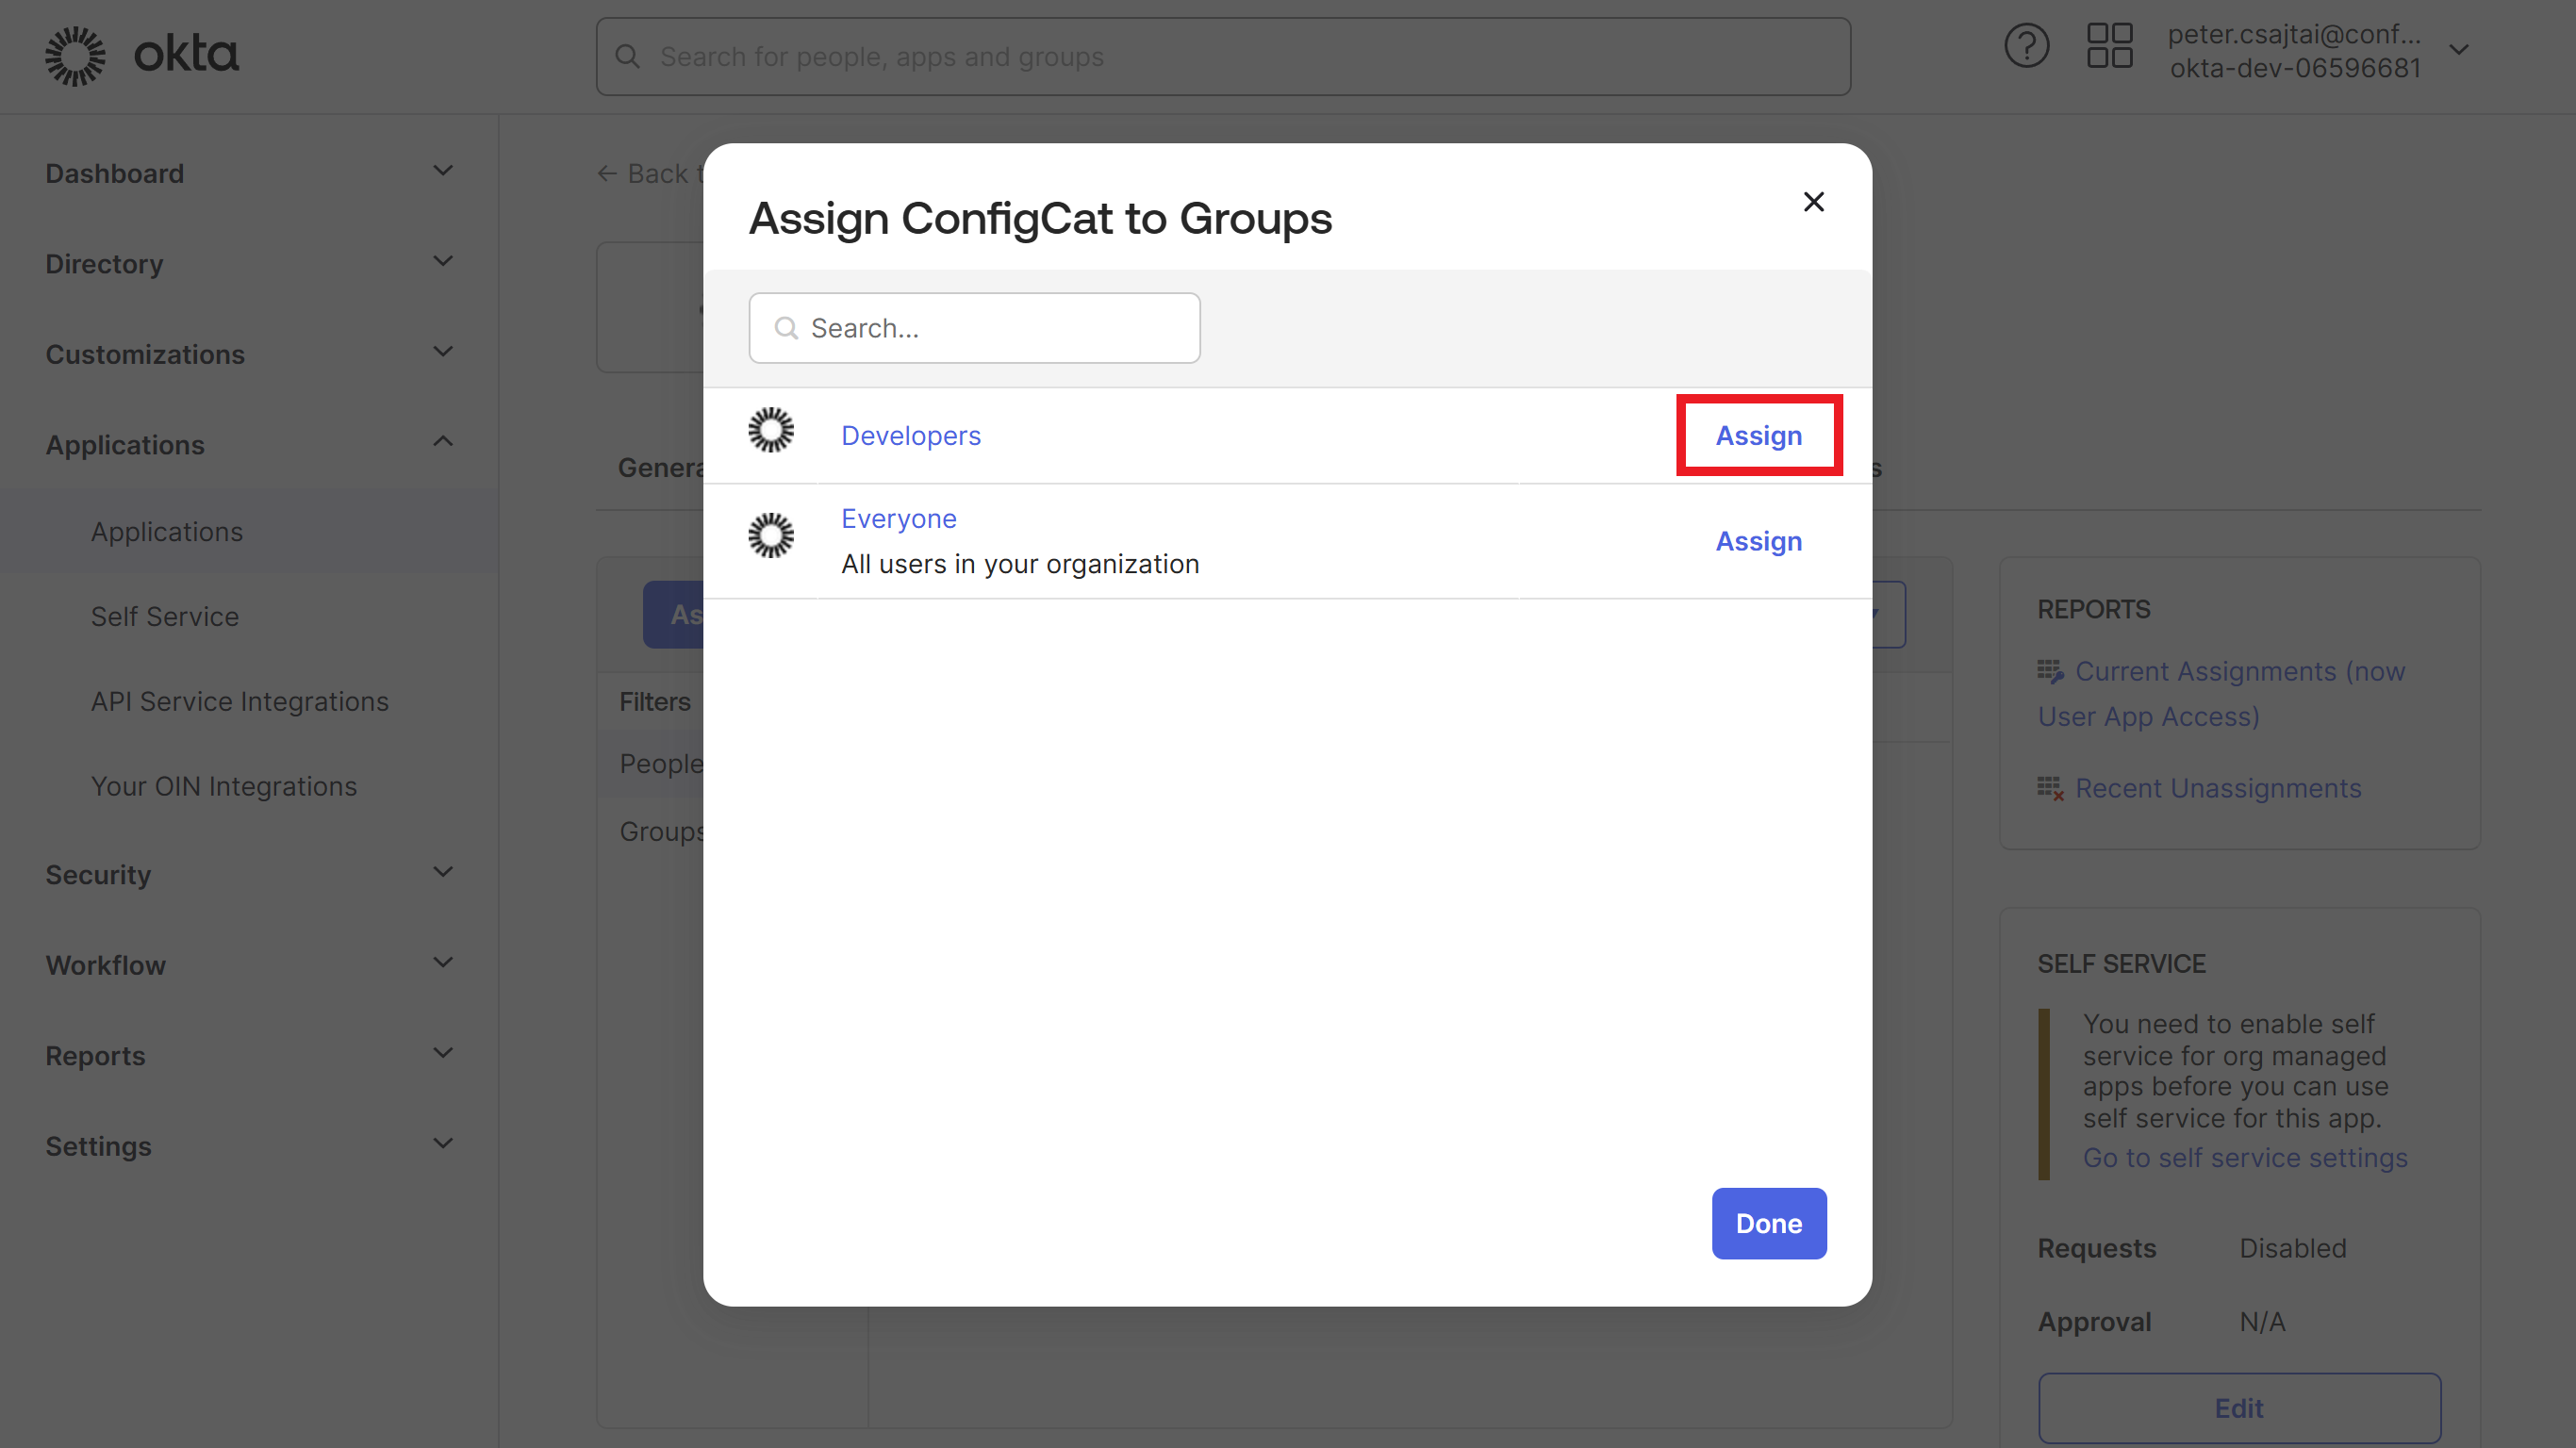
The above action starts the synchronization of the selected users but not their groups.
Okta does not support using the same Okta group for assignments and for syncing group-member relations.
You need to create a separate group that is used exclusively for syncing group-member relations.
These groups are called Push Groups in Okta.
To learn more, see Okta's documentation about Push Groups.
To enable group syncing, create separate groups for the users that you want to sync and add these new groups to the application as Push Groups.
-
Go to the
Push Groupstab, click on thePush Groupsdropdown, and selectFind groups by name.
-
Select the group that you want to push, and click on the
Savebutton.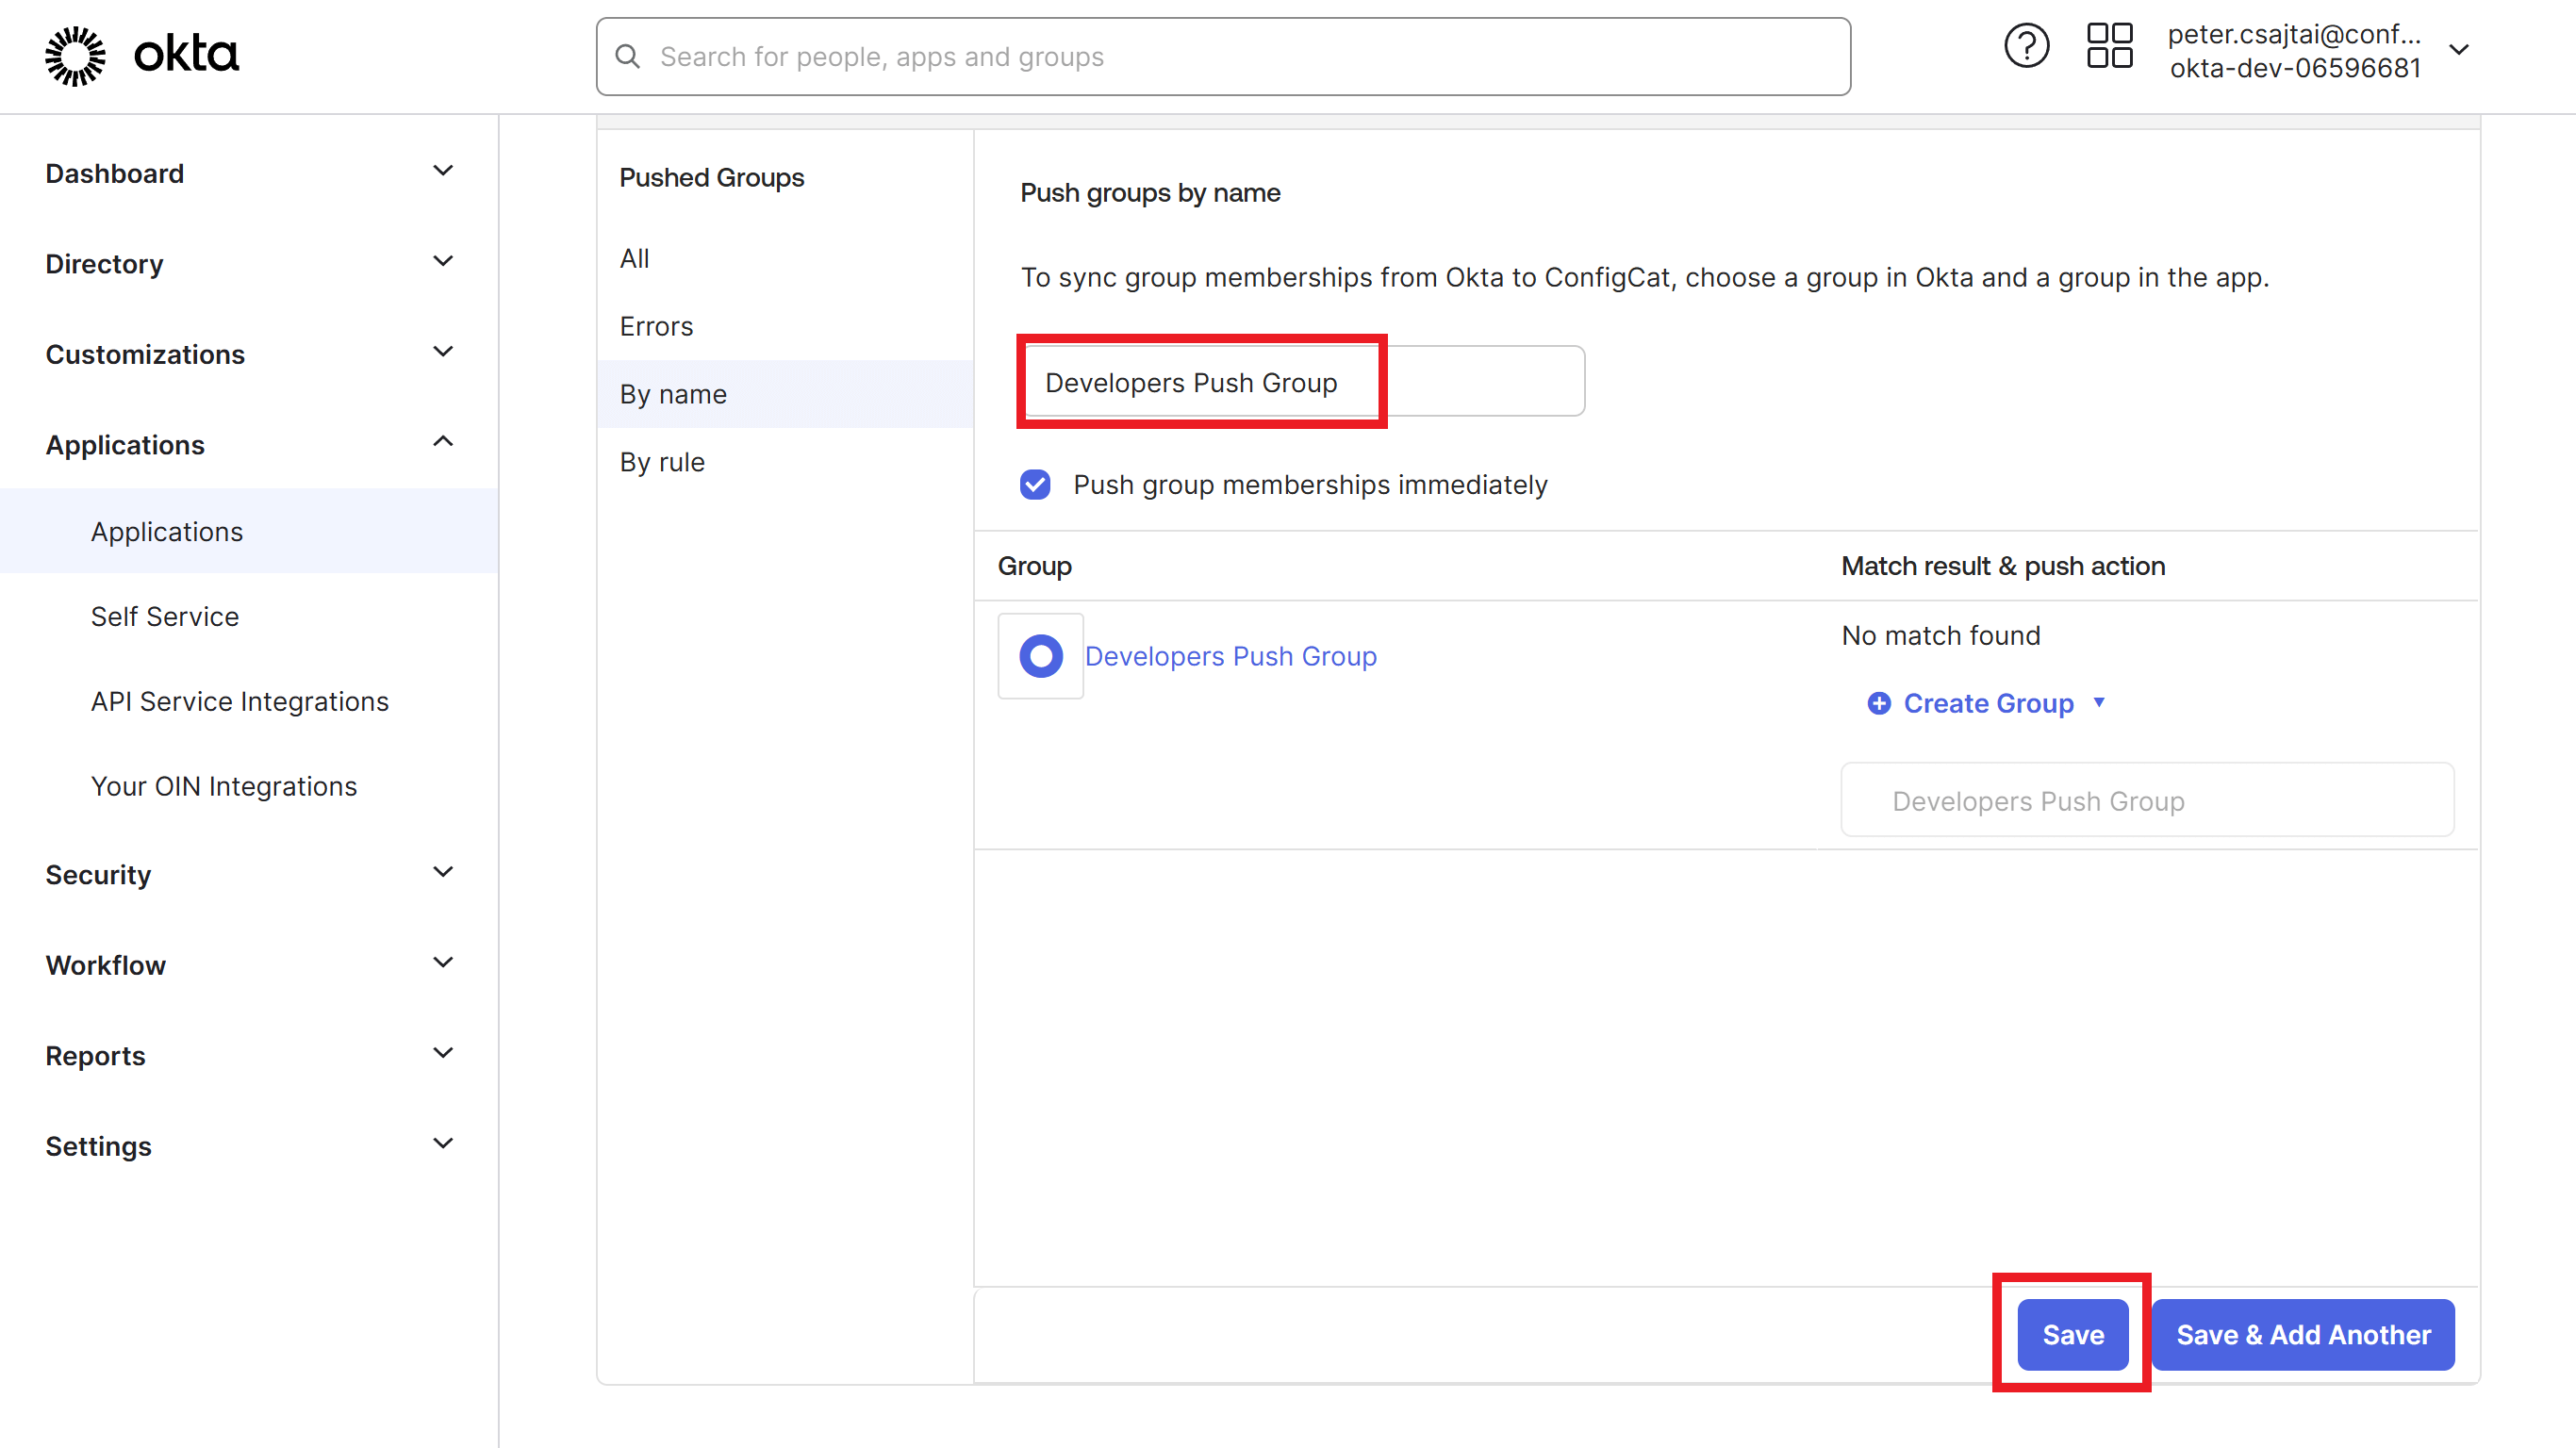
-
Make sure that the created push group's status is active.
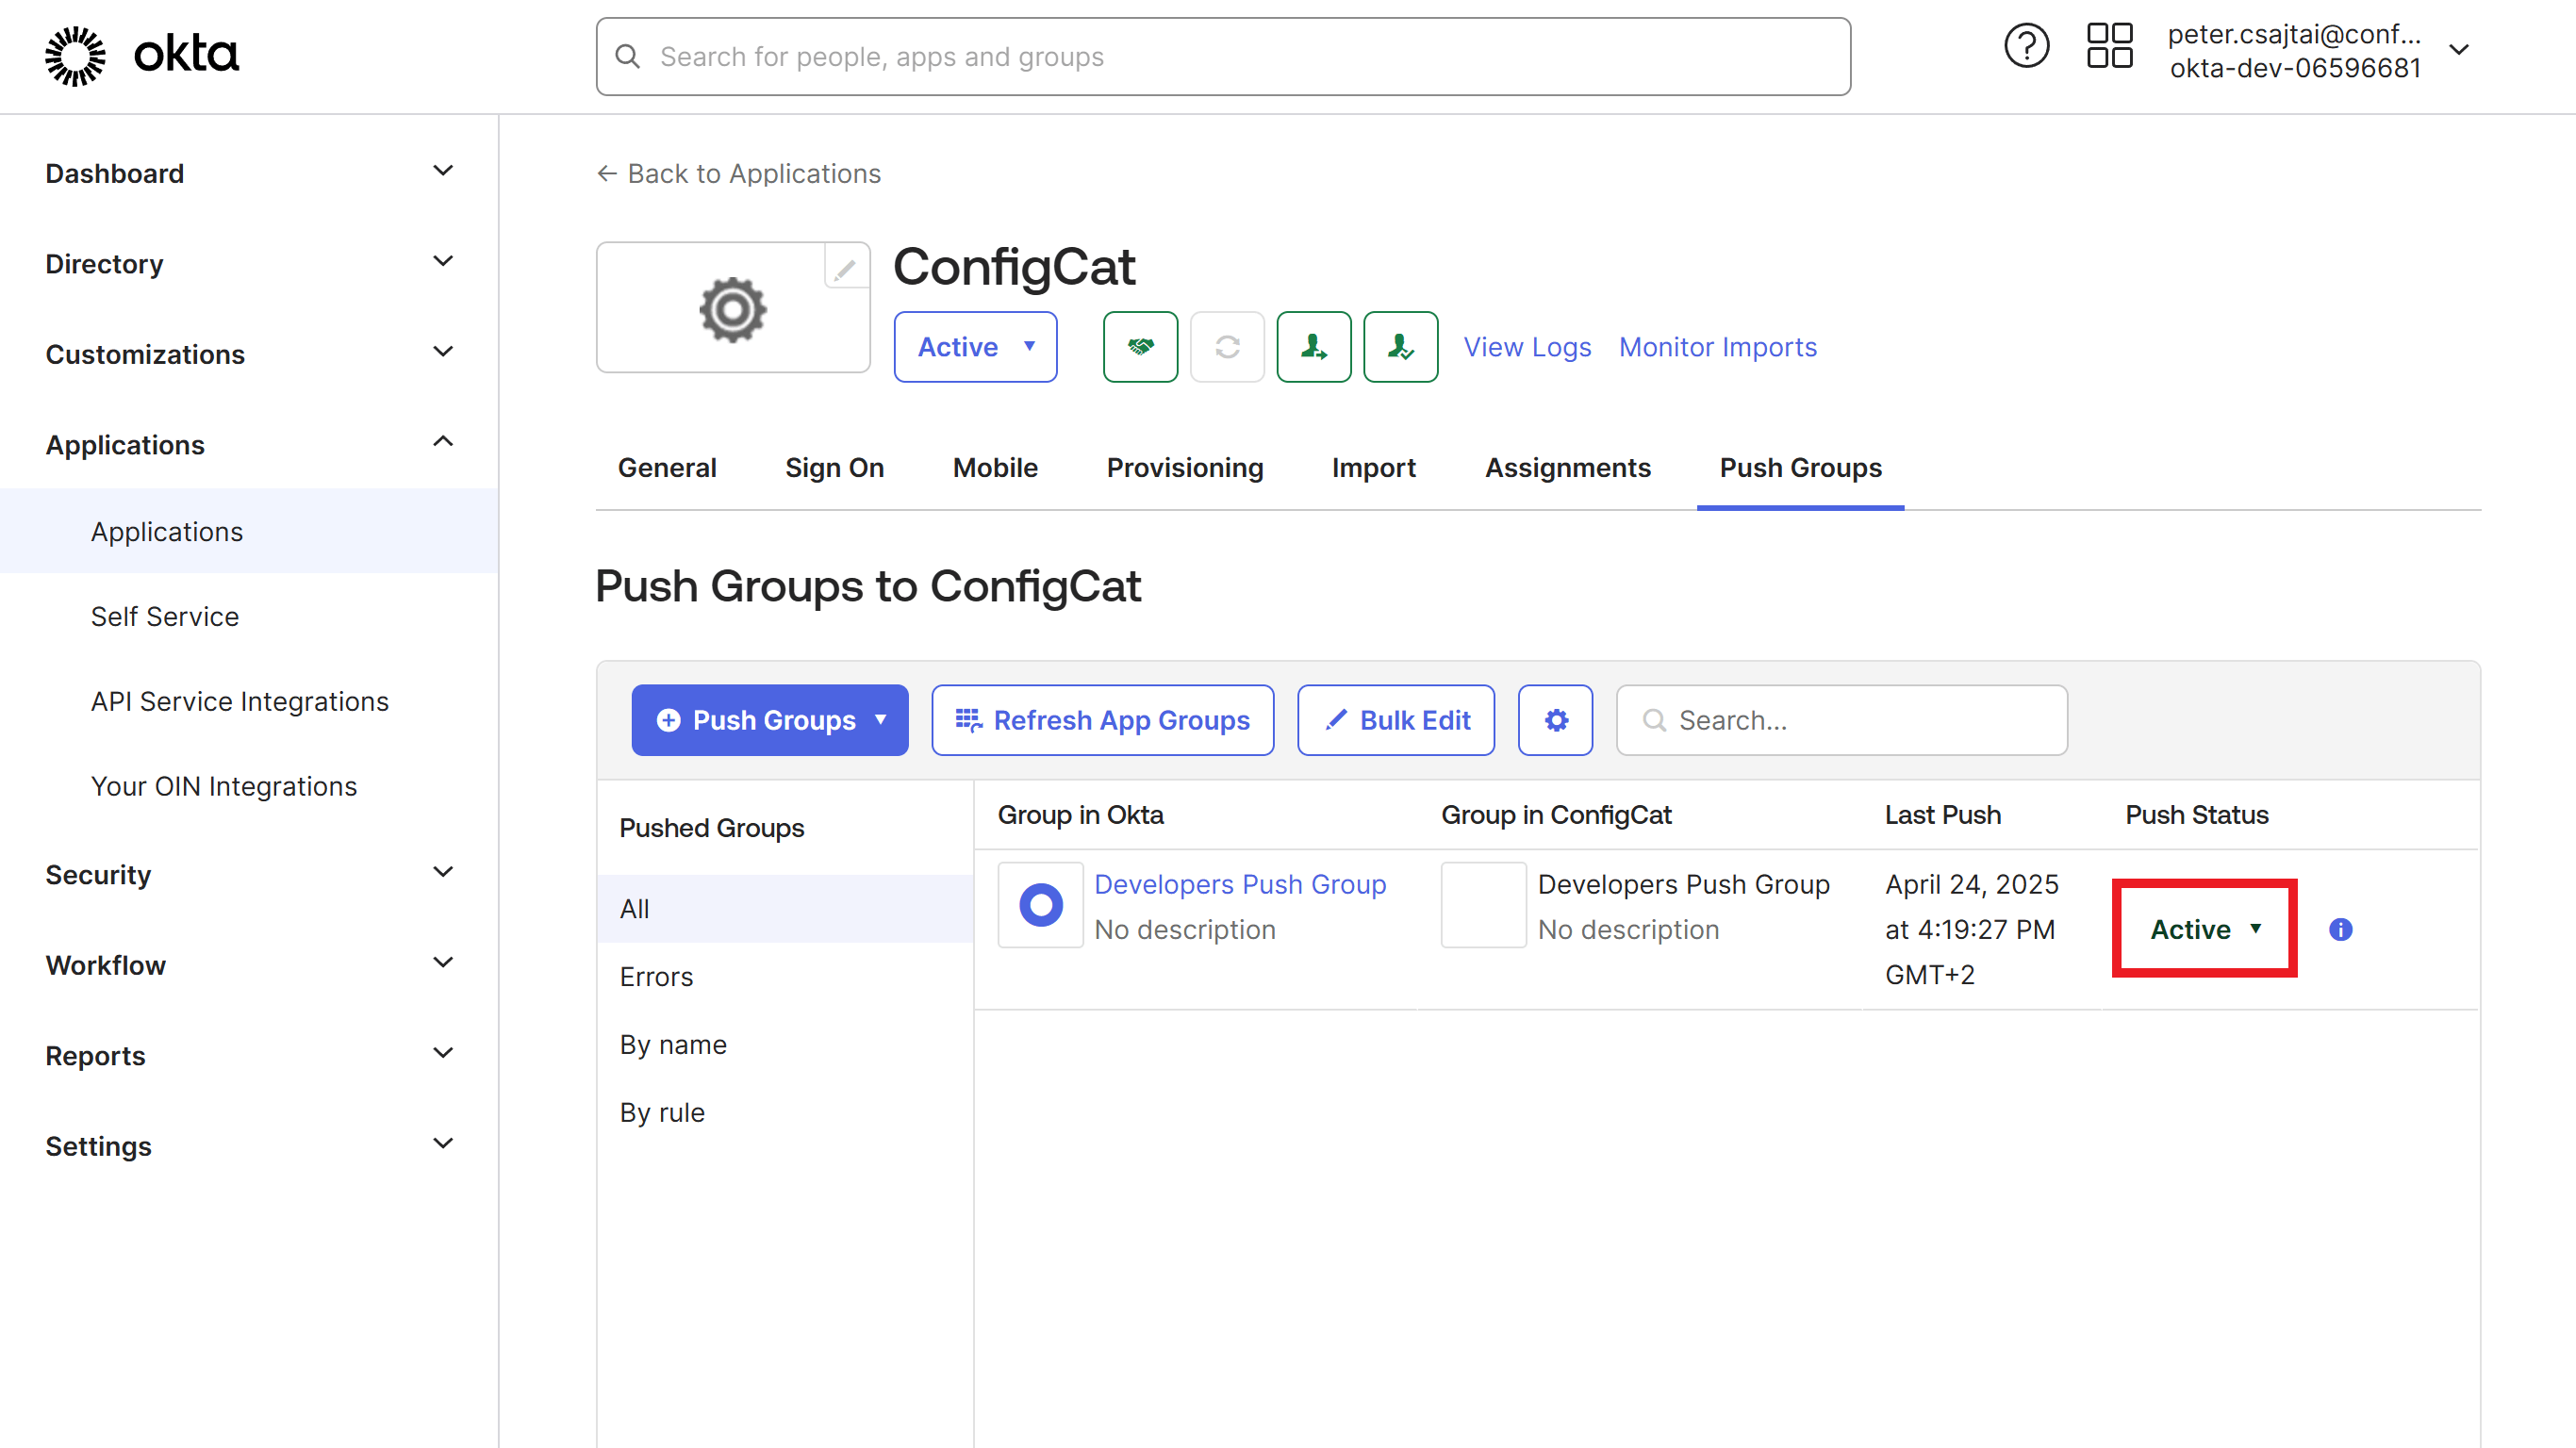
-
You should see each synced group and user on ConfigCat's Authentication & Provisioning page.
5. Next Steps
- Continue with assigning ConfigCat permissions to the synced groups.