How to Use Feature Flags in Vue.js


Something breaks in your Vue app, and you need to act fast.
Do you push a hotfix and redeploy? Roll back the entire release? Or what if you could simply turn the feature off without touching a line of code?
That is one of the reasons development teams use feature flags. Feature flags let you separate deploying code from releasing it to users. You can ship code to production with a feature turned off, enable it for selected users, roll it out gradually, or disable it if something goes wrong.
In this guide, you will build a small Vue 3 application and use ConfigCat to control a feature remotely without changing or redeploying the application.
What Are Feature Flags?
A feature flag is a runtime control that lets an application choose between different behaviors without requiring a new deployment.
In a Vue application, a feature flag can control a component, route, button, new interface, or alternative implementation. A Boolean flag commonly evaluates to true or false, and your application decides what to render or execute based on that value.
For example:
if (isNewDashboardEnabled) {
  showNewDashboard();
} else {
  showCurrentDashboard();
}
The important part is that the flag value is managed separately from the deployed code. You could deploy the new dashboard today, keep it hidden, enable it for your internal team tomorrow, and gradually release it to more users later.
Feature flags can also work with user targeting and percentage-based rollouts. For example, you might release a feature only to beta testers, Pro customers, users in a particular country, or 10% of your audience.
Why Use Feature Flags in a Vue App?
Feature flags can be useful in many ways, from the simplest to the most advanced scenarios in modern software development workflows. Here are a few examples that highlight their usefulness:
- Facilitate beta testing & A/B testing.
- Easily roll back a feature using a kill switch.
- Decouple new features from deployment without deploying new code.
- Allow non-technical people to manage feature releases.
- Facilitate subscription/membership-based access to features.
- Safely push to production more often with a shorter release cycle.
- Mitigate typical deployment risks like bugs and downtime.
- Enable or disable maintenance mode.
As you can see, there are many benefits to using feature flags in your application.
How to Use Feature Flags in Vue.js
Now that we understand the basics of feature flags and their potential applications, we'll explore how to implement feature flags in Vue.js using ConfigCat's feature flagging service.
ConfigCat simplifies feature management in your applications without requiring code redeployment. You can roll out features to specific percentages of users or targeted user groups based on attributes like geo-location or other custom criteria. These changes can be managed via a user-friendly web interface, allowing both technical and non-technical team members to toggle feature flags on or off without modifying configuration files. For more automated control, everything on the ConfigCat dashboard is also accessible programmatically through the Public Management API.
The Sample App
If you choose to follow along, the source code for the sample application is available here.
To keep it simple, we will develop an age calculator that enables users to determine their age. The app will feature a form that lets users enter their birth year, and it will display their age. This functionality will be accessible to users only when its feature flag is enabled from the ConfigCat dashboard. Let’s get started.
Prerequisites
- A basic understanding of Vue.js
- Node.js version 22 or higher
- A code editor, such as Visual Studio Code
- A ConfigCat account
Creating a Vue.js Application
Let's jump right into our code editor and create a new Vue.js application from the terminal using the following command:
npm create vue@latest
You will be prompted to give your project a name, add TypeScript support, etc:
% npm create vue@latest
Need to install the following packages:
Ok to proceed? (y)
> npx
> "create-vue"
┌ Vue.js - The Progressive JavaScript Framework
│
◇ Project name (target directory):
│ feature-flags-in-vuejs-with-sdk-sample
│
◇ Use TypeScript?
│ Yes
│
◇ Select features to include in your project: (↑/↓ to navigate, space to
│ select, a to toggle all, enter to confirm)
│ none
│
◇ Select experimental features to include in your project: (↑/↓ to navigate,
│ space to select, a to toggle all, enter to confirm)
│ none
│
◇ Skip all example code and start with a blank Vue project?
│ No
Scaffolding project in /feature-flags-in-vuejs-with-sdk-sample...
│
└ Done. Now run:
cd feature-flags-in-vuejs-with-sdk-sample
npm install
npm run dev
Install the npm dependencies and launch the app in your browser using the following commands:
cd feature-flags-in-vuejs-with-sdk-sample
npm install
npm run dev
Creating a Feature Flag
To create a feature flag, head over to the dashboard - if you don't already have an account, quickly sign up for a Forever Free account.
On the dashboard, click the ADD FEATURE FLAG button, and enter the following details, then click ADD FEATURE FLAG to create the feature flag.
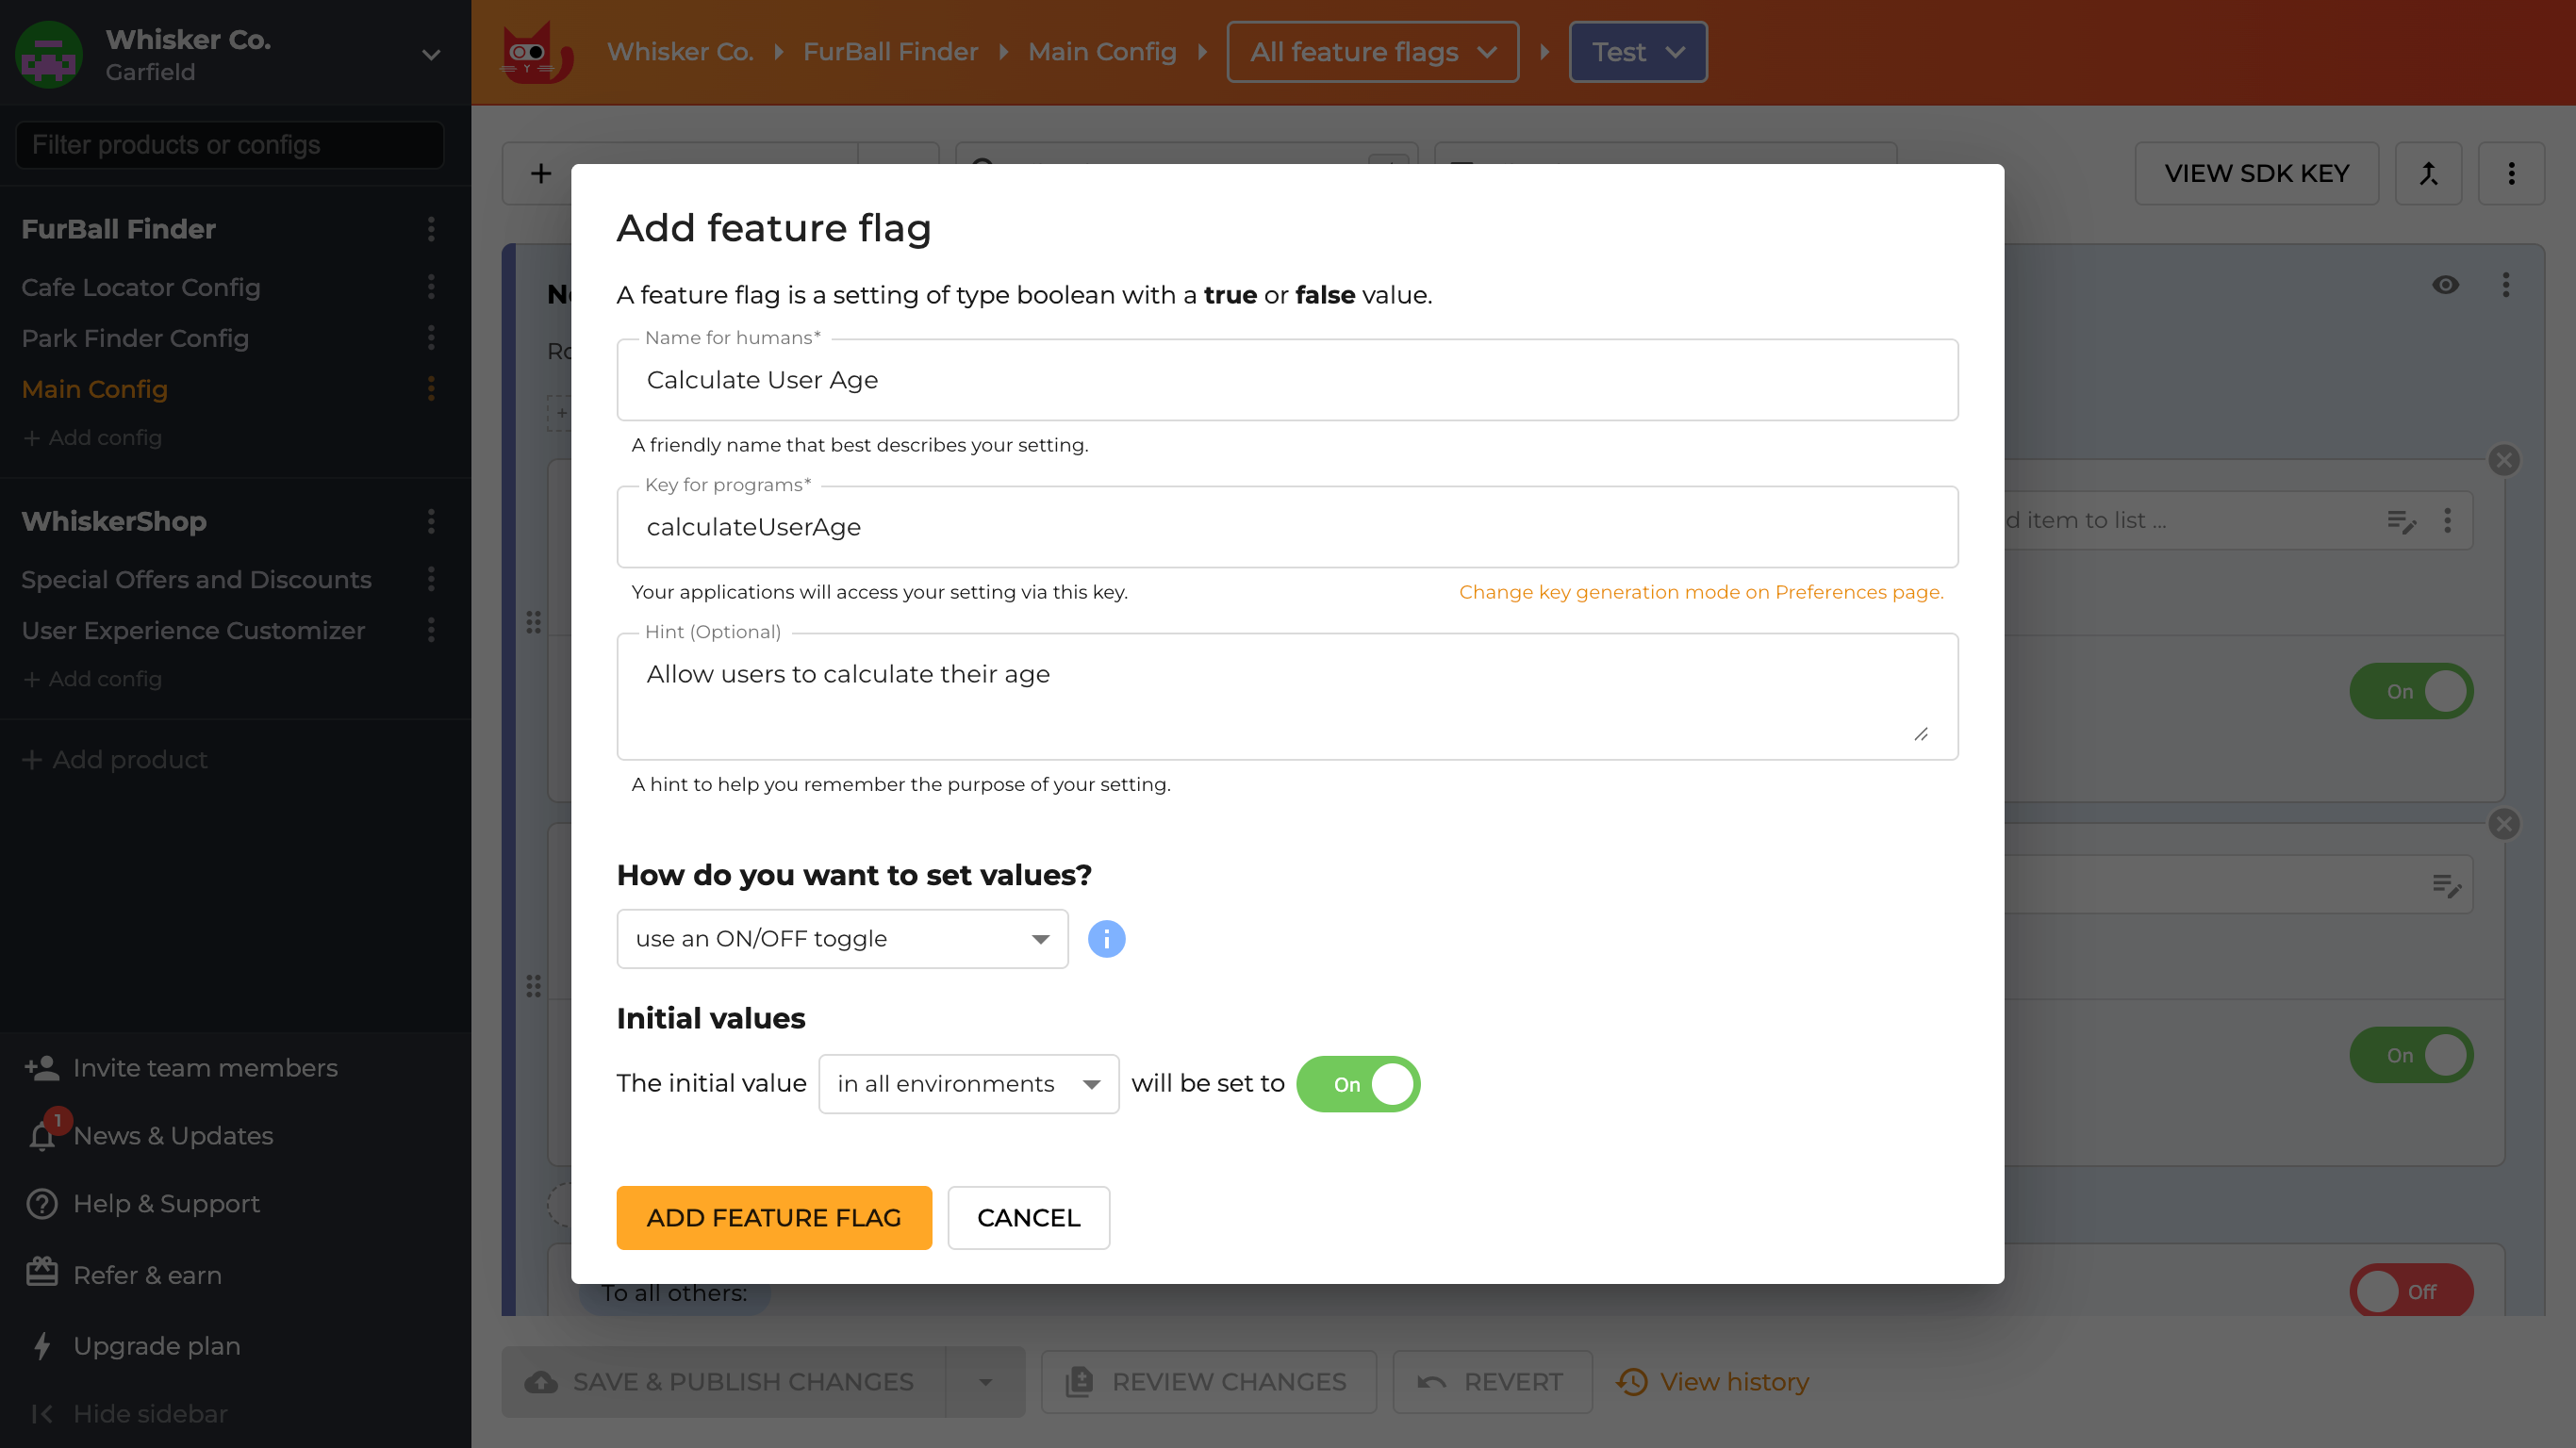
After saving, the feature flag should be toggled on. To retrieve your SDK key, click the VIEW SDK KEY button at the top right of your dashboard or visit https://app.configcat.com/sdkkey to access it.

Connecting the App to ConfigCat
- Replace the contents in the
App.vuefile with the following template to create the age calculator form:
<template>
  <main id="main">
    <h1>Age Calculator</h1>

    <FeatureWrapper feature-key="calculateUserAge">
      <div>
        <p class="text">Calculate your age by providing your birth year.</p>
        <input type="number" v-model="appData.birthYear" />
        <button class="button button-calculate" @click="calculateUserAge()" :disabled="!isYearValid">
          Calculate
        </button>

        <p v-if="appData.age">You are {{ appData.age }} years old!</p>

        <p v-else>Enter your year of birth above and press calculate!</p>
      </div>

      <template #else>
        Sorry, this feature is disabled by the Admin.
      </template>

      <template #loading>
        <p>Loading...</p>
      </template>
    </FeatureWrapper>
  </main>
</template>
The age calculator is wrapped within the <FeatureWrapper /> component provided by the ConfigCat Vue.js SDK and will only be displayed if the feature flag with the key calculateUserAge is enabled. If the feature flag is off, the content in the #else template will be displayed, informing users that the feature is currently unavailable.
- Install the ConfigCat Vue.js SDK. You can read its full documentation here.
npm install configcat-vue
- Import and install the
ConfigCatPluginin themain.tsfile and initialize it with your SDK key.
import './assets/main.css'

import { createApp } from 'vue'
import App from './App.vue'
import { ConfigCatPlugin, PollingMode } from 'configcat-vue';

const app = createApp(App);

app.use(ConfigCatPlugin, {
  sdkKey: "YOUR-CONFIGCAT-SDK-KEY", // Replace with your SDK key
  pollingMode: PollingMode.AutoPoll, // Optional. Default is AutoPoll
  clientOptions: {
    pollIntervalSeconds: 5 // Optional. Specify the polling interval in seconds. The default is 60 seconds.
  }
})

app.mount('#app')
The <FeatureWrapper> component uses the polling mode and interval you set when evaluating your feature flag.
To learn more about polling modes, click here.
If you prefer not to use the built-in <FeatureWrapper> component, check out
Using the underlying ConfigCat client in the documentation.
- In the
App.vuefile, addbirthYearandageas reactive data properties to track the user's birth year and age. These will also be used by thecalculateUserAgefunction to determine the user's age:
<script setup lang="ts">
import { computed, reactive } from 'vue';
import { FeatureWrapper } from 'configcat-vue';

const appData = reactive({
  birthYear: 0,
  age: 0,
});

const currentYear = new Date().getFullYear();

const isYearValid = computed((): boolean => {
  return (
    appData.birthYear >= 1900 &&
    appData.birthYear < currentYear
  );
});

const calculateUserAge = () => {
  if (isYearValid.value) {
    const userAge = currentYear - appData.birthYear;
    appData.age = userAge
    appData.birthYear = 0;
  }
}
</script>
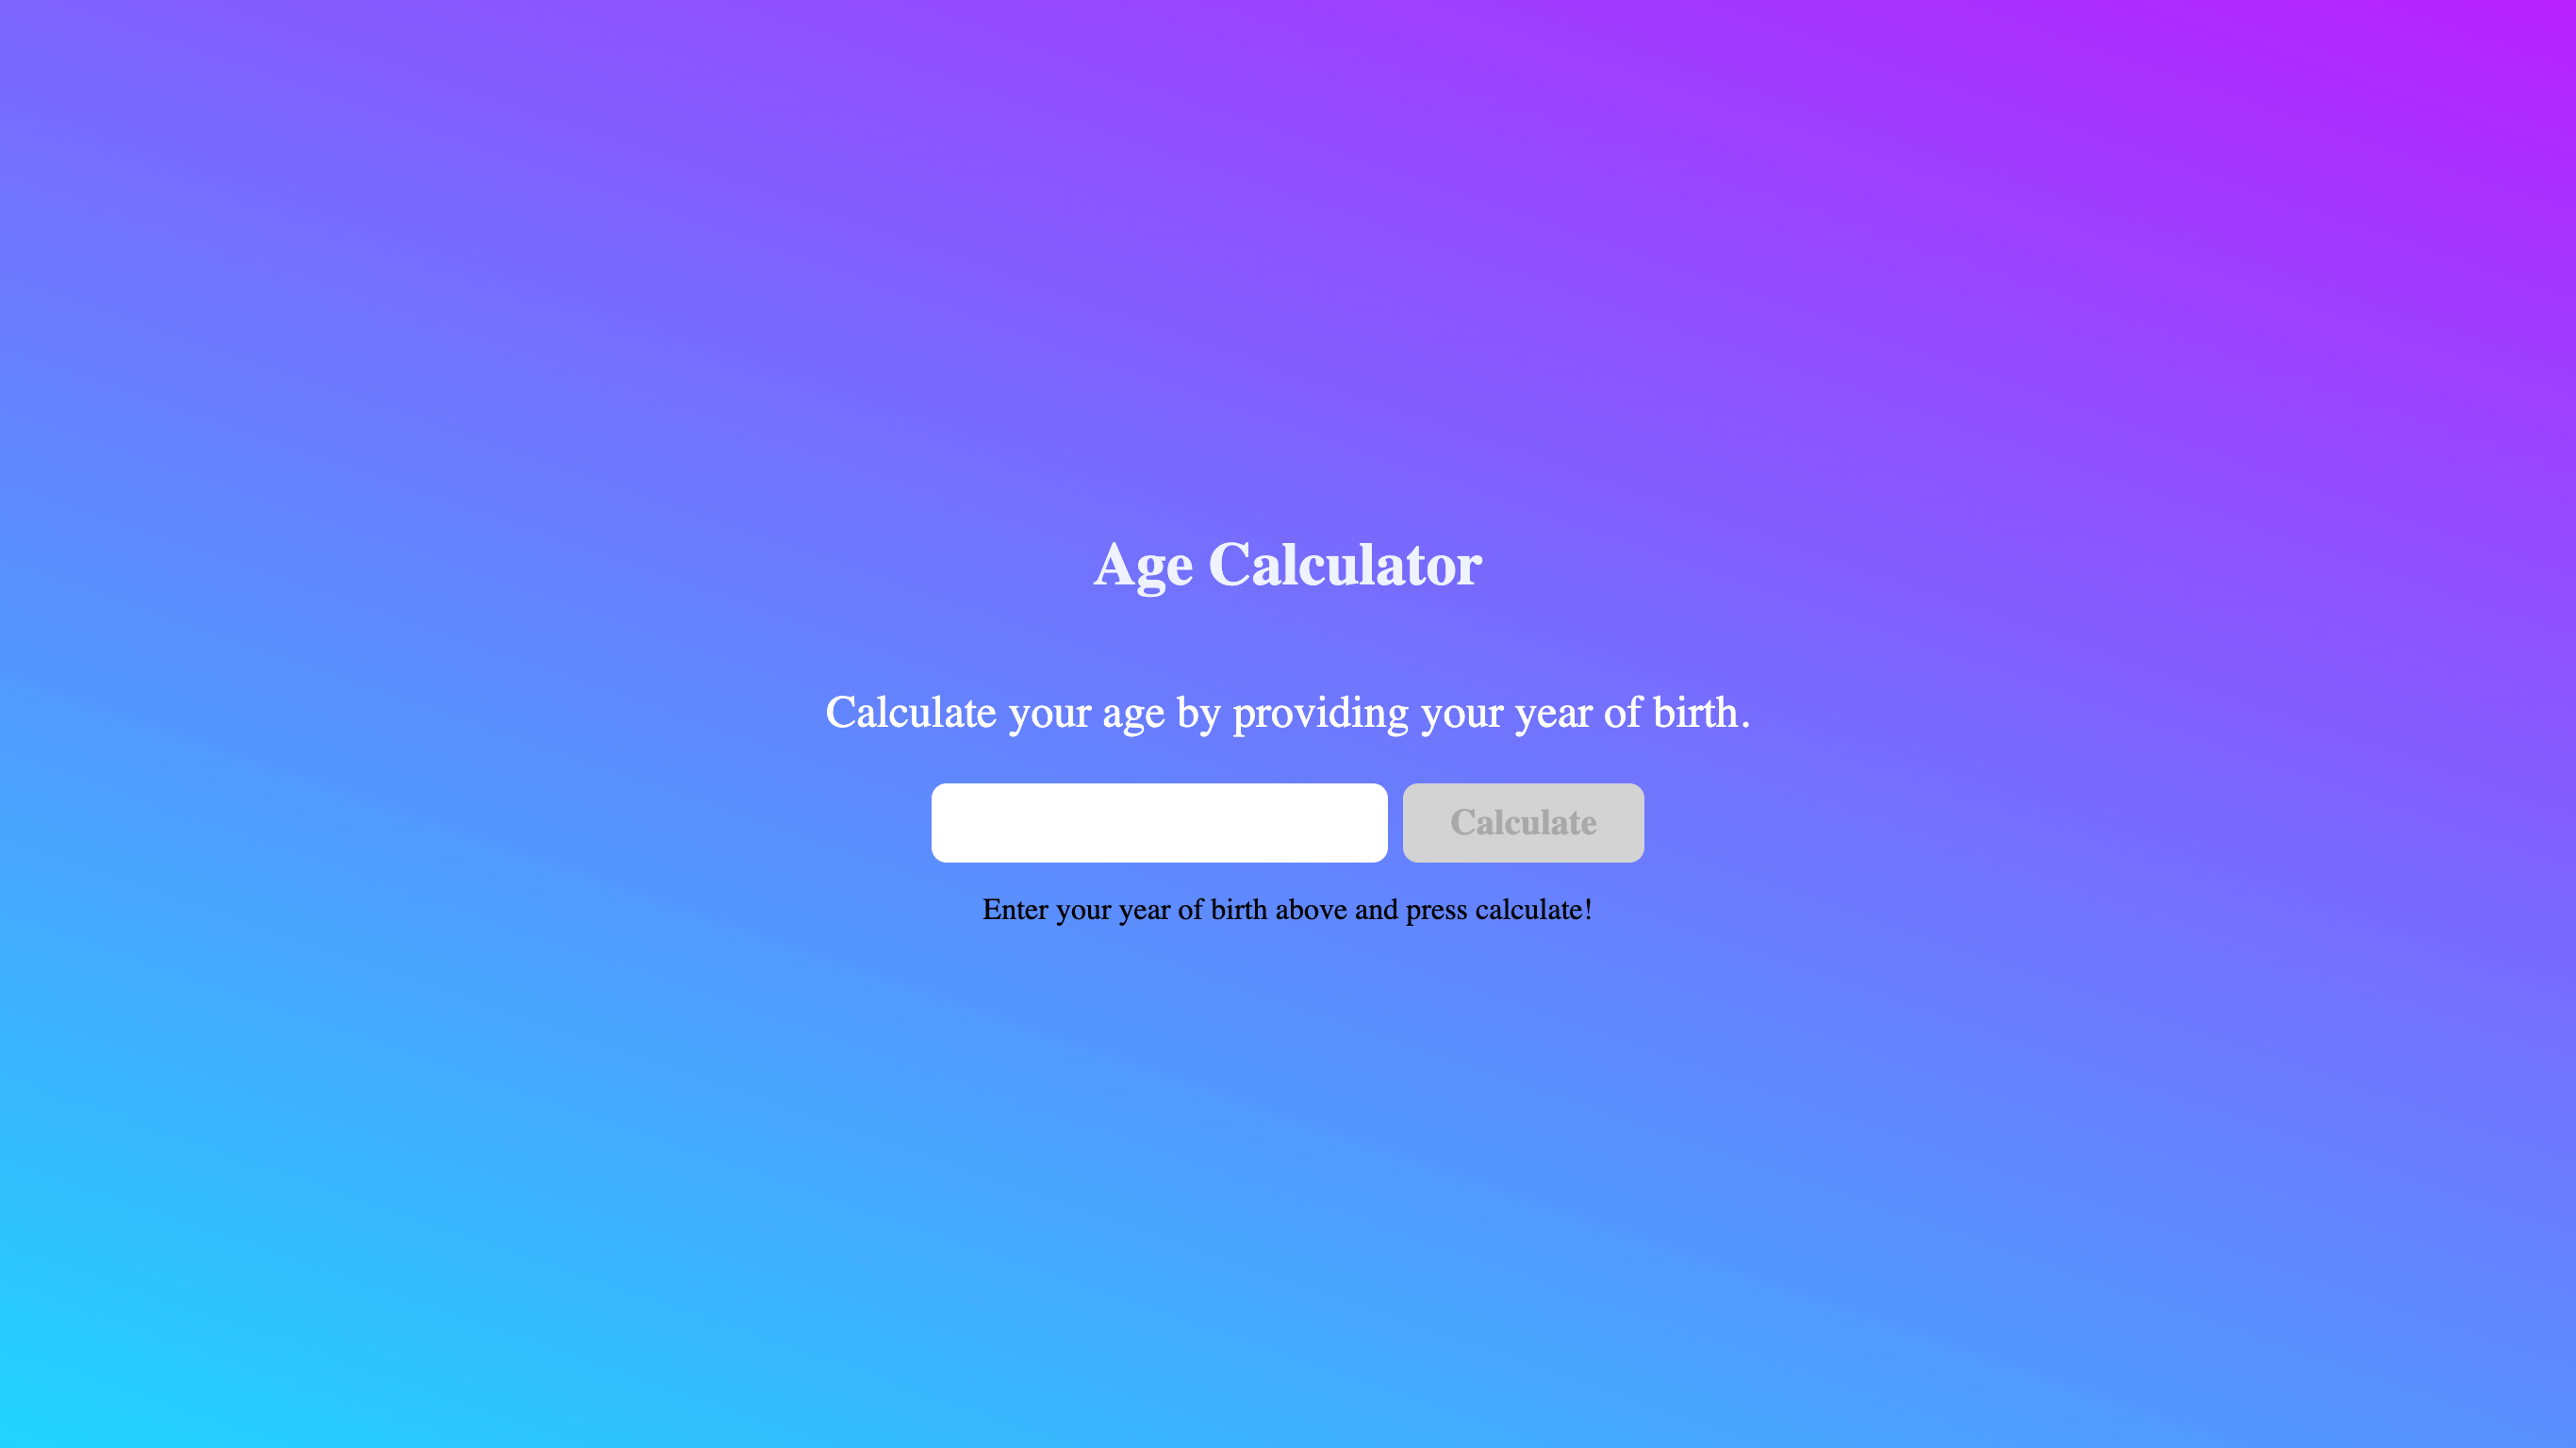
When the feature flag is enabled, users will see the following:
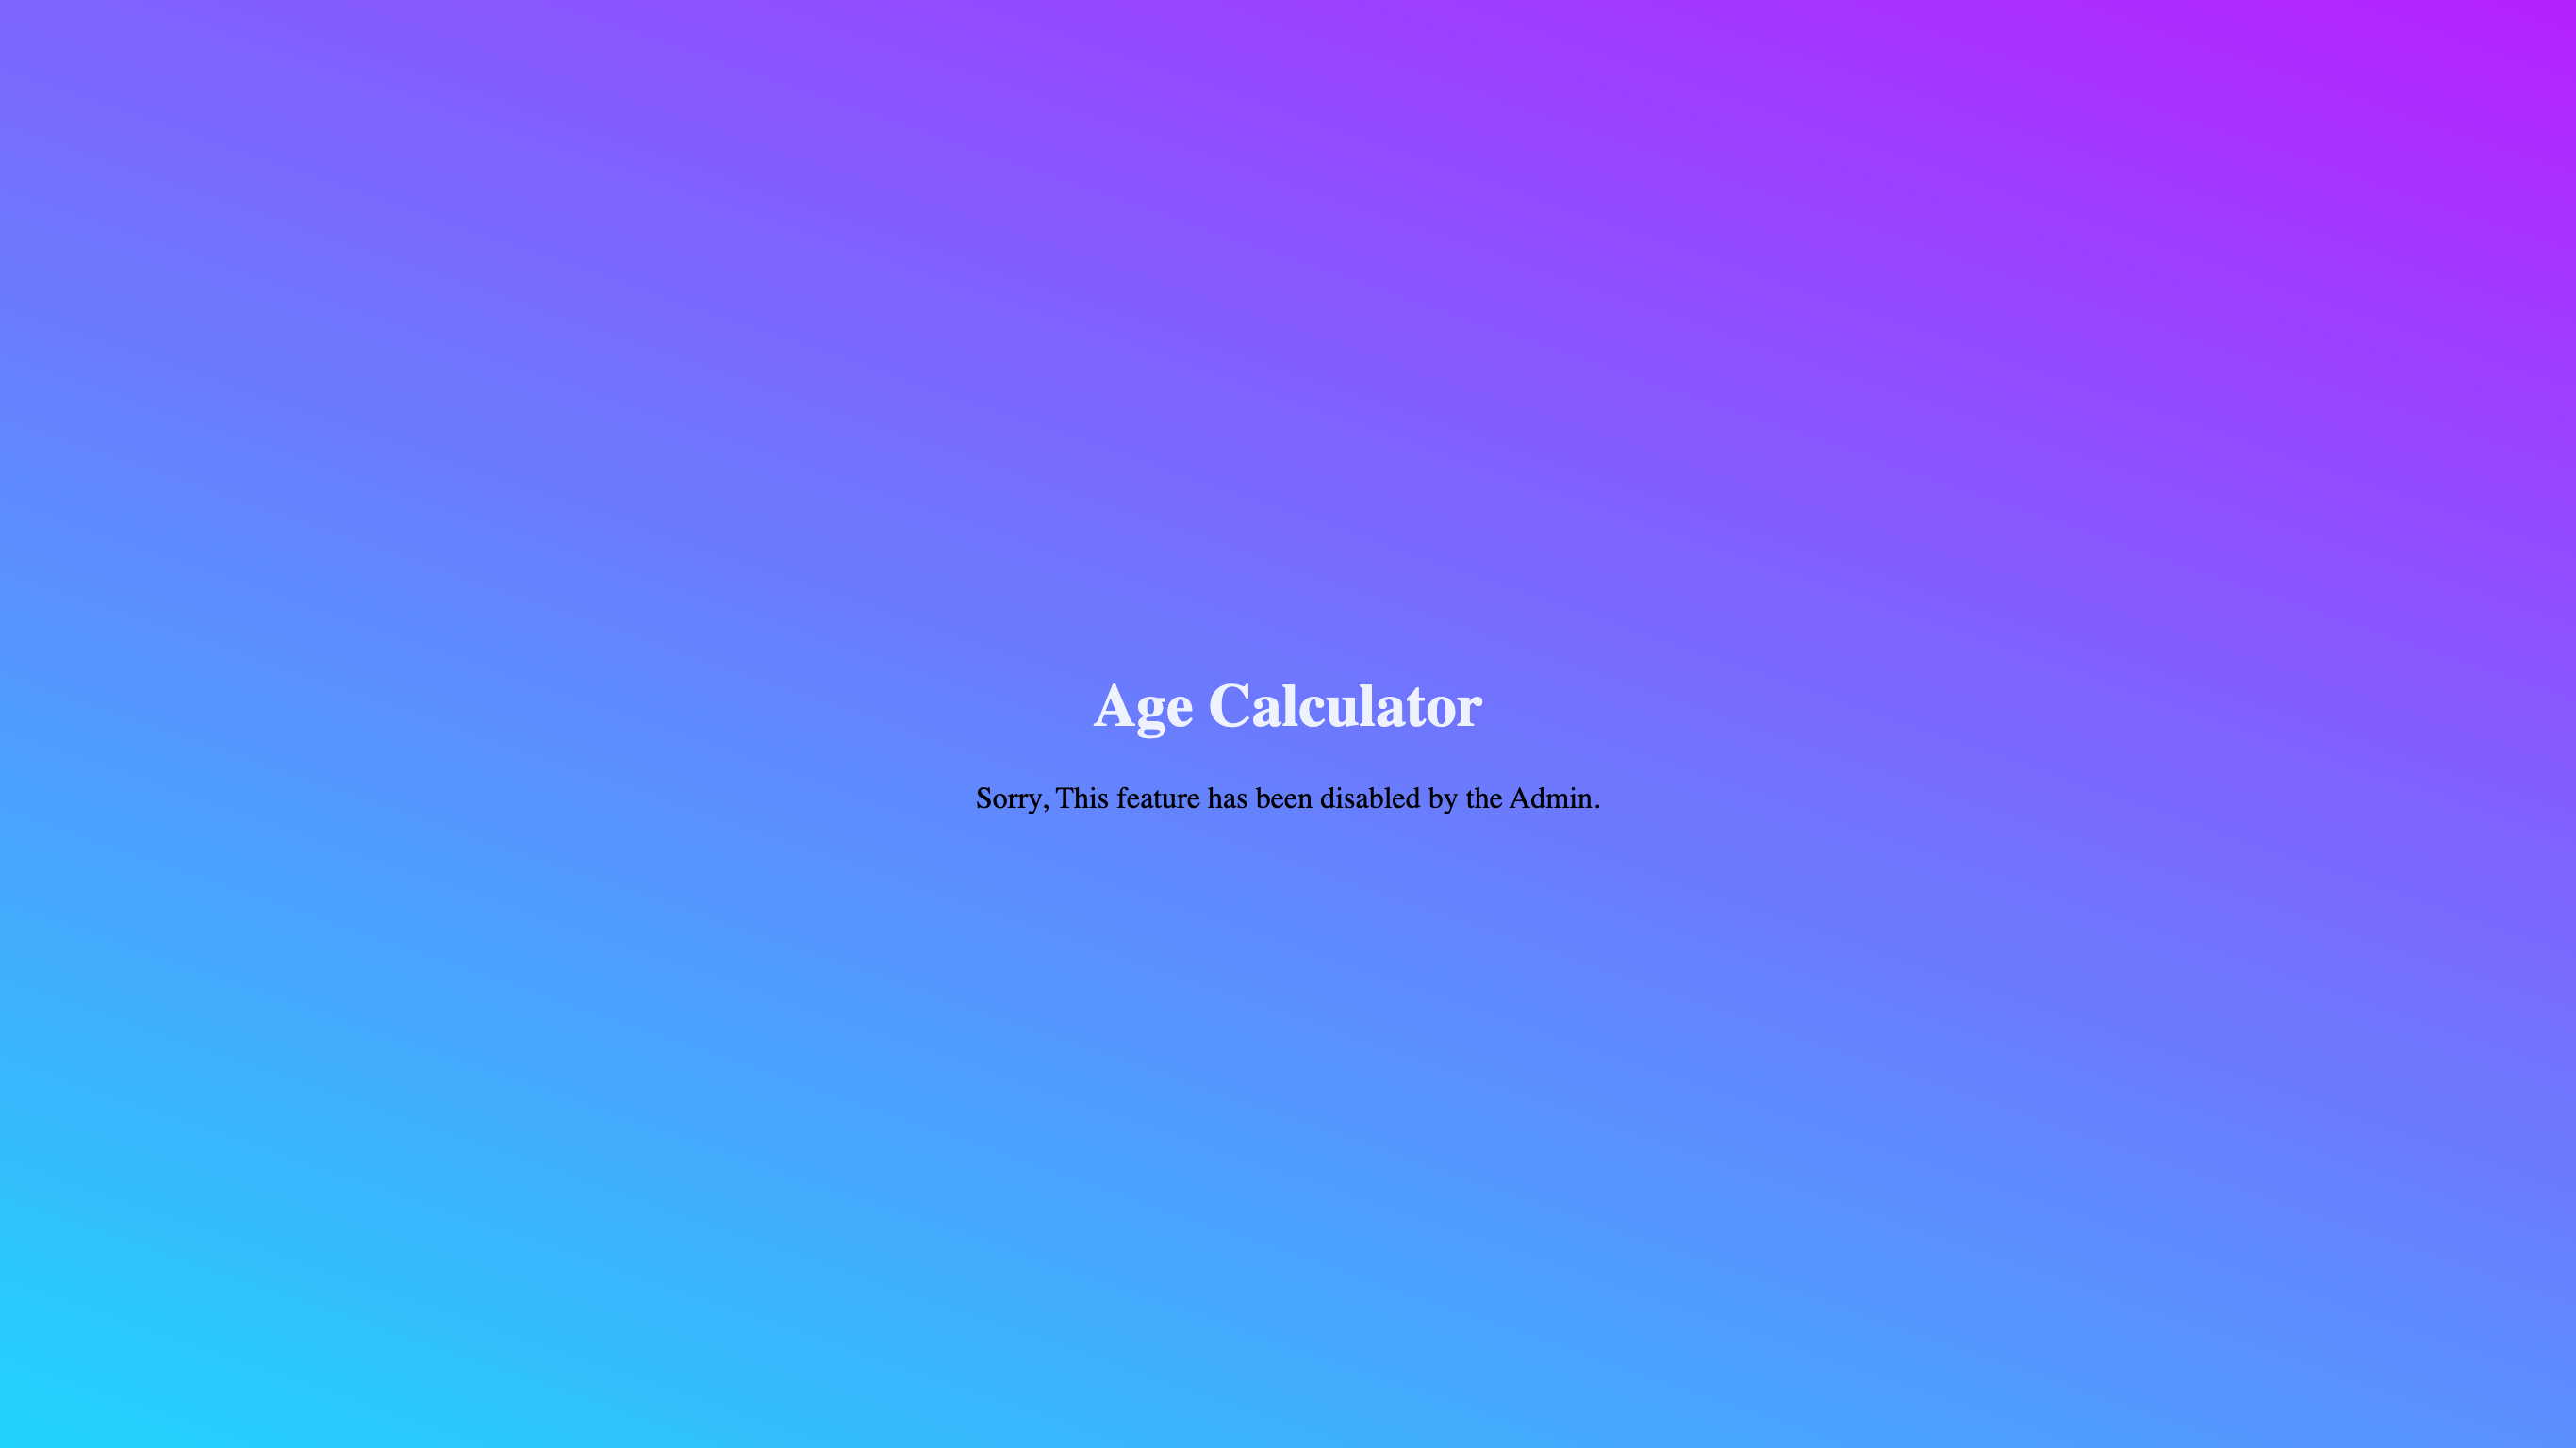
And when the feature flag is disabled, users will see this message:
You can find the complete code here.
Conclusion
You've now seen how to implement feature flags in a Vue.js app with ConfigCat — from creating a flag in the dashboard to toggling a feature on or off in your UI without a redeploy. If you're not using feature flags, you might be missing out on the benefits they bring to your development and feature release cycles. Vue.js isn't the only JavaScript framework supported! ConfigCat provides many SDKs to integrate feature flags across your entire tech stack. So what are you waiting for? Deploy any time, release when confident.
If you found this article interesting, you might also like this guide on implementing ConfigCat's feature flag in React.
For more feature flagging posts and announcements, stay connected to ConfigCat on X, Facebook, LinkedIn, and GitHub.