How to Use Feature Flags in Godot Engine with C#

Game developers often need to release new functionality without making every change available to every player at once. Feature flags make this possible by letting teams remotely enable or disable features, test changes with selected audiences, and respond quickly if something goes wrong.
In this tutorial, you'll connect a C# Godot project to ConfigCat and use a feature flag to control whether a sprite rotates.
What Is a Feature Flag?
A feature flag is a remote configuration value that controls how an application behaves without requiring a new deployment. In this tutorial, we'll use a Boolean flag as an on/off switch.
Depending on how your game is set up, the game client or a backend service can evaluate the feature flag and change the application's behavior based on its value.
In games, feature flags can be used to control mechanics, interface changes, seasonal content, experiments, and staged releases. The same approach can also be used across many programming languages, frameworks, and application types.
Prerequisites
Before starting the tutorial, make sure you have the following:
- The .NET-enabled version of Godot installed. Choose the .NET download for your operating system rather than the standard version. Digital-store versions of Godot may not include .NET/C# support.
- The .NET 10 SDK. Download the SDK, not only the runtime, because the project needs to build C# code and install NuGet packages.
- A ConfigCat account. You can sign up for the Forever Free plan.
- Git installed if you want to clone the sample project.
This sample project uses .NET 10. Make sure the version you install is compatible with the project's target framework.
What Is Godot Engine?
Godot is an open-source game engine for developing 2D and 3D games. Compared to similar technologies like Unity and Unreal Engine, Godot is lightweight and can run with fewer system resources. Its flexible scene system and support for both 2D and 3D development make it suitable for projects of different sizes and levels of complexity. It supports several scripting options, including GDScript, C#, and C++.
This tutorial uses C#, so you'll need the .NET-enabled version of Godot rather than the standard build.
Use this sample project to help you follow along.
Set Up the Sample Project
1. Clone the sample project repository and switch to the starter-code branch.
2. Launch Godot, select Import, and open the project.godot file from the cloned repository.
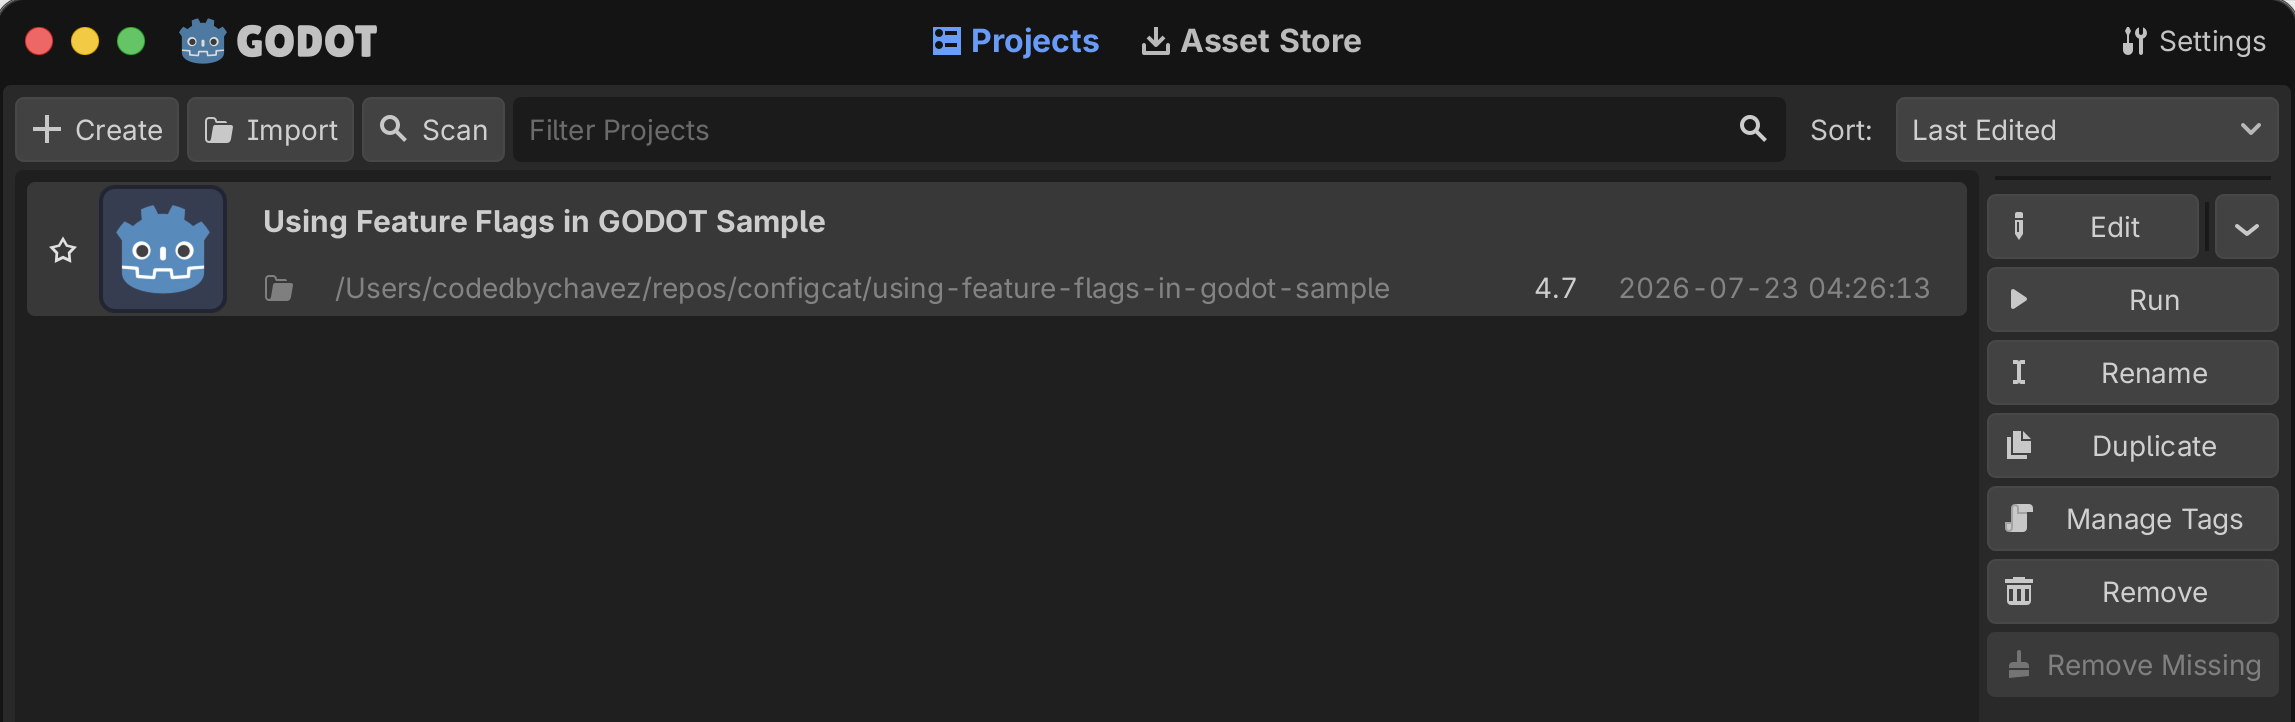
Add a Sprite to the Godot Scene
We'll integrate ConfigCat by attaching a C# script to a Sprite2D node. When the node enters the scene, the script will evaluate the feature flag and store its value.
1. With the project open and the Scene tab selected, create a new node by clicking the + button in the left sidebar.
2. In the popup, search for and create a Sprite2D node. You can also create just about any node with an attached script.
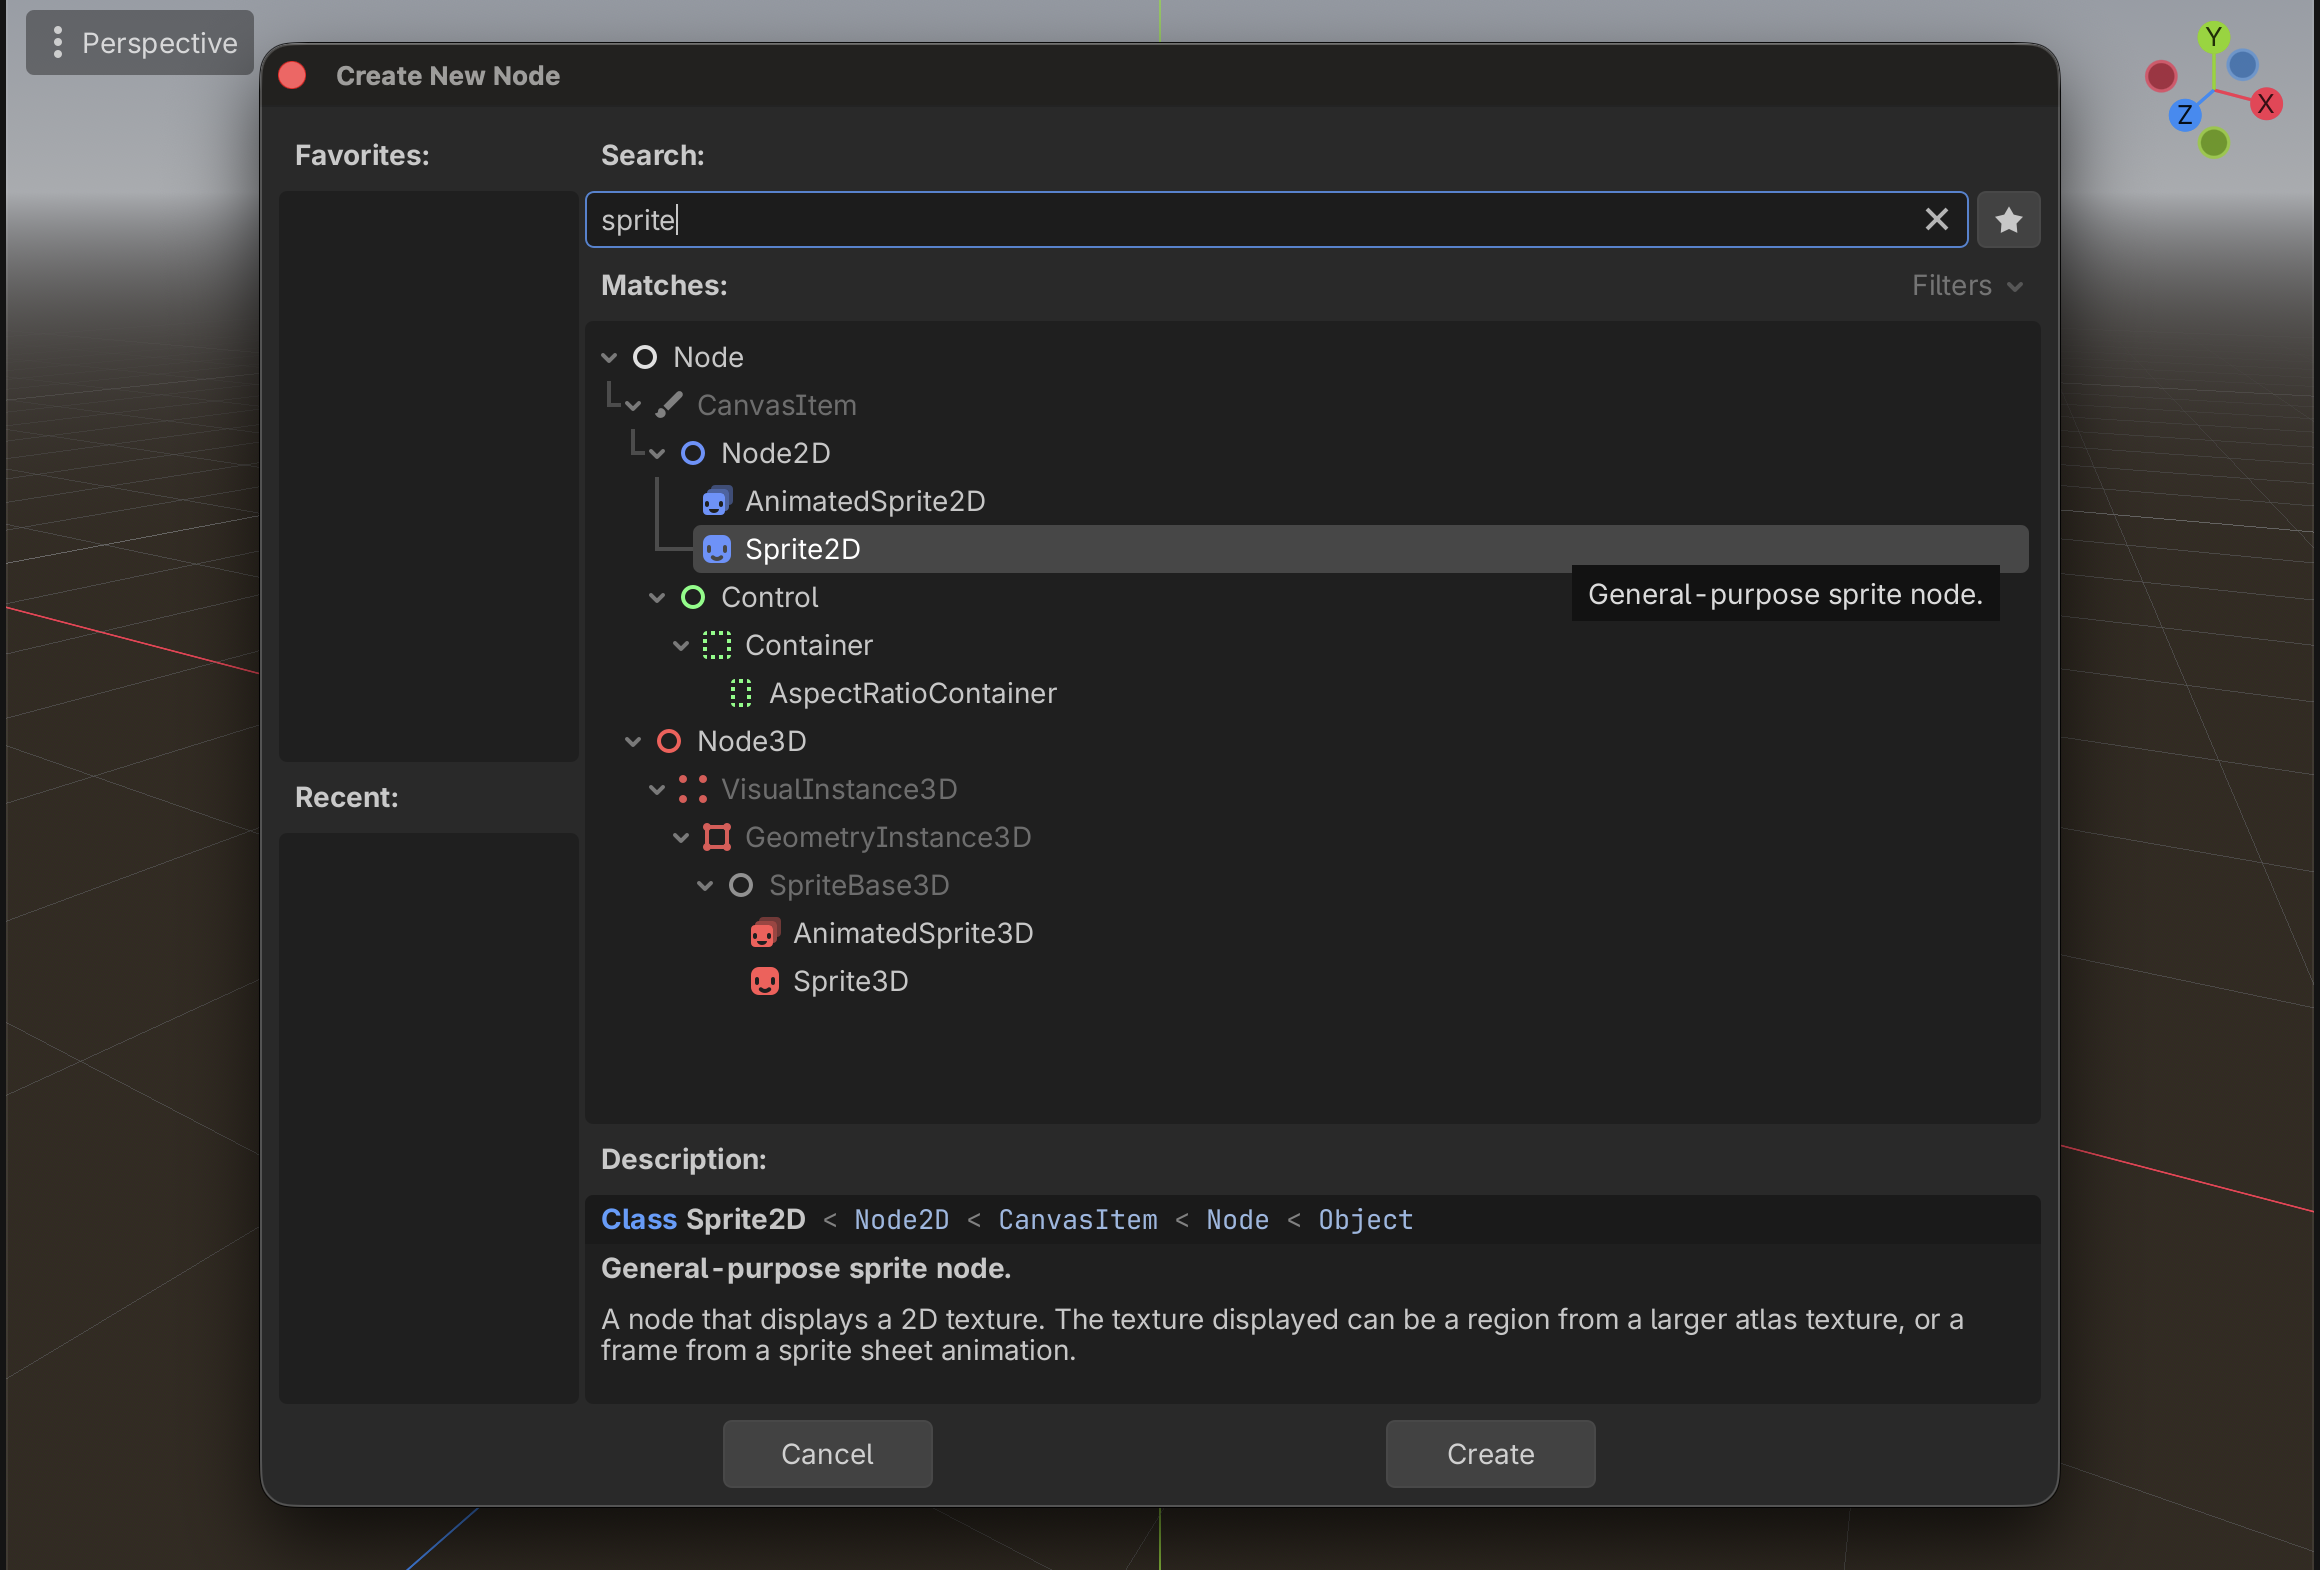
3. Select the Sprite2D node. In the Inspector, drag the sprite image from the FileSystem panel onto the empty Texture field.
4. Right-click on the Sprite2D node in the Scene panel on the left to open the context menu, and select Attach Script. Select C# as the language and create the script.
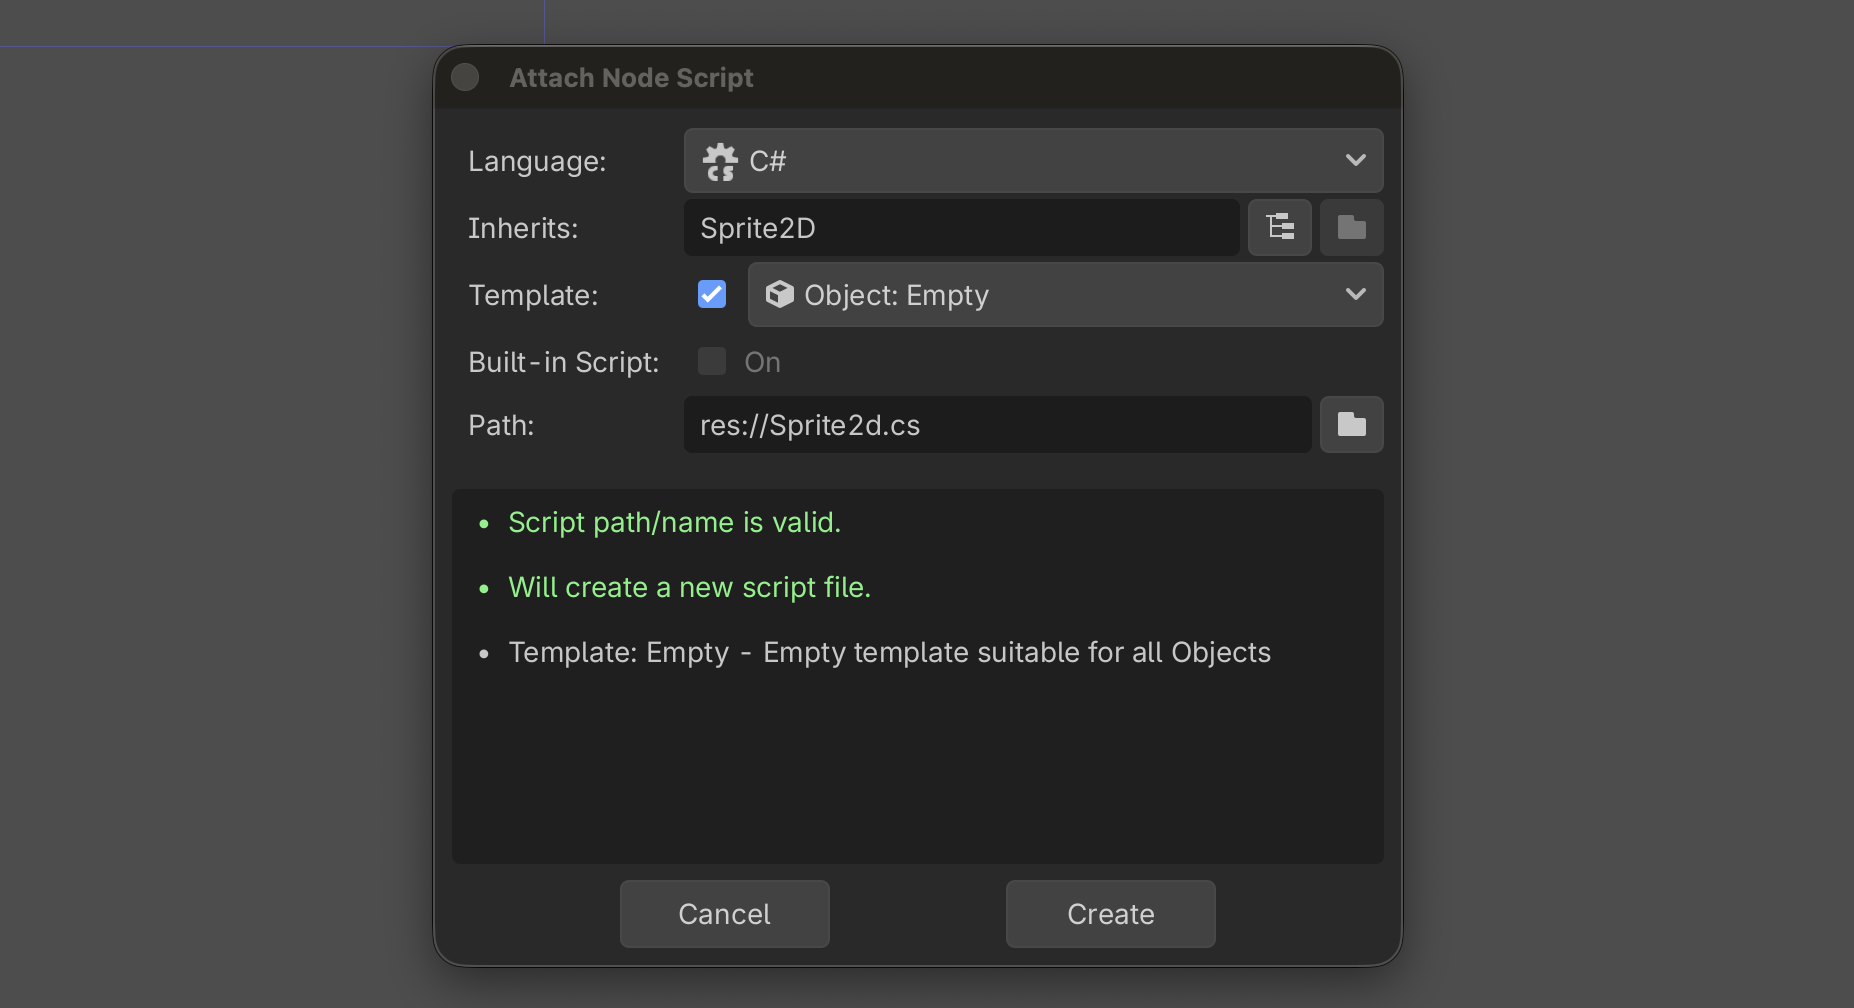
Godot will add a new file with the name Sprite2d.cs in your project folder.
5. Save the scene: Scene -> Save Scene.
Let's look at how we can print a feature flag status message to the console when the Sprite node is loaded.
Create a Feature Flag in ConfigCat
ConfigCat offers a cloud-based solution for creating and managing feature flags. Let's use ConfigCat to add a Boolean feature flag to the Godot project.
1. Log in to your ConfigCat account, or sign up for the Forever Free plan here.
2. In the ConfigCat Dashboard, create a feature flag with the following details:
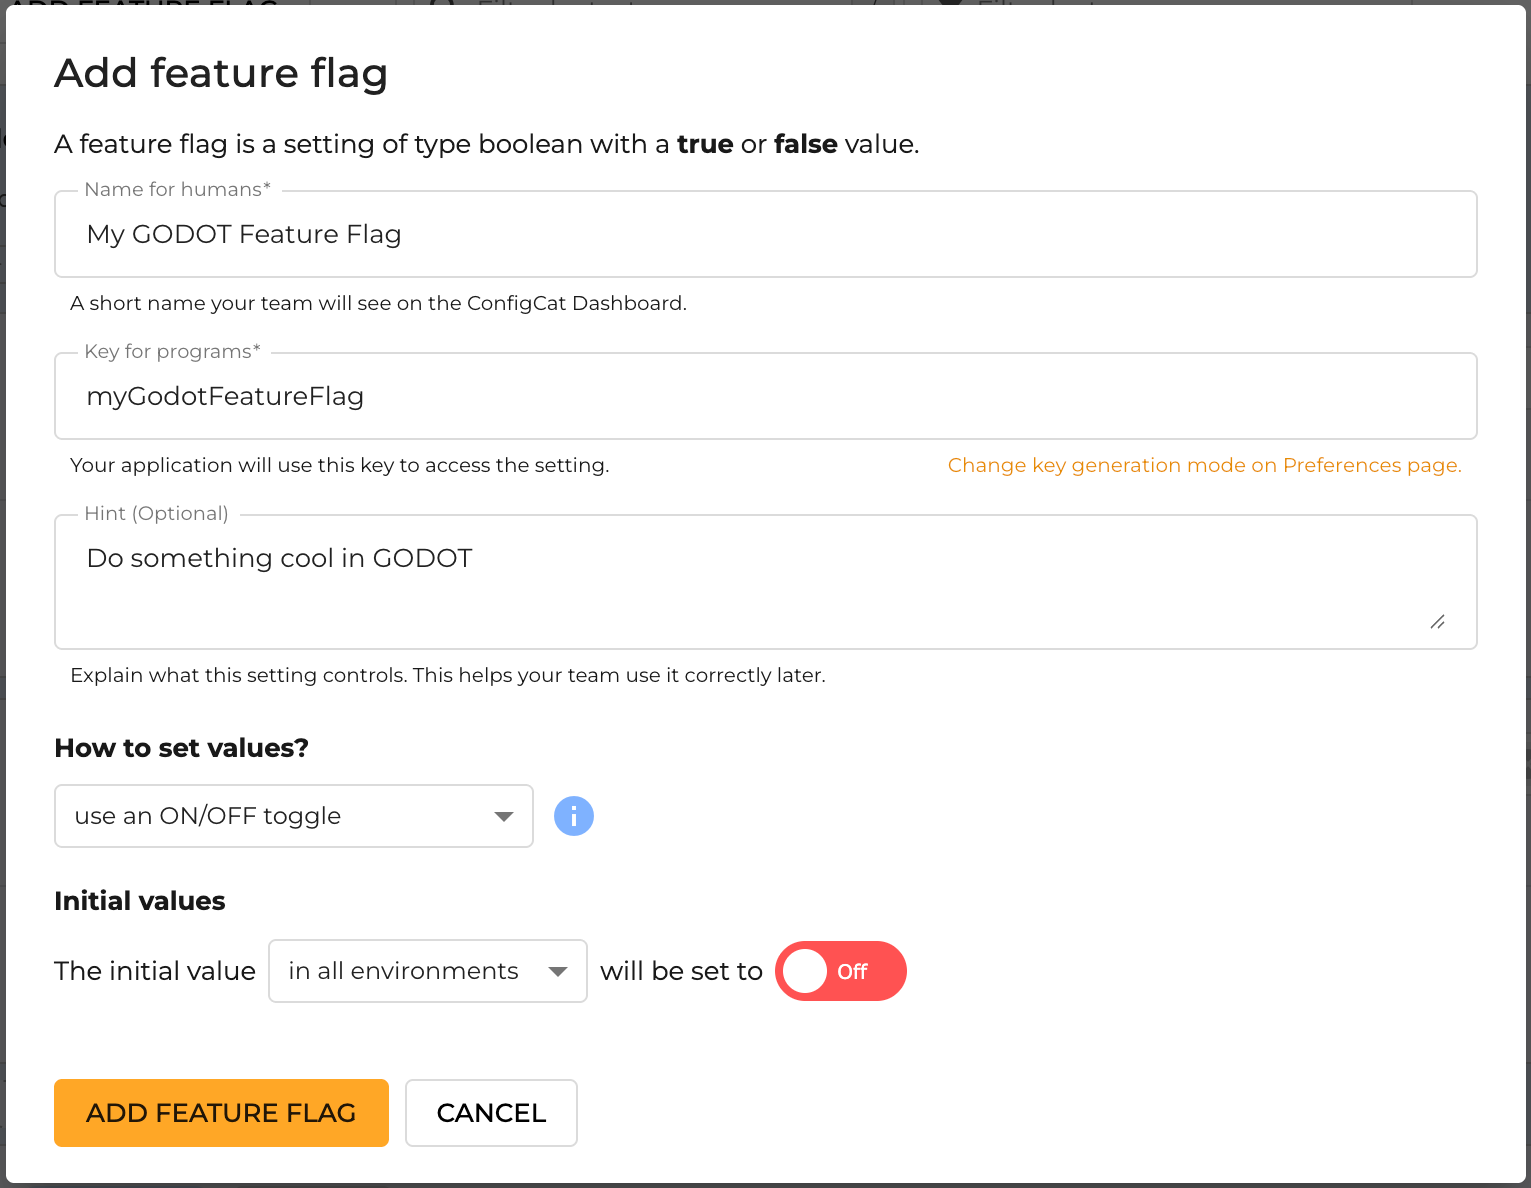
Connect Godot to ConfigCat
To connect the Godot script to ConfigCat and retrieve the flag value, we'll add ConfigCat's .NET SDK to the project.
1. Make sure the .NET 10 SDK required by the sample project is installed.
2. After the installation completes, double-check that dotnet is installed by running this command:
dotnet --info
3. Launch a terminal window in the project folder, and run the following command to install the ConfigCat SDK for .NET:
dotnet add package ConfigCat.Client
4. Open the Sprite2d.cs file, and add the following line at the top:
using ConfigCat.Client;
5. Let's create a _Ready() method to execute when the node enters the scene. In the body of the class, add the following code:
using Godot;
using System;
using ConfigCat.Client;

public partial class Sprite2d : Sprite2D
{
  // Initialize the ConfigCat client
  private IConfigCatClient configCatClient = ConfigCatClient.Get("YOUR-CONFIGCAT-SDK-KEY");

  private bool isMyGodotFeatureFlagEnabled;

  public override async void _Ready()
  {
    base._Ready();

    isMyGodotFeatureFlagEnabled = await configCatClient.GetValueAsync("myGodotFeatureFlag", false);

    if (isMyGodotFeatureFlagEnabled)
    {
      GD.Print("Your feature flag is enabled!");
    }
    else
    {
      GD.Print("Your feature flag is disabled!");
    }
  }
}
Replace YOUR-CONFIGCAT-SDK-KEY with the SDK key from your ConfigCat Dashboard. The second argument passed to GetValueAsync() is the fallback value. If the flag cannot be evaluated, the SDK returns false, keeping the feature disabled.
Godot lifecycle methods such as _Ready() normally return void. Marking _Ready() as async void is acceptable for this small example, but it limits how exceptions can be handled and prevents other code from awaiting the method. In larger projects, consider moving asynchronous initialization into a dedicated service or startup workflow.
ConfigCat also provides snapshots for synchronous, non-blocking flag evaluation after configuration data has been loaded.
You can learn more about it here.
Build and run the project by clicking the "Play" icon button at the top right. You should see the following message logged to the console output in Godot:
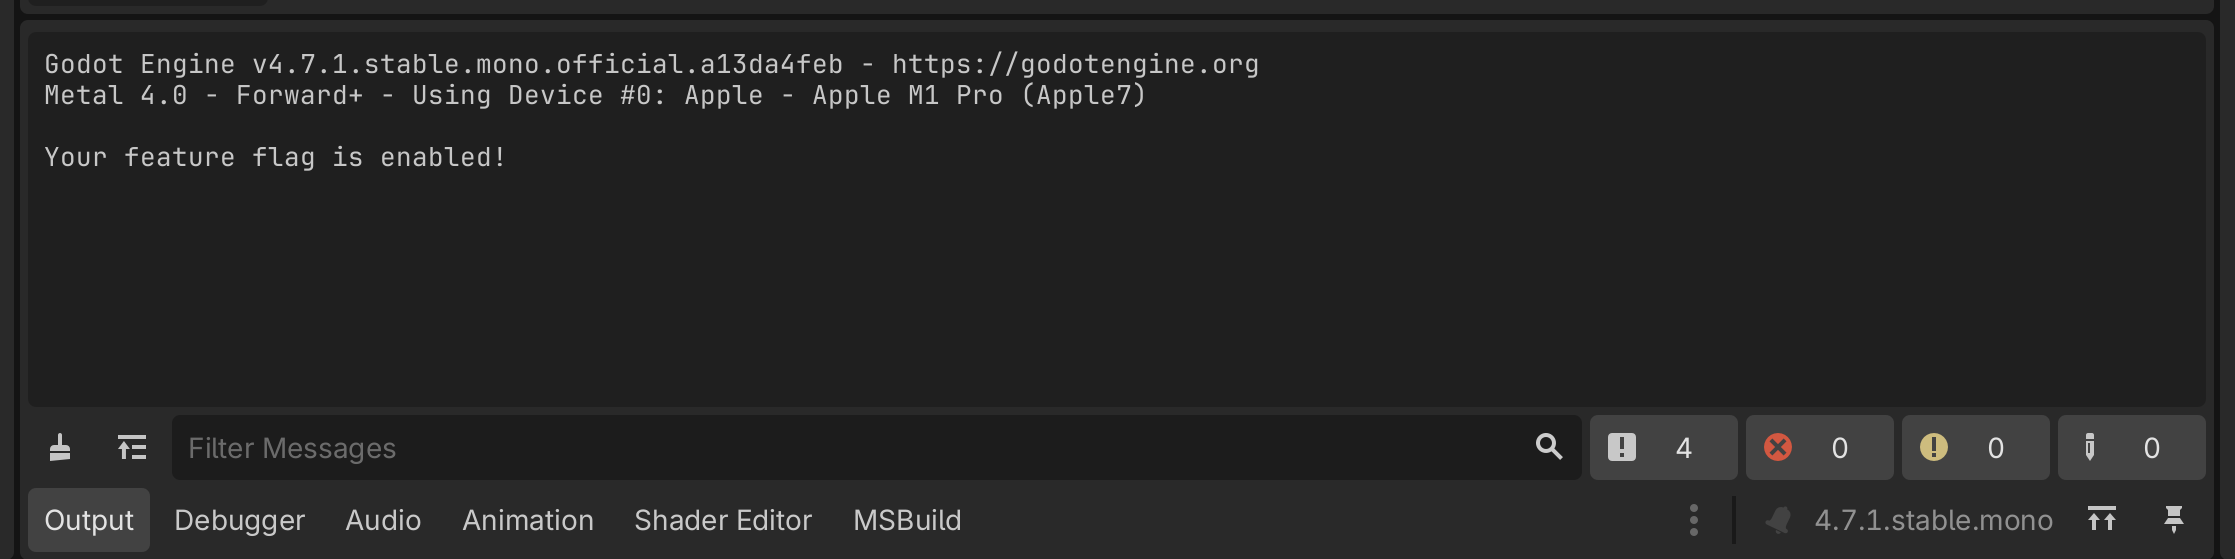
Let's take it a step further and make the Sprite2D node rotate when the feature flag is enabled. To do this:
6. Select the 2D tab at the top in the Godot project window, then drag the sprite icon from the res:// folder on the left onto the canvas:
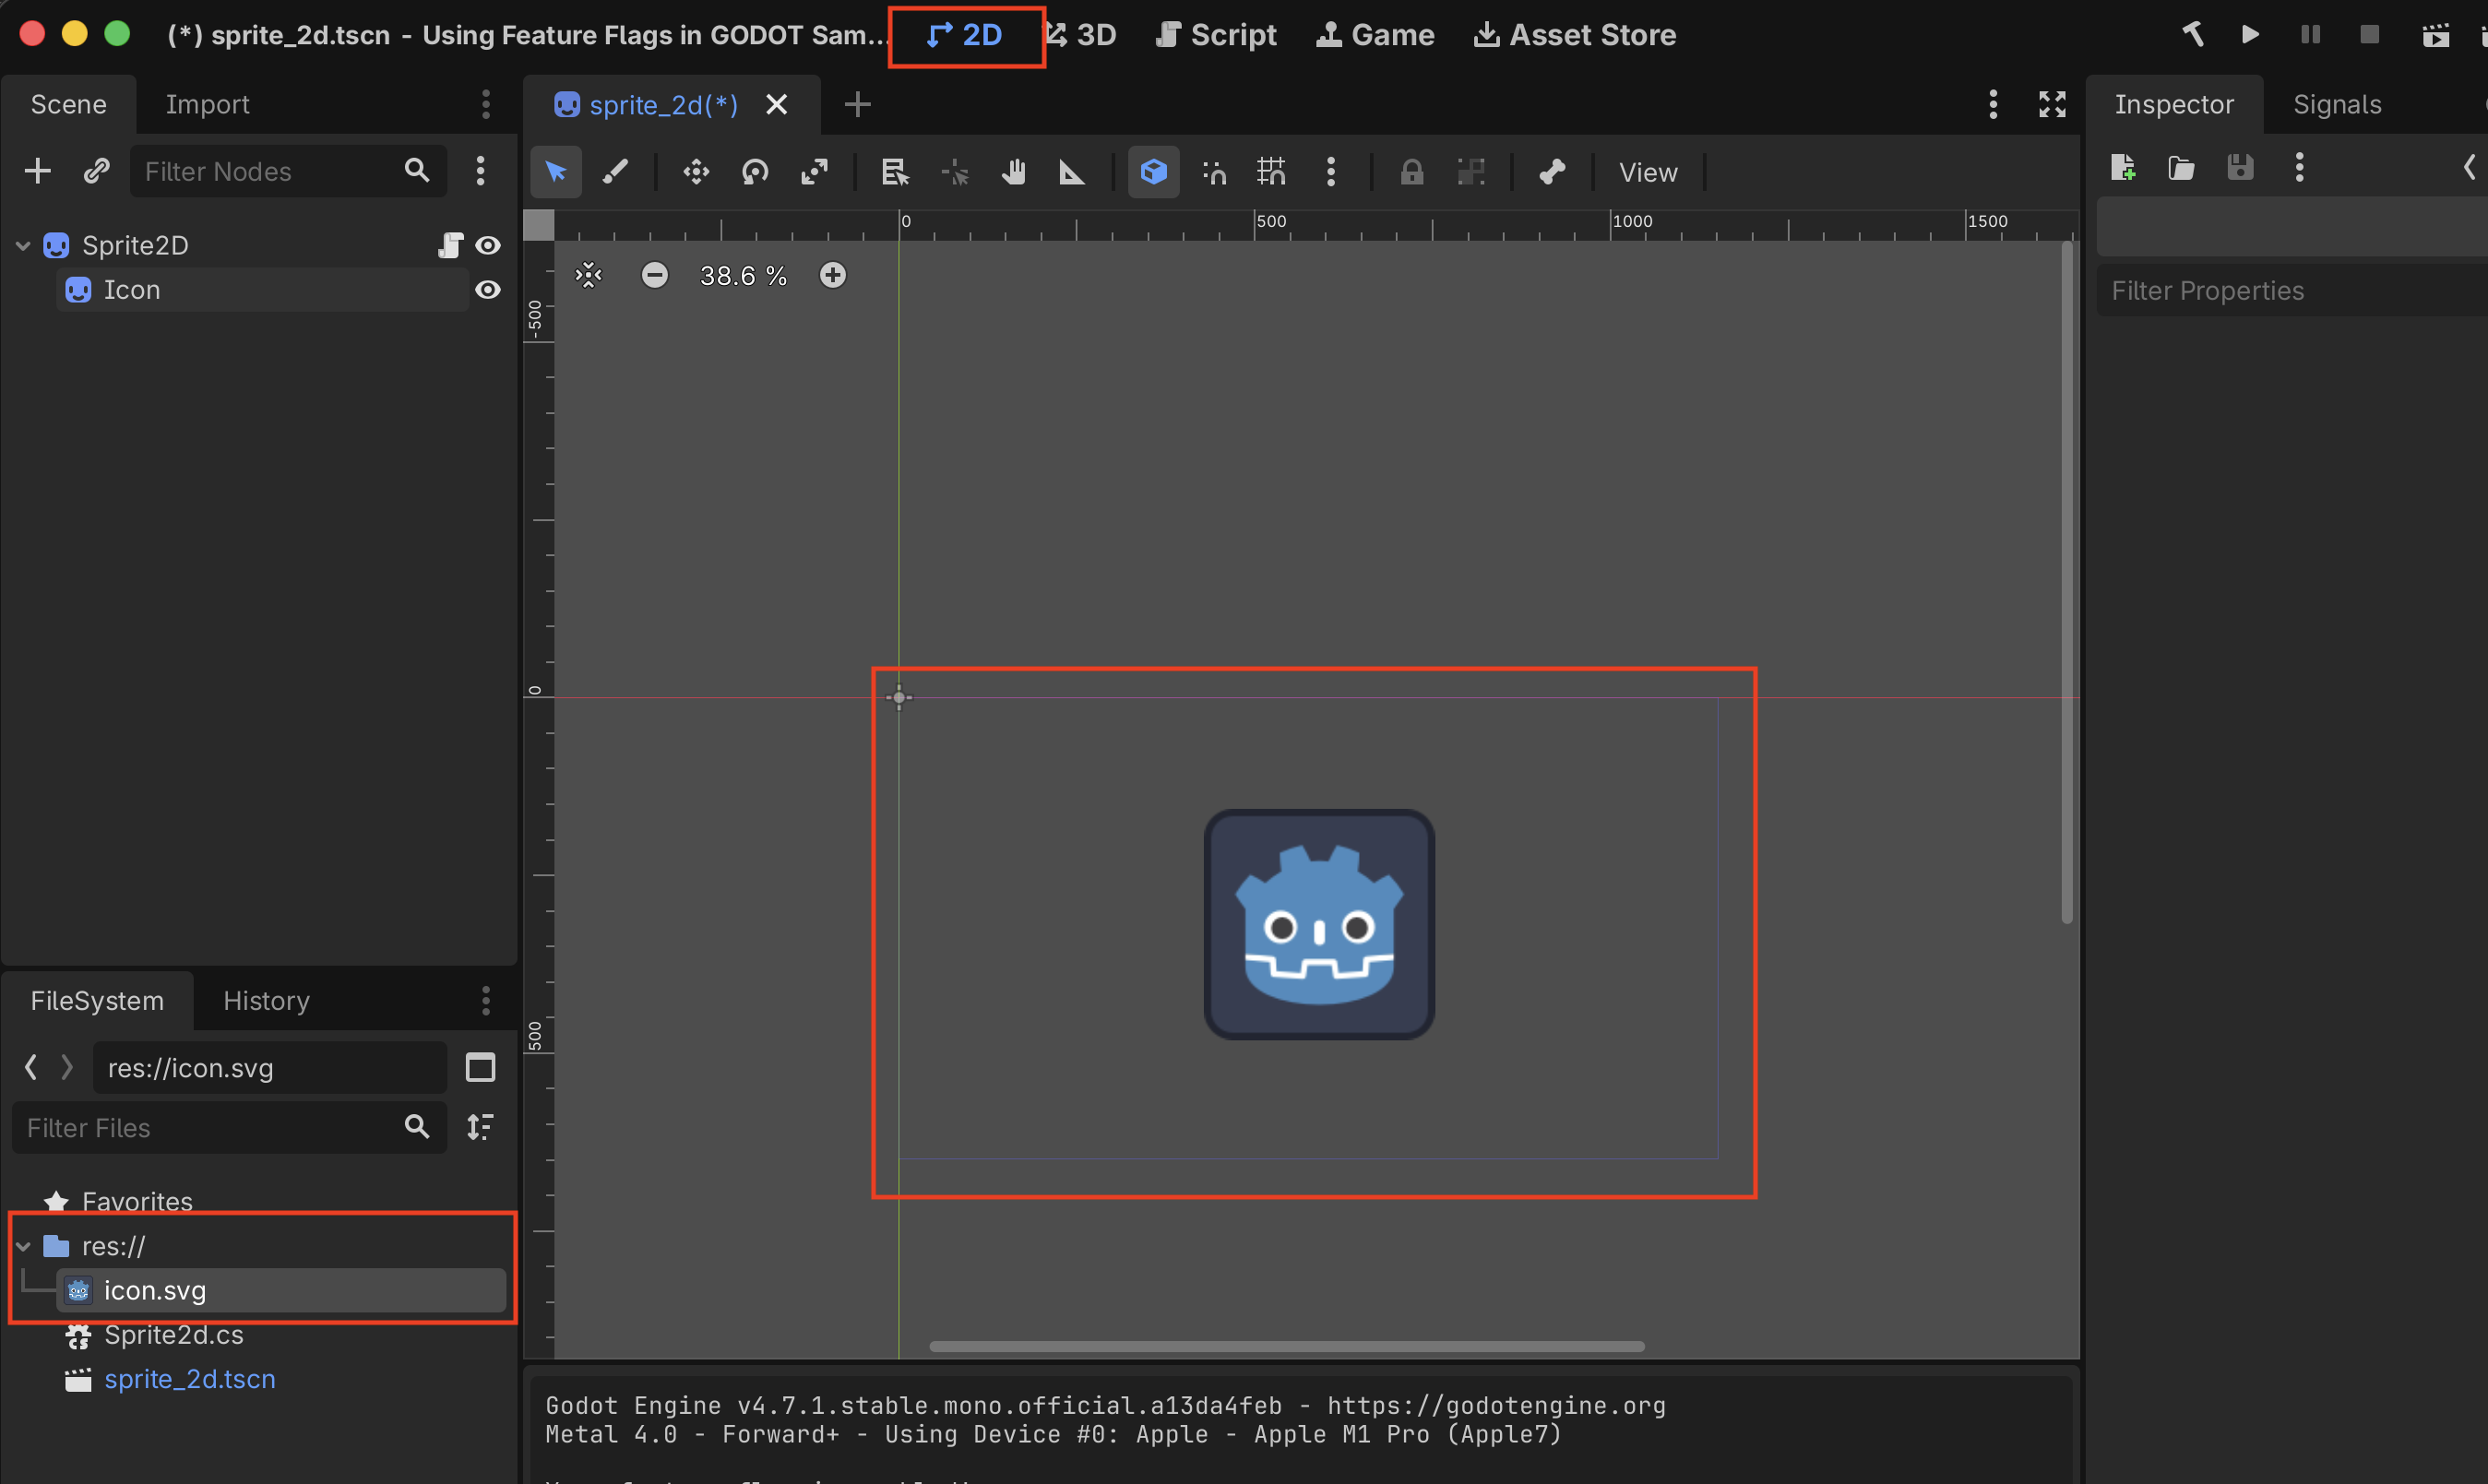
7. Modify the Sprite2d class as follows:
public partial class Sprite2d : Sprite2D
{
  // ...

  private bool isMyGodotFeatureFlagEnabled;
  private float angularSpeed = Mathf.Pi;

  public override async void _Ready()
  {
    base._Ready();

    isMyGodotFeatureFlagEnabled = await configCatClient.GetValueAsync("myGodotFeatureFlag", false);

    if (isMyGodotFeatureFlagEnabled)
    {
      GD.Print("Your feature flag is enabled!");
    }
    else
    {
      GD.Print("Your feature flag is disabled!");
    }
  }

  public override void _Process(double delta)
  {
    if (isMyGodotFeatureFlagEnabled)
    {
      Rotation += angularSpeed * (float) delta;
    }
  }
}
You can view the complete Sprite2d.cs file here.
8. Run the project with the feature flag enabled. The sprite should rotate.
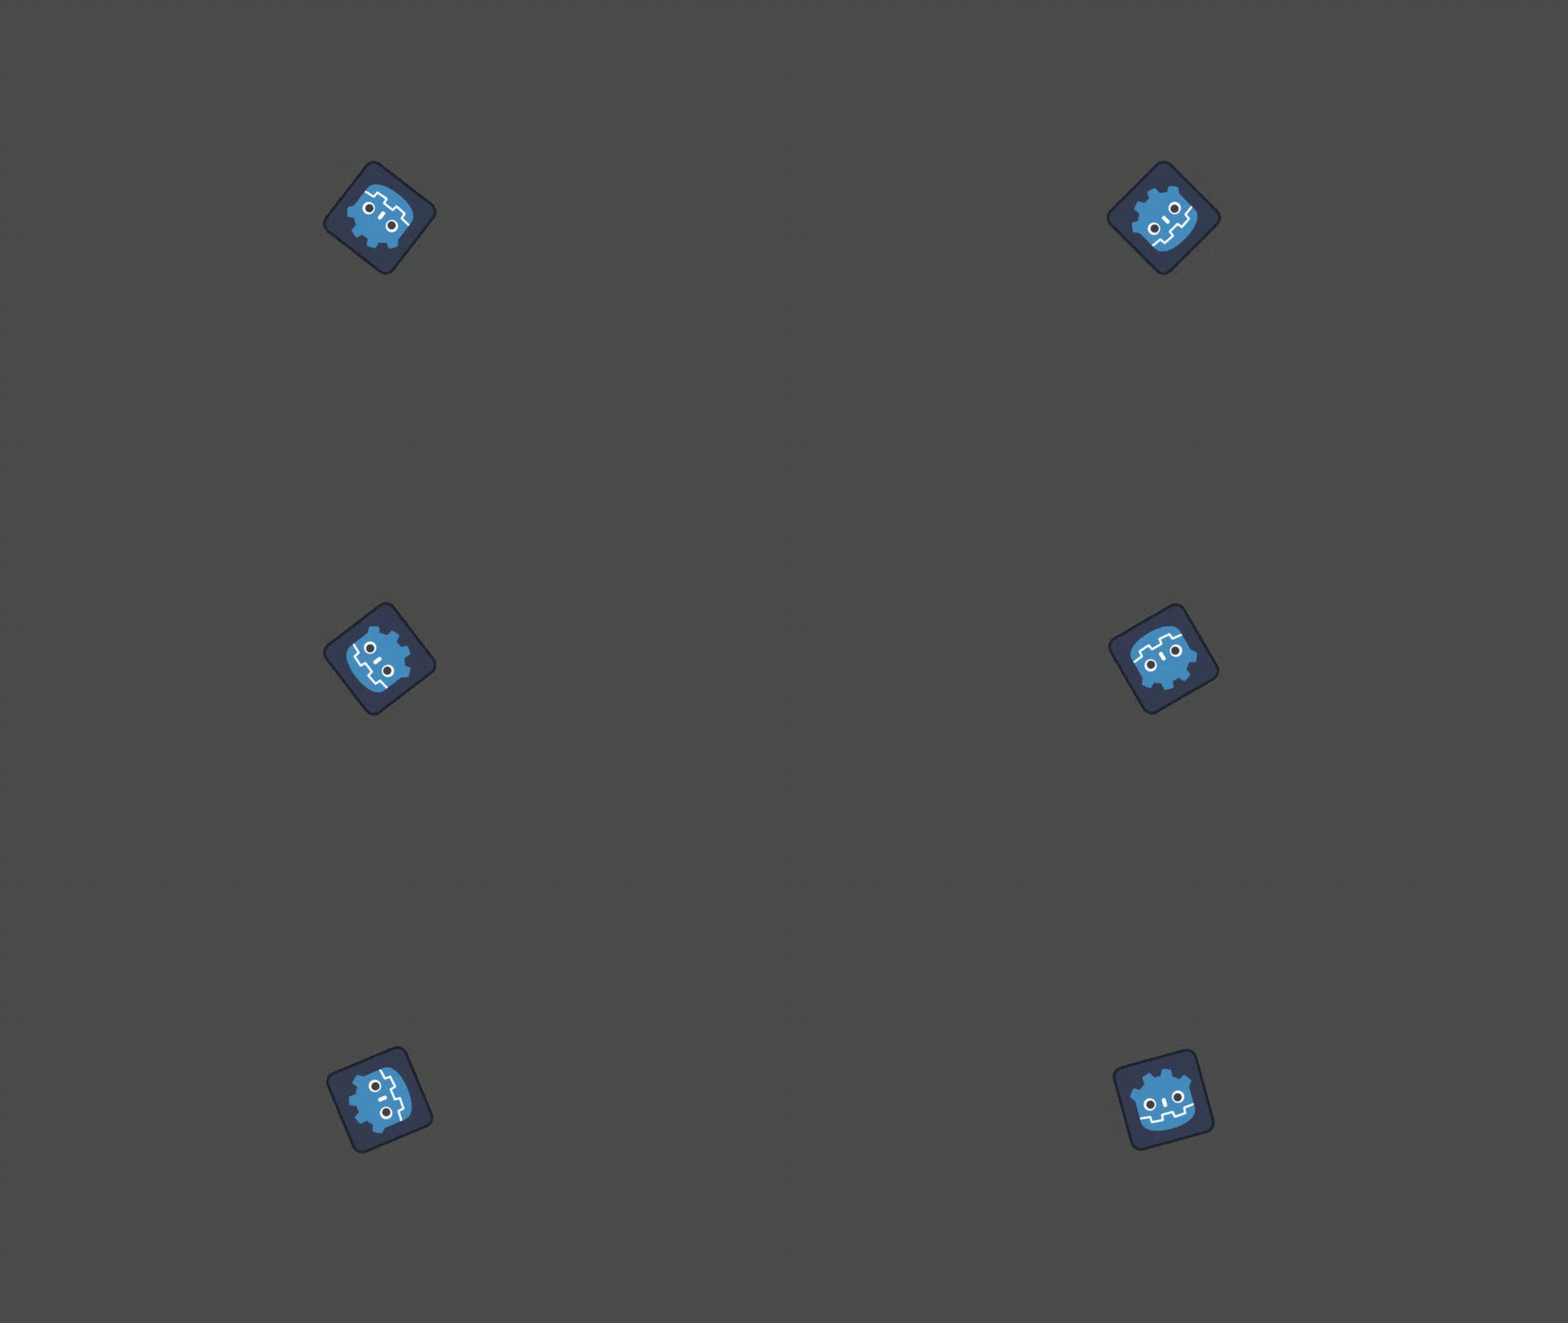
To test the other state, disable the flag in ConfigCat, reload the scene, and run the project again. The sprite should remain still.
Production Considerations
This example creates the ConfigCat client directly inside the node to keep the tutorial simple. In a larger Godot project, create one shared client and reuse it rather than initializing a separate client for every node.
A shared service, autoload singleton, or dependency-injected component can make the client available throughout the game. It also gives you one place to configure polling behavior, logging, error handling, and application shutdown.
When the application no longer needs the client, dispose of it so that the SDK can release its resources cleanly. For example, a shared service can call Dispose() when the game exits. Avoid disposing of a shared client from an individual scene or node that does not own it.
You should also decide when updated flag values should take effect. Suitable refresh points could include game startup, player login, the main menu, or the beginning of a new level. Applying changes at predictable points can prevent gameplay behavior from changing unexpectedly during an active session.
This is particularly important for features that affect game state, saved data, networking, matchmaking, or competitive balance. A flag that changes safely in a menu may cause inconsistent behavior if it changes halfway through a level or multiplayer session.
Feature flags should also be treated as temporary operational controls rather than permanent branches in the codebase. Once a rollout is complete and the old behavior is no longer needed, remove the flag and the inactive code path.
Control Game Features Remotely with ConfigCat
You've now connected a Godot C# project to ConfigCat and used a Boolean feature flag to control whether a sprite rotates. Although the example is simple, the same approach can be used to manage larger game features, including seasonal content, experimental mechanics, interface changes, gradual rollouts, and emergency kill switches.
You can review the complete implementation in the sample repository here. Use it as a reference while following the tutorial or as a starting point for adding feature flags to your own Godot project.
ConfigCat also supports many other frameworks and languages. Check out the entire list of supported SDKs to find an SDK for your technology stack.
Create a free ConfigCat account, add your first feature flag, and start controlling your Godot features remotely.
For more ConfigCat tutorials and product updates, follow ConfigCat on X, Facebook, LinkedIn, GitHub, and the News & Product Updates page.