Using Feature Flags in a React Application


In this tutorial, you'll learn how to use feature flags in React with the ConfigCat React SDK. We'll build a small car-racing app where a feature flag controls whether the race starts, making it easy to see how a remote feature flag change can affect the UI without a new deployment.
What Are Feature Flags?
A feature flag is a switch that allows specific features in an application to be turned on or off via a remote interface without requiring a new deployment.
Feature flags are useful in many scenarios, such as gradually releasing new features, targeting specific users and groups, running A/B tests to compare different experiences, and more.
Creating a Feature Flag
-
Log in to your ConfigCat account, or sign up for the Forever Free plan here.
-
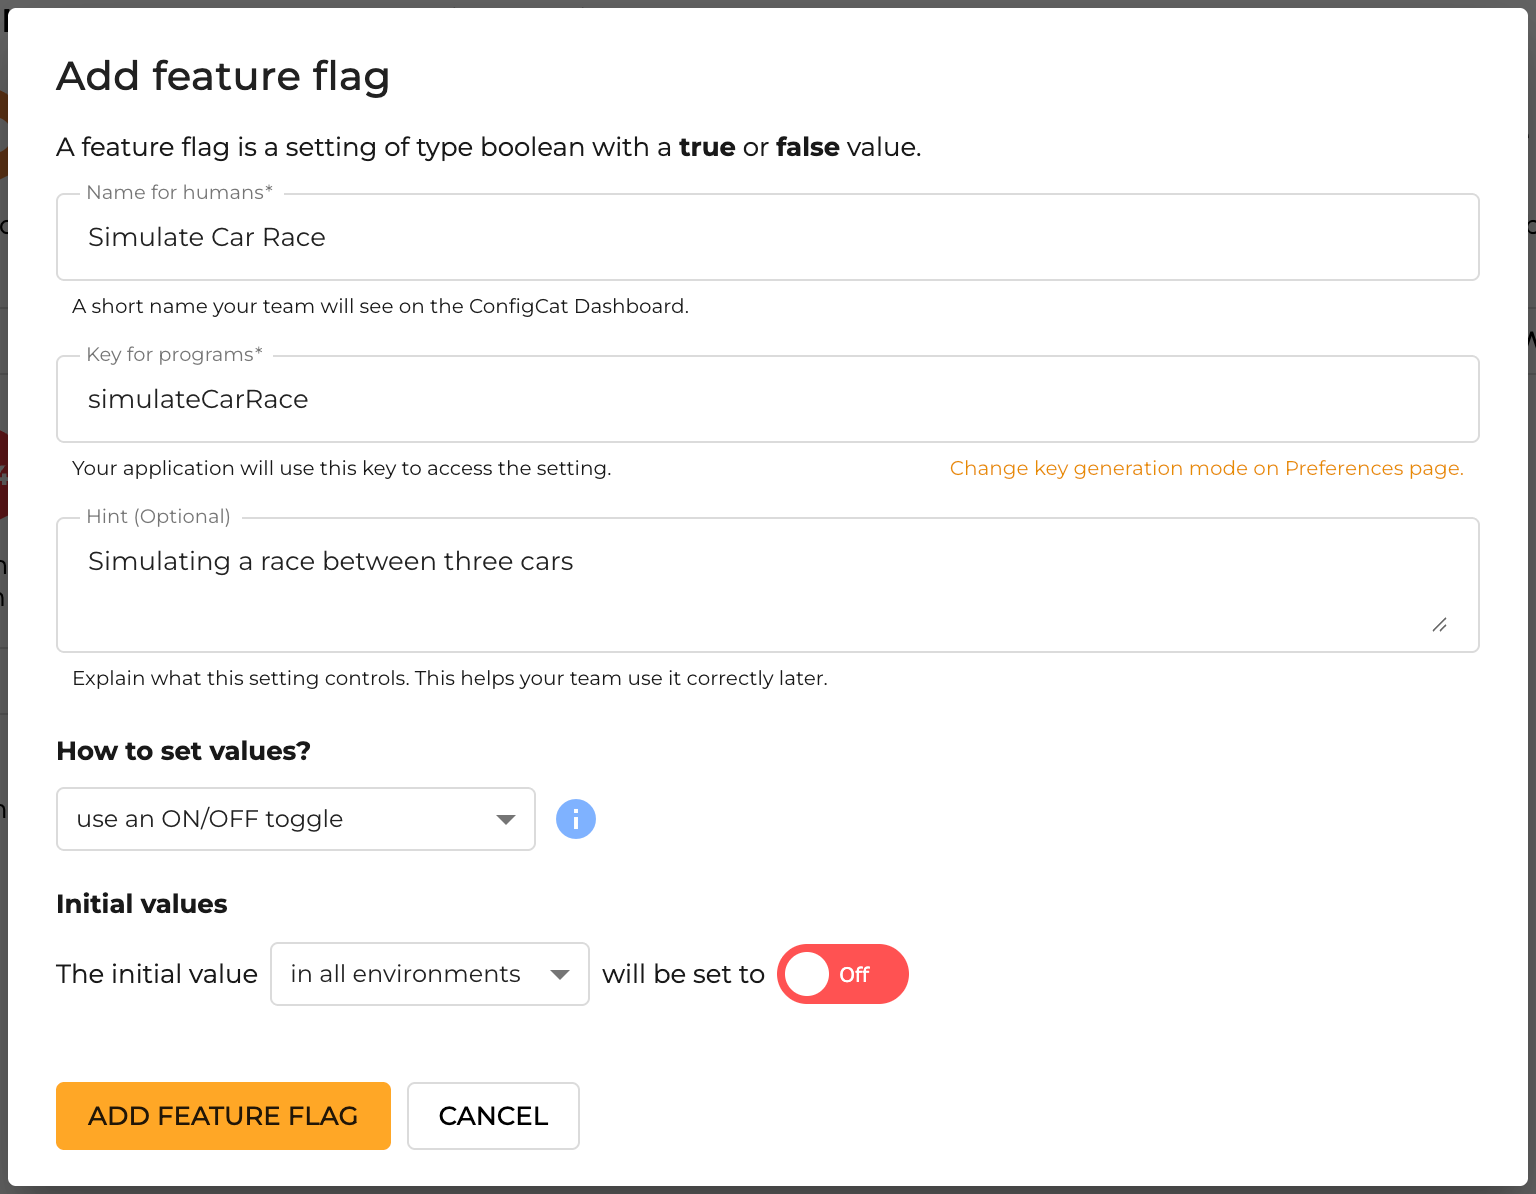
In the ConfigCat Dashboard, click the ADD FEATURE FLAG button.
-
Then create a boolean feature flag with the following details:
How Will the App Use the Feature Flag?
I'll demonstrate how to use a feature flag to enable a race between three cars and see which one reaches the finish line first. The feature flag will work like a stoplight: when the flag is on, the light turns green and the cars race; otherwise, they remain still.
Hooking up ConfigCat to React
Let's start by setting up the React app. The Creating a React App section of the official React documentation recommends using a framework, such as Next.js, for building new React applications.
If you're using Next.js, check out our guide on using ConfigCat feature flags in Next.js.
For this tutorial, however, we'll keep things simple and follow React's Build a React App from Scratch approach using Vite.
To follow along, you can copy or reference the supporting files from the sample app's repository.
- Create a new React app with the Vite build tool, navigate to the generated project folder, and install the configcat-react SDK:
npm create vite@latest feature-flags-in-react-sample -- --template react-ts

cd feature-flags-in-react-sample

npm install

npm install configcat-react
- In the
src/main.tsxfile, wrap the root component of your app with theConfigCatProviderso you can access ConfigCat's feature flags in child components:
import { StrictMode } from 'react'
import { createRoot } from 'react-dom/client'
import './index.css'
import App from './App.tsx'
import { ConfigCatProvider, PollingMode } from 'configcat-react';

createRoot(document.getElementById('root')!).render(
  <StrictMode>
    <ConfigCatProvider
      sdkKey='YOUR-CONFIGCAT-SDK-KEY'
      pollingMode={PollingMode.AutoPoll}
      options={{
        pollIntervalSeconds: 5,
      }}
    >
      <App />
    </ConfigCatProvider>
  </StrictMode>,
)
In the code above, I added the following props to the ConfigCatProvider:
-
sdkKey: This identifies the ConfigCat Config and Environment whose feature flags the application will evaluate. You can find your SDK key here. Since the React SDK runs in the browser, the SDK key can be visible to users. -
pollingMode: This determines how the SDK retrieves the latest feature flag configuration. Here, we're using Auto Polling (PollingMode.AutoPoll), which automatically downloads the latest configuration and stores it in a local cache. You can choose a different polling mode depending on your use case. -
options: This prop can be used to configure the underlying ConfigCat client. You can read more about it here. SpecifyingpollIntervalSecondsconfigures how frequently the SDK downloads the latest feature flag configuration from ConfigCat. Here, we've set the polling interval to five seconds.
- In
src/components/Cars/Cars.tsx, import theuseFeatureFlaghook from theconfigcat-reactpackage to access the feature flag's value and loading state.
// ...
import { useFeatureFlag } from "configcat-react";
import type { TImage } from "../../types/TImage";

export const Cars = () => {
  const { value, loading } = useFeatureFlag("simulateCarRace", false);

  const images: TImage[] = [
    // ...
  ];

  return loading ? (
    <div>Loading...</div>
  ) : (
    <>
      <div className={value ? "cars-container-race" : "cars-container"}>
        {images.map((image) => (
          <Car carImage={image} key={image.link} raceMode={value}></Car>
        ))}
      </div>
      <div className="finish-line"></div>
      <RaceStatus raceMode={value}></RaceStatus>
    </>
  );
};
I've passed the feature flag's value to each Car component through the raceMode prop, along with the corresponding car image. Now, let's get to the fun part where we make the cars race based on the feature flag's value.
Using the Feature Flag Value
Initially, the app shows the three cars aligned on a road, ready to race each other to the finish line.
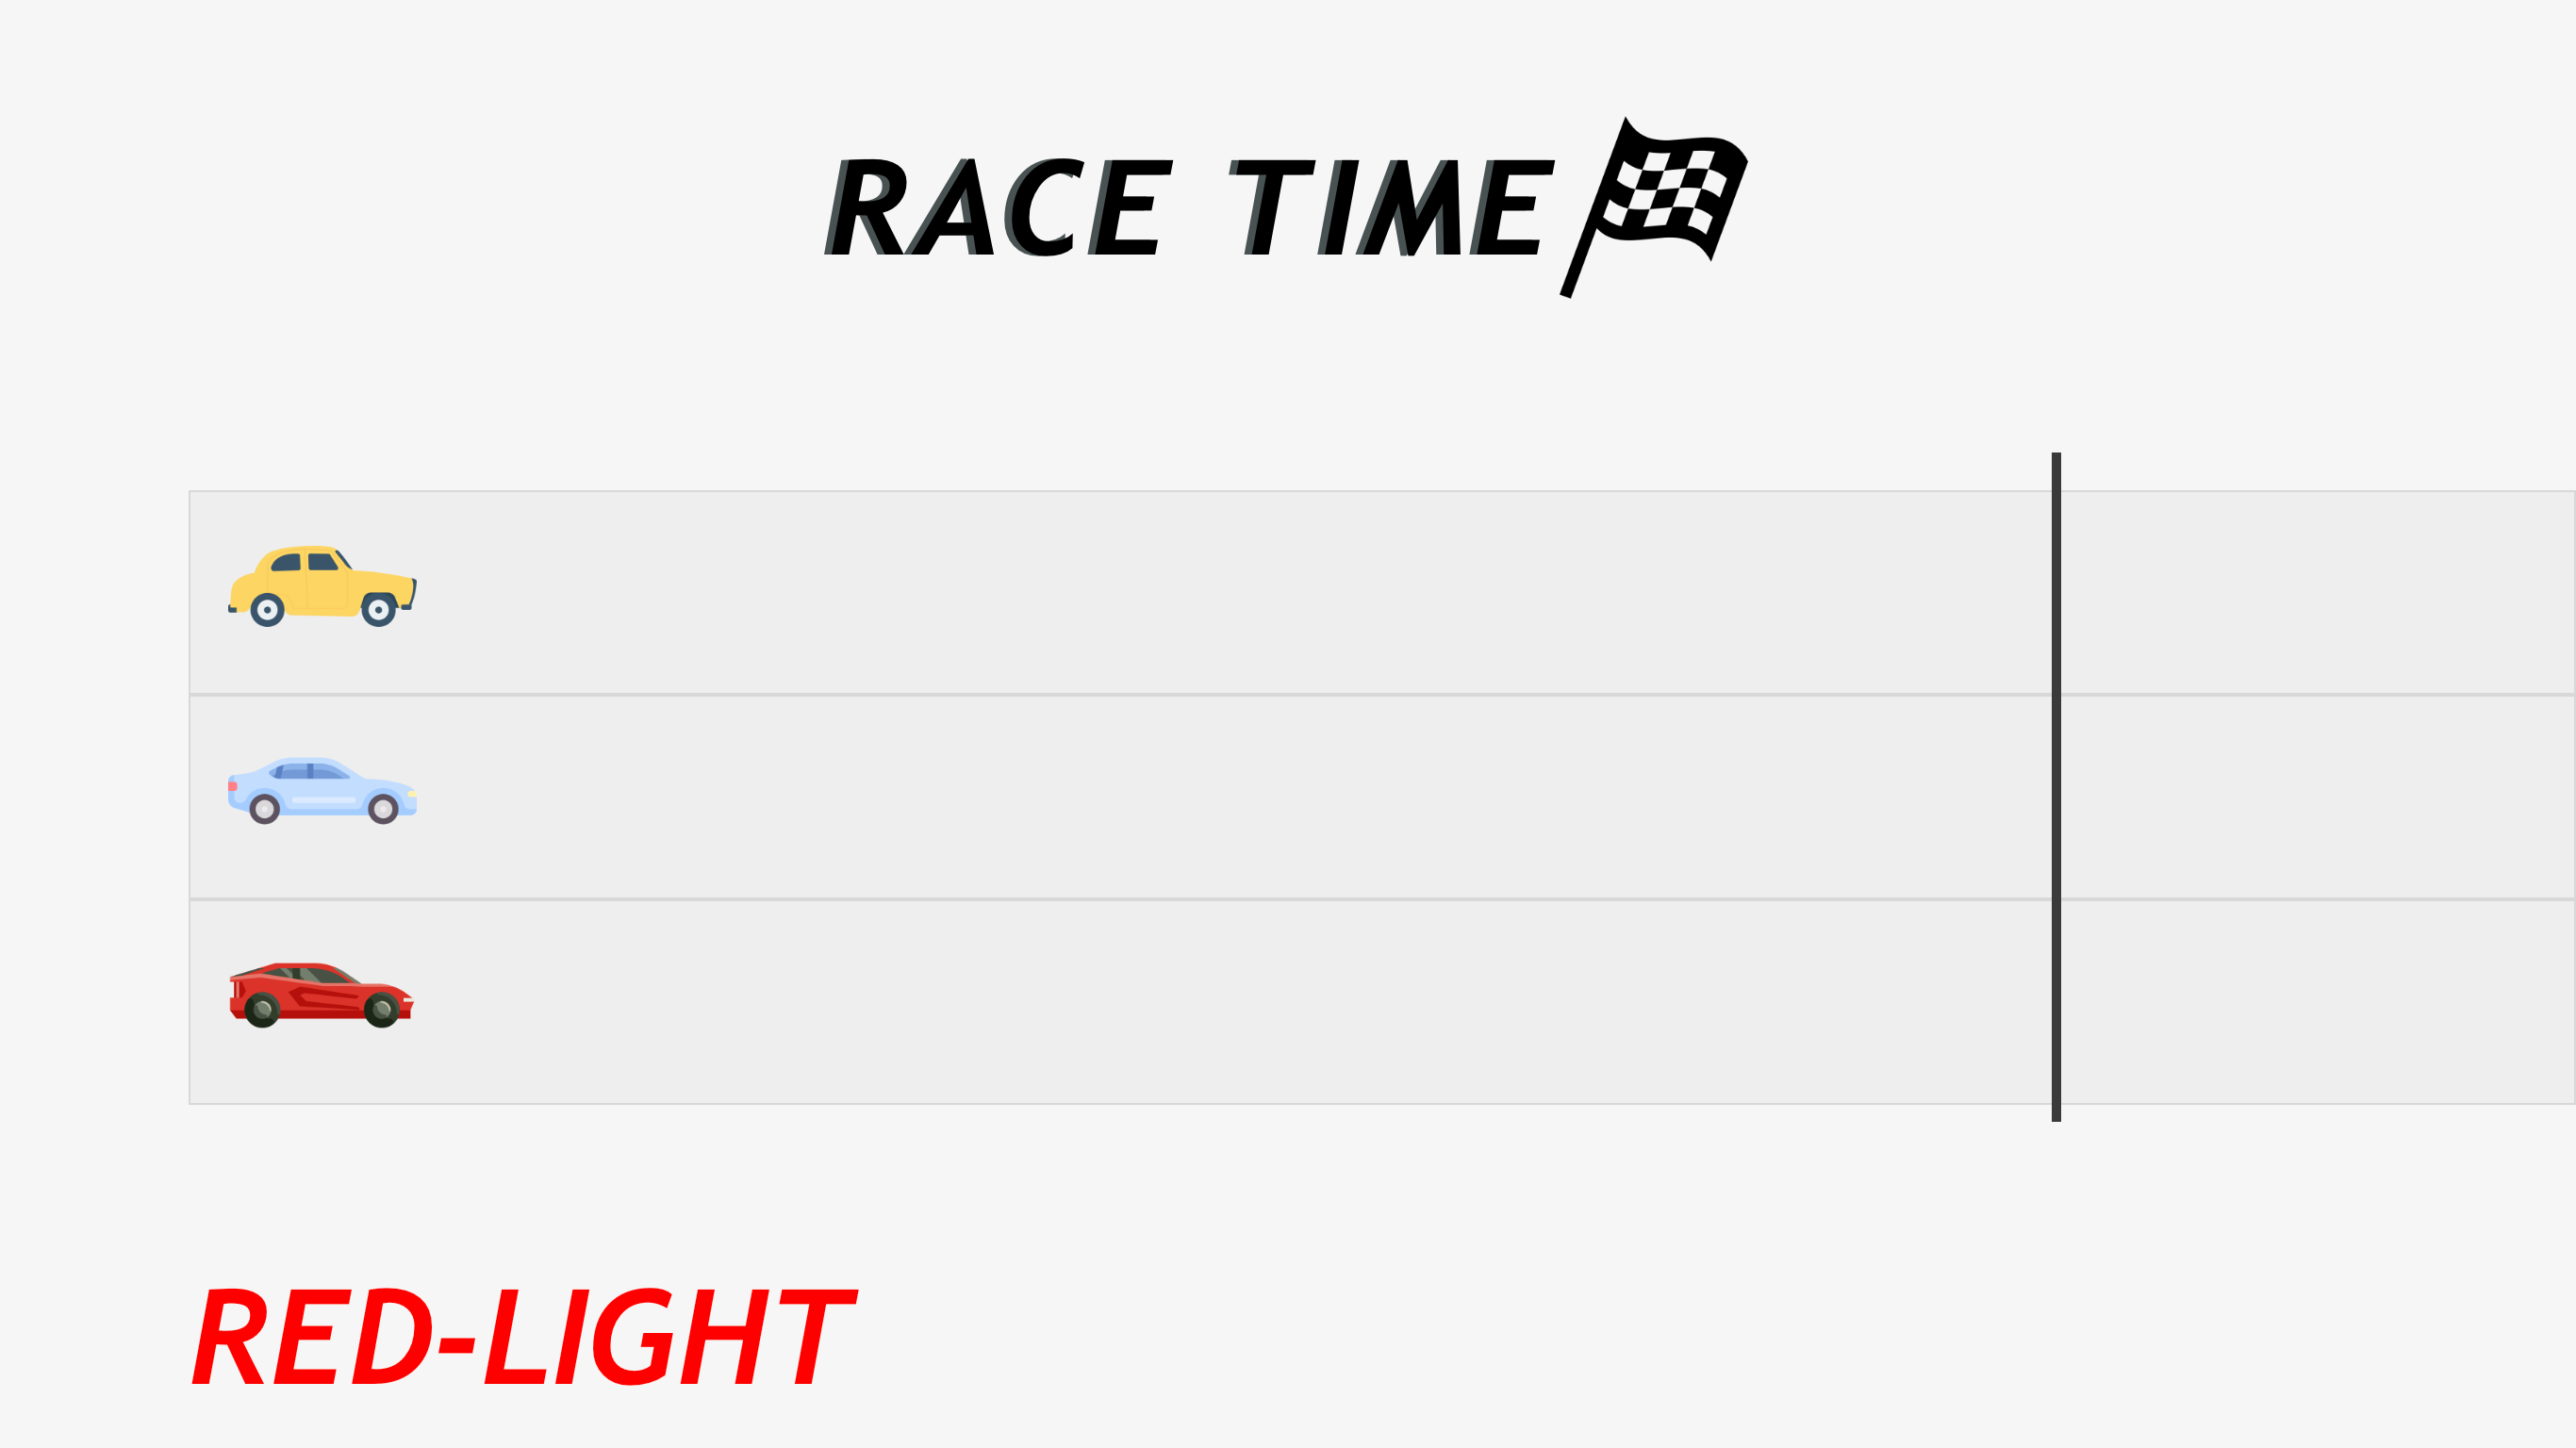
In the Car component, use the raceMode prop to conditionally apply the car's racing animation class when the feature flag is enabled.
export const Car = ({ carImage, raceMode }: CarProps) => {
  const customClass = raceMode ? carImage.class : "";

  return (
    <div className="car-container">
      <img
        src={carImage.link}
        alt={carImage.class}
        className={`car-image ${customClass}`}
        width={100}
        height={100}
      ></img>
    </div>
  );
};
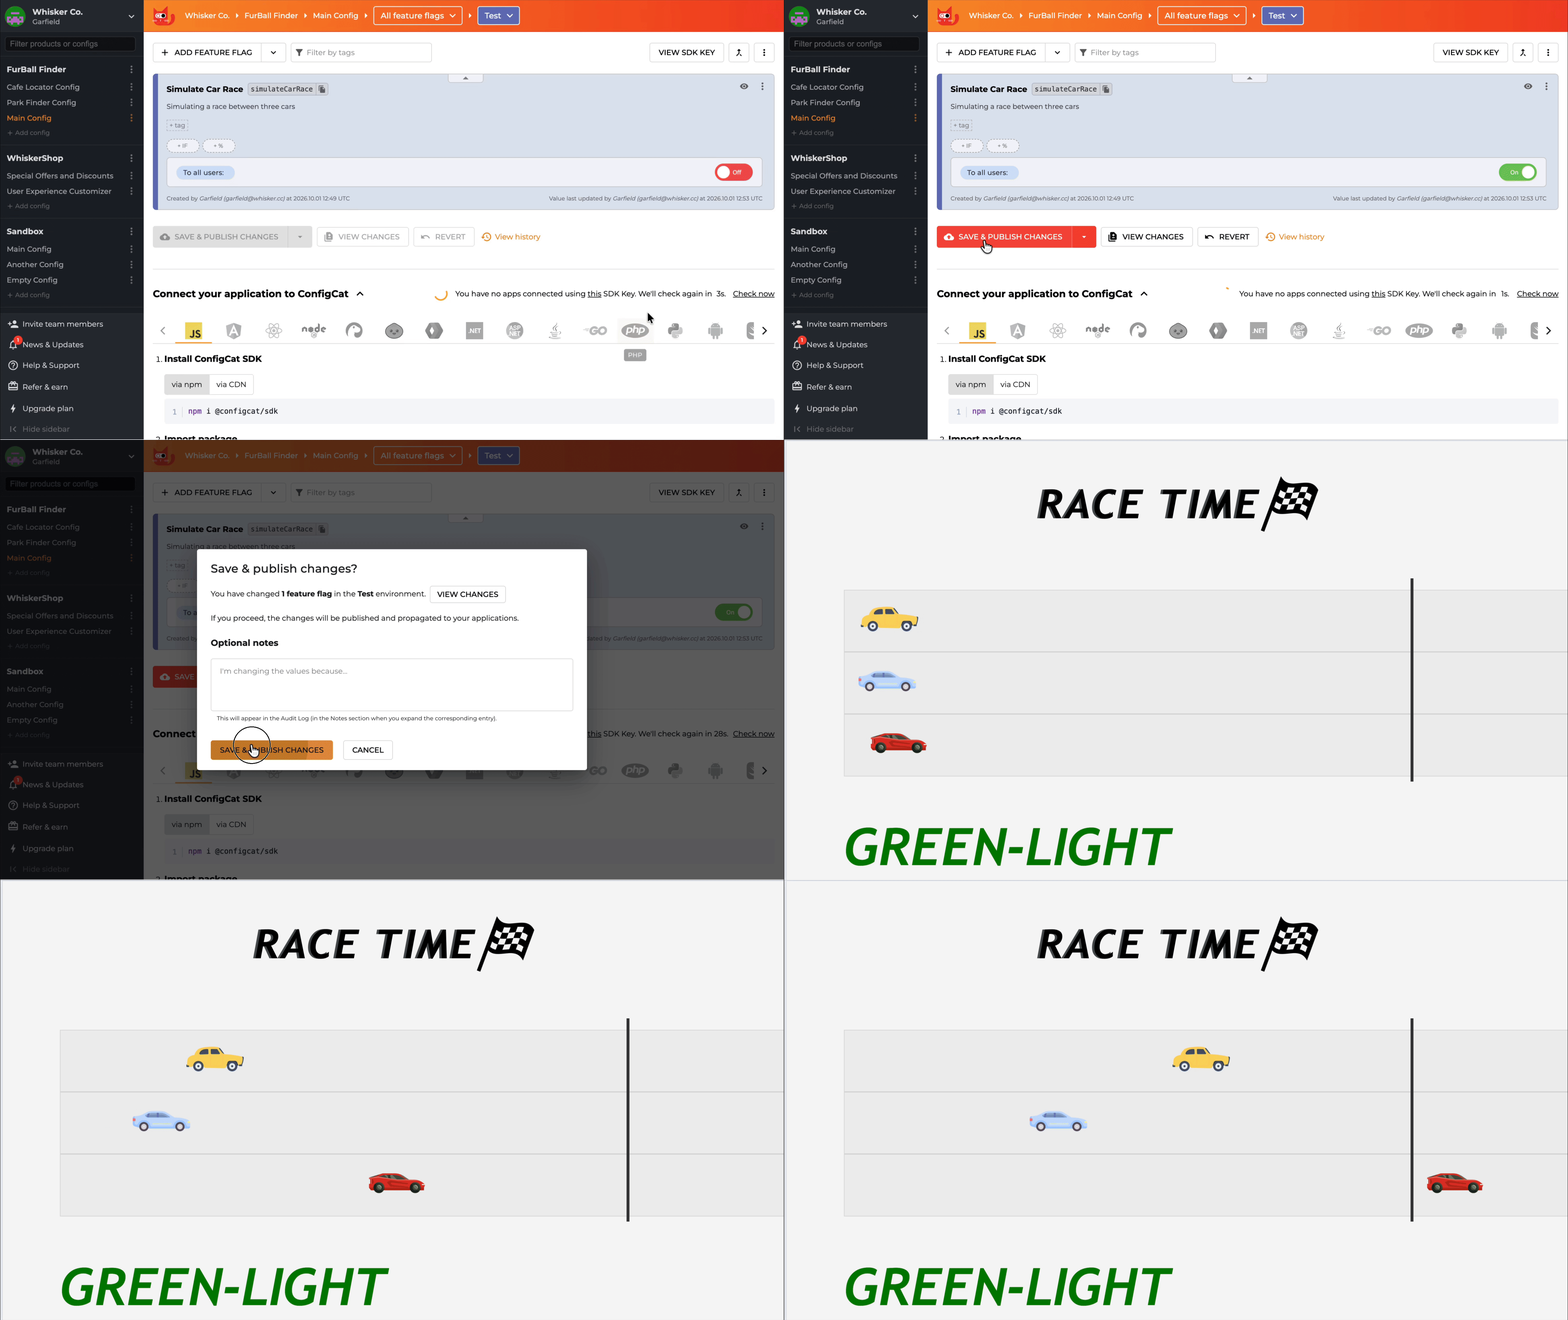
In the ConfigCat Dashboard, I'll switch the feature flag ON. The light turns green, and the cars start racing! I'm betting on the red one.
Summary
As a quick recap, what were the key steps in this demo? First, I installed the ConfigCat React SDK and wrapped the app's root component with the ConfigCatProvider. Next, I accessed the feature flag's value and loading state using the useFeatureFlag hook. Finally, when the flag is switched on, a CSS animation class is applied to each Car component, and the race begins.
Conclusion
Feature flags can be used in many ways across different types of applications. With ConfigCat, developers and non-technical team members can control feature availability from a central interface without requiring a new application deployment.
If hope you found this article useful, and want to implement feature flags in your own React applications, the source code from this demo is available in this public repository on GitHub.
For more awesome content, keep up with ConfigCat on X, Facebook, LinkedIn, GitHub, and the News & Product Updates page.