Using ConfigCat Feature Flags in ASP.NET Core Web API


ASP.NET Core APIs often need to change behavior without requiring a new deployment. You might want to release functionality to a small group of users, make a feature available only to certain subscription tiers, or quickly disable a problematic change.
Feature flags make this possible by letting you change behavior remotely without modifying and redeploying your code.
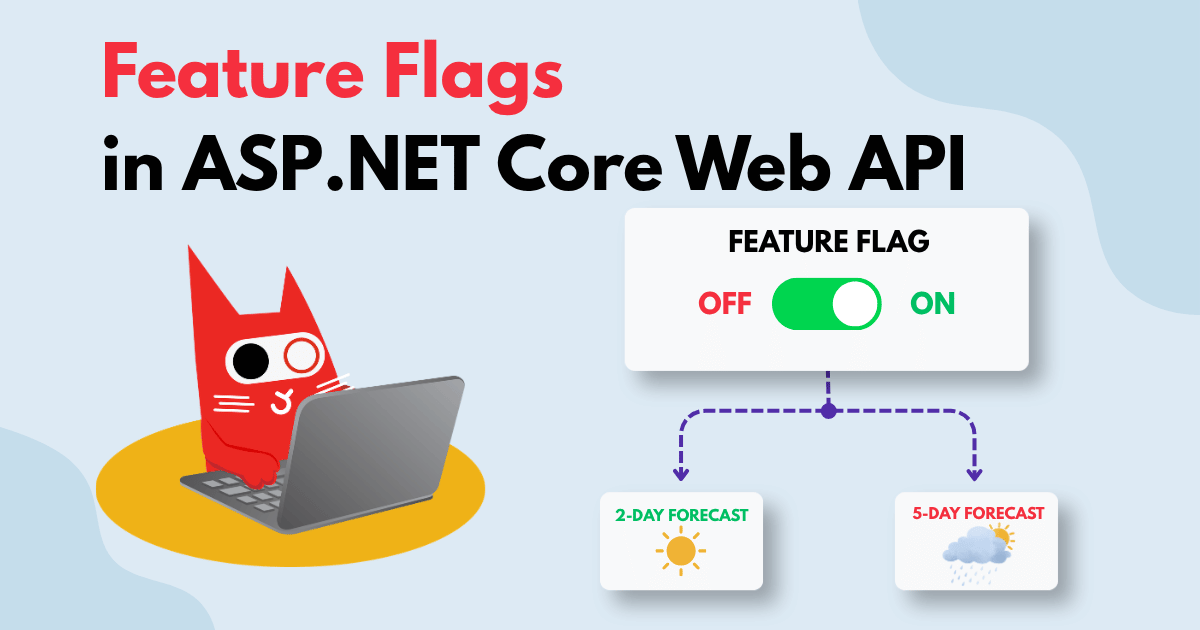
In this tutorial, we'll build a simple ASP.NET Core Web API and use a ConfigCat feature flag to control if it returns a two-day or five-day weather forecast. Then, we'll add a targeting rule so only users on a premium subscription receive the full forecast.
Understanding the Terms
What Is a Web API?
An API is an interface that acts as a software intermediary, allowing a client application to communicate with the underlying system.
A Web API is an API that allows clients and servers to communicate over the internet. Web APIs commonly use HTTP as the communication protocol and exchange data using formats such as JSON (the format our API will use later on).
What Is a Feature Flag?
A feature flag is a boolean toggle that can be turned on or off to control the behavior of an application. A feature flag can have its own set of rules that determine who gets to see and interact with the feature it controls.
What You'll Build
We'll use the default weather forecast example as a simple way to demonstrate feature flag evaluation. When the feature flag is off, the API will return two forecast entries. When it's on, it will return the full five-day forecast. Finally, we'll add a targeting rule so that the five-day forecast is returned only for users whose accountType is premium.
The same pattern can be used in real applications to enable beta functionality, switch between old and new implementations, expose functionality by subscription tier, or disable problematic behavior without redeploying the API.
You can find the source code on GitHub.
Building an ASP.NET Core Web API
Prerequisites
Before starting the tutorial, make sure you have the following:
- Previous experience with C#
- Familiarity with HTTP request methods and JSON
- Visual Studio Code with the C# Dev Kit extension installed
- Microsoft .NET SDK installed
Creating a Flag
-
Log in to your ConfigCat account, or sign up for the Forever Free plan here.
-
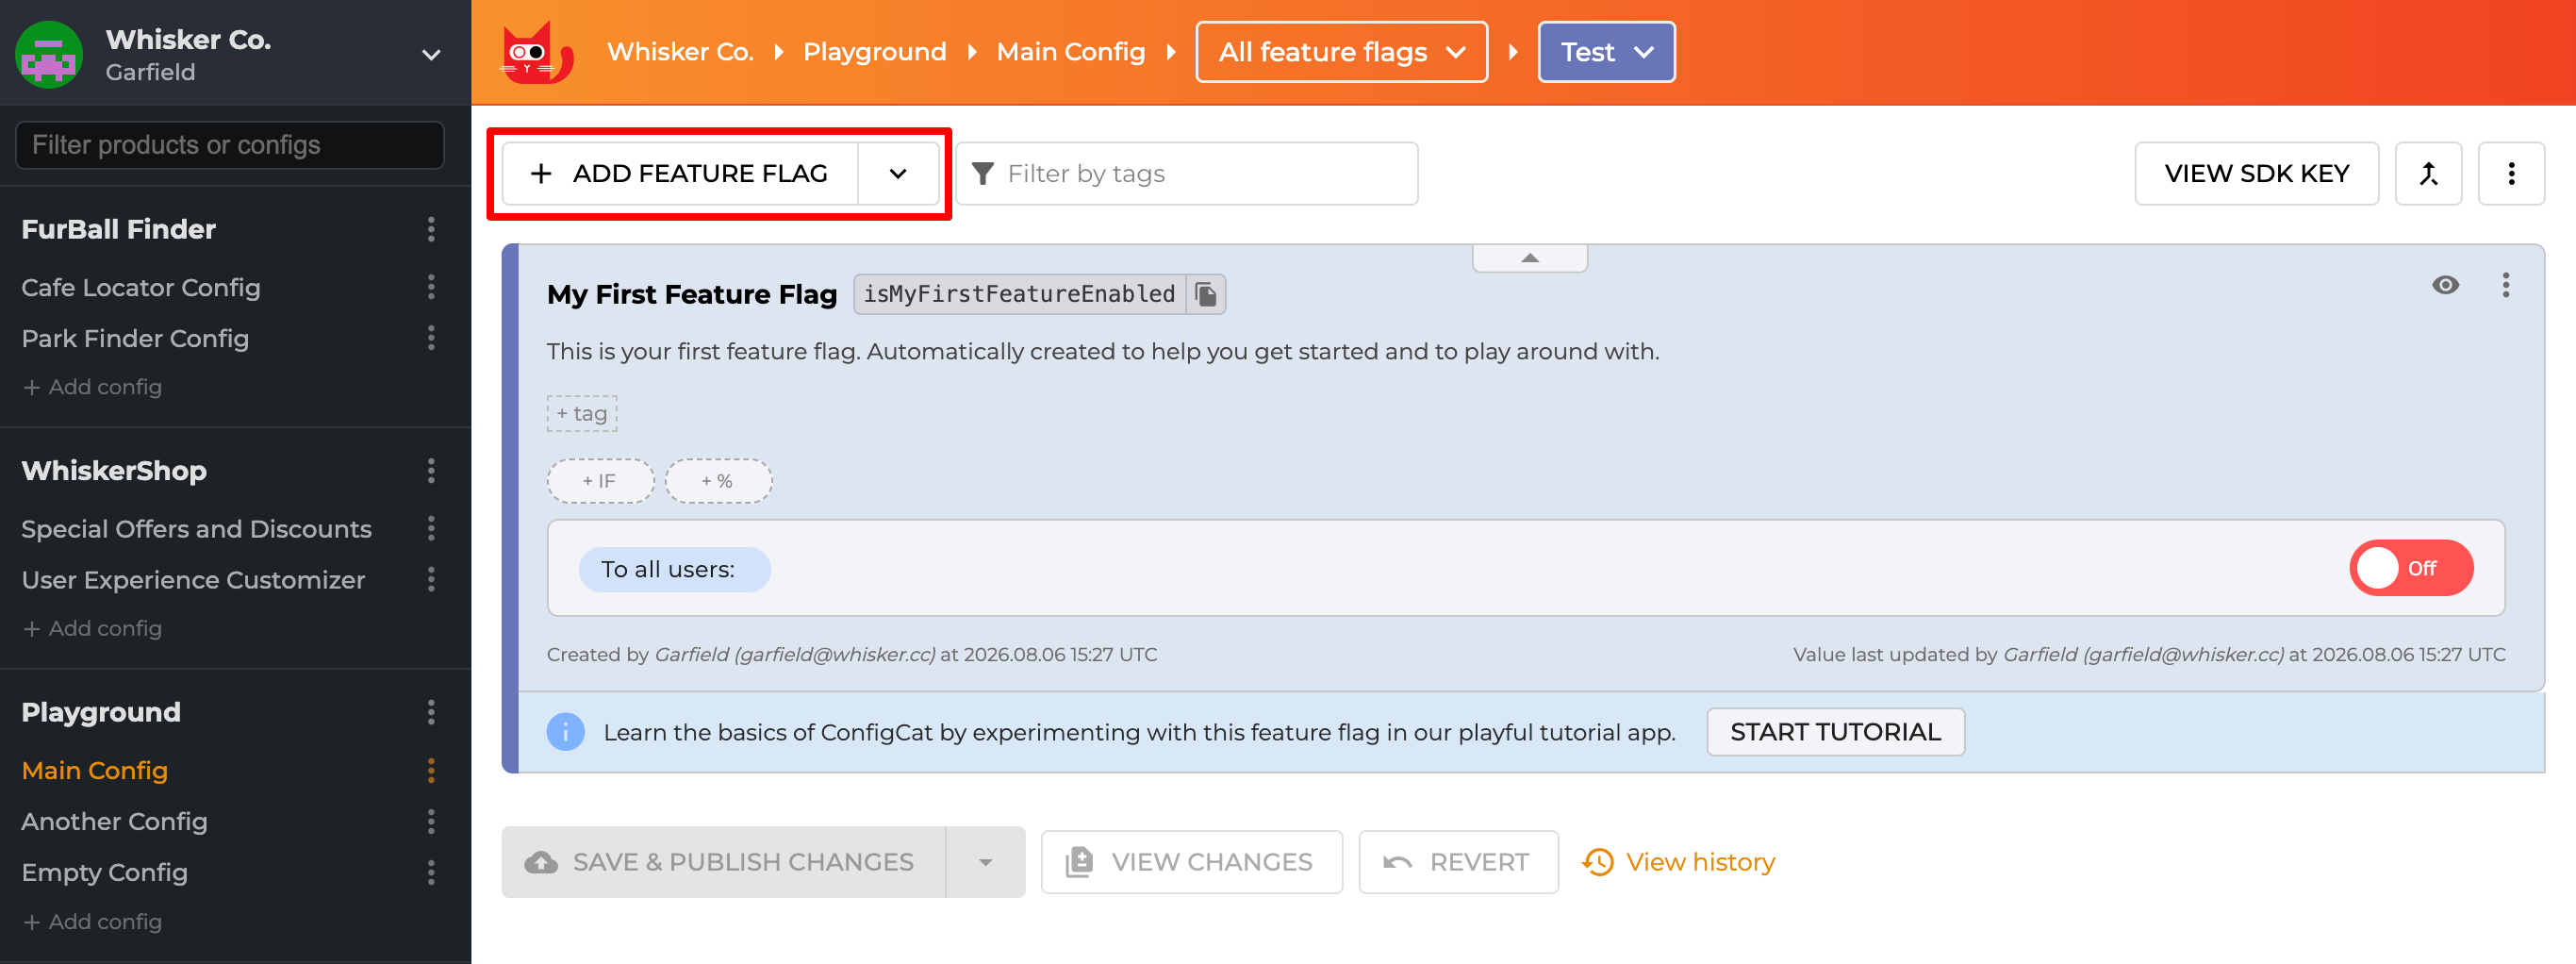
In the ConfigCat Dashboard, click the ADD FEATURE FLAG button.
-
Then create a boolean feature flag with the following details:
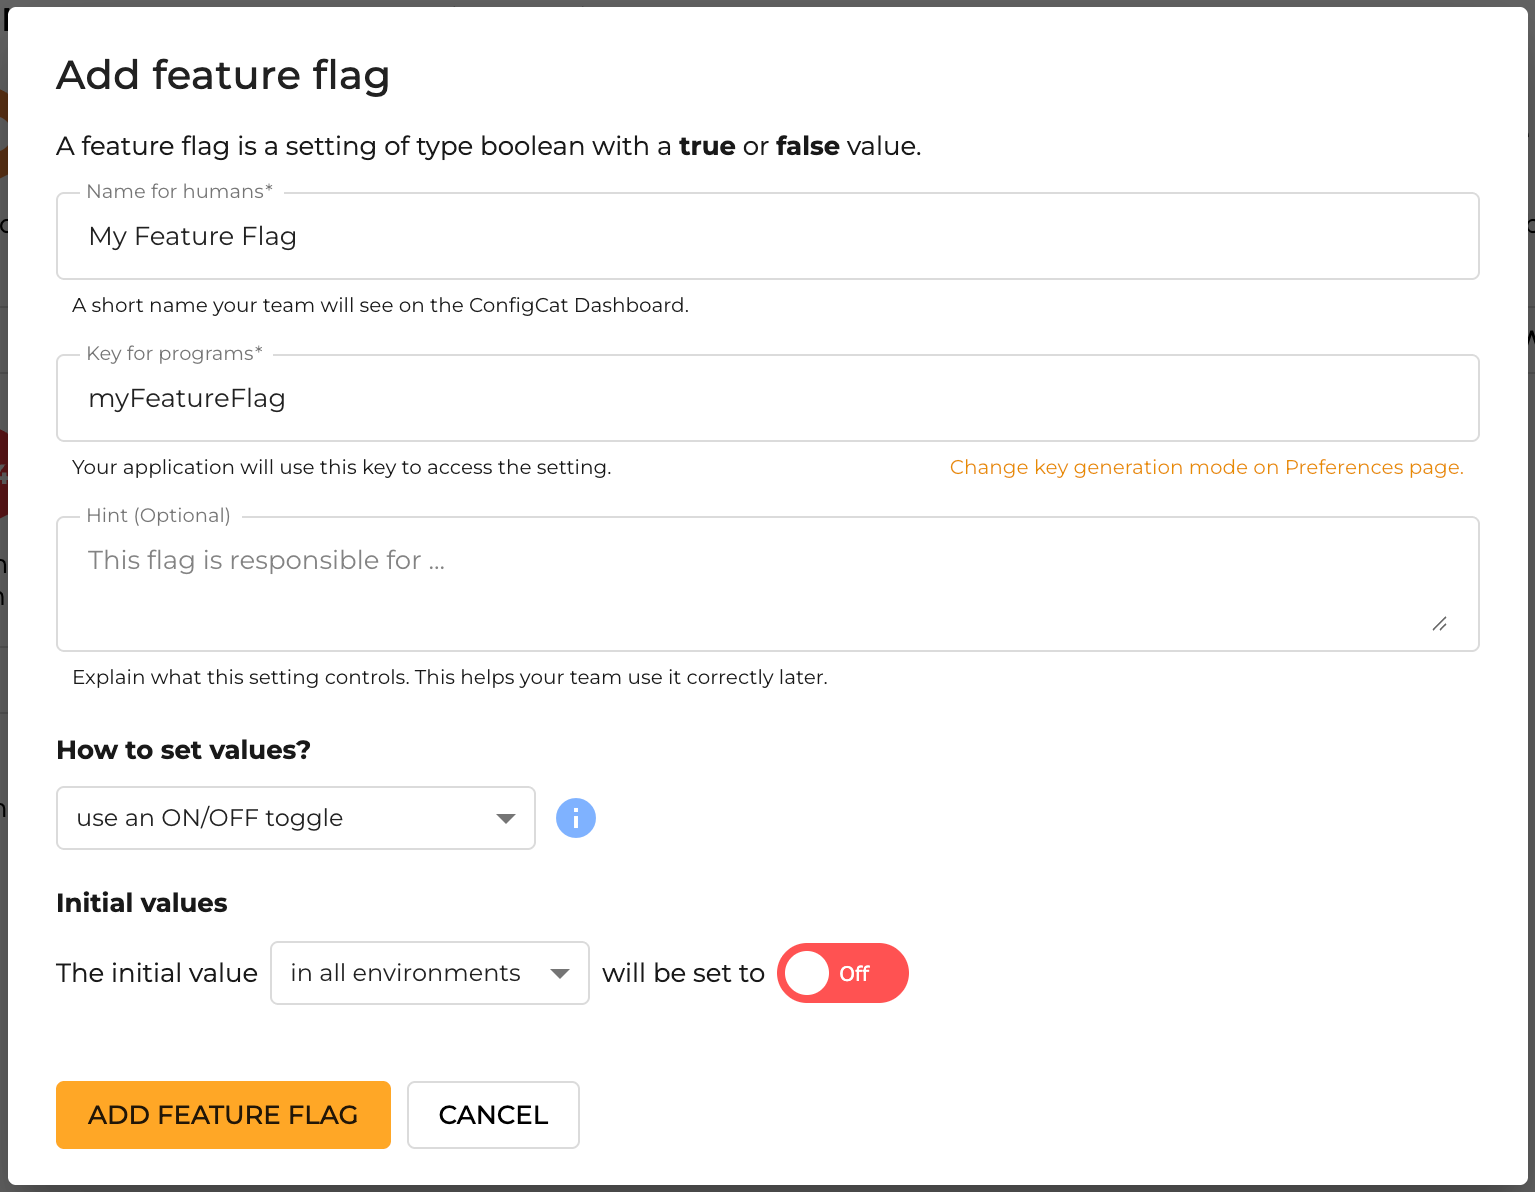
Now that the flag is created, let's set up the project in VS Code and connect to the feature flag.
Creating the Project
-
On your computer, create a new folder for the project, and open it in your code editor. Then use the following command to create a new Web API project.
dotnet new webapi --use-controllers -
Install the local web development certificate for the project.
dotnet dev-certs https --trustinfoThis installs and trusts a local HTTPS development certificate, allowing your browser to open your application over HTTPS without displaying a security warning.
-
Launch the app with the command below, then find and click the link that the host is listening on.
dotnet run --launch-profile https -
The browser will display a default 404 not-found page. Append
/weatherforecastto the URL and you should see the following: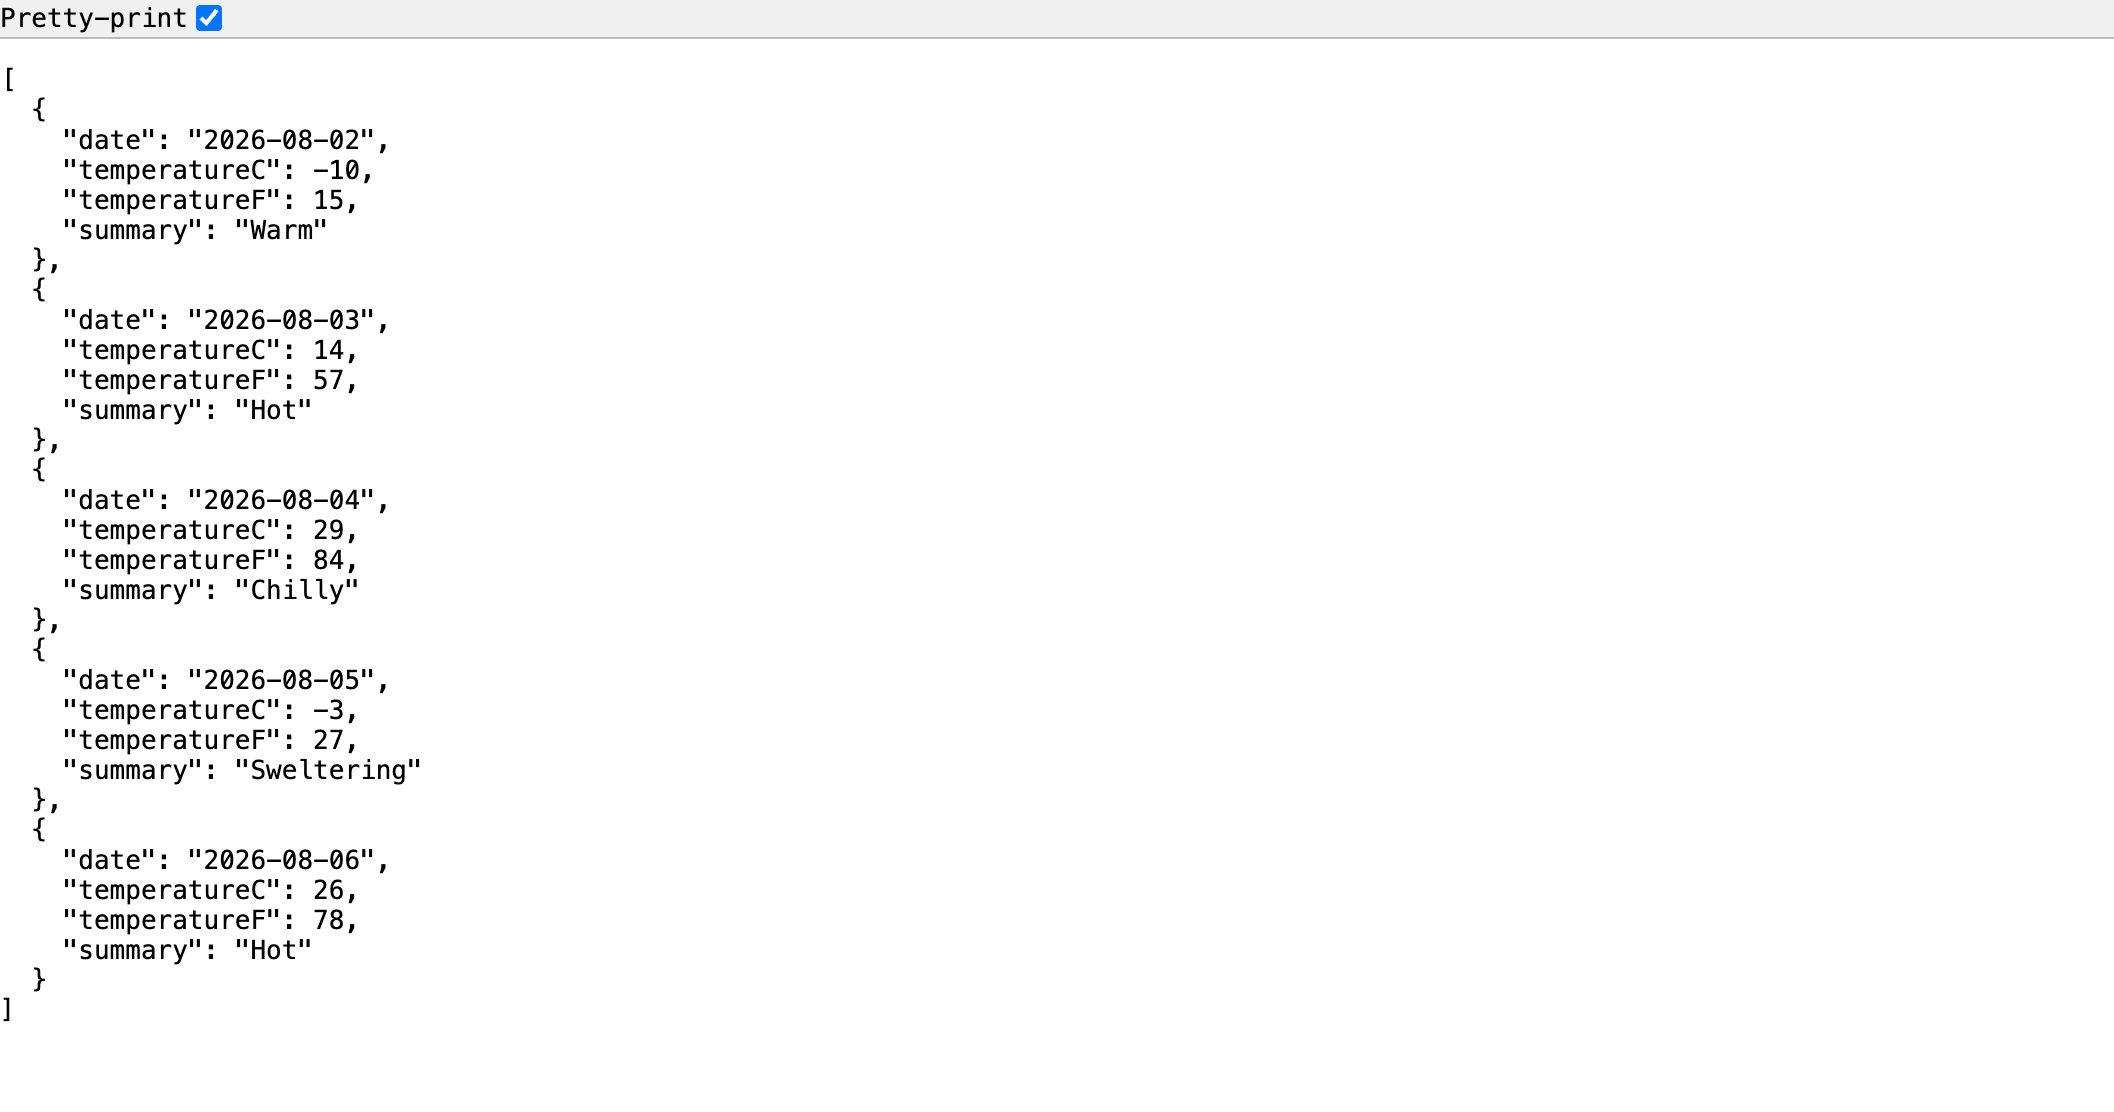
Let's integrate a ConfigCat feature flag and use it to control the Web API response.
Adding ConfigCat to the Application
-
To connect the Web API to the ConfigCat feature flag we created, install the ConfigCat SDK for .NET (more precisely, its integration package for ASP.NET Core).
dotnet add package ConfigCat.Extensions.HostinginfoThe integration package allows setting up your ASP.NET Core application so it manages the ConfigCat client automatically, from initialization at startup to disposal at shutdown.
-
In your
appsettings.jsonfile, add a block for ConfigCat, and specify your ConfigCat SDK Key:appsettings.json{"ConfigCat": {"DefaultClient": {"SdkKey": "YOUR-CONFIGCAT-SDK-KEY-FOR-PRODUCTION"}},// rest of configs...}infoUse separate ConfigCat environments and SDK keys for development and production. For example, you can add a corresponding ConfigCat block with your development SDK Key to
appsettings.Development.json.For production applications, environment-specific configuration can also be supplied through other .NET configuration providers, such as environment variables, rather than being hard-coded into source-controlled configuration.
-
In the
Program.csfile, hook ConfigCat up via the application builder. This allows you to inject the ConfigCat client in any controller or service class to look up a feature flag's value.Program.csvar builder = WebApplication.CreateBuilder(args);builder.UseConfigCat();// rest of code... -
To control the default weather forecast endpoint's response using the feature flag, let's edit the
Controllers/WeatherForecastController.csfile. The code comments explain what each part does:Controllers/WeatherForecastController.csusing Microsoft.AspNetCore.Mvc;using ConfigCat.Client; // Import types from the ConfigCat SDK's main namespacenamespace feature_flags_dotnet_core_web_api_sample.Controllers;[ApiController][Route("[controller]")]// Inject the ConfigCat client via a constructor parameter// so we can use it within the class to control the API responsepublic class WeatherForecastController(IConfigCatClient configCatClient) : ControllerBase{private static readonly string[] Summaries =["Freezing", "Bracing", "Chilly", "Cool", "Mild", "Warm", "Balmy", "Hot", "Sweltering", "Scorching"];[HttpGet(Name = "GetWeatherForecast")]public async Task<IEnumerable<WeatherForecast>> Get(){// Get the flag's latest valuevar isMyFeatureFlagEnabled = await configCatClient.GetValueAsync("myFeatureFlag", false);// When the flag is off, return only a limited number of itemsvar numDays = isMyFeatureFlagEnabled ? 5 : 2;return Enumerable.Range(1, numDays).Select(index => new WeatherForecast{Date = DateOnly.FromDateTime(DateTime.Now.AddDays(index)),TemperatureC = Random.Shared.Next(-20, 55),Summary = Summaries[Random.Shared.Next(Summaries.Length)]}).ToArray();}}
Adding a Targeting Rule to the Feature Flag
Rather than controlling the API response for all users, you can configure targeting rules to target specific users based on attributes or characteristics about them.
-
Click the + IF button on the feature flag, then select Target users.
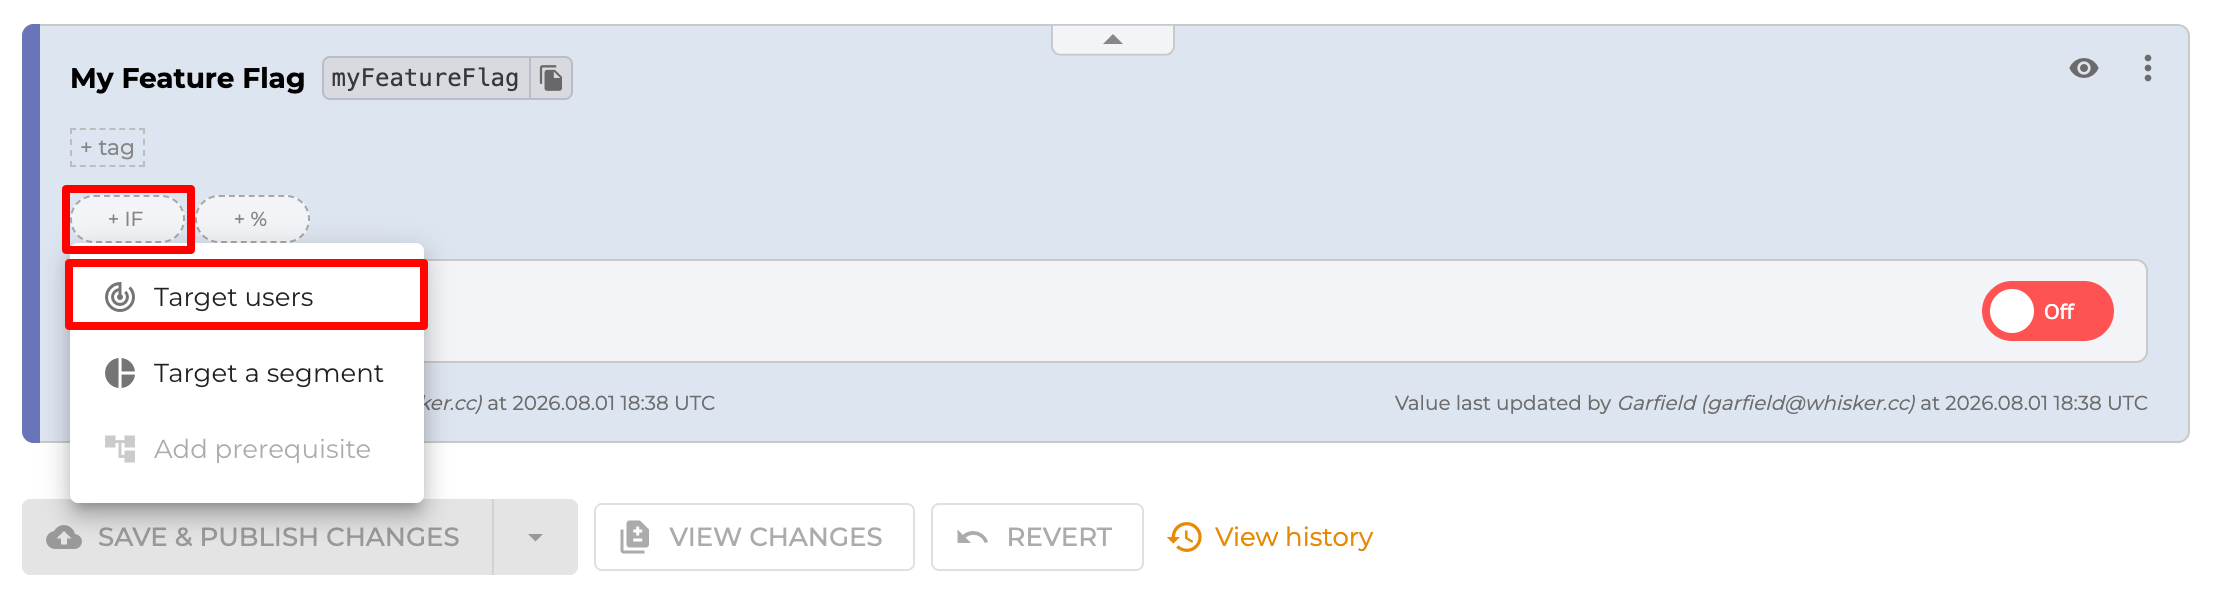
-
Add a targeting rule to target users with a premium account, then save and publish the changes.
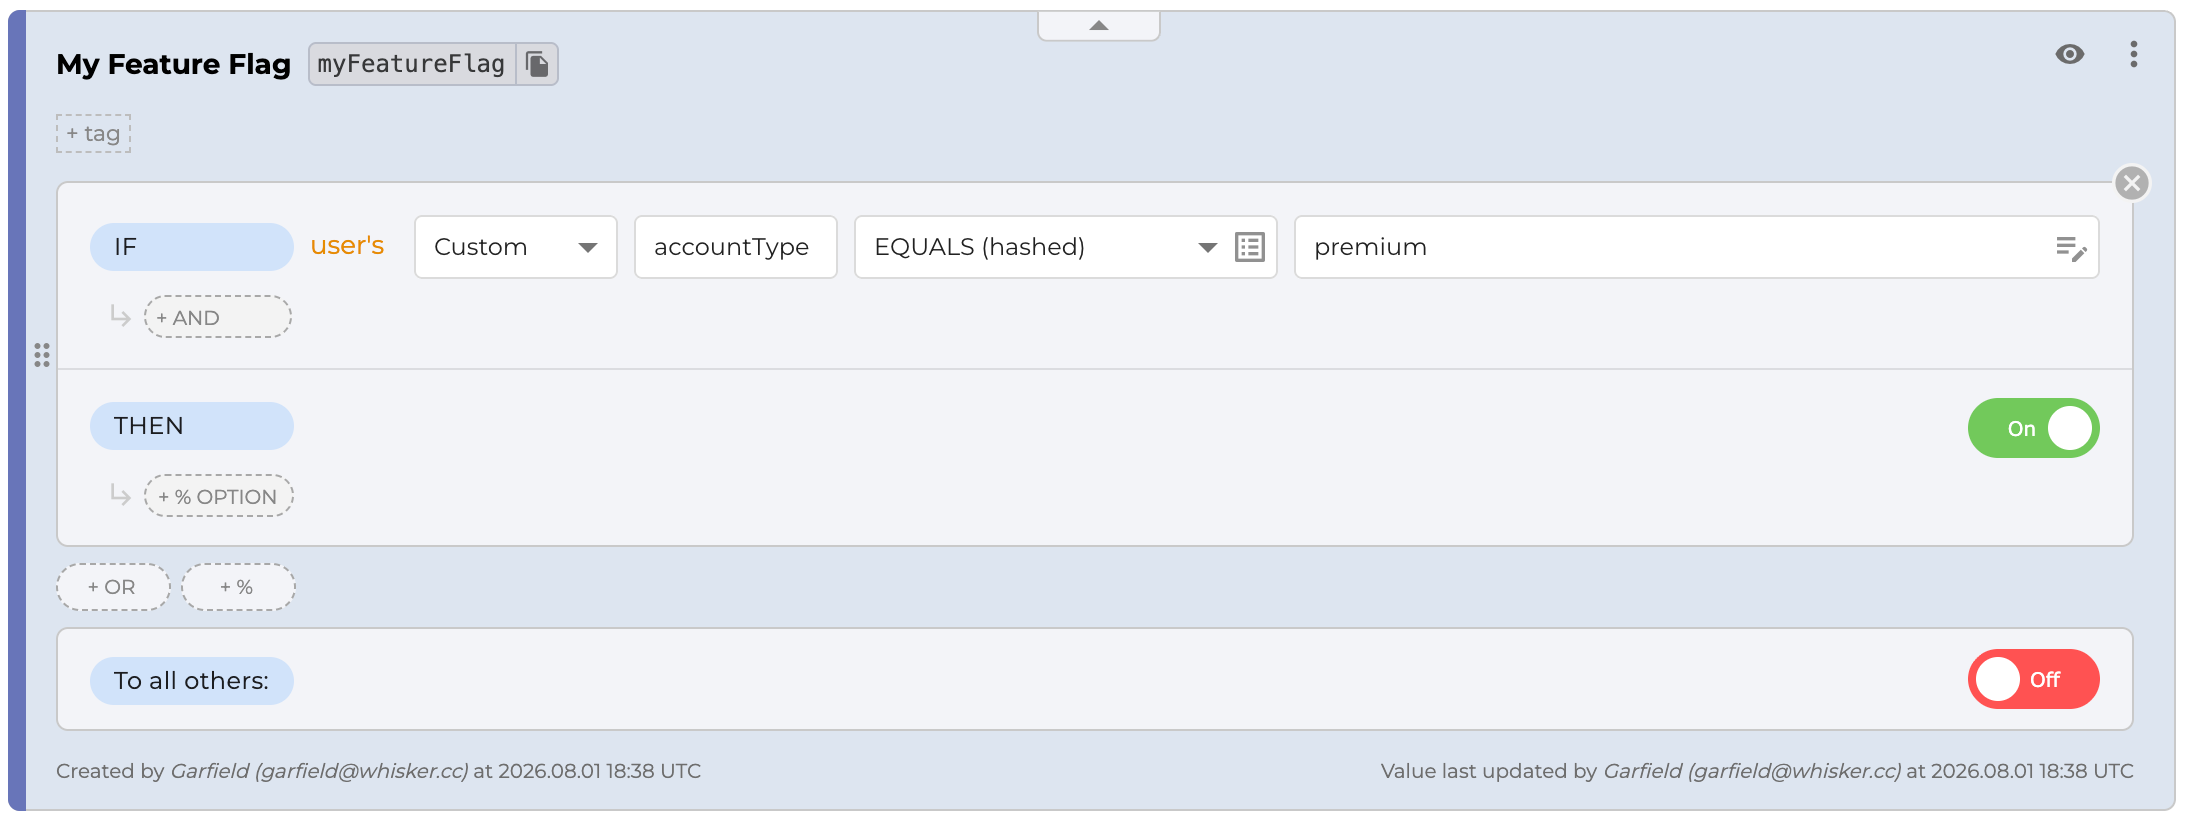
You can learn more about ConfigCat's targeting here.
Passing a User Object
The SDK can only evaluate the targeting rule if it knows who the user is. Pass a User Object to the GetValueAsync method so ConfigCat can match the user against the rule.
In the WeatherForecastController.cs file, create and pass a User Object when calling the await configCatClient.GetValueAsync method as follows:
using Microsoft.AspNetCore.Mvc;
using ConfigCat.Client; // Import types from the ConfigCat SDK's main namespace
namespace feature_flags_dotnet_core_web_api_sample.Controllers;
[ApiController]
[Route("[controller]")]
// Inject the ConfigCat client via a constructor parameter
// so we can use it within the class to control the API response
public class WeatherForecastController(IConfigCatClient configCatClient) : ControllerBase
{
private static readonly string[] Summaries =
[
"Freezing", "Bracing", "Chilly", "Cool", "Mild", "Warm", "Balmy", "Hot", "Sweltering", "Scorching"
];
[HttpGet(Name = "GetWeatherForecast")]
public async Task<IEnumerable<WeatherForecast>> Get()
{
// A unique user id is required when creating a ConfigCat User Object
var configCatUser = new User("user-id-123")
{
Country = "United Kingdom",
Custom =
{
// The dictionary keys you use here should match the custom comparison attributes
// you added to your flag's targeting rule on the ConfigCat Dashboard
["accountType"] = "premium",
}
};
// Get the flag's latest value for the user described by the User Object
var isMyFeatureFlagEnabled = await configCatClient.GetValueAsync("myFeatureFlag", false, configCatUser);
// When the flag is off, return only a limited number of items
var numDays = isMyFeatureFlagEnabled ? 5 : 2;
return Enumerable.Range(1, numDays).Select(index => new WeatherForecast
{
Date = DateOnly.FromDateTime(DateTime.Now.AddDays(index)),
TemperatureC = Random.Shared.Next(-20, 55),
Summary = Summaries[Random.Shared.Next(Summaries.Length)]
})
.ToArray();
}
}
Testing the Application
Back in the ConfigCat Dashboard, confirm the targeting rule is set, and the feature flag is on for premium accountType users:
The API response should be:
If you change the user account type in your code, the app should return only a limited number of items. That's it!
Feel free to experiment with the code.
In summary, integrating ConfigCat's feature flags into an ASP.NET Core API is super easy and requires minimal effort.
Resources
If you would like to see how to use ConfigCat in other applications/programming languages, check out configcat-labs on GitHub.
All ConfigCat SDKs have their own GitHub repository with sample applications; you can find them here.
To learn more about ConfigCat's feature flags, visit the docs.
For more awesome content, keep up with ConfigCat on X, Facebook, LinkedIn, GitHub, and the News & Product Updates page. Deploy any time, release when confident.