User Provisioning (SCIM) with OneLogin
Introduction
Each Identity Provider requires specific information to configure a SCIM integration. The following guide will walk you through how you can connect ConfigCat with OneLogin via SCIM.
1. Create an Application in OneLogin
-
Log in to OneLogin, select
Applicationsand click onAdd App.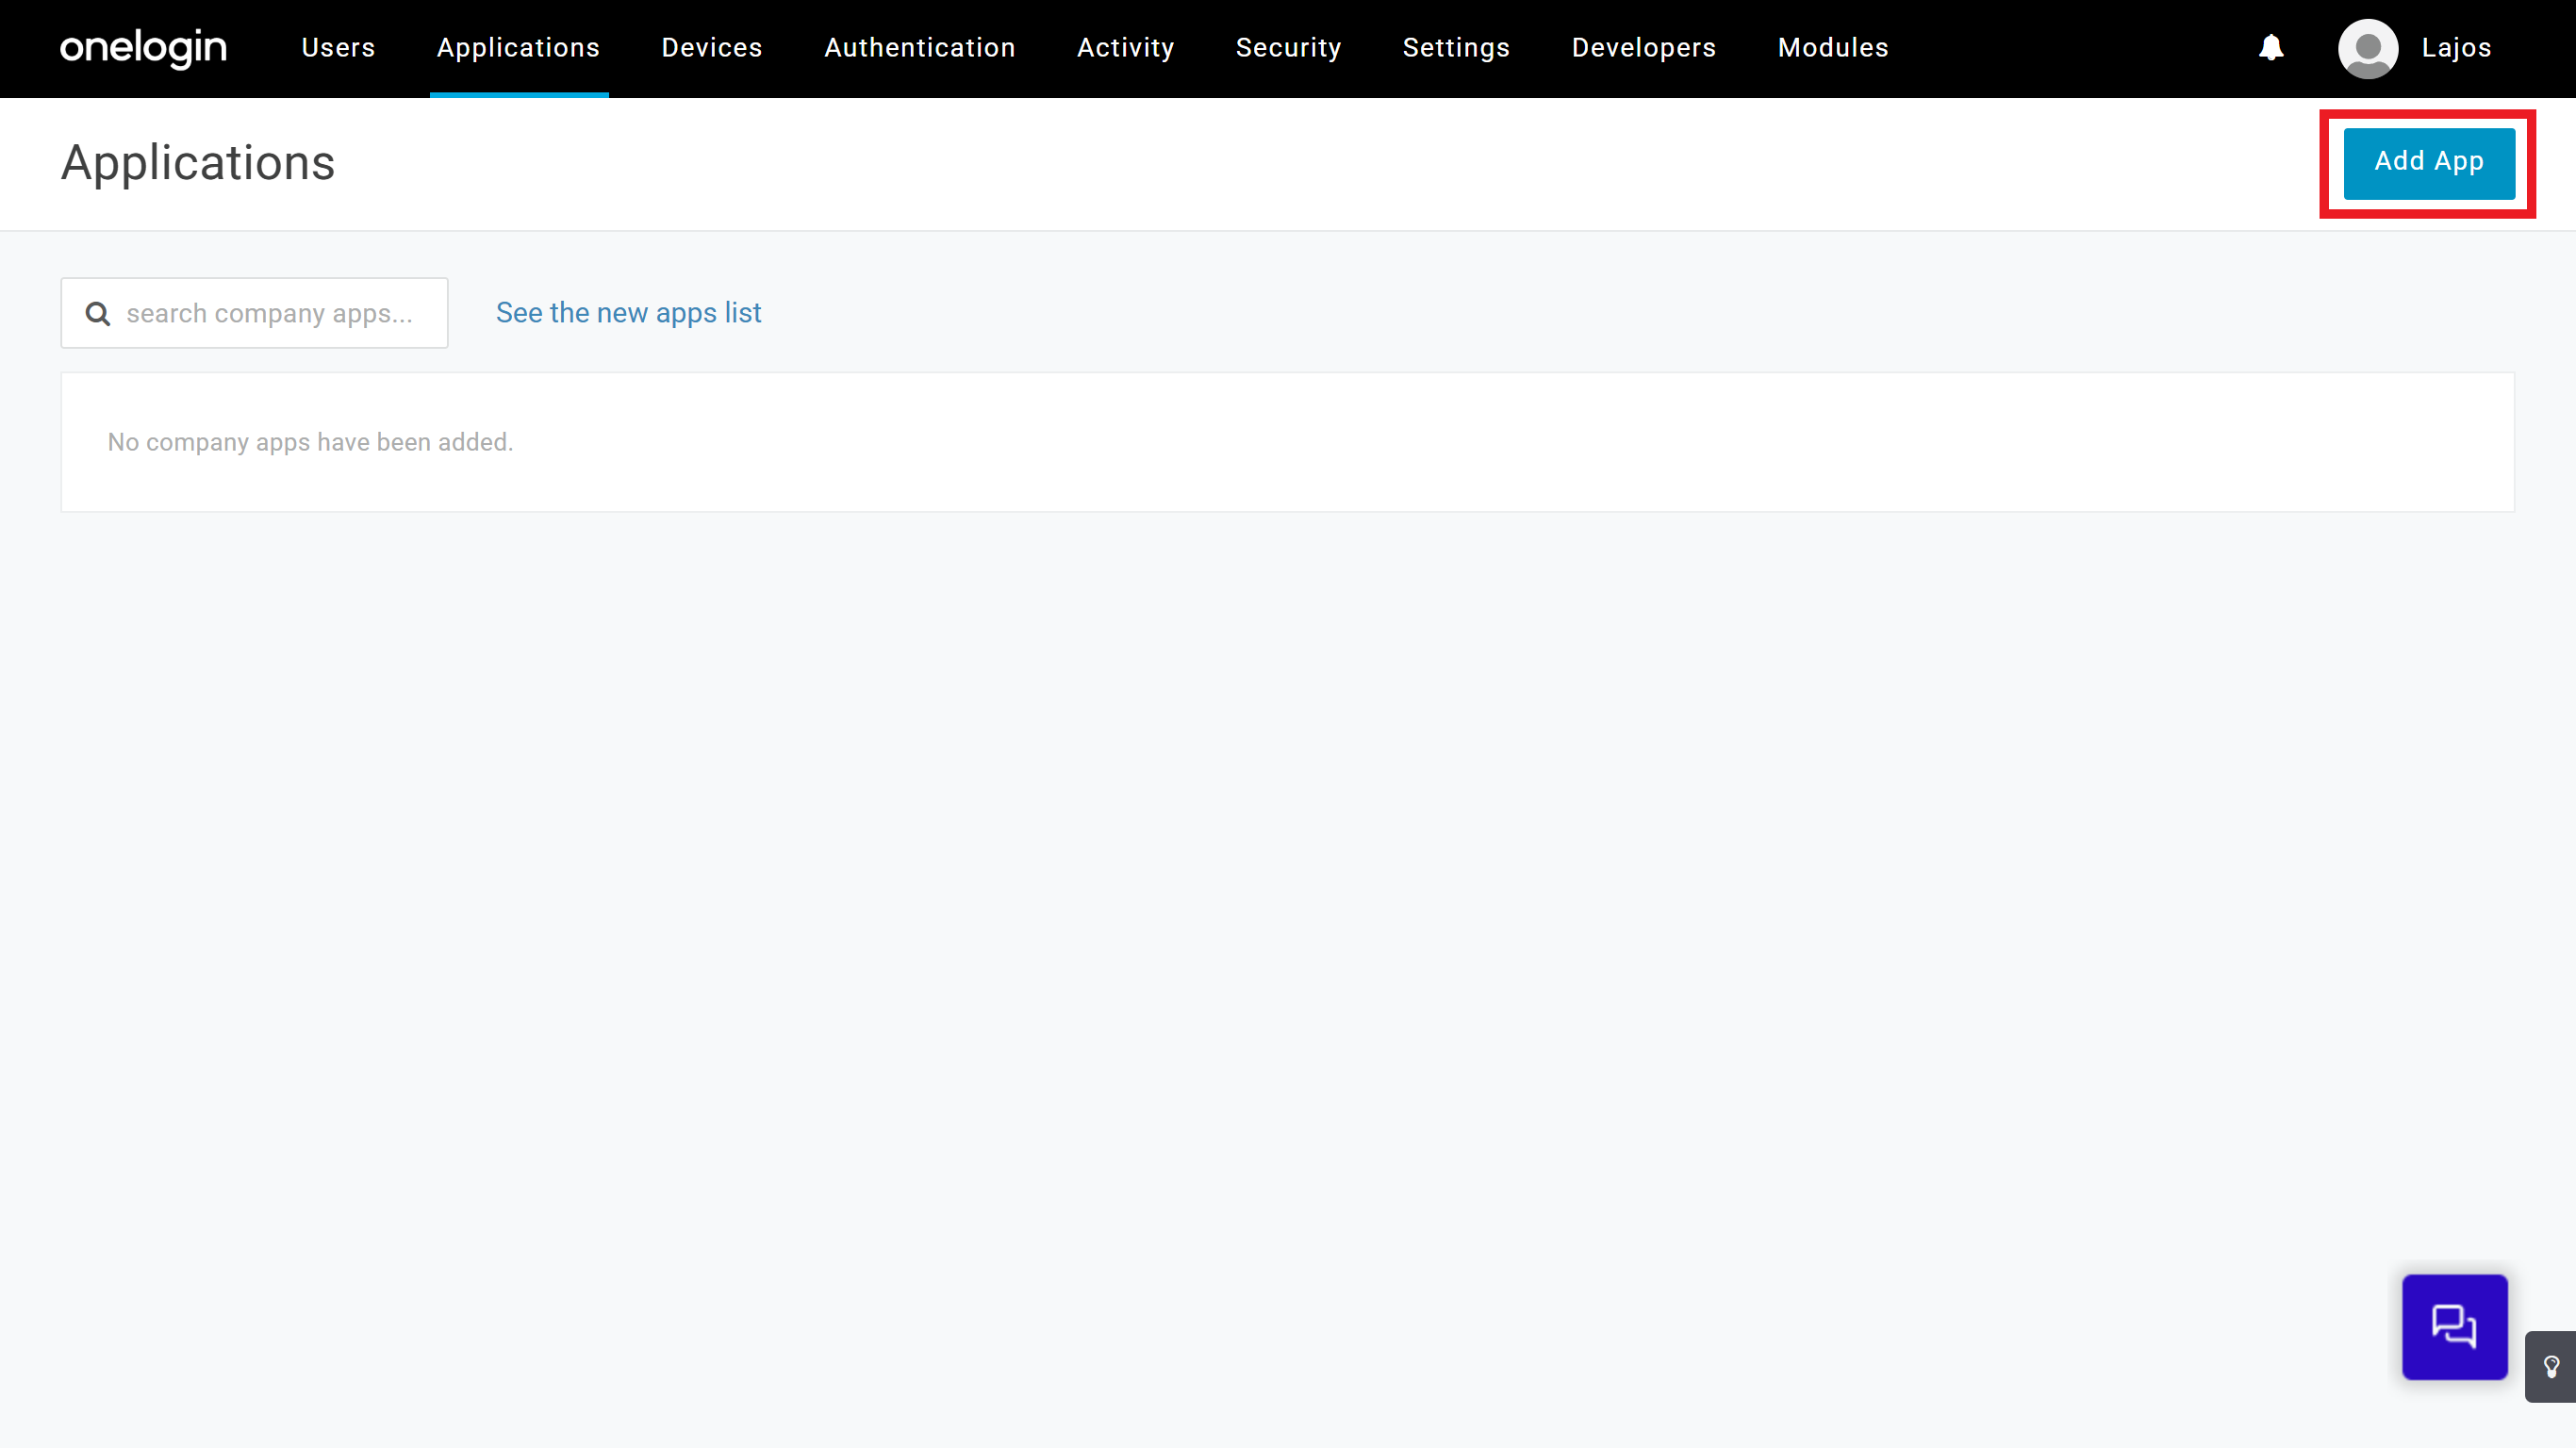
-
Type
SCIM V2into the search bar, and selectSCIM Provisioner with SAML (SCIM v2 Core).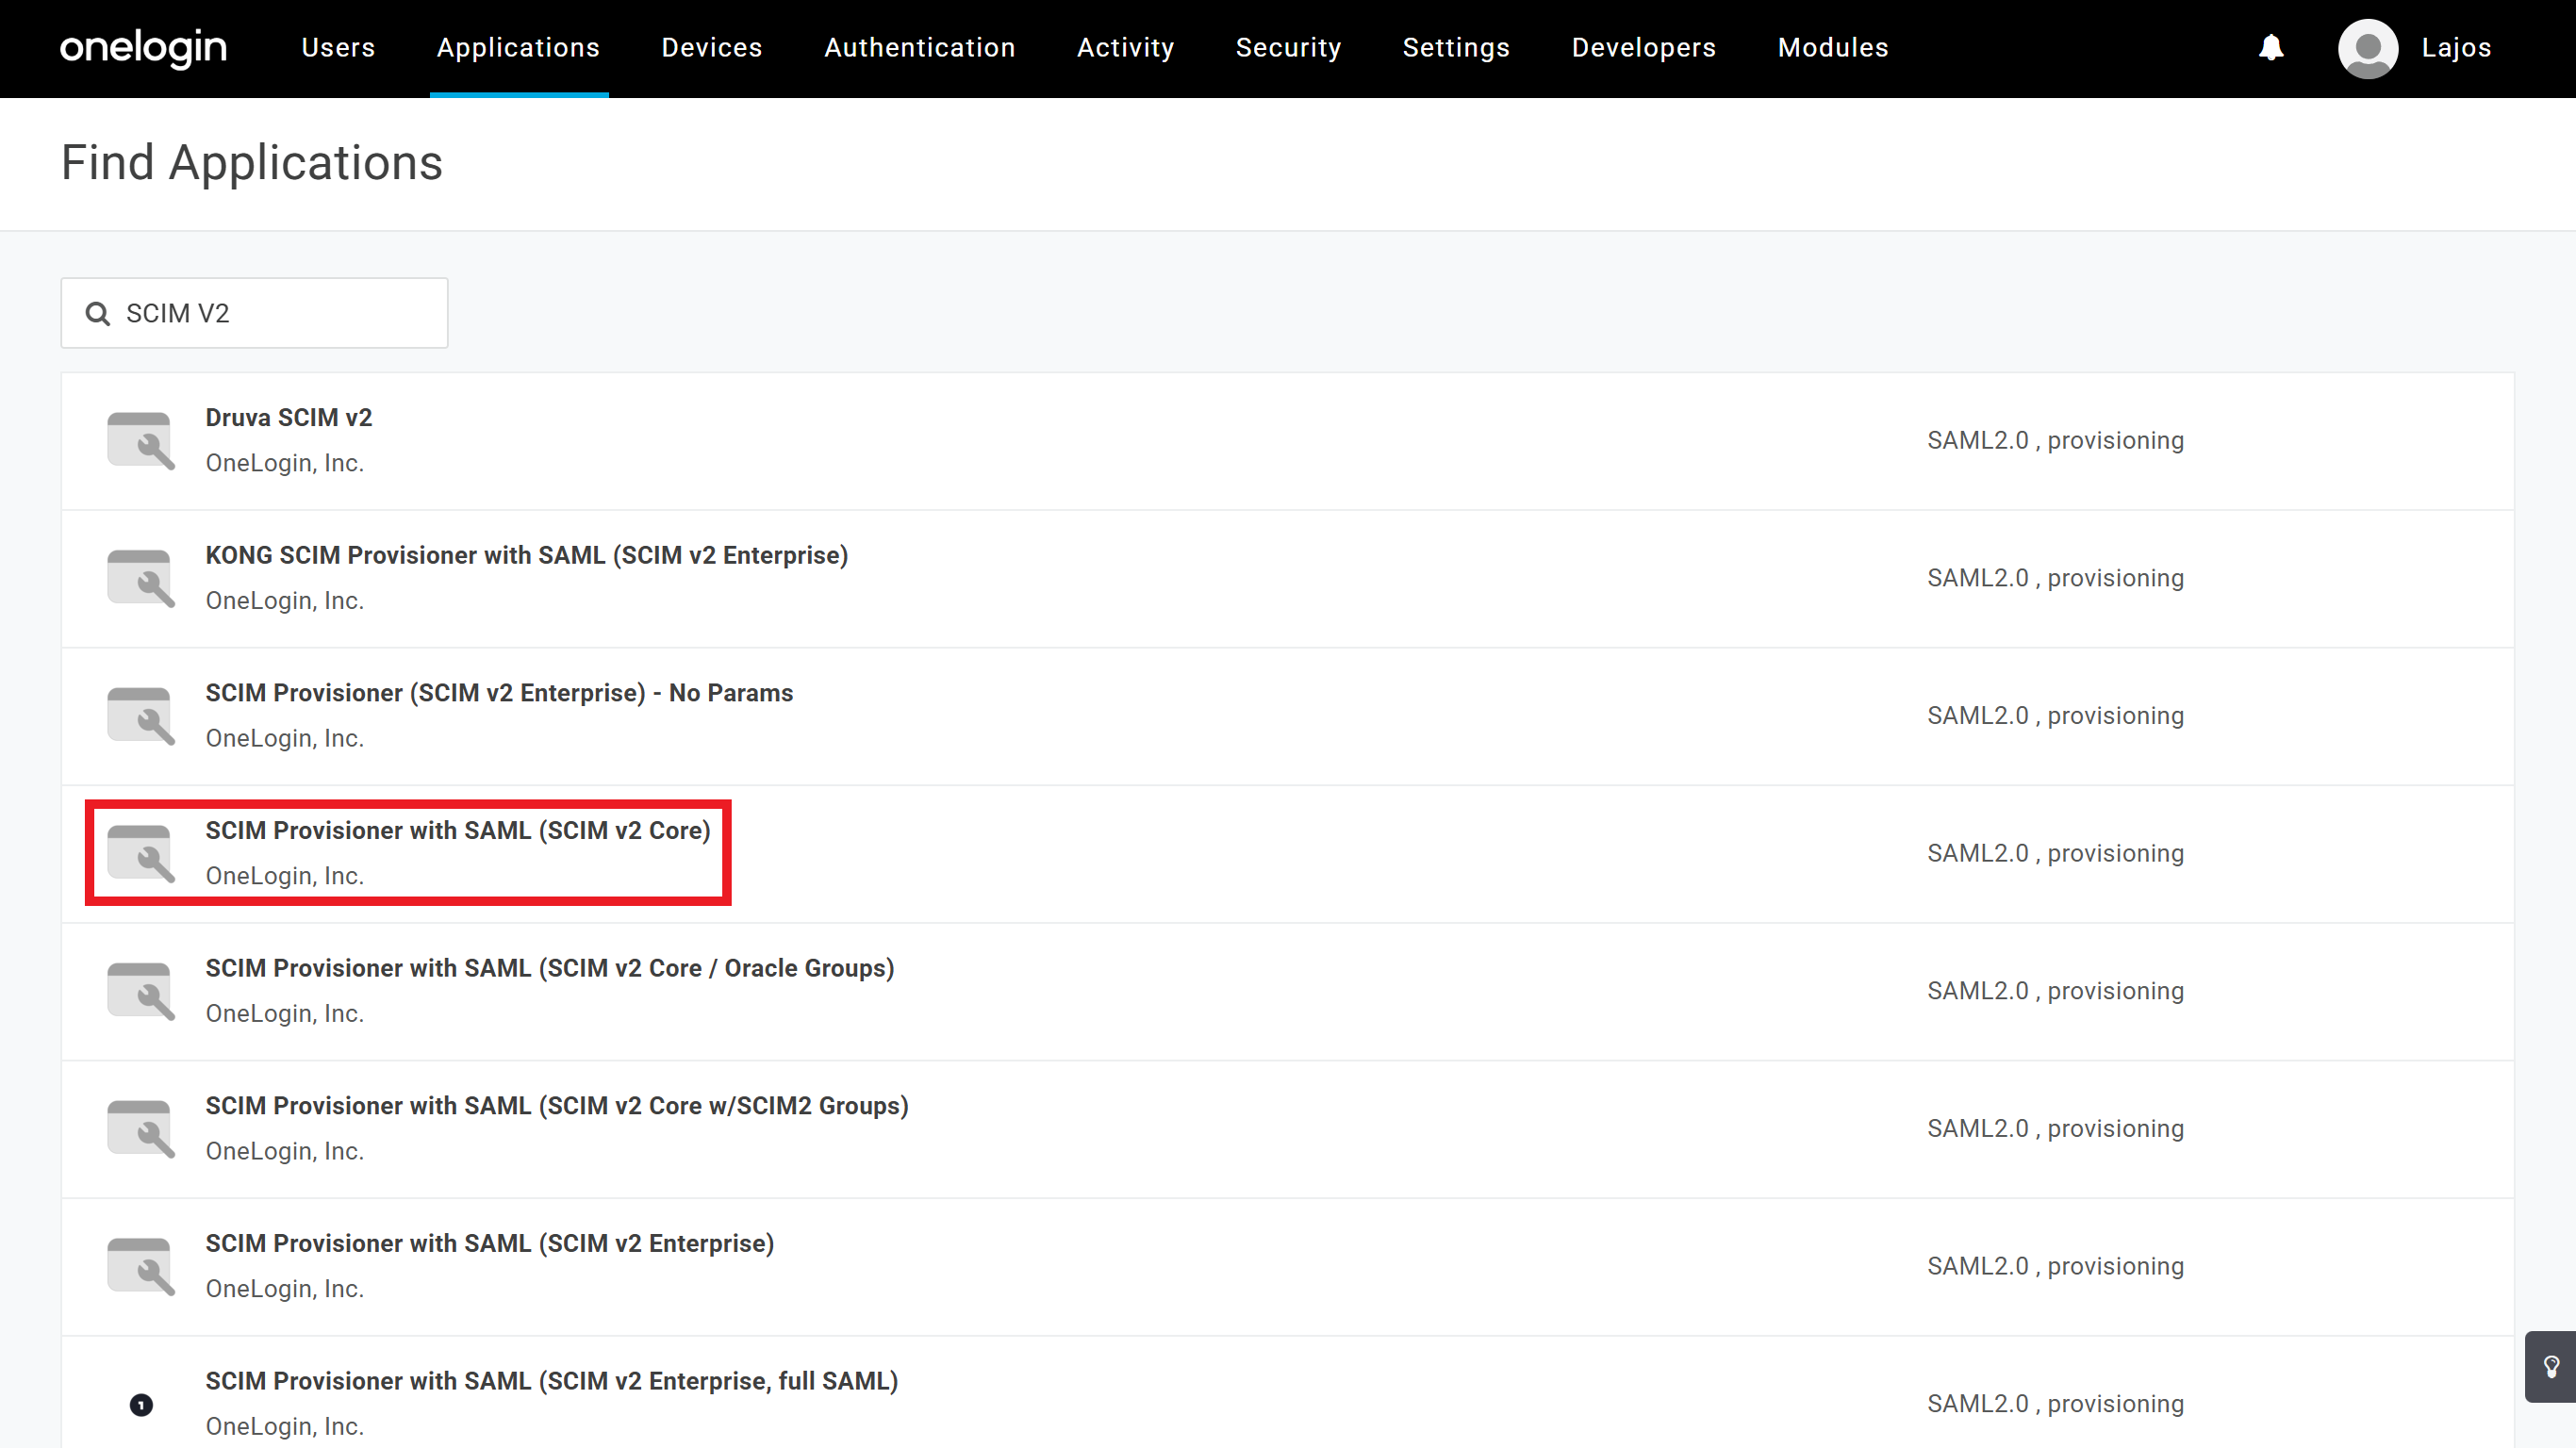
-
Enter a descriptive
Display Name, then clickSave.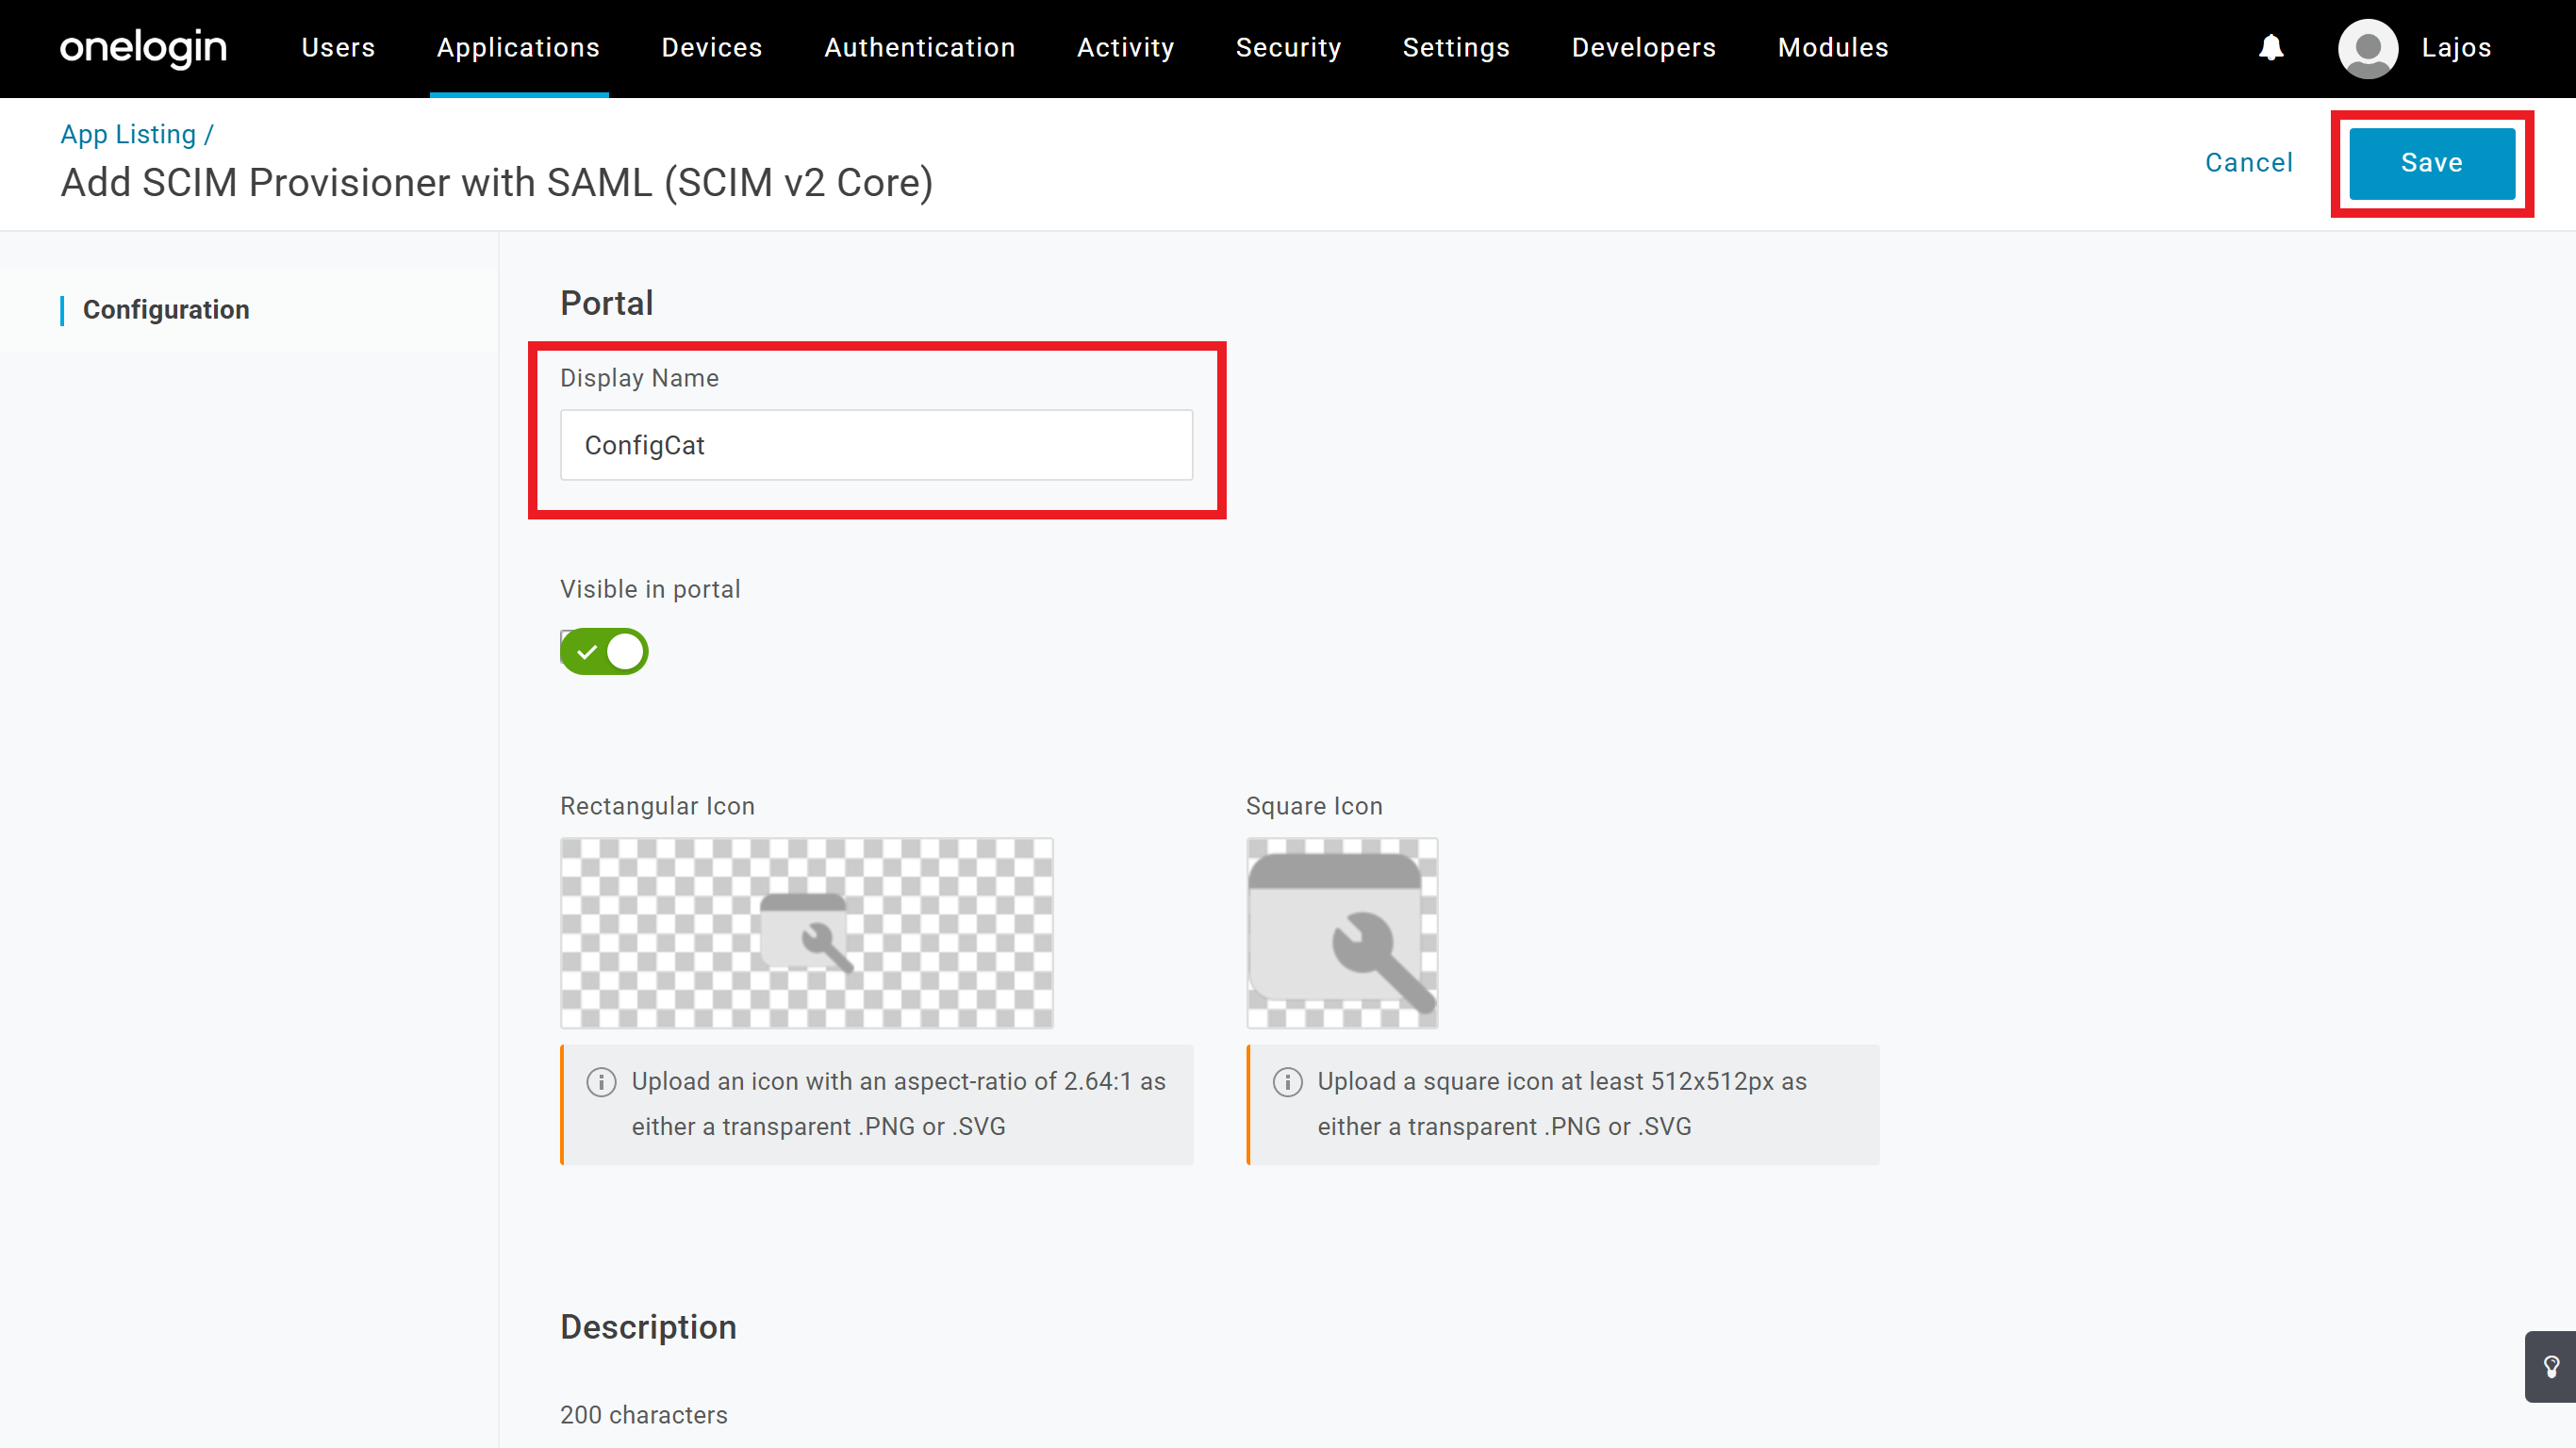
2. Configure Provisioning (SCIM) for the OneLogin Application
-
Gather the
SCIM URLand theTokenfrom the Authentication & Provisioning page in ConfigCat.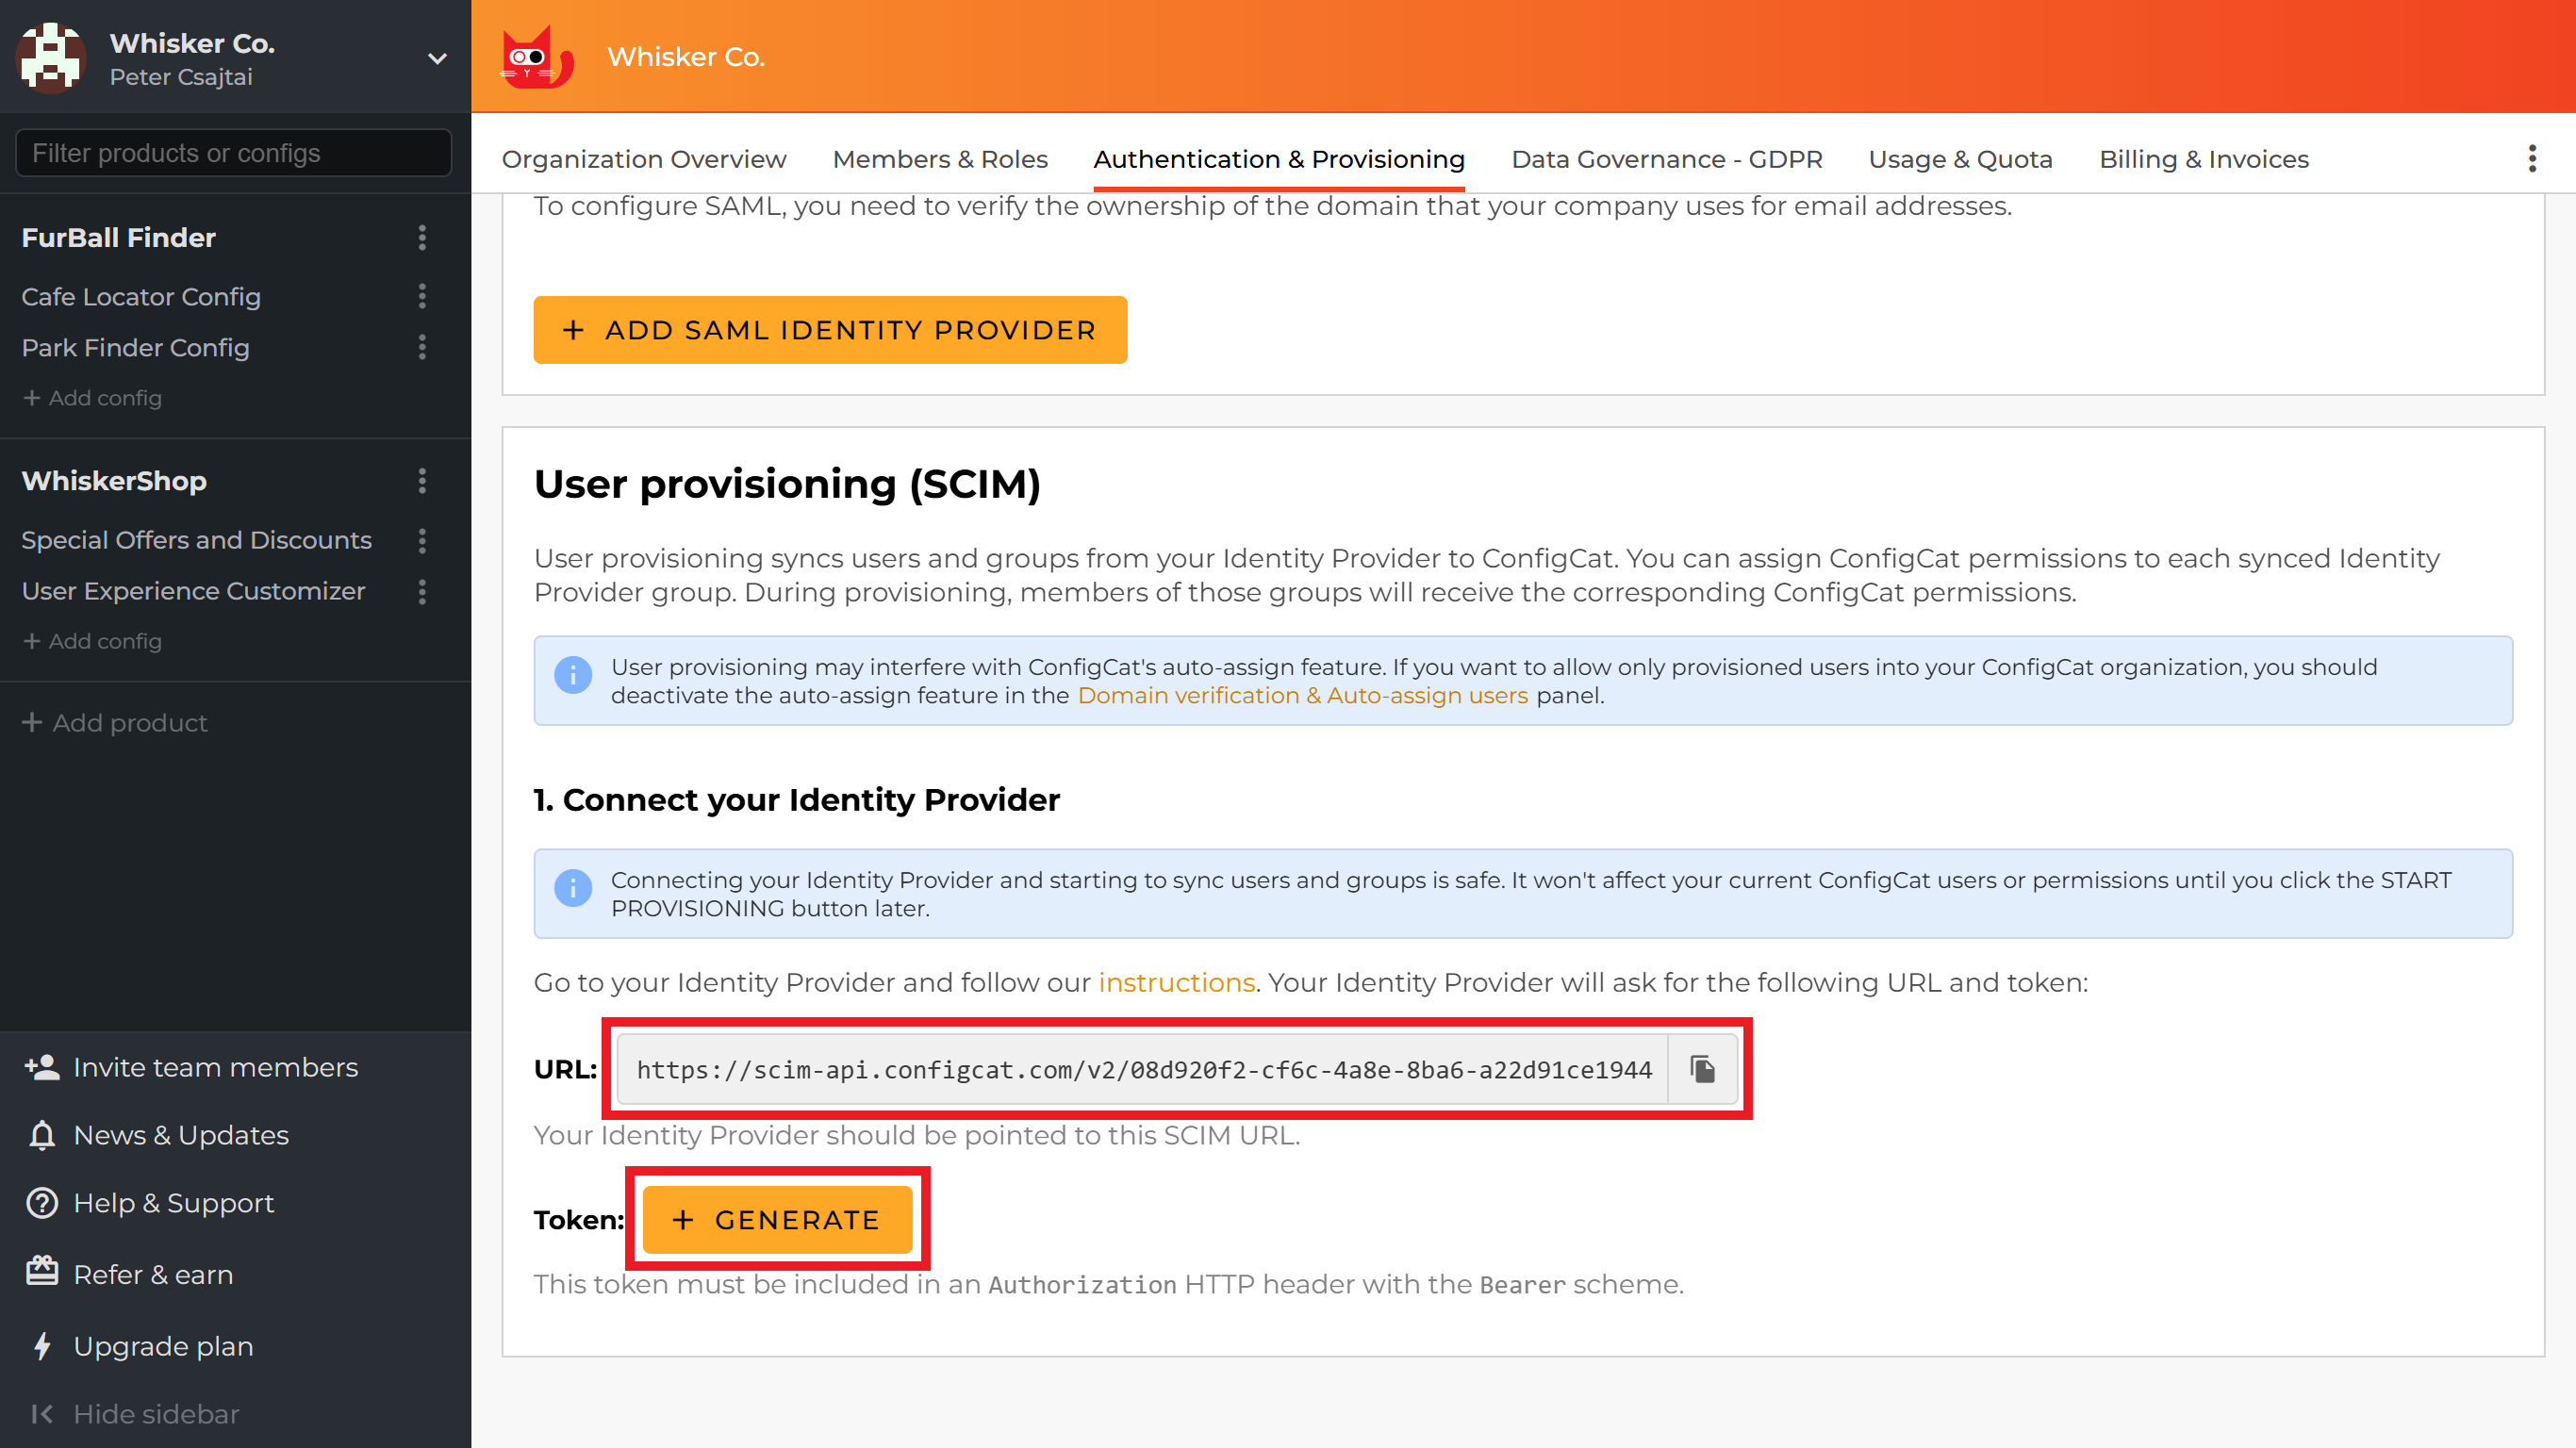

-
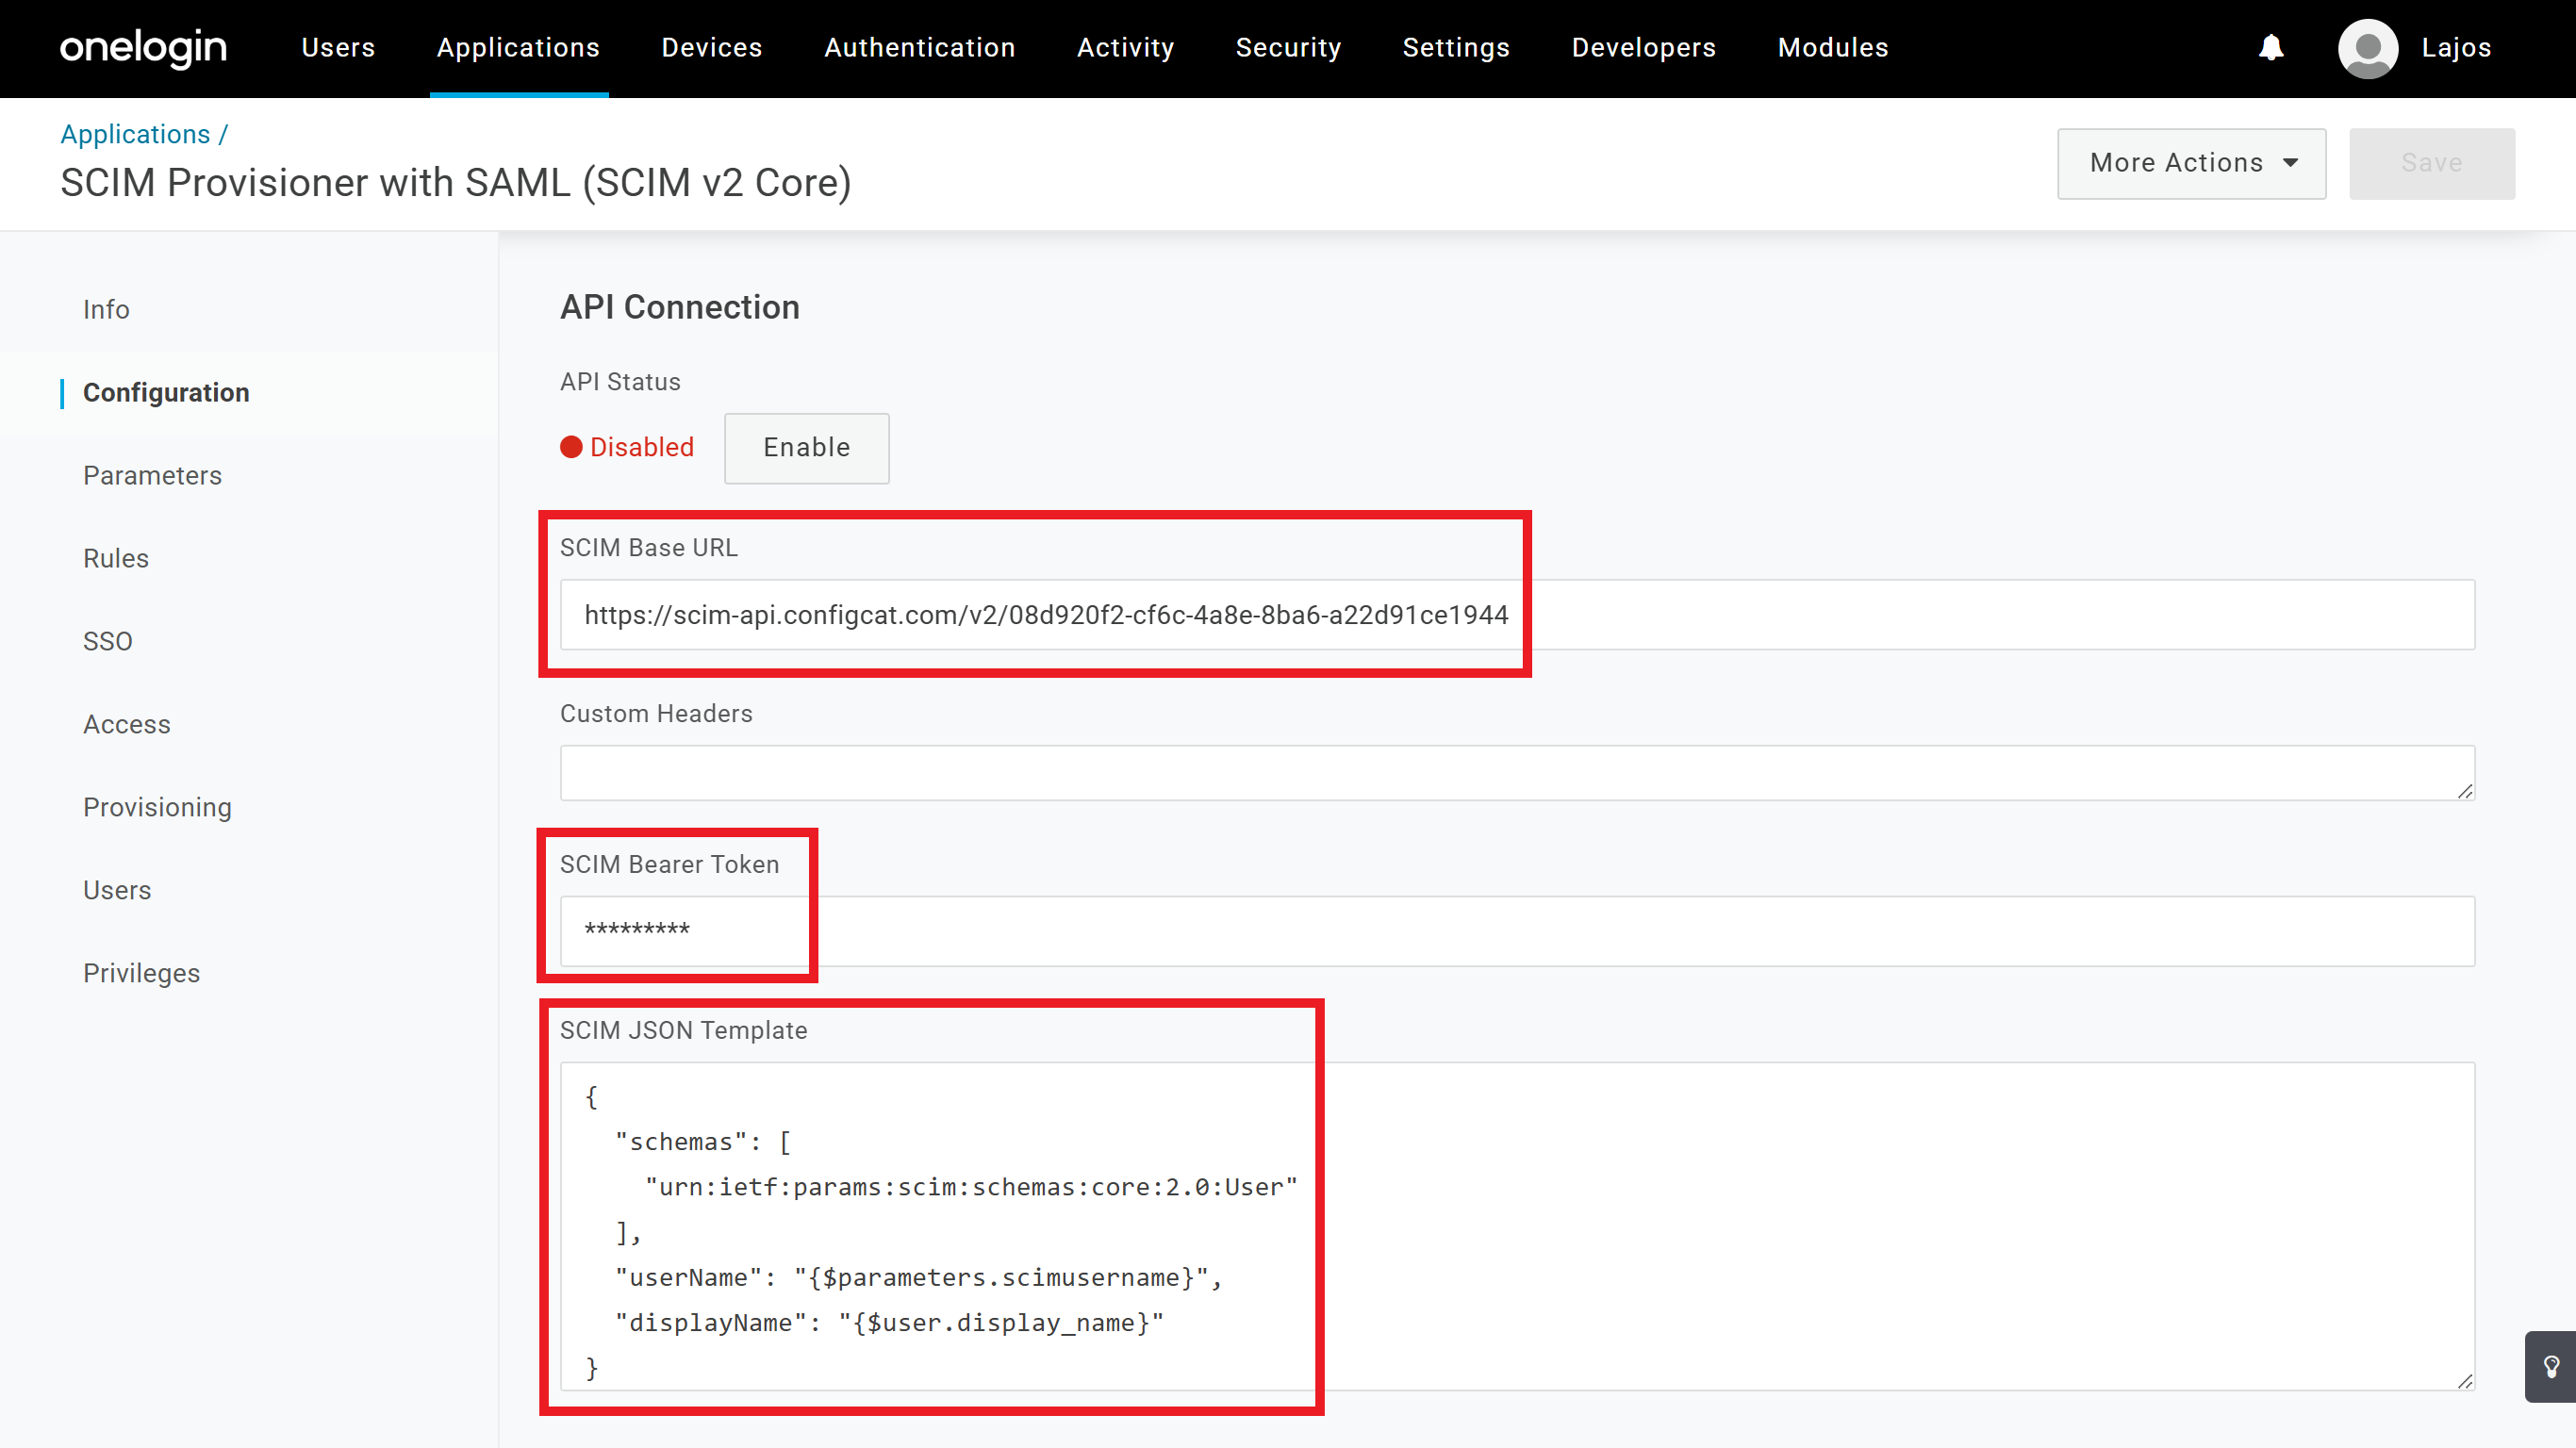
On the OneLogin application's Configuration tab's API Connection section configure the following:
- Add the
SCIM URLfrom the ConfigCat Dashboard as theSCIM Base URL. - Add the
Tokenfrom the ConfigCat Dashboard as theSCIM Bearer Token. - Add the following as the
SCIM JSON Template:{
"schemas": [
"urn:ietf:params:scim:schemas:core:2.0:User"
],
"userName": "{$parameters.scimusername}",
"displayName": "{$user.display_name}"
}
- Add the
-
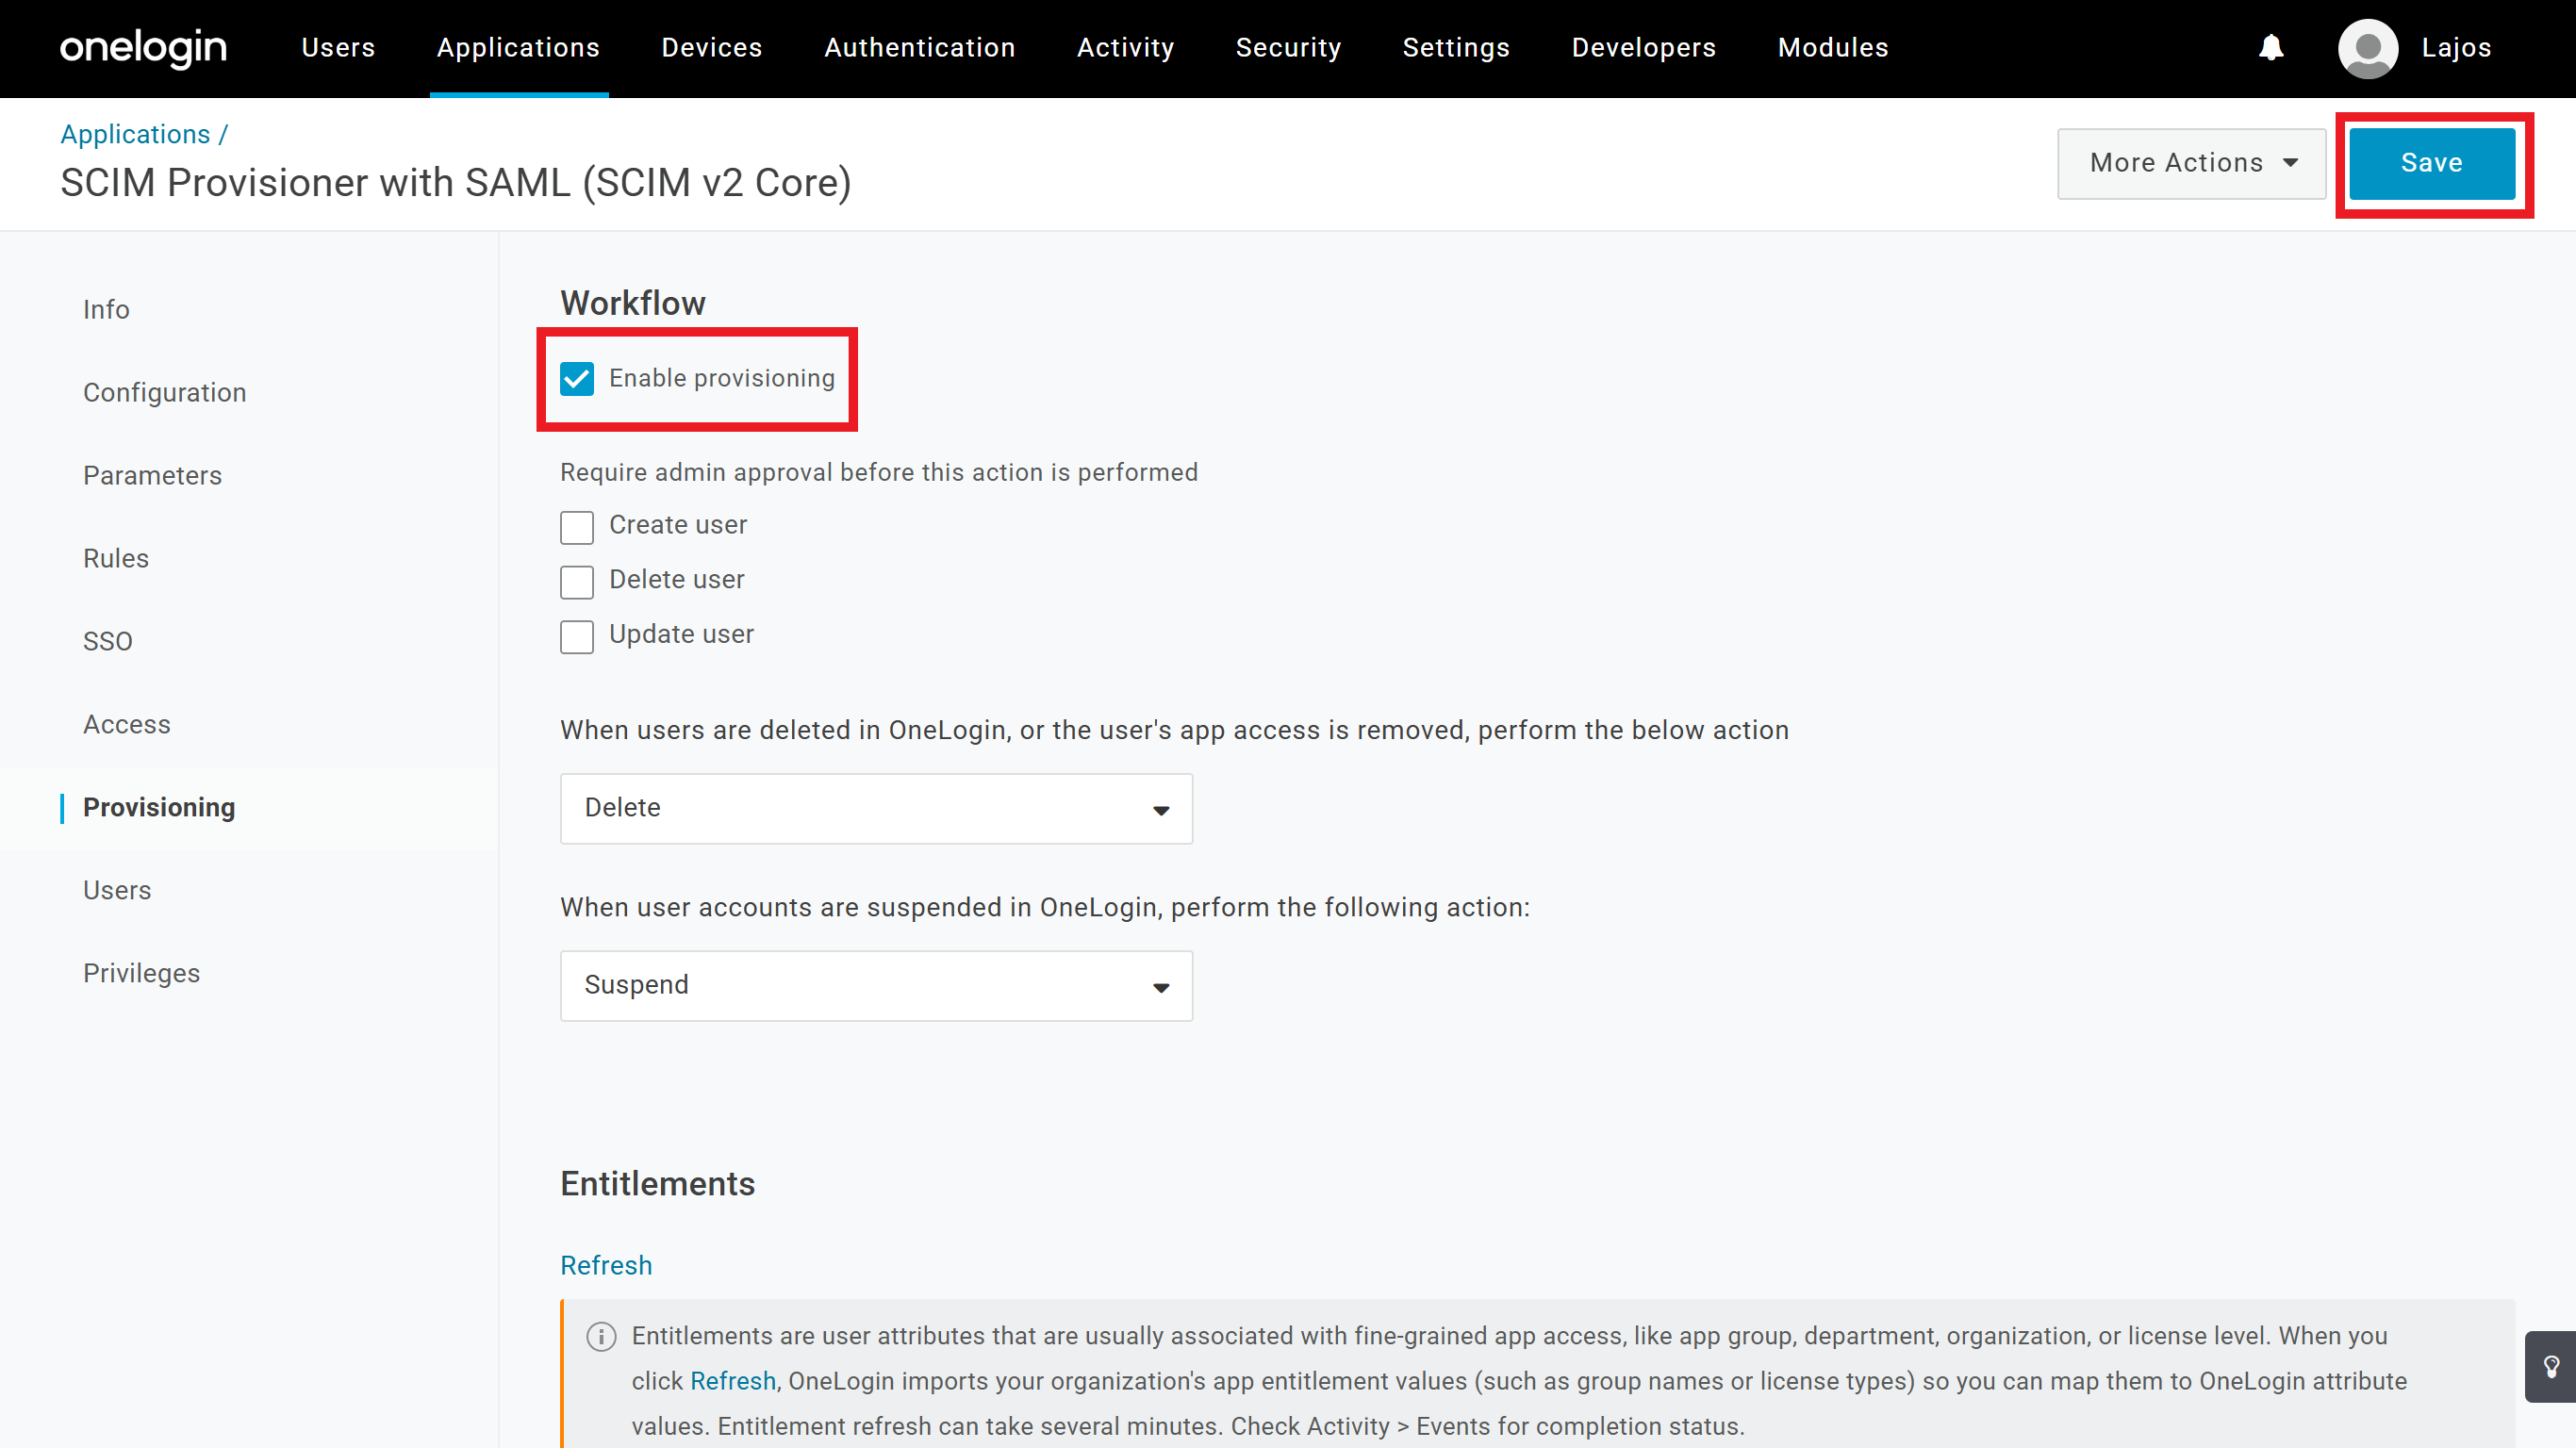
On the OneLogin application's Provisioning tab configure the following:
- Check the
Enable provisioningcheckbox. - Configure the other checkboxes and dropdowns based on your preference.
- Check the
-
On the OneLogin application's Parameters tab configure the following:
- Set Email as the
scimusernameparameter.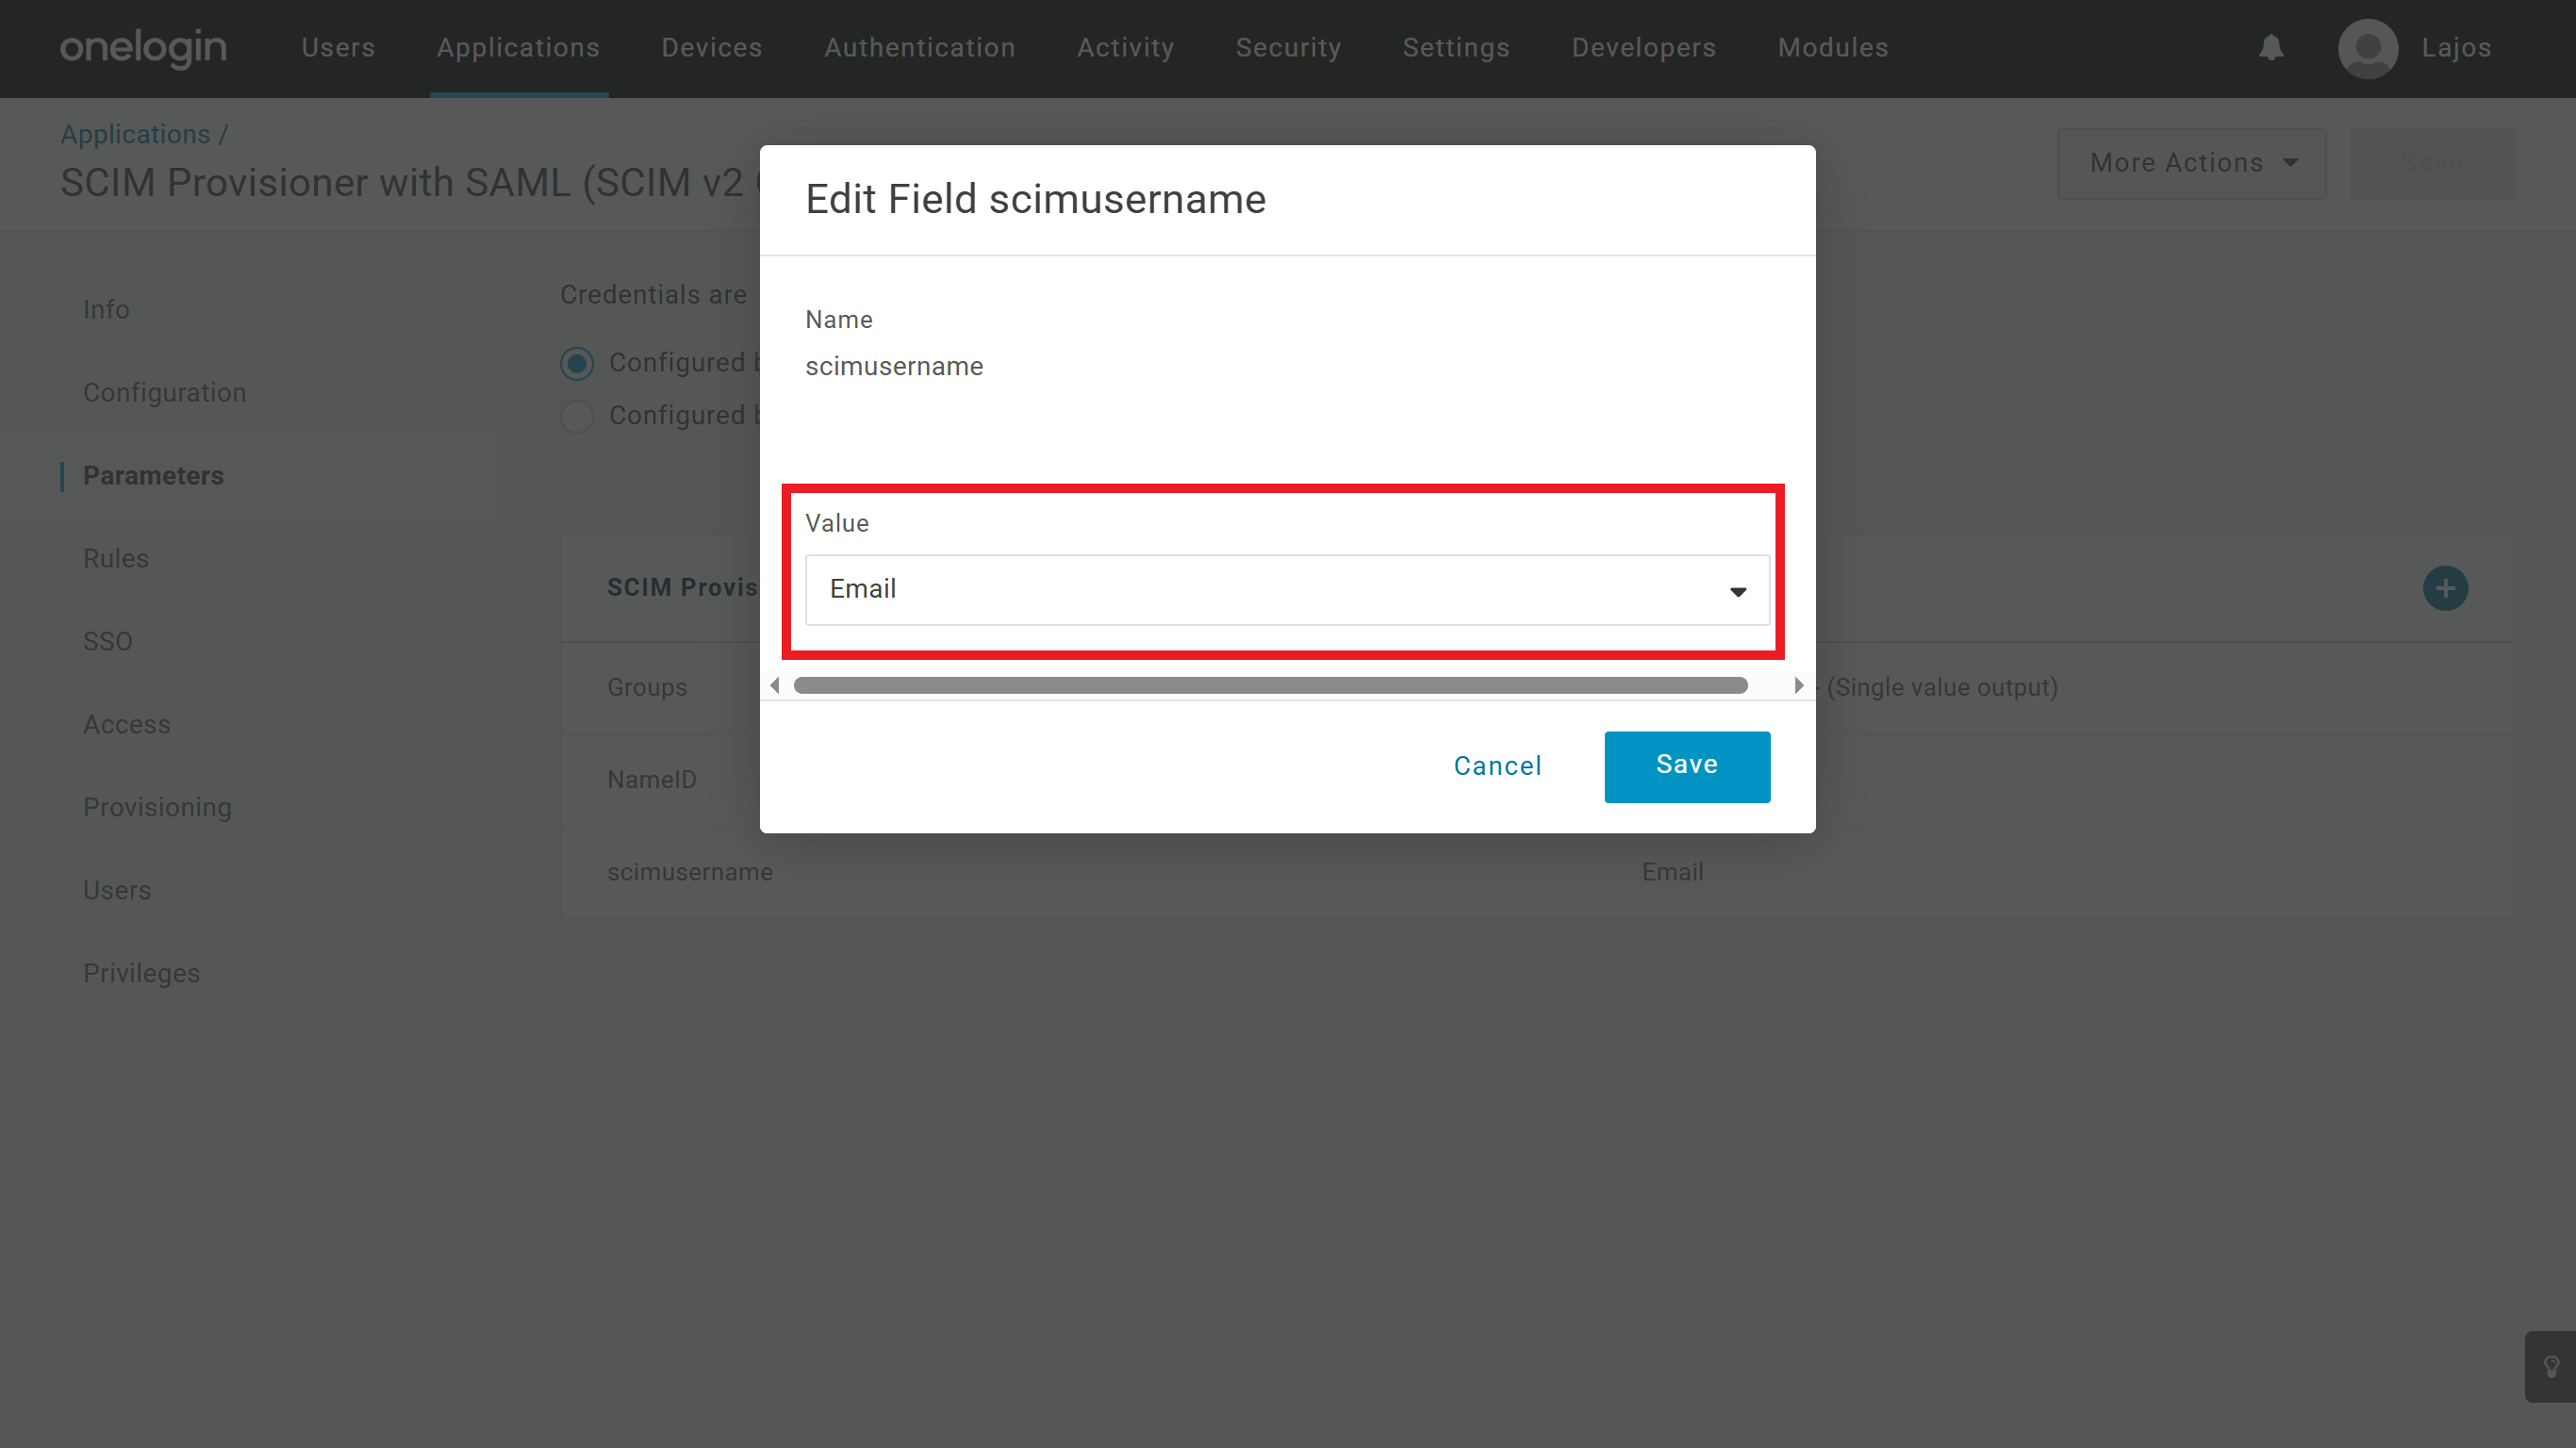
- Check the
Include in User Provisioningcheckbox at the Groups parameter.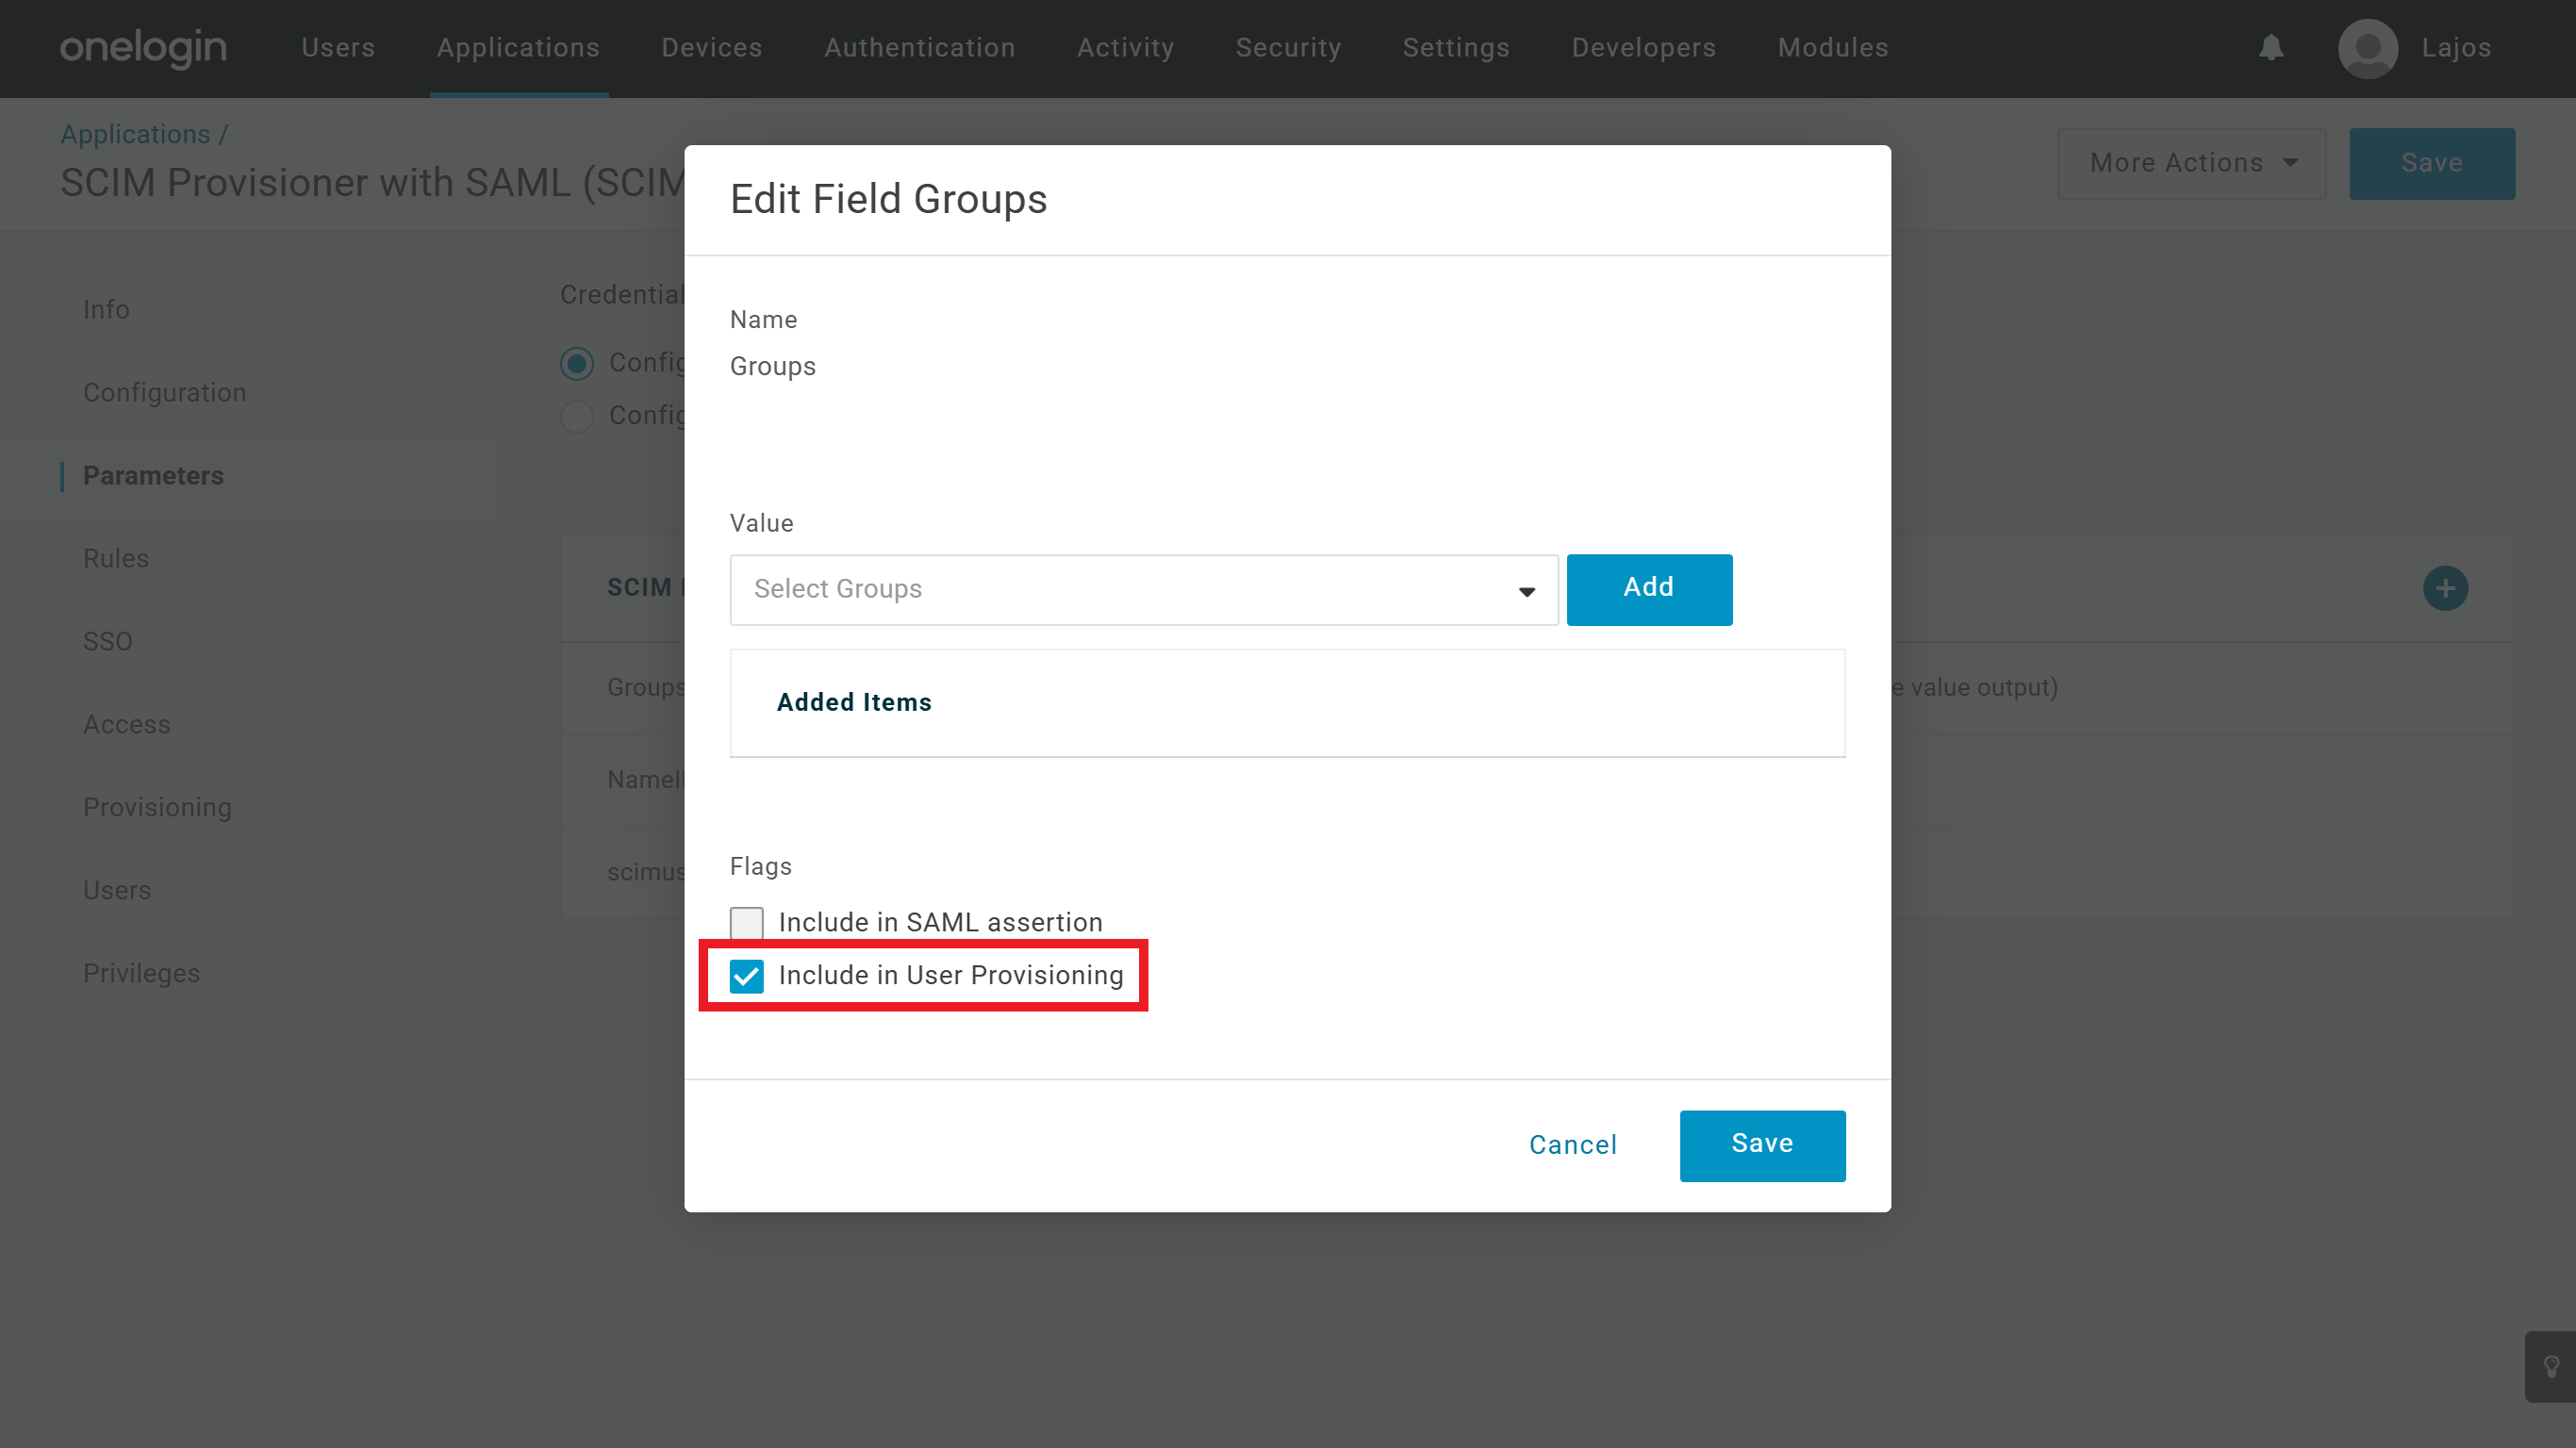
- Set Email as the
-
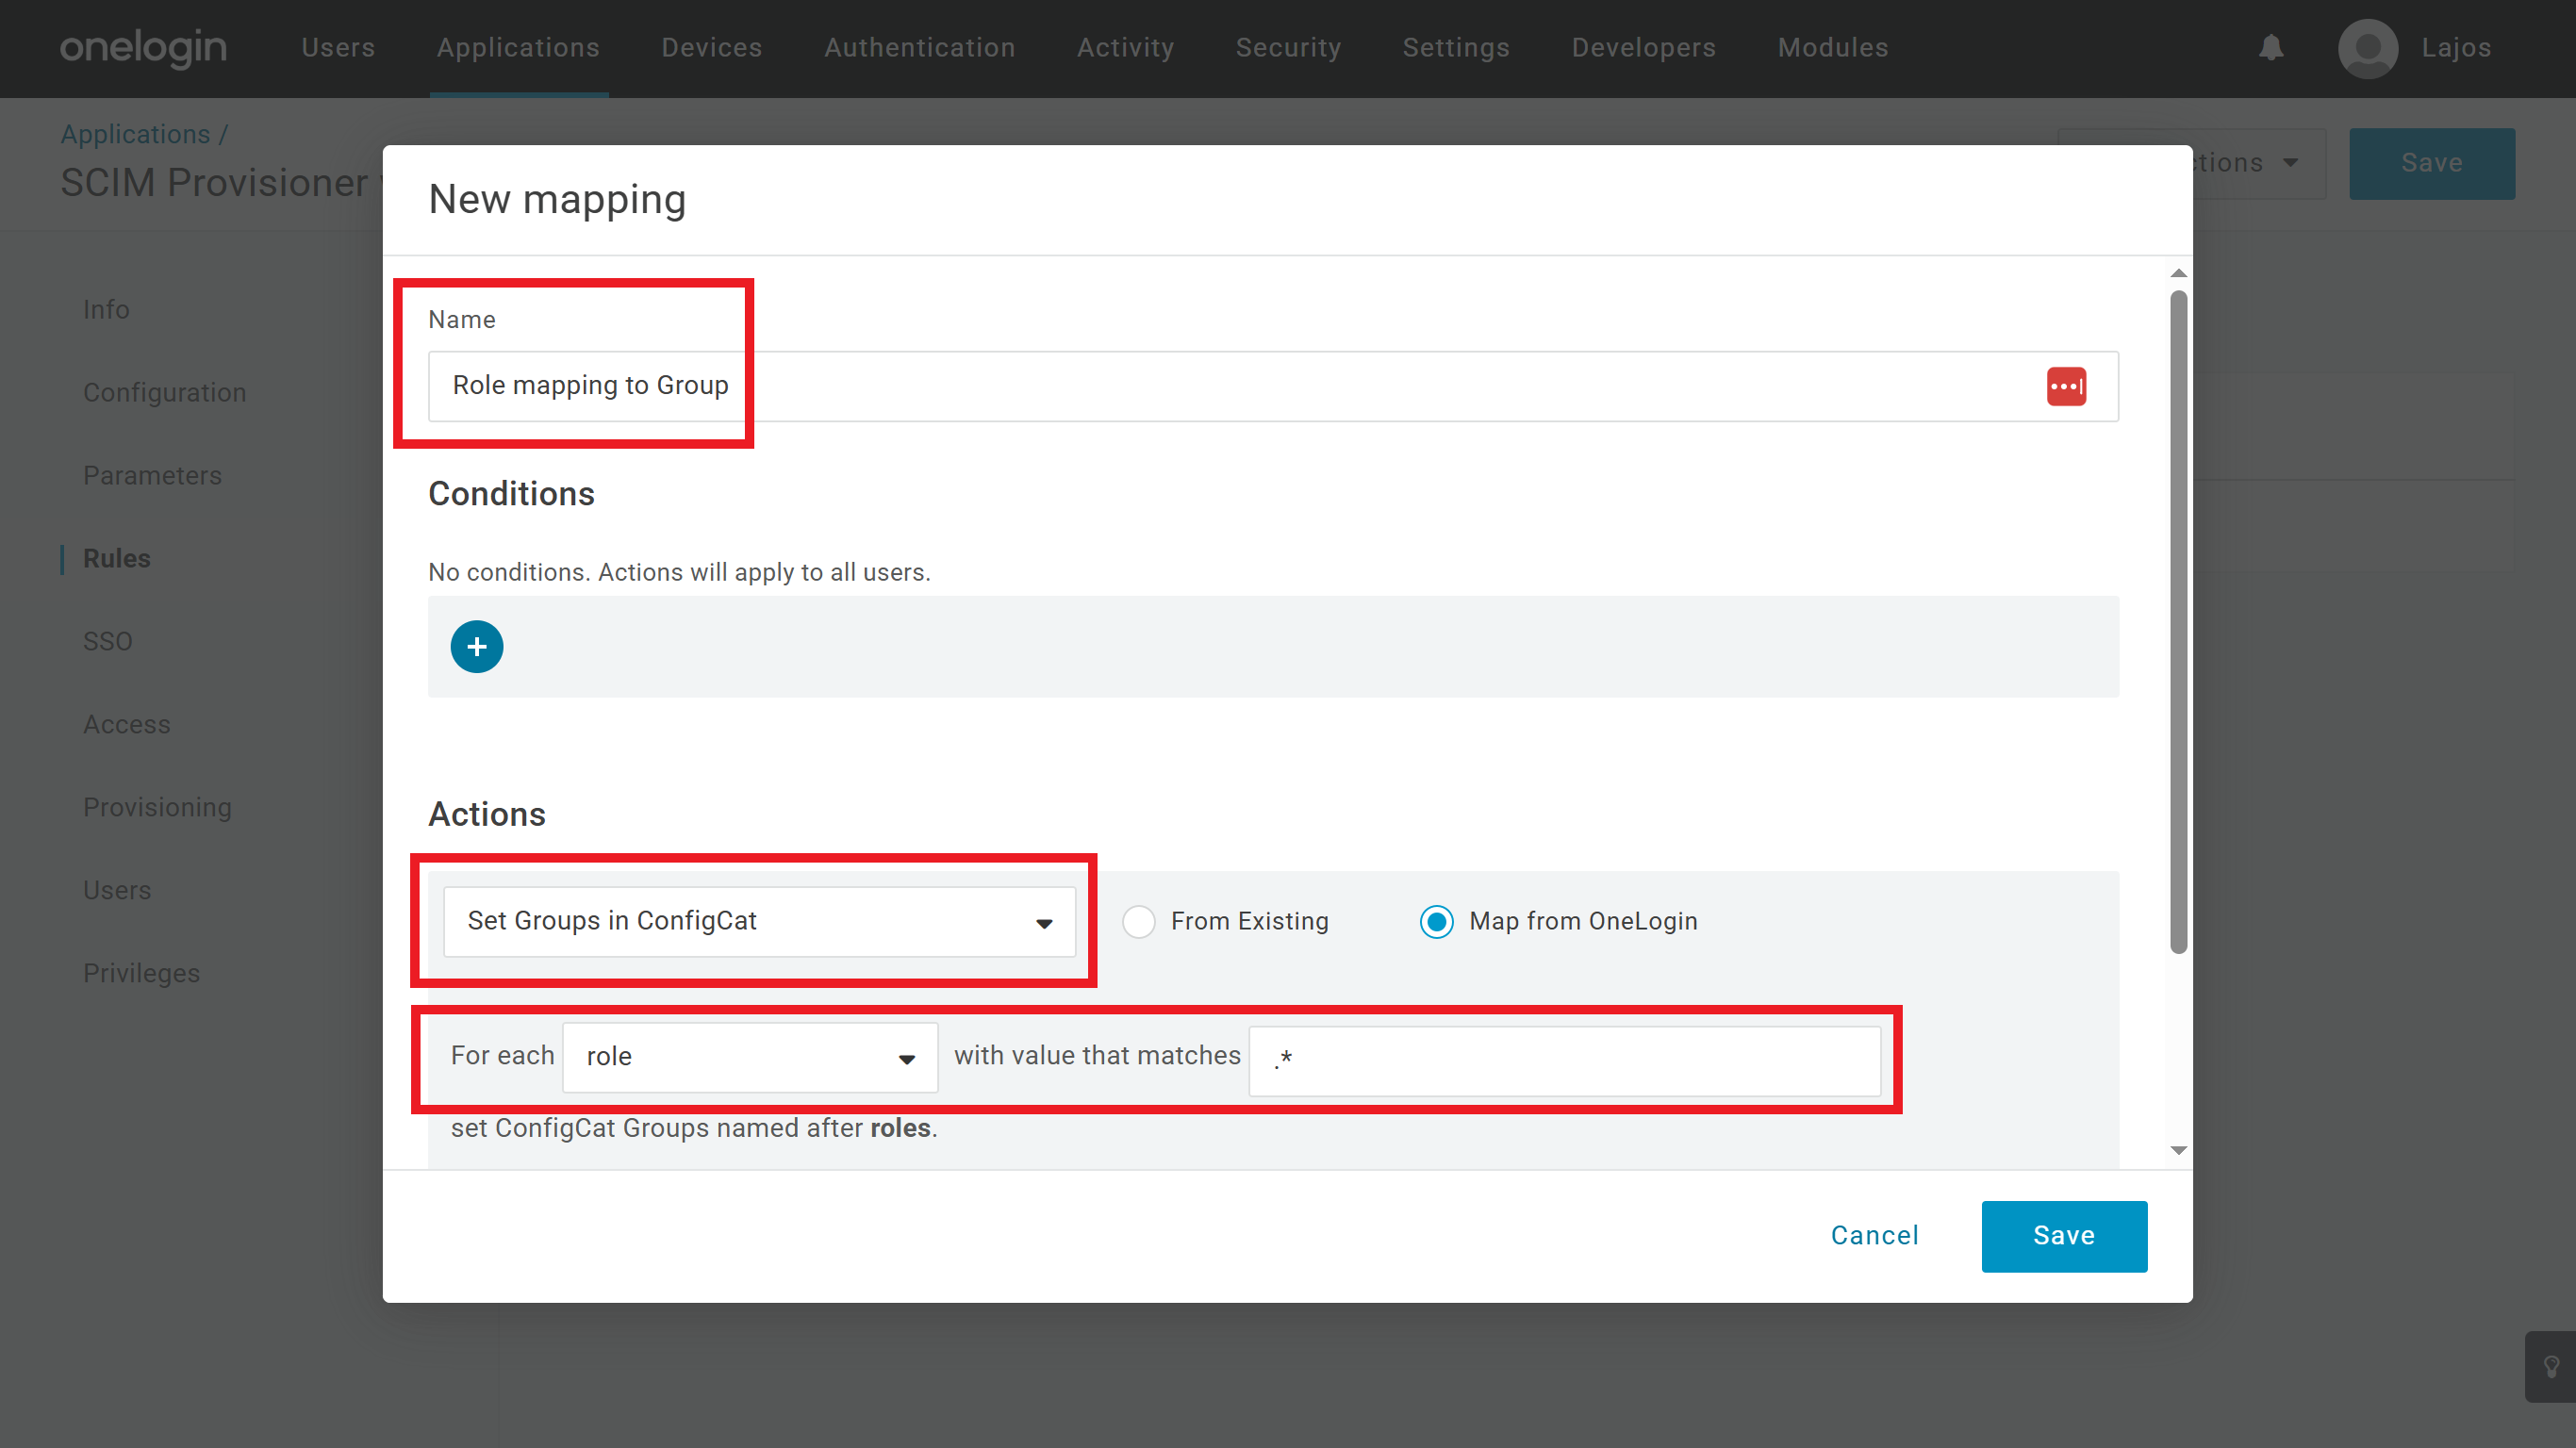
On the OneLogin application's Rules tab configure which property should OneLogin send as the user's groups to ConfigCat.
In the following example we are mapping the user's role in OneLogin as the synced group to ConfigCat, but you can create other mappings as well based on your preference. Read more about mappings here.- Click on te
Add rulebutton. - Specify a
Namefor your rule. - Select
Set Groups in ##YOUR APPLICATION NAME##at theActions. - Select
roleat theFor eachdropdown. - Set
.*for thewith value that matchesinput.
- Click on te
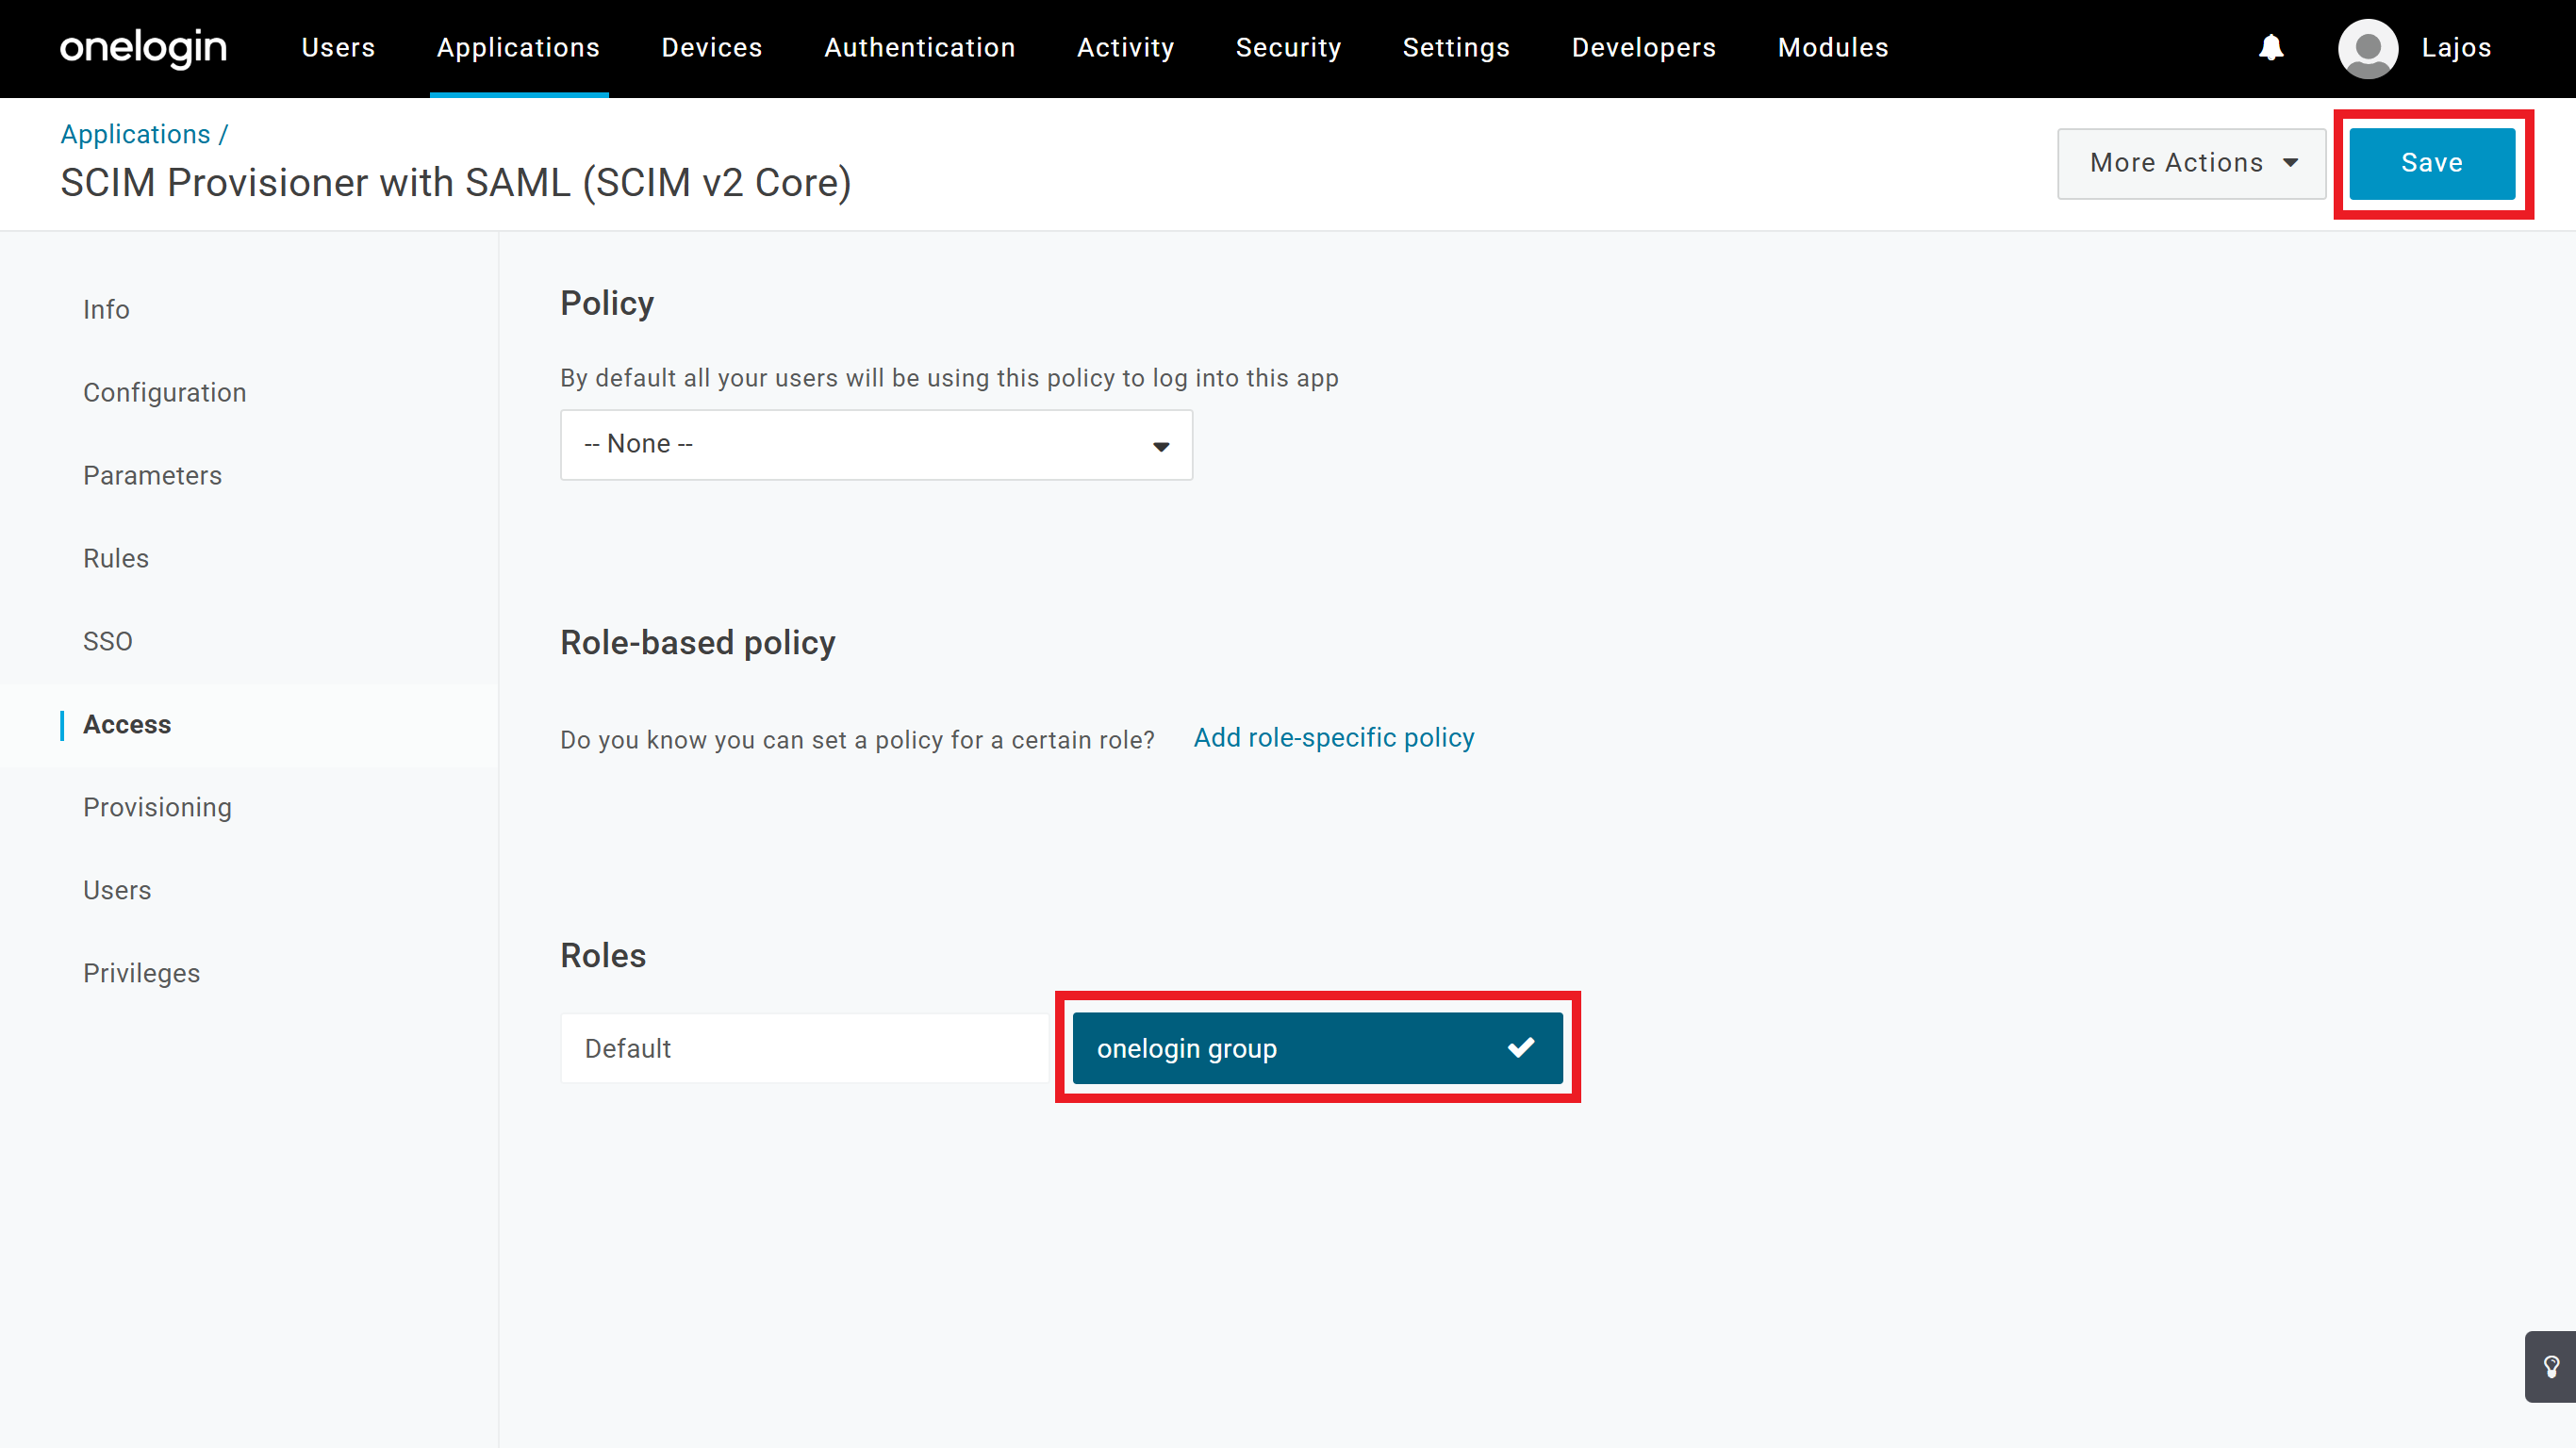
3. Assign users manually to the application or set access based on policies/roles on the OneLogin application's Access tab.
4. Start provisioning
-
On the OneLogin application's Configuration tab click on the
Enablebutton to start the provisioning.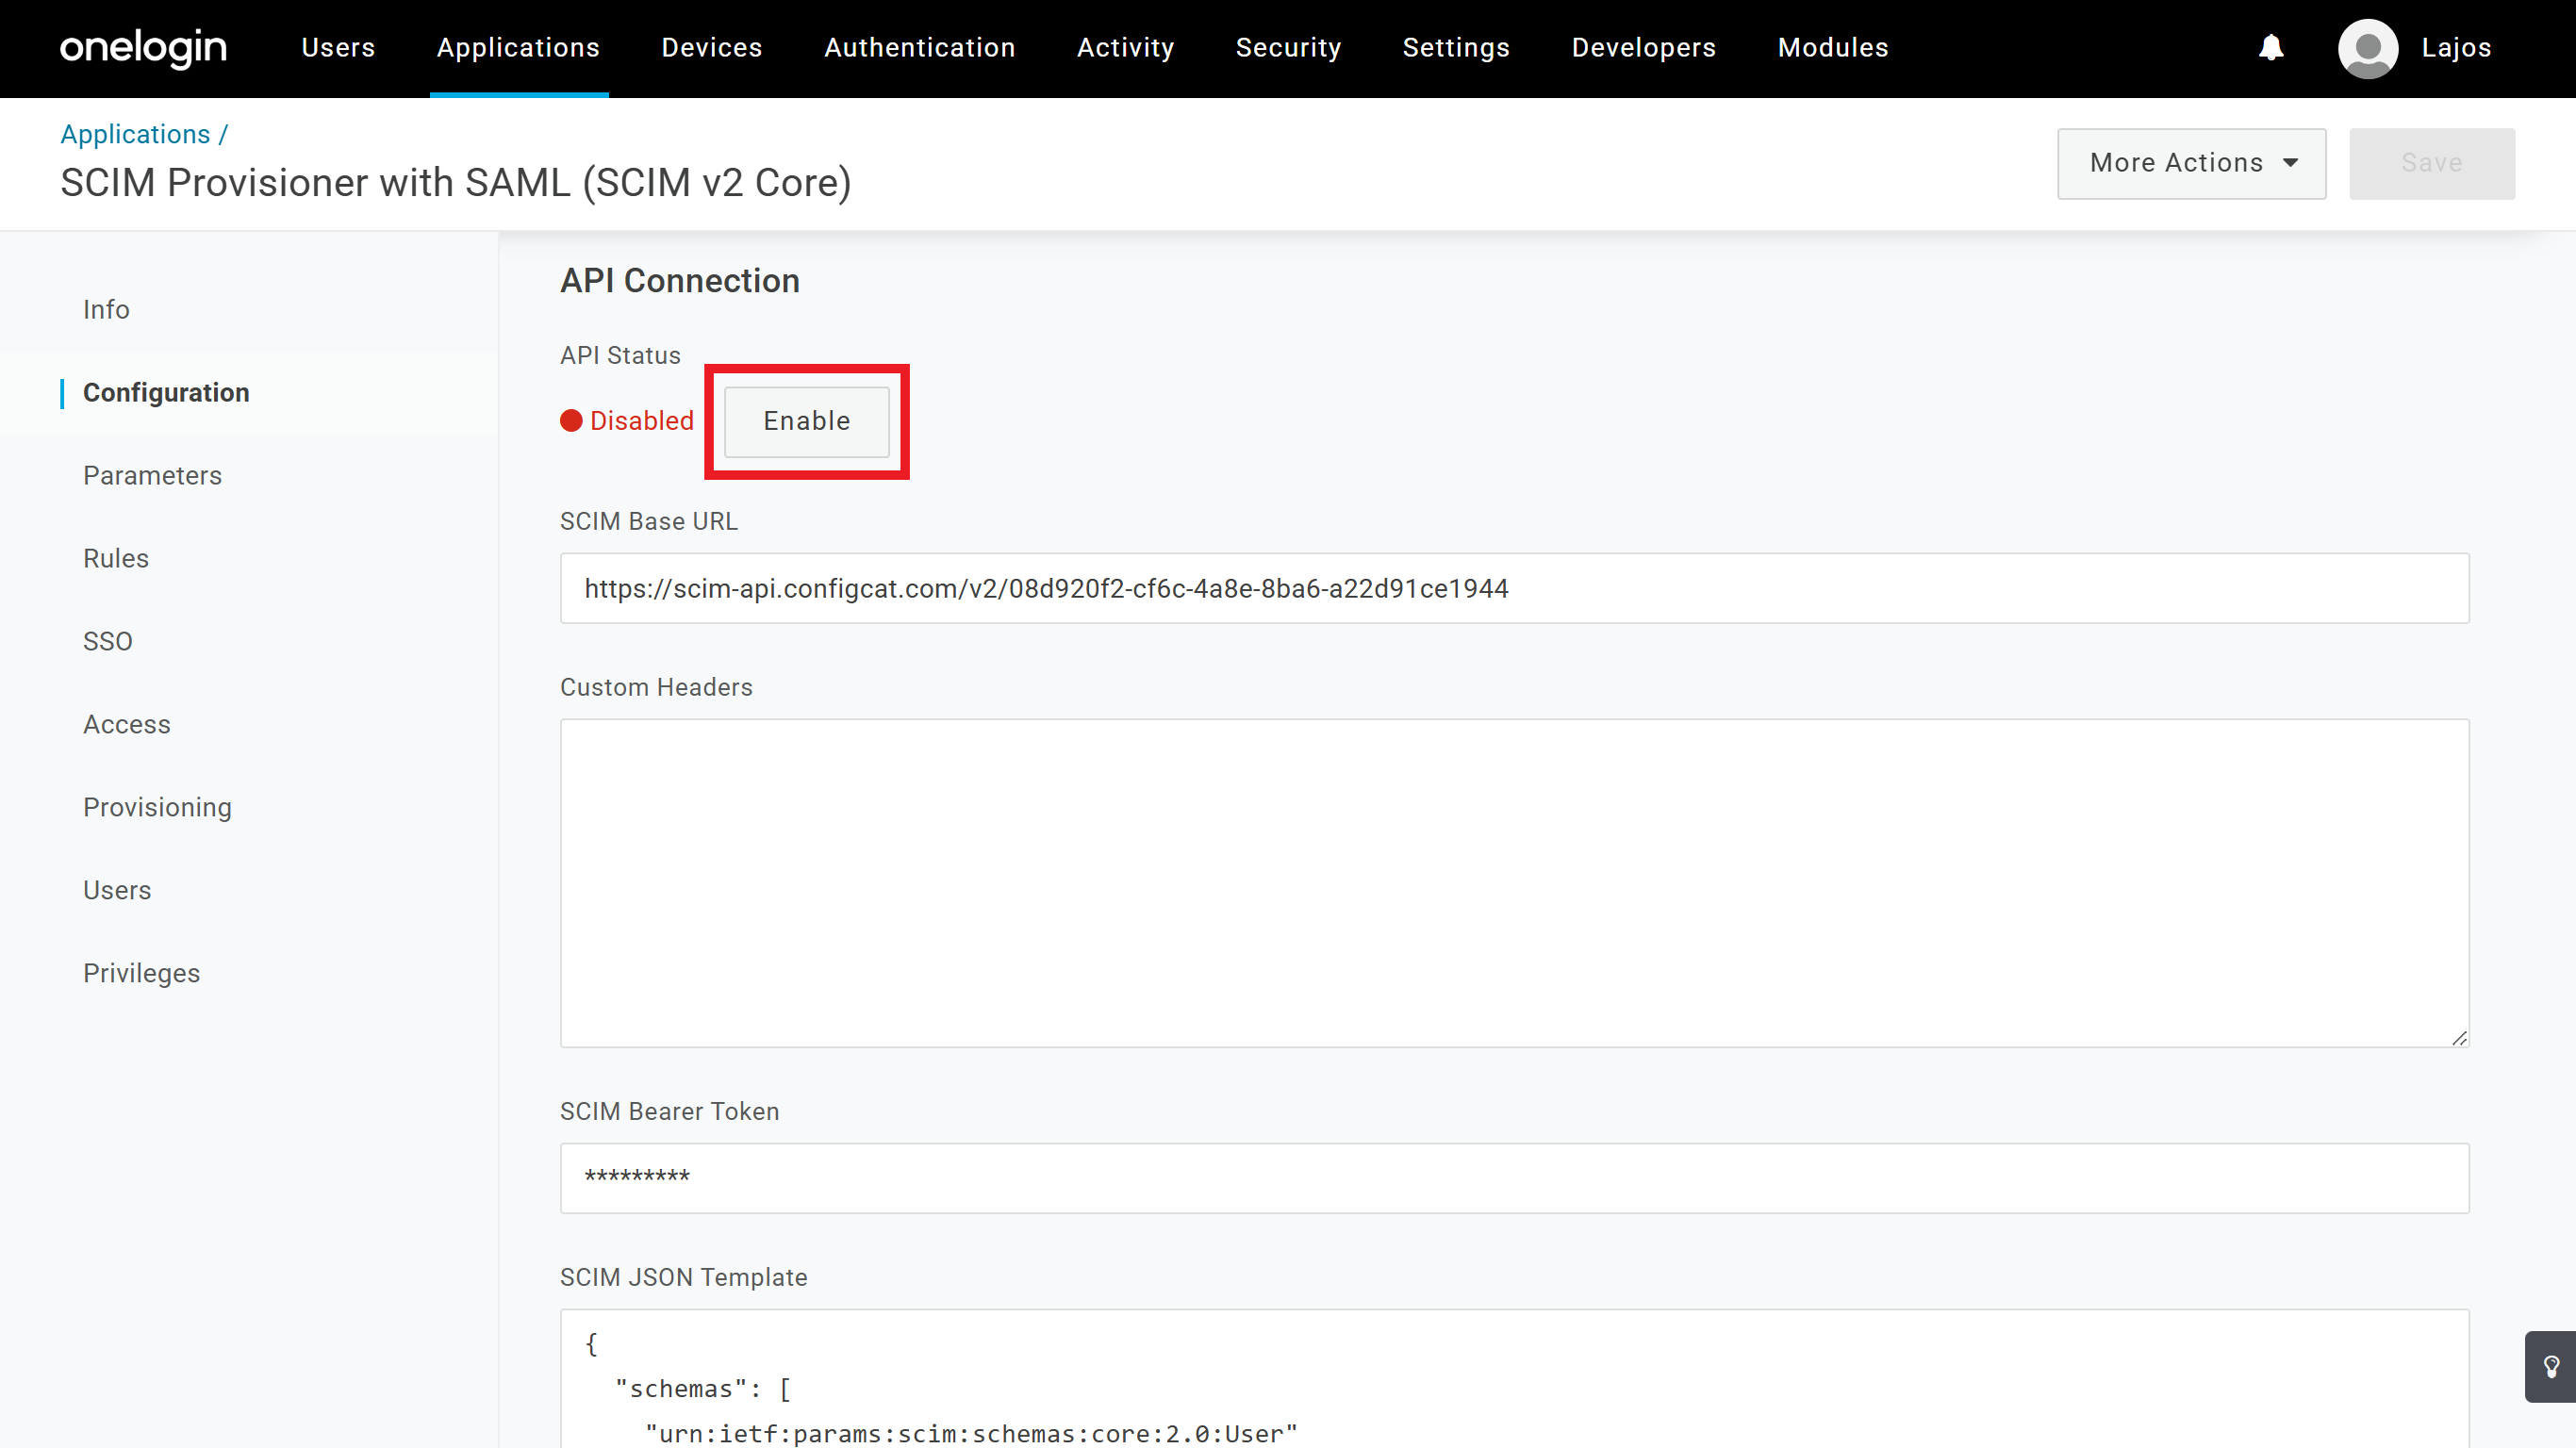
-
Wait until the first provisioning is finished, and you should see each synced group and user on ConfigCat's Authentication & Provisioning page.
5. Next Steps
- Continue with assigning ConfigCat permissions to the synced groups.