User Provisioning (SCIM) with Entra ID (Azure AD)
Introduction
Each Identity Provider requires specific information to configure a SCIM integration. The following guide will walk you through how you can connect ConfigCat with Entra ID via SCIM.
1. Create an Entra ID Enterprise Application
If you already configured your organization to use Entra ID as a SAML provider, you can use the existing Entra ID Enterprise application and skip to the next step.
-
Log in to the Azure Portal, go to the
Entra IDresource, selectEnterprise applications, and click onNew application.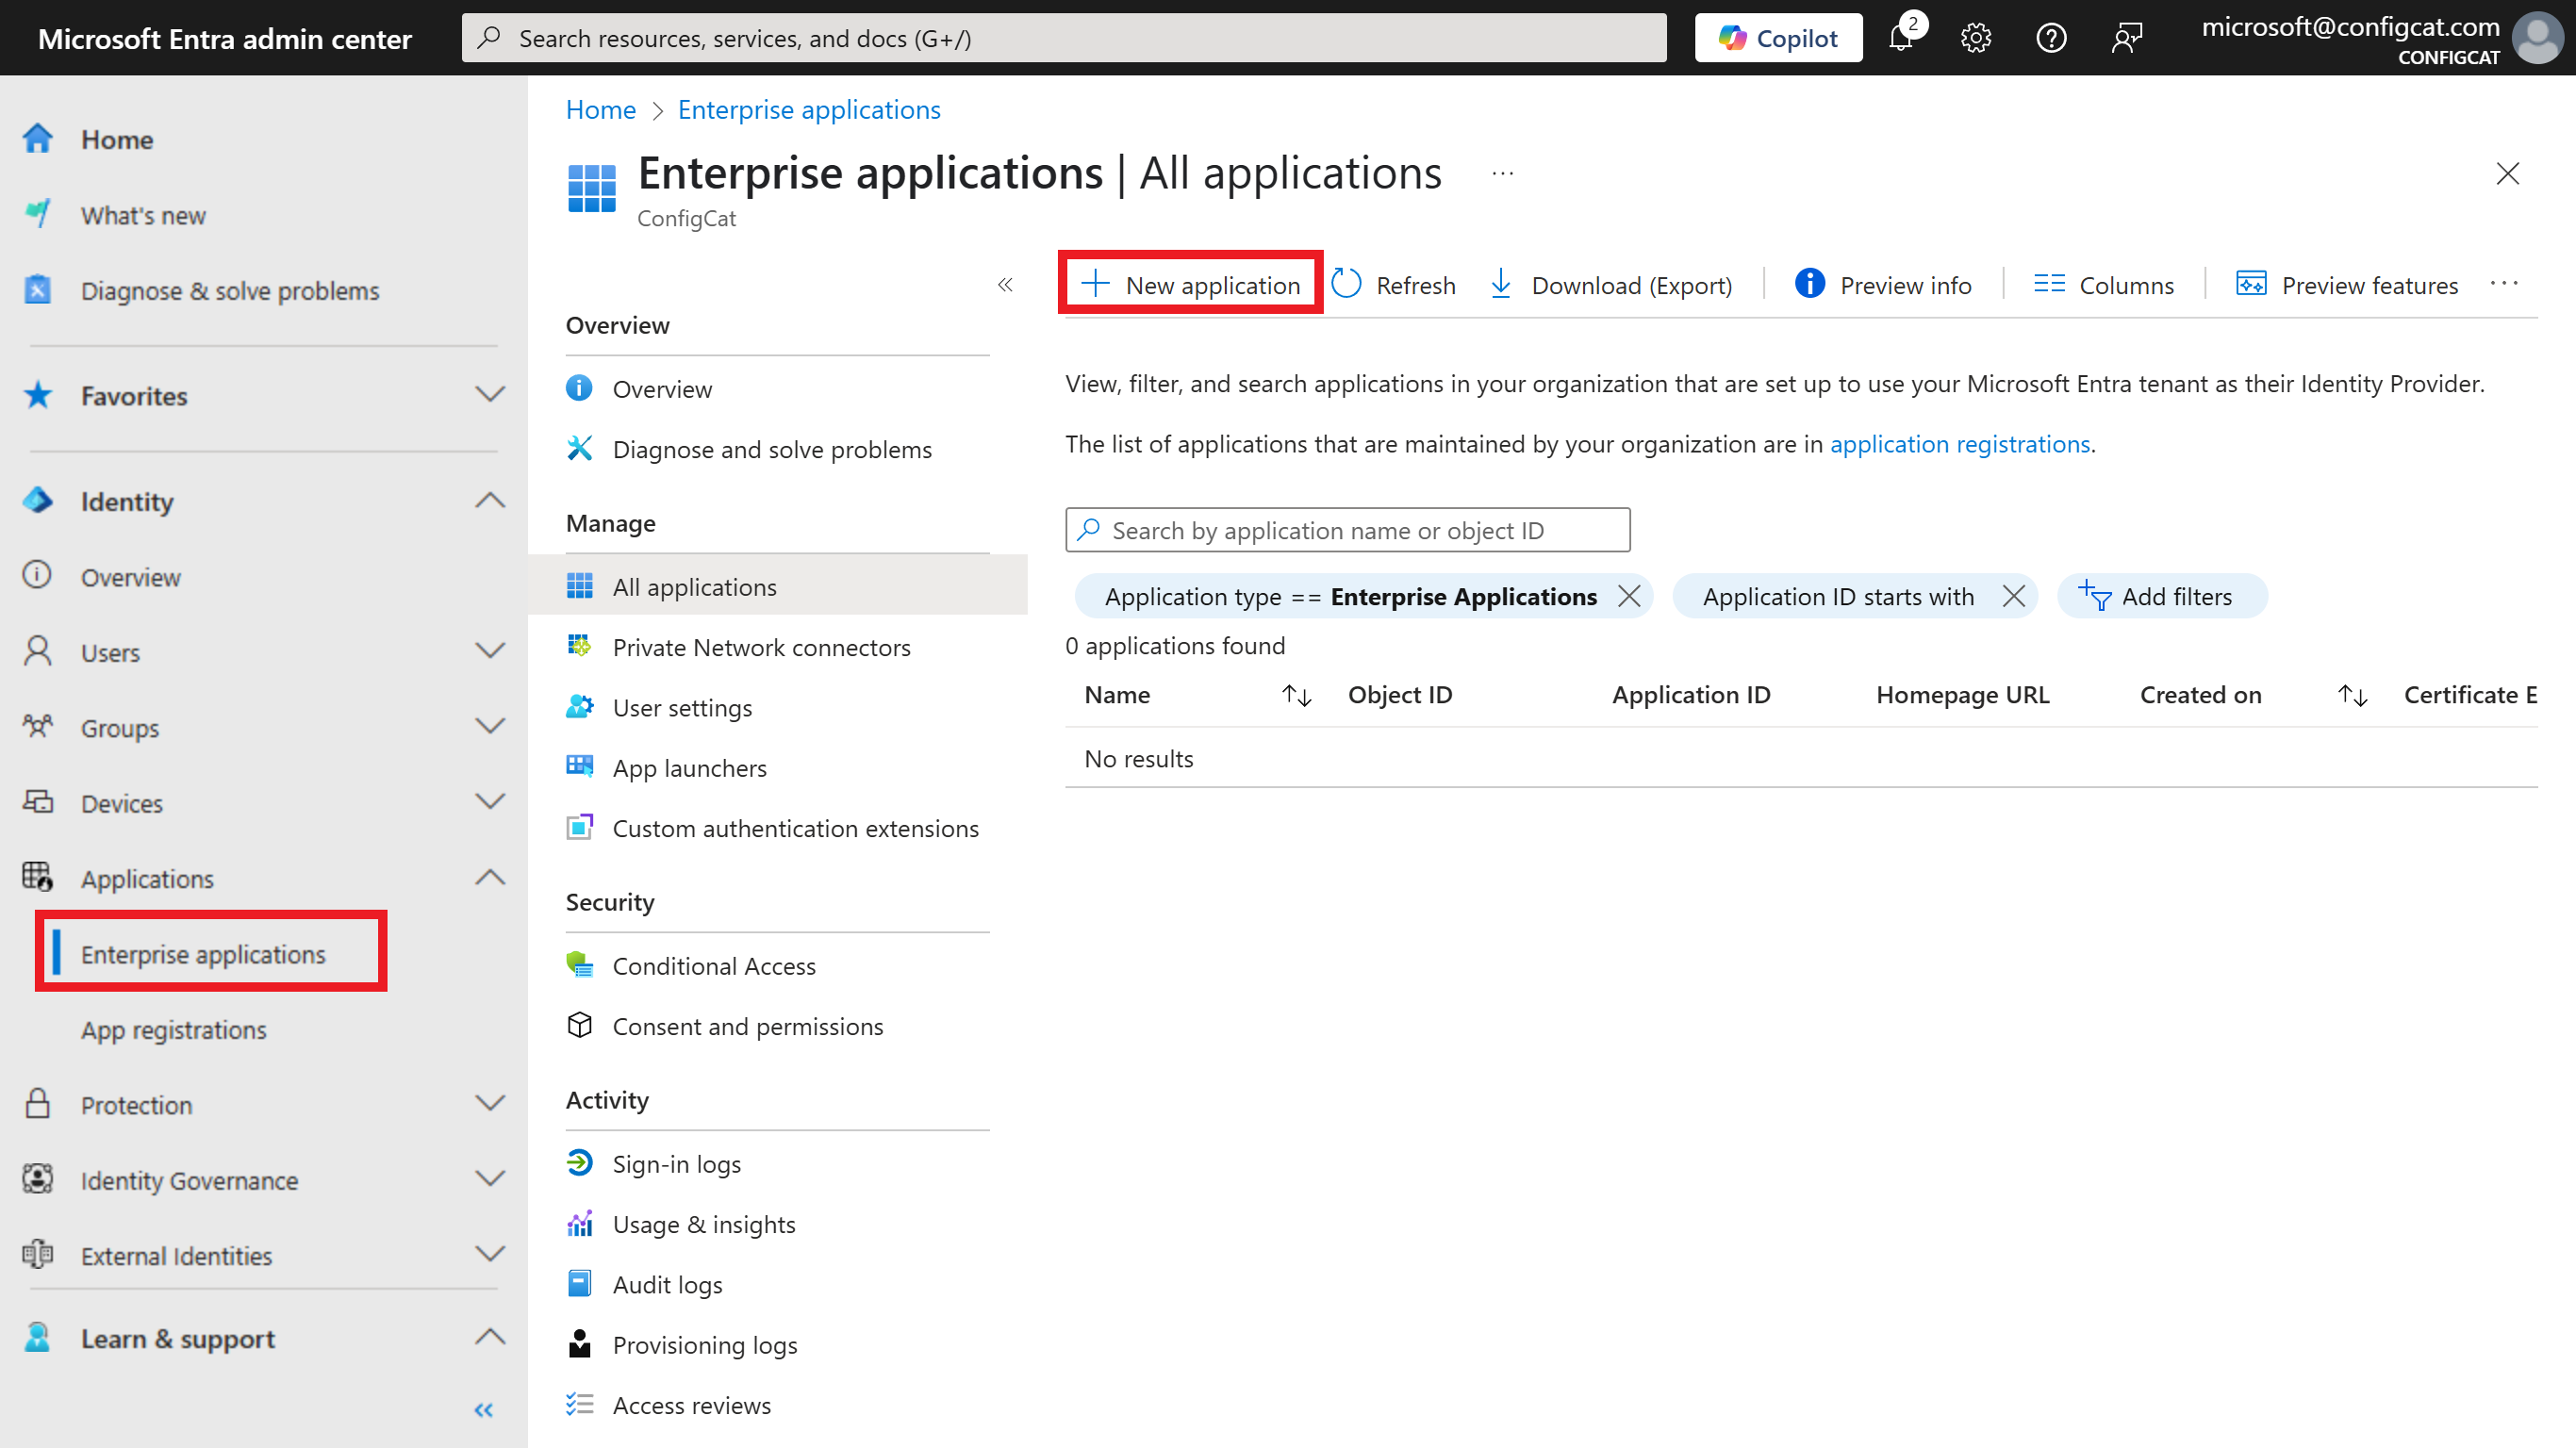
-
Click on
Create your own application.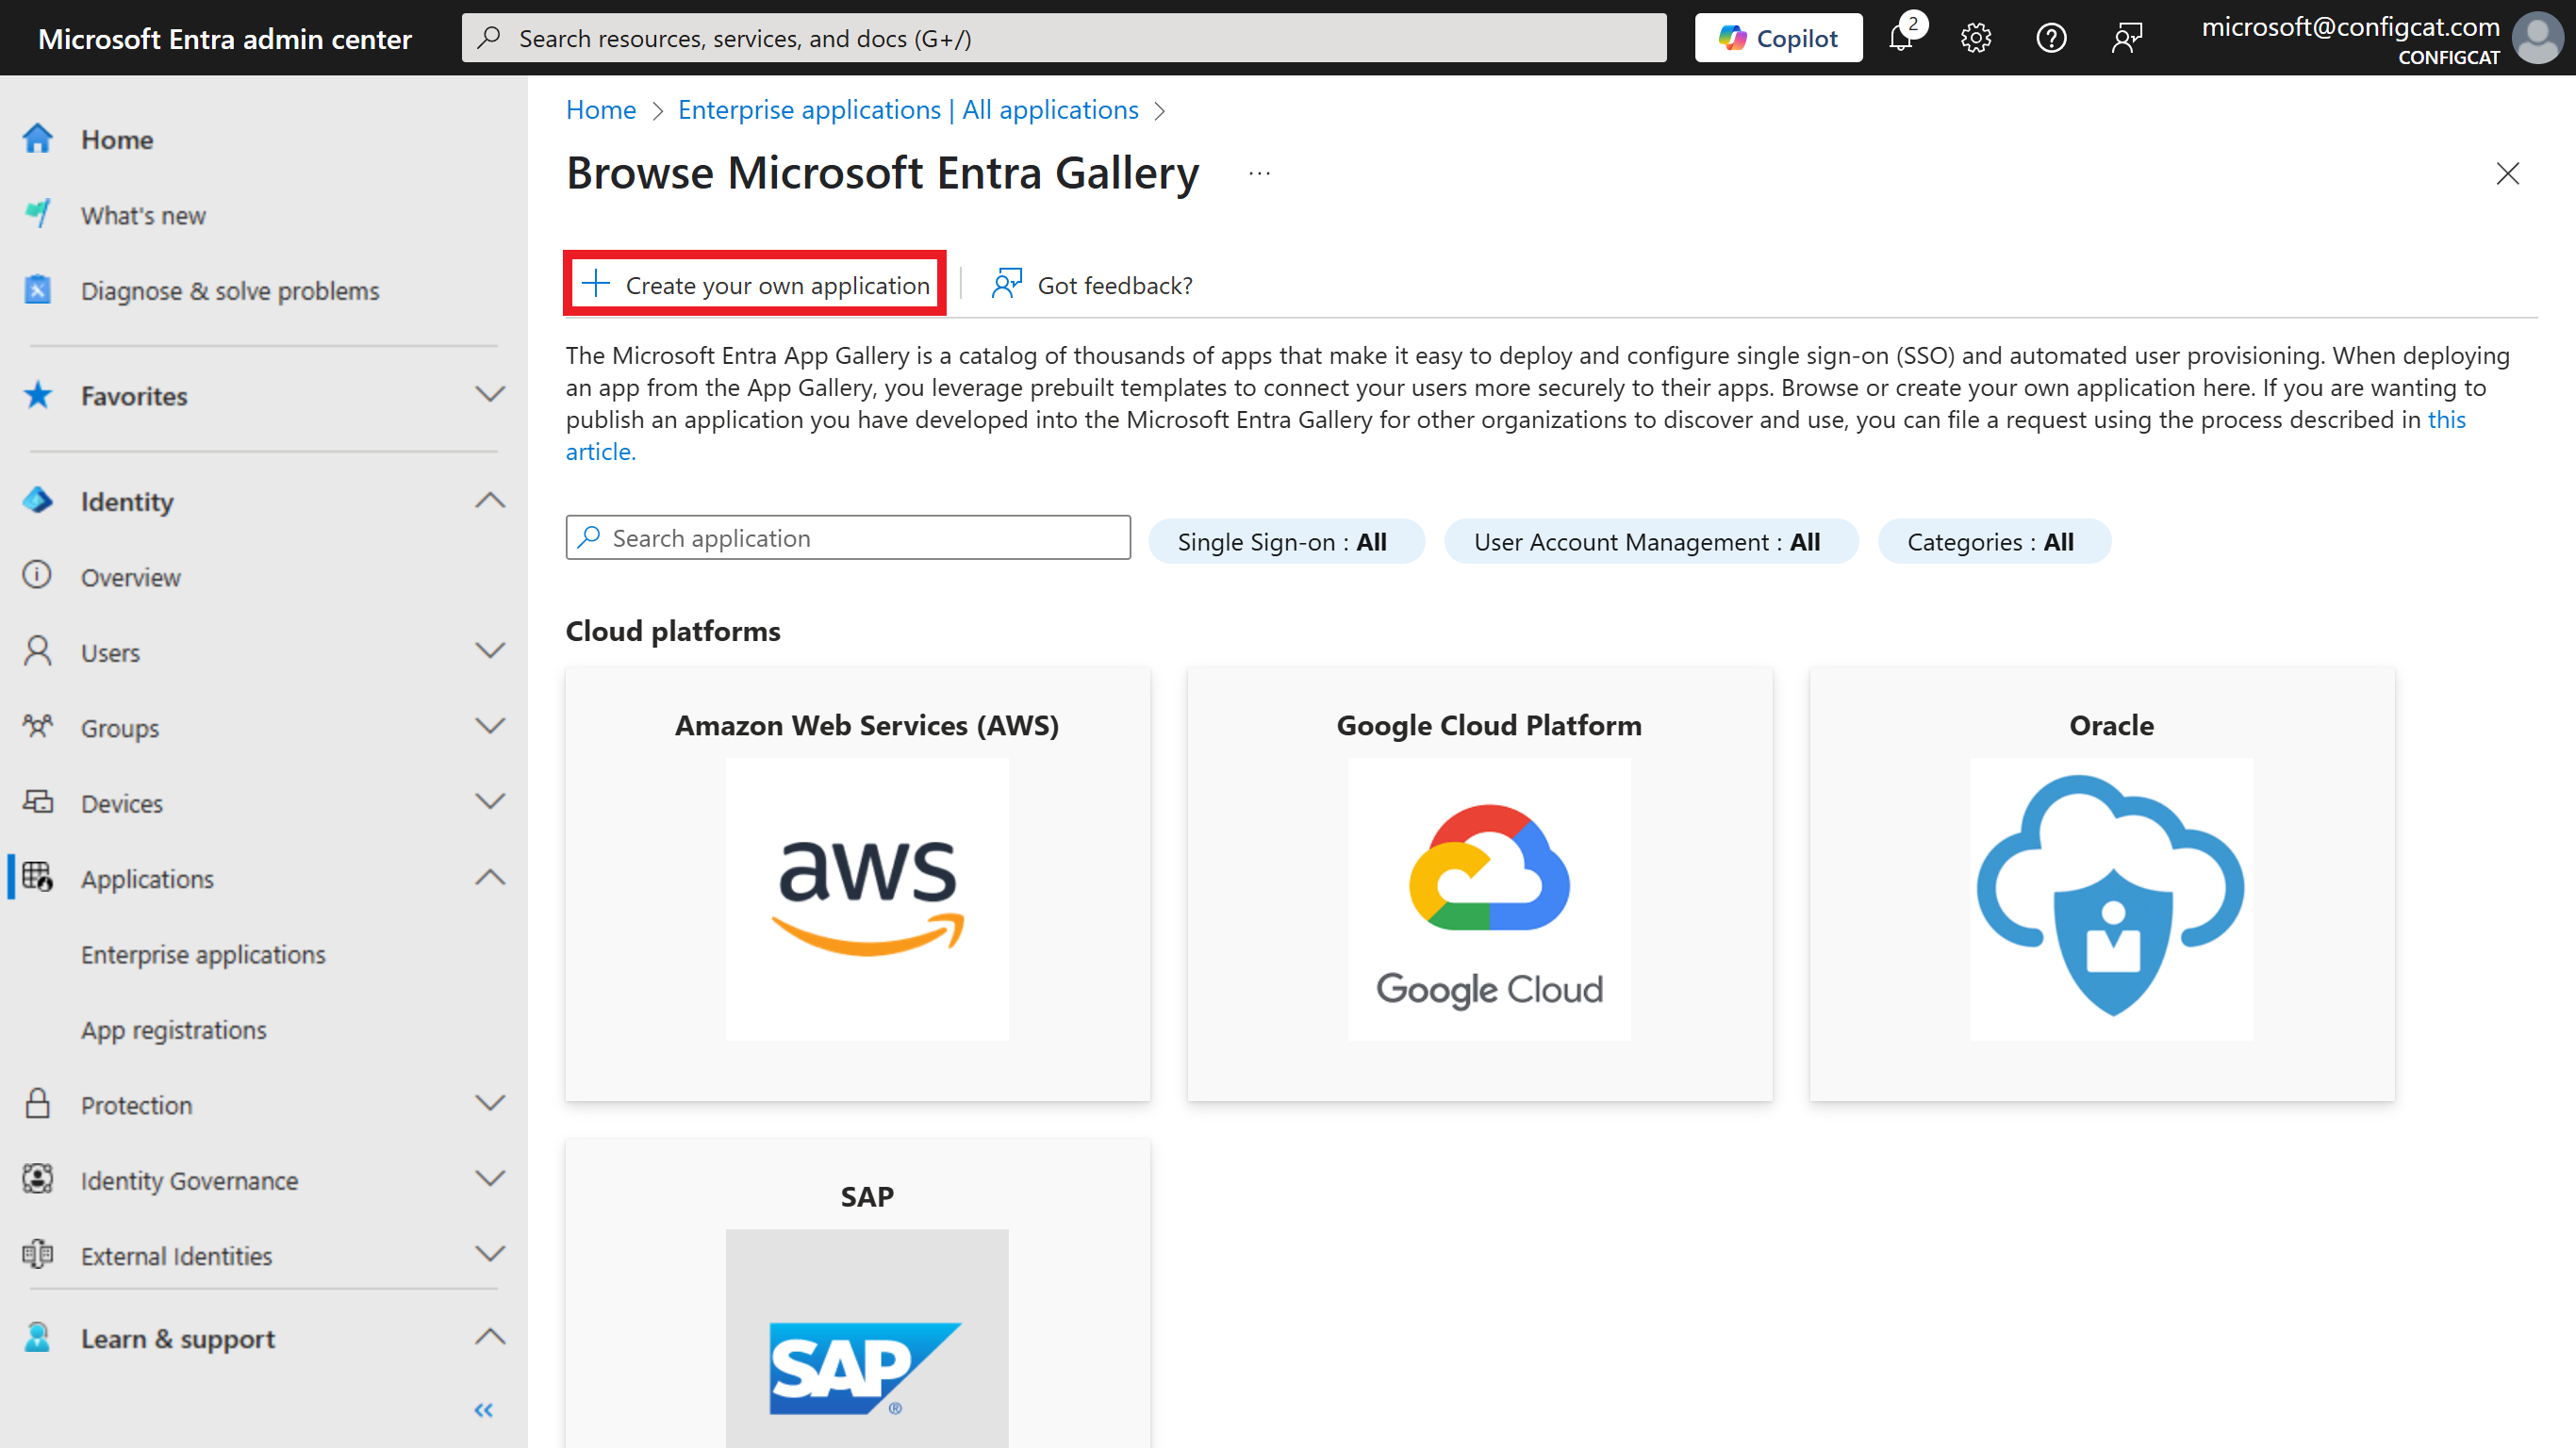
-
Enter a descriptive
App name, select theIntegrate any other application you don't find in the gallery (Non-gallery)option, then clickCreate.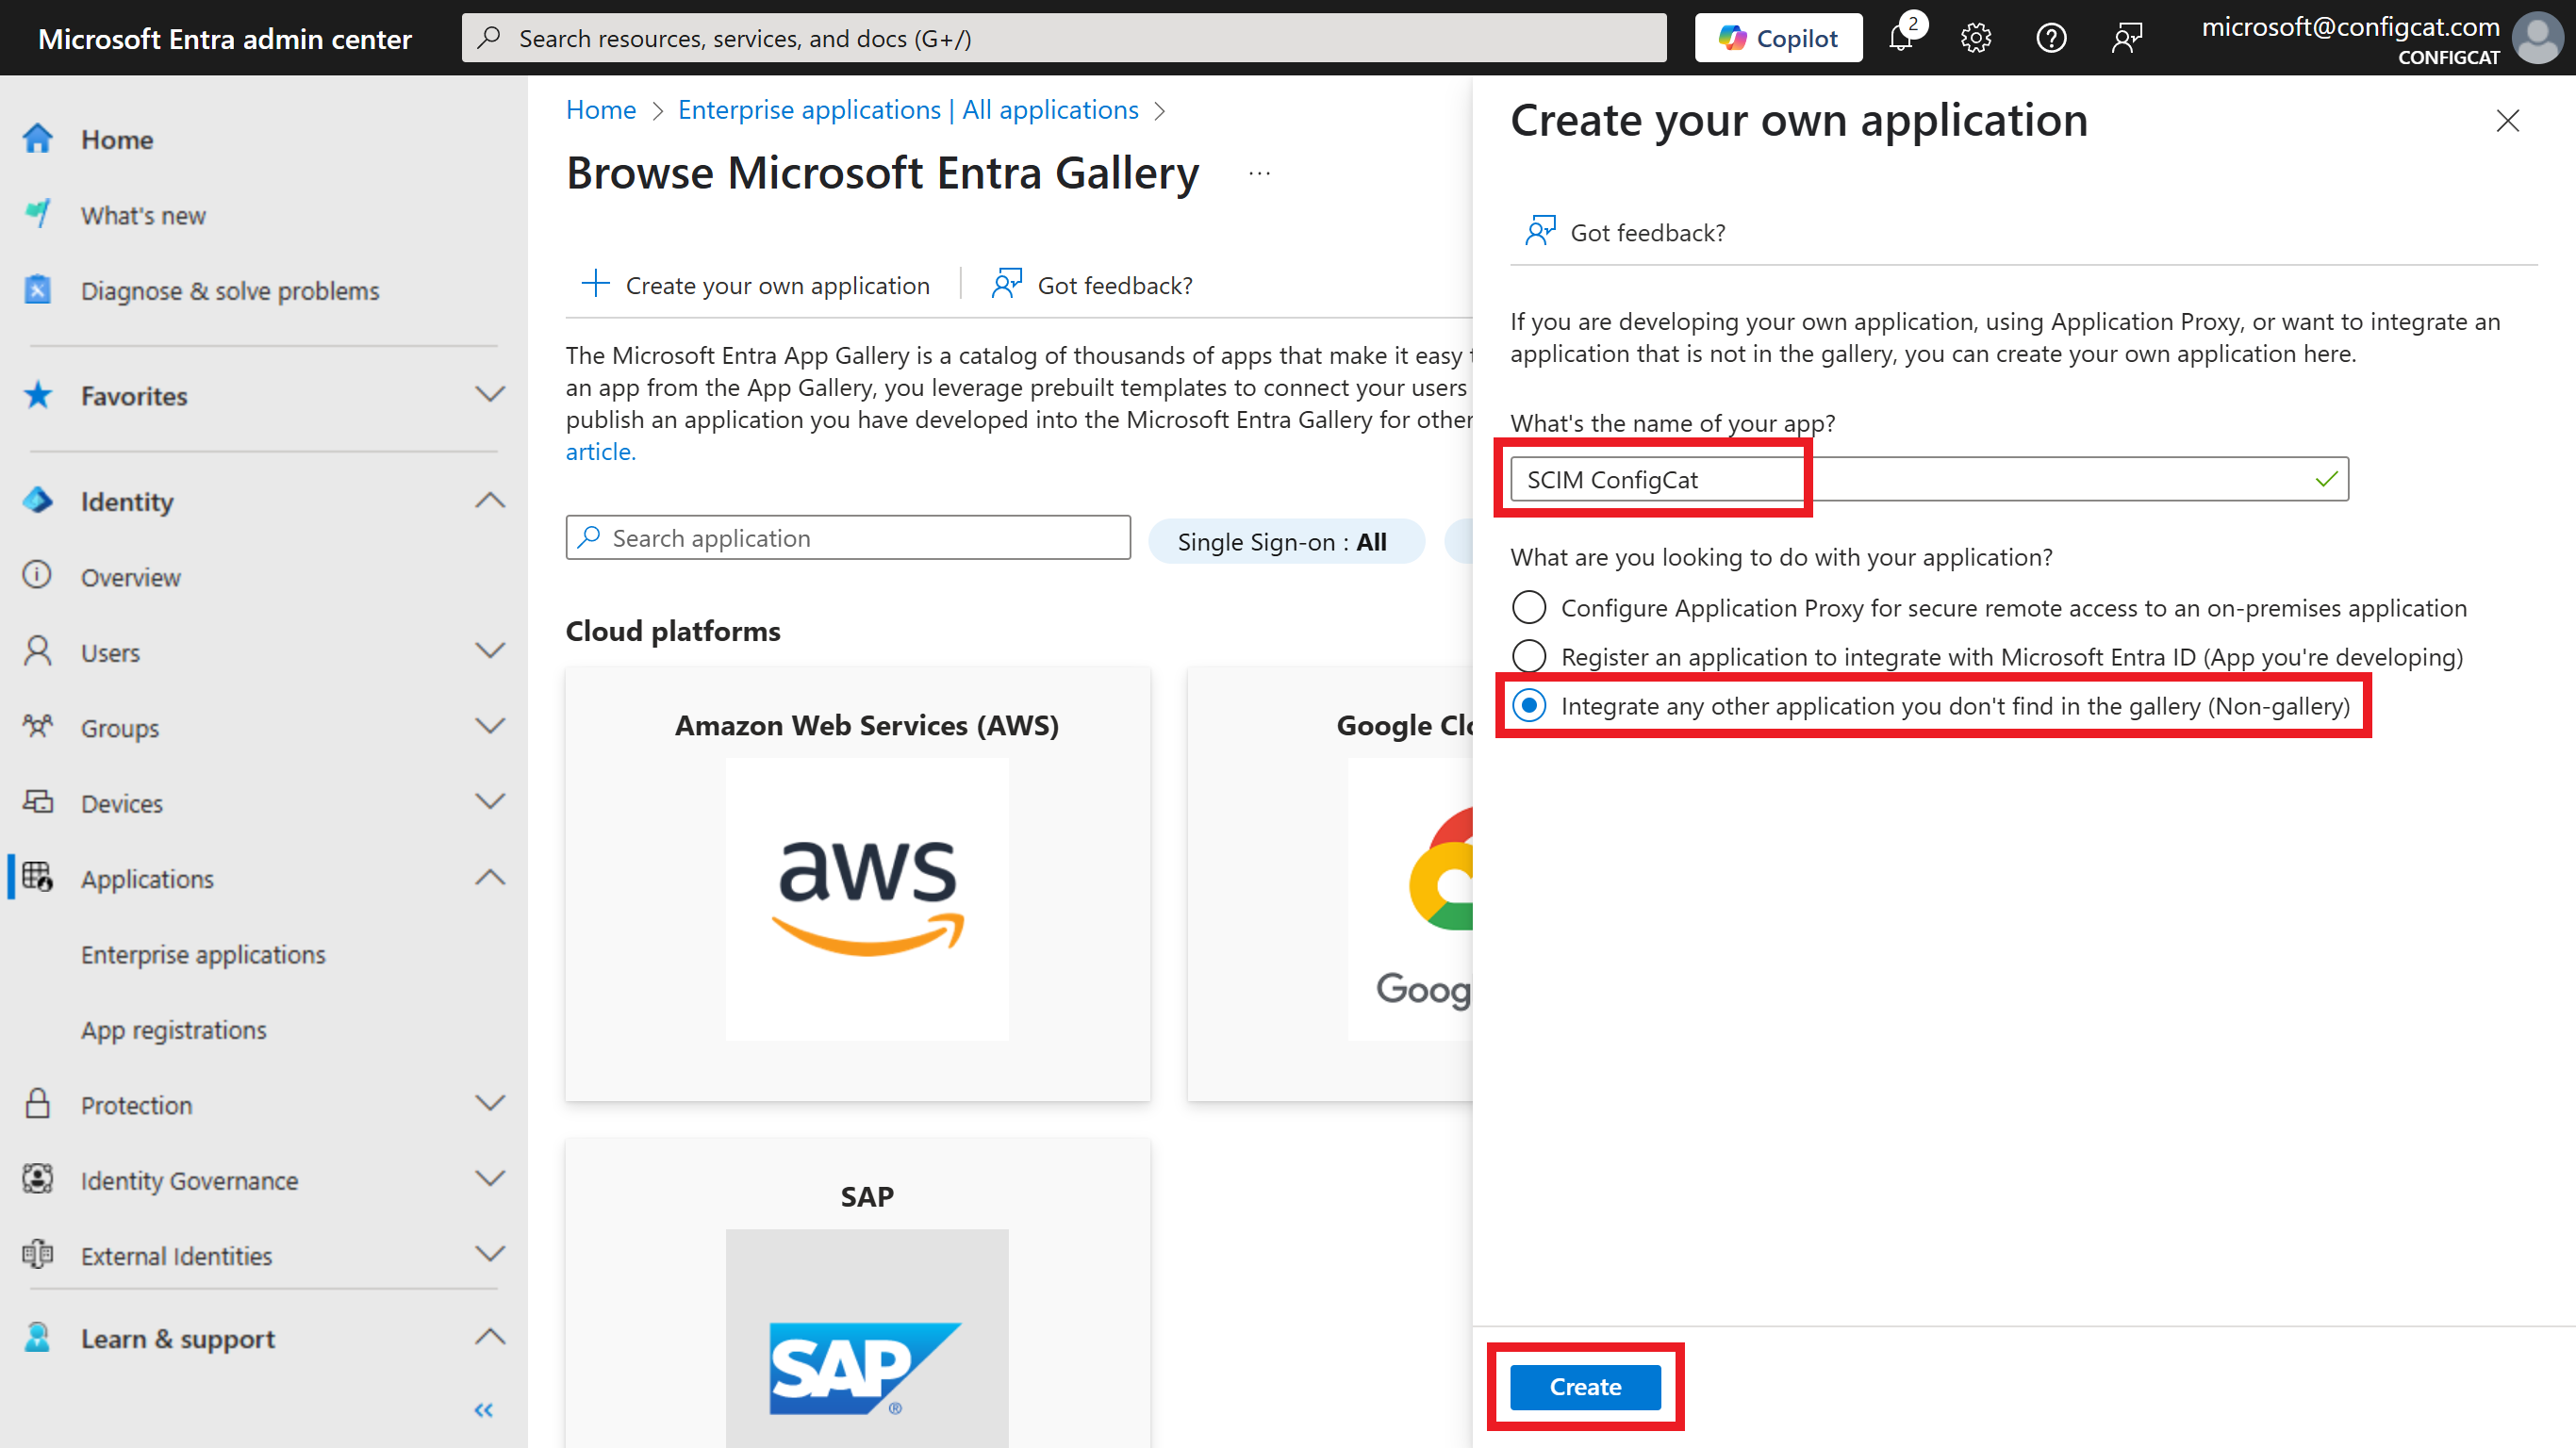
The next step will guide you on how to setup Entra ID to synchronize your Identity Provider users and Identity Provider groups to ConfigCat.
2. Configure Provisioning (SCIM) for the Azure Enterprise Application
-
On the
Managesection of the application, selectProvisioning, then click onNew Configuration.
-
Gather the
SCIM URLand theTokenfrom the Authentication & Provisioning page in ConfigCat.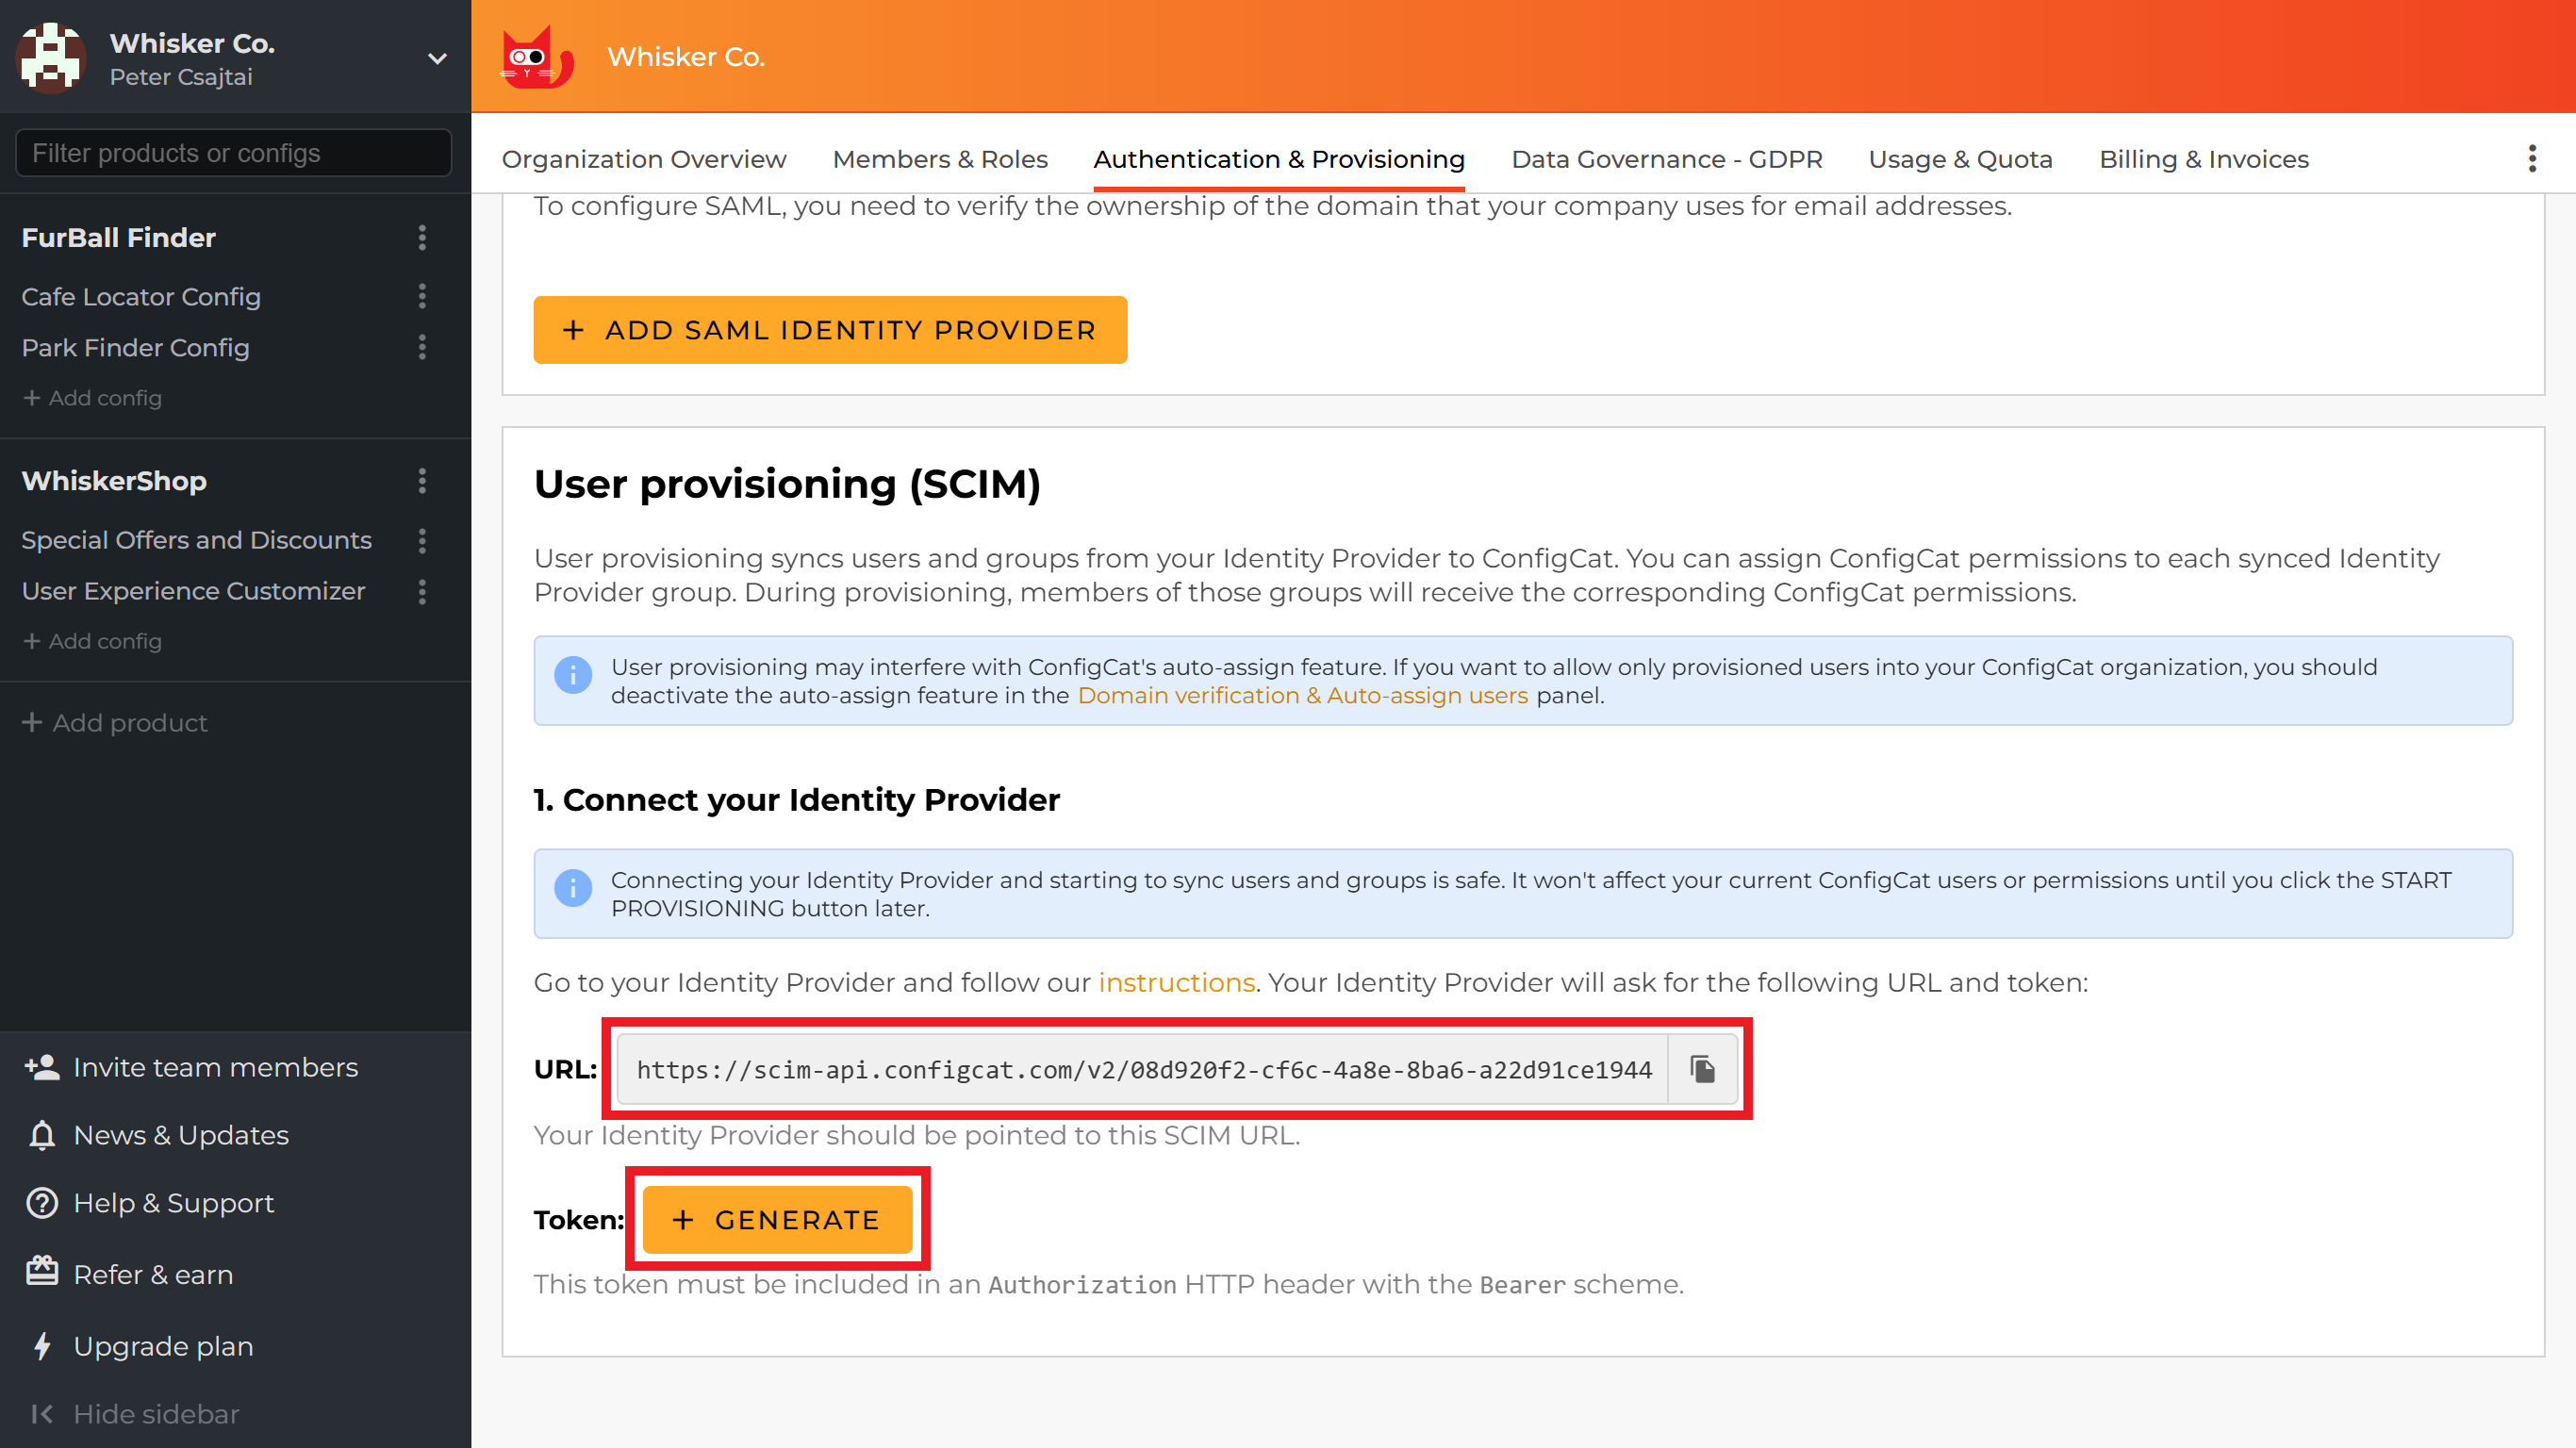

-
Add the
SCIM URLas theTenant URLand theTokenas theSecret tokenon the New provisioning configuration page in Azure. Click on theCreatebutton.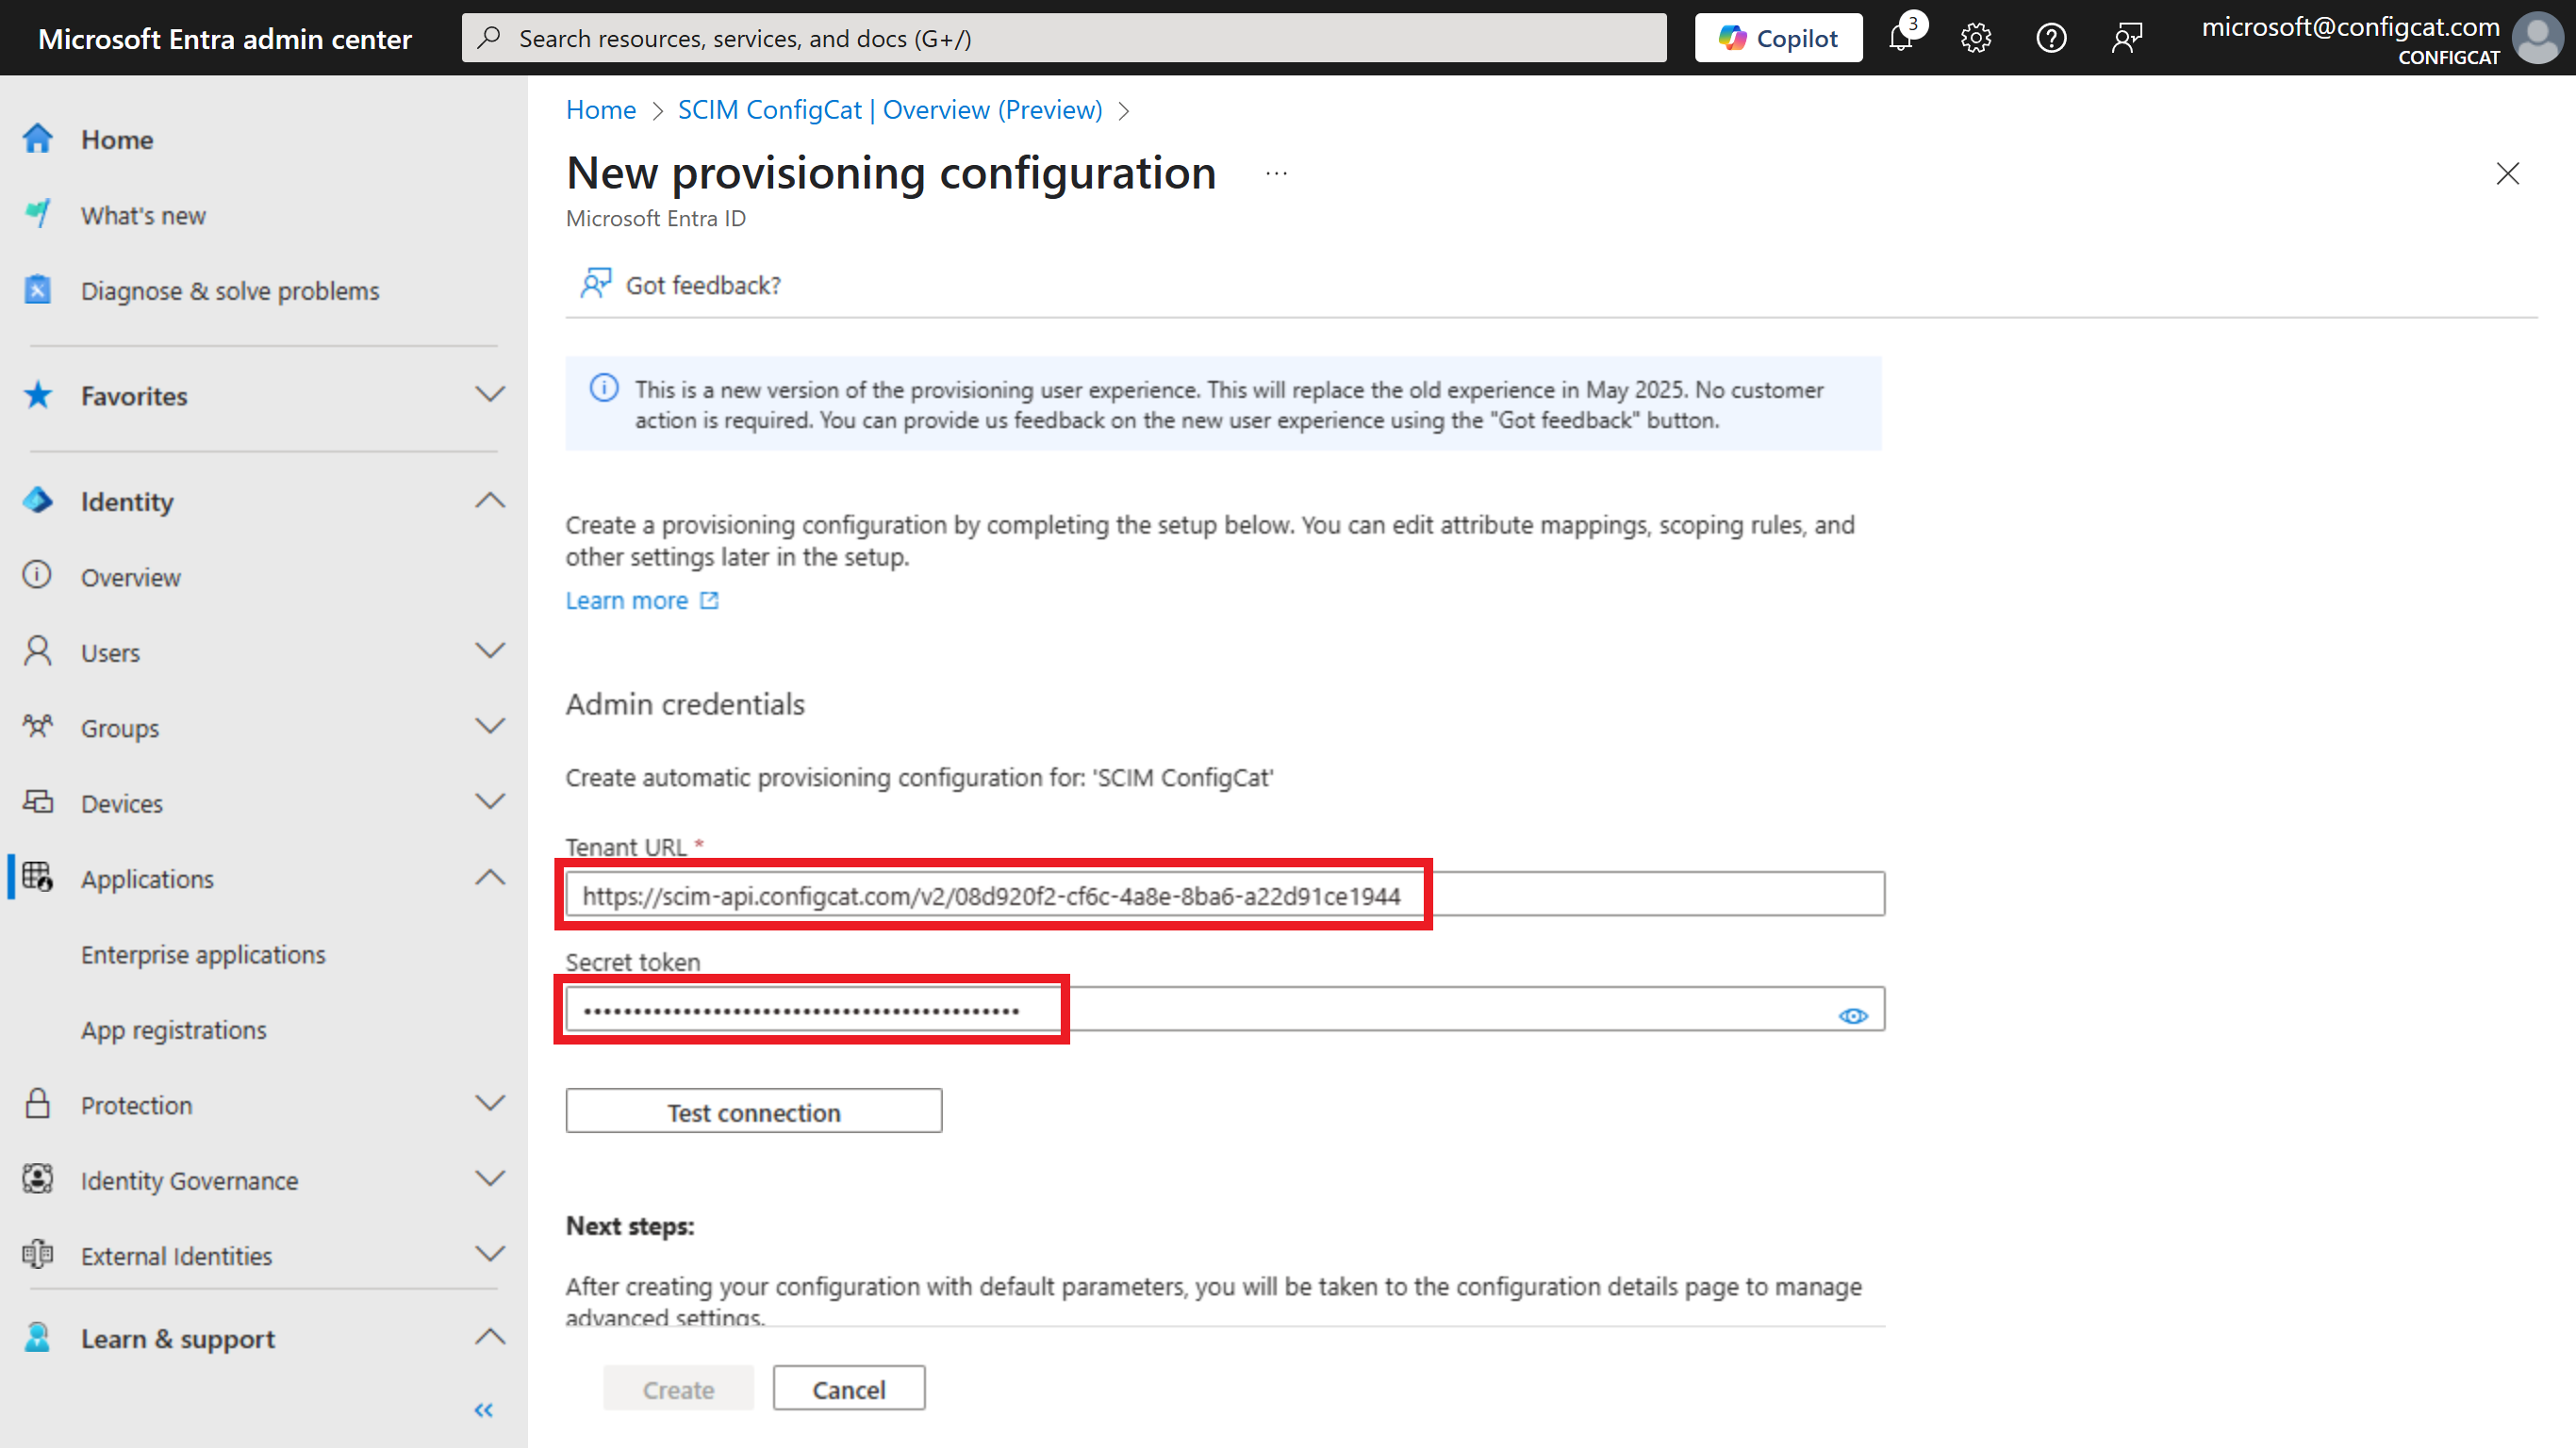
-
Select the
Provisioningmenu and in the Mappings, configure the mapping for Users and Groups.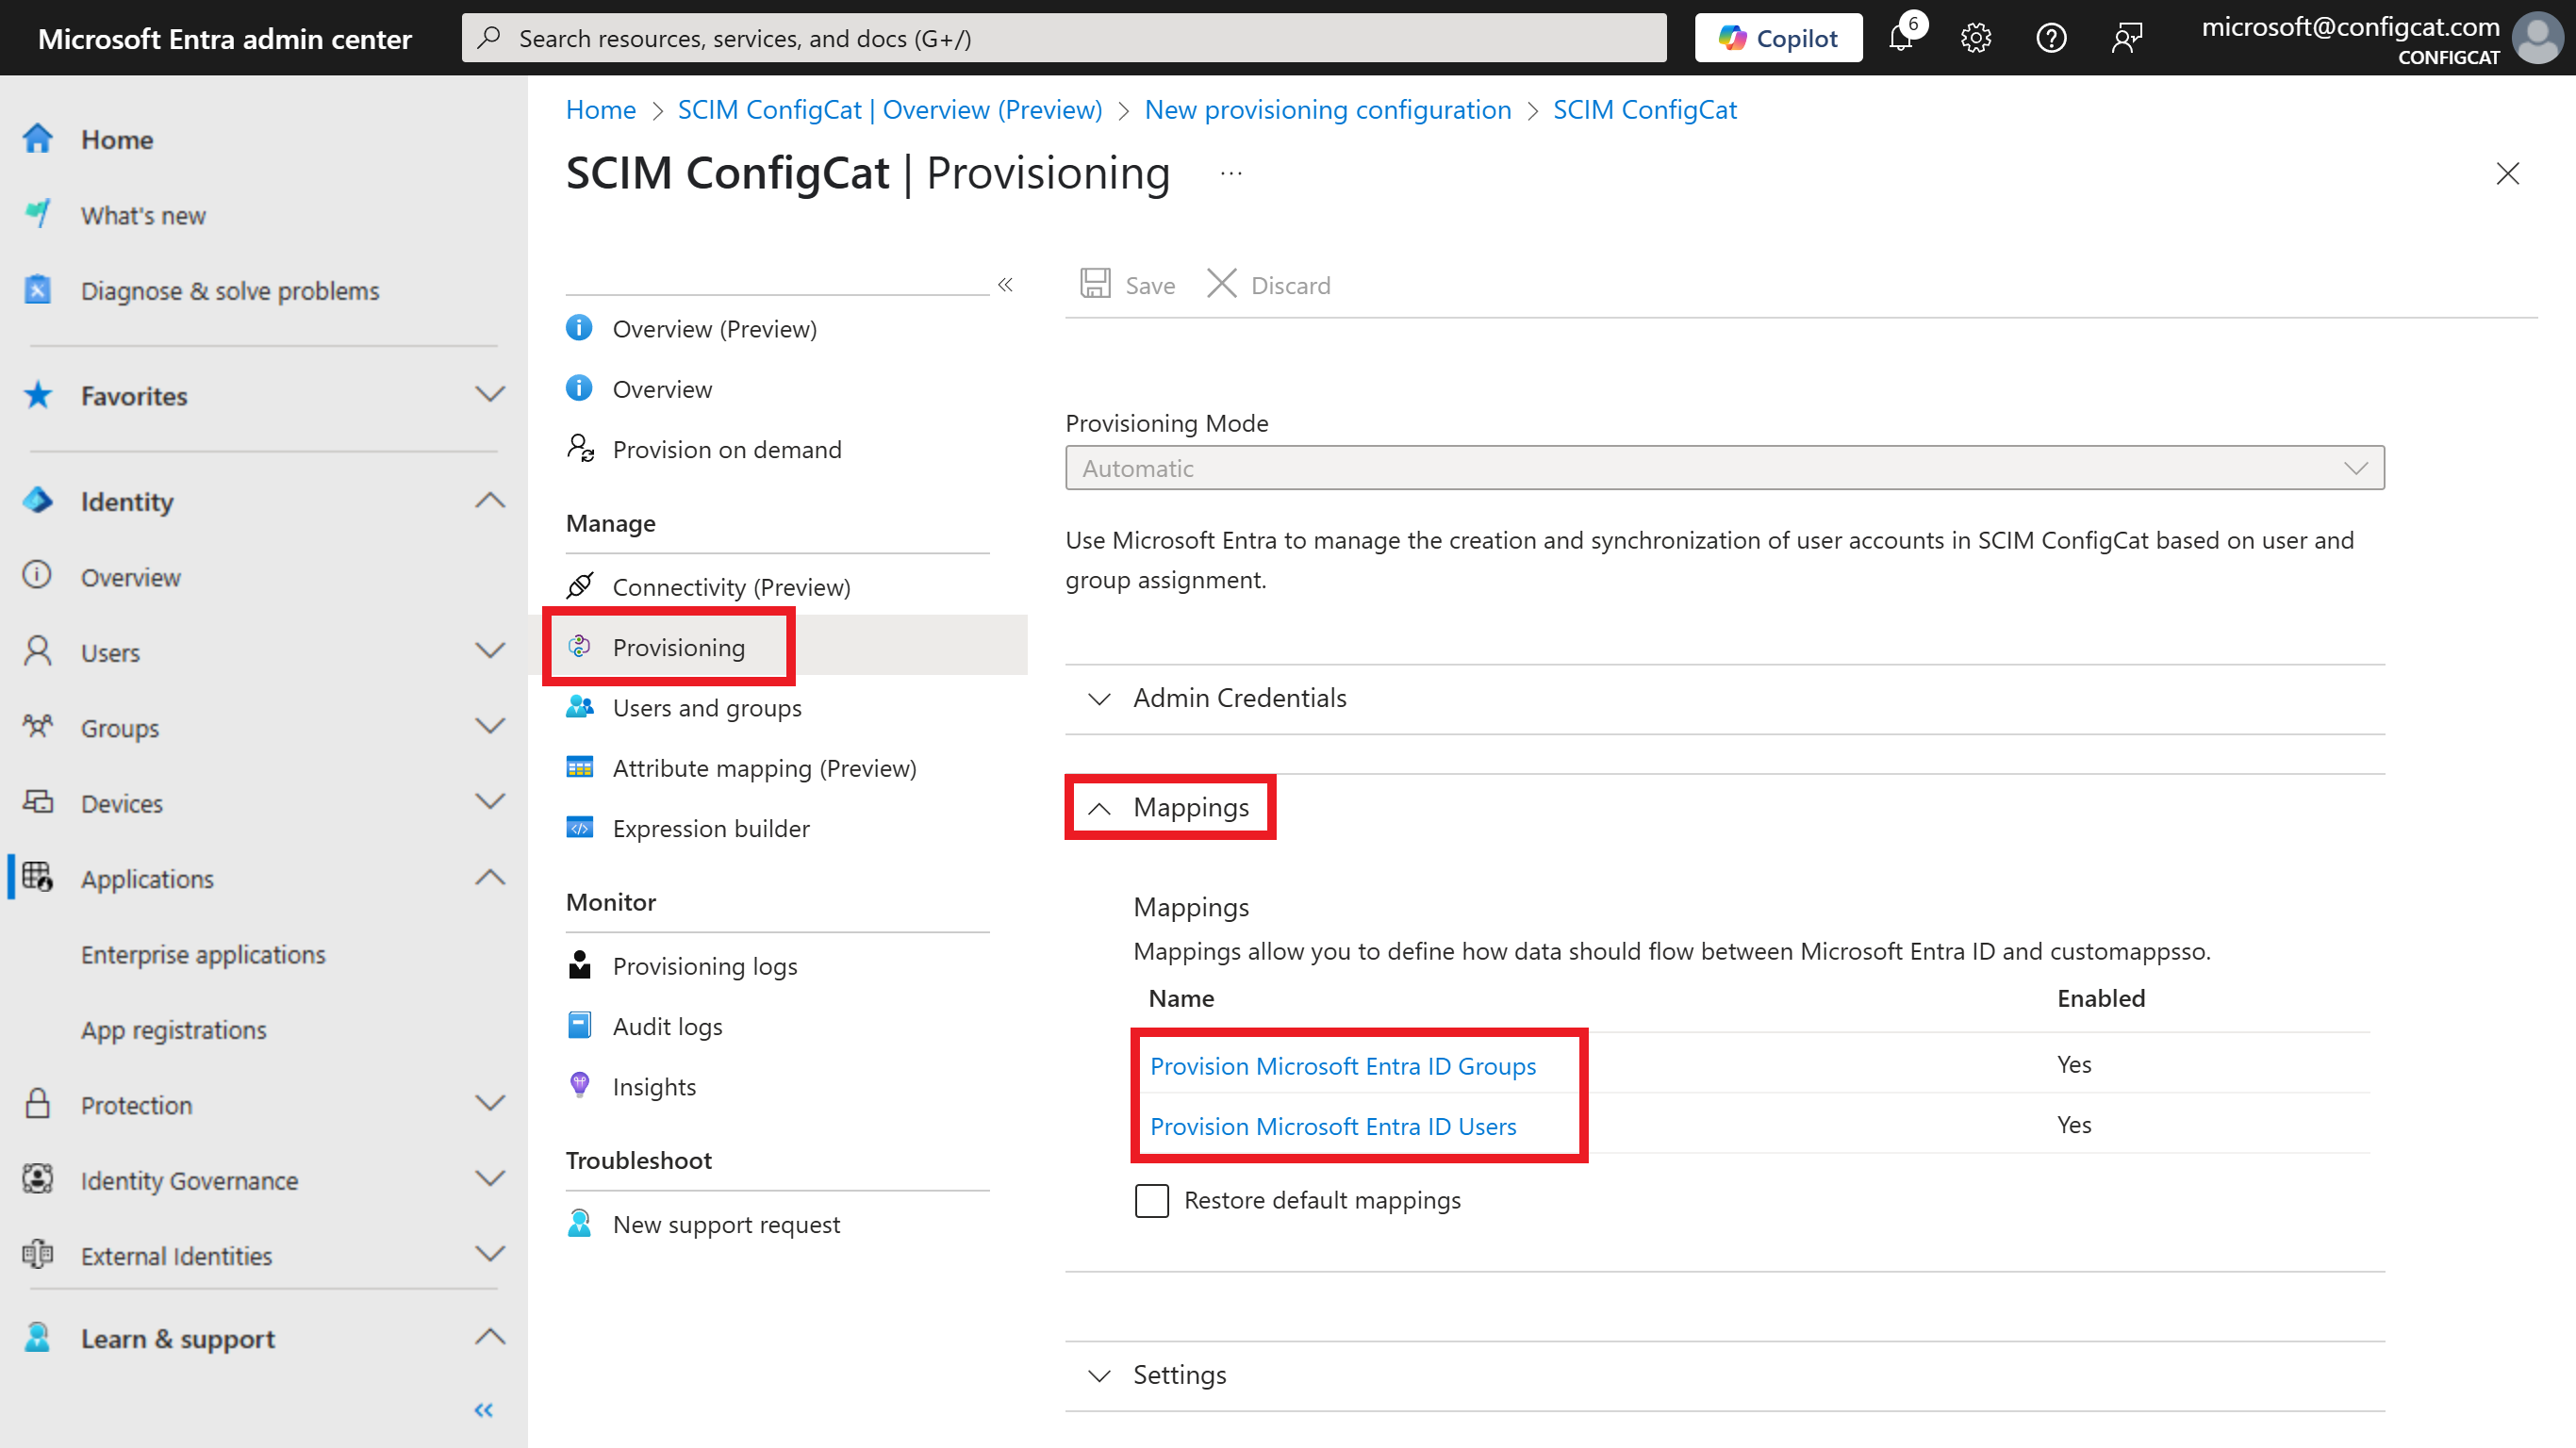
-
Mapping for Users: Configure only the following mappings and remove all other mappings if there are any.
Provisioning Attribute Microsoft Entra ID Attribute externalId objectId userName userPrincipalName displayName displayName active Switch([IsSoftDeleted], , "False", "True", "True", "False") 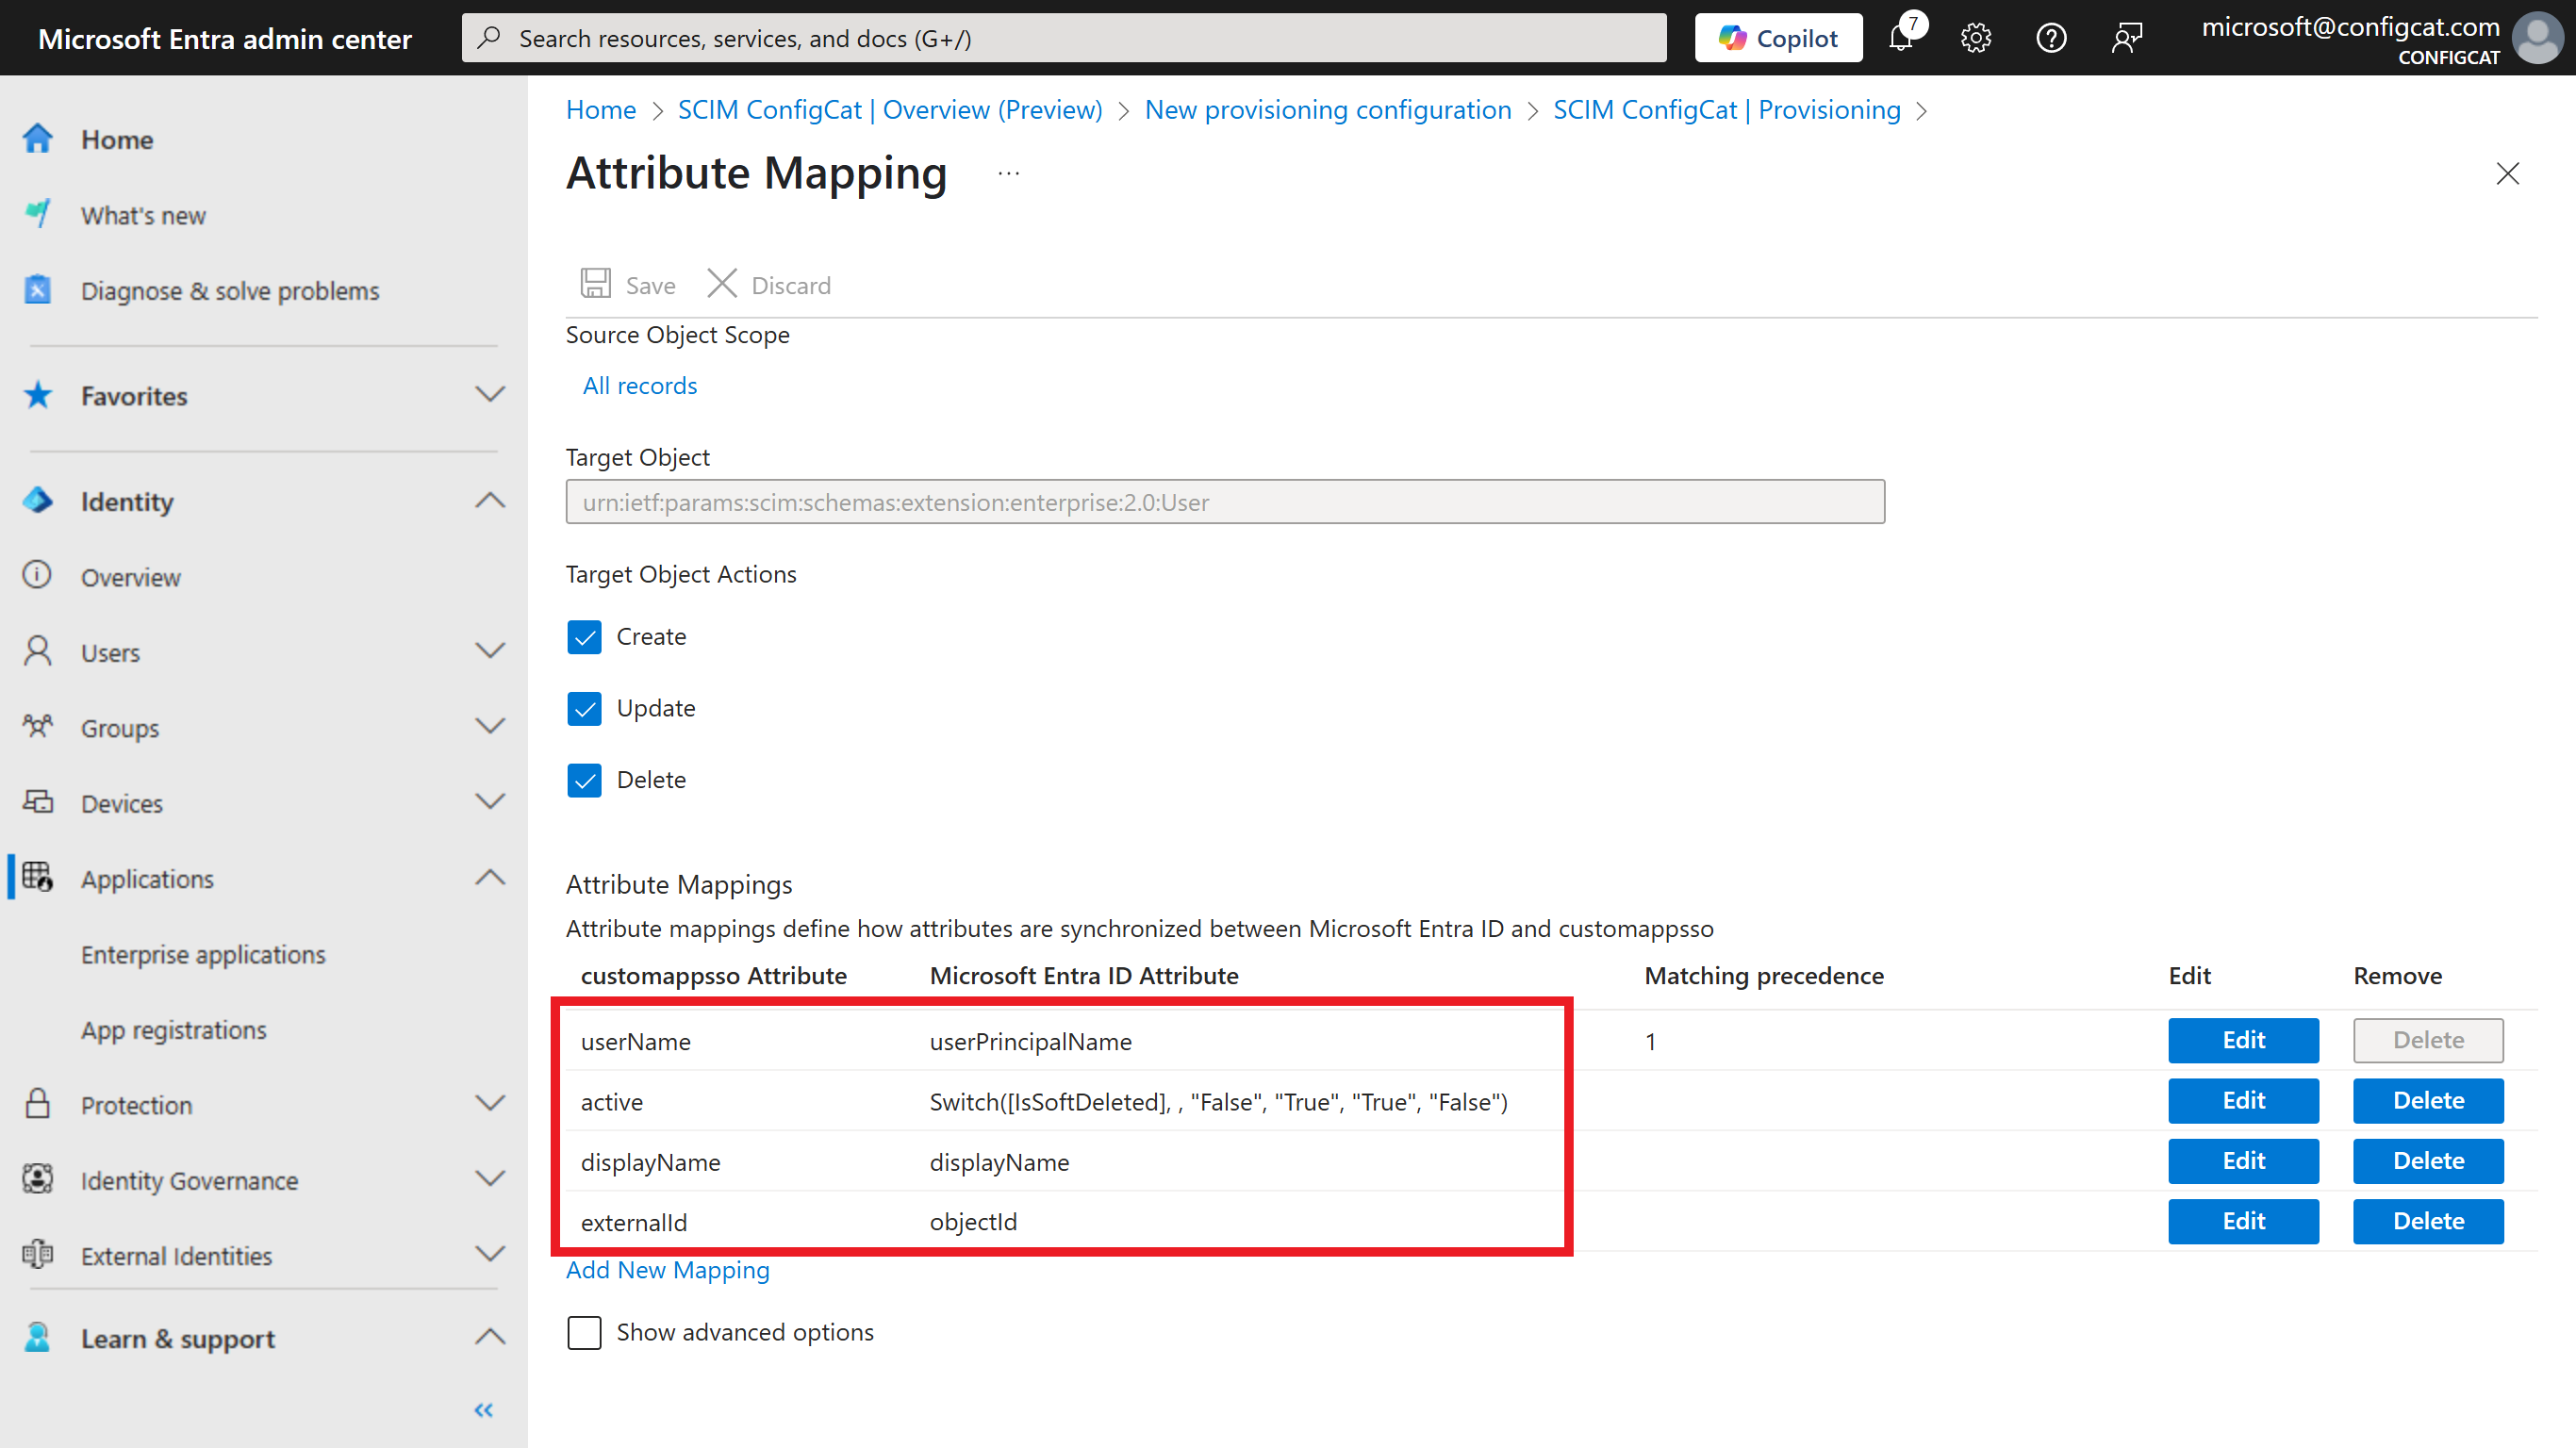
-
Mapping for Groups: Configure only the following mappings and remove all other mappings if there are any.
Provisioning Attribute Microsoft Entra ID Attribute externalId objectId displayName displayName members members 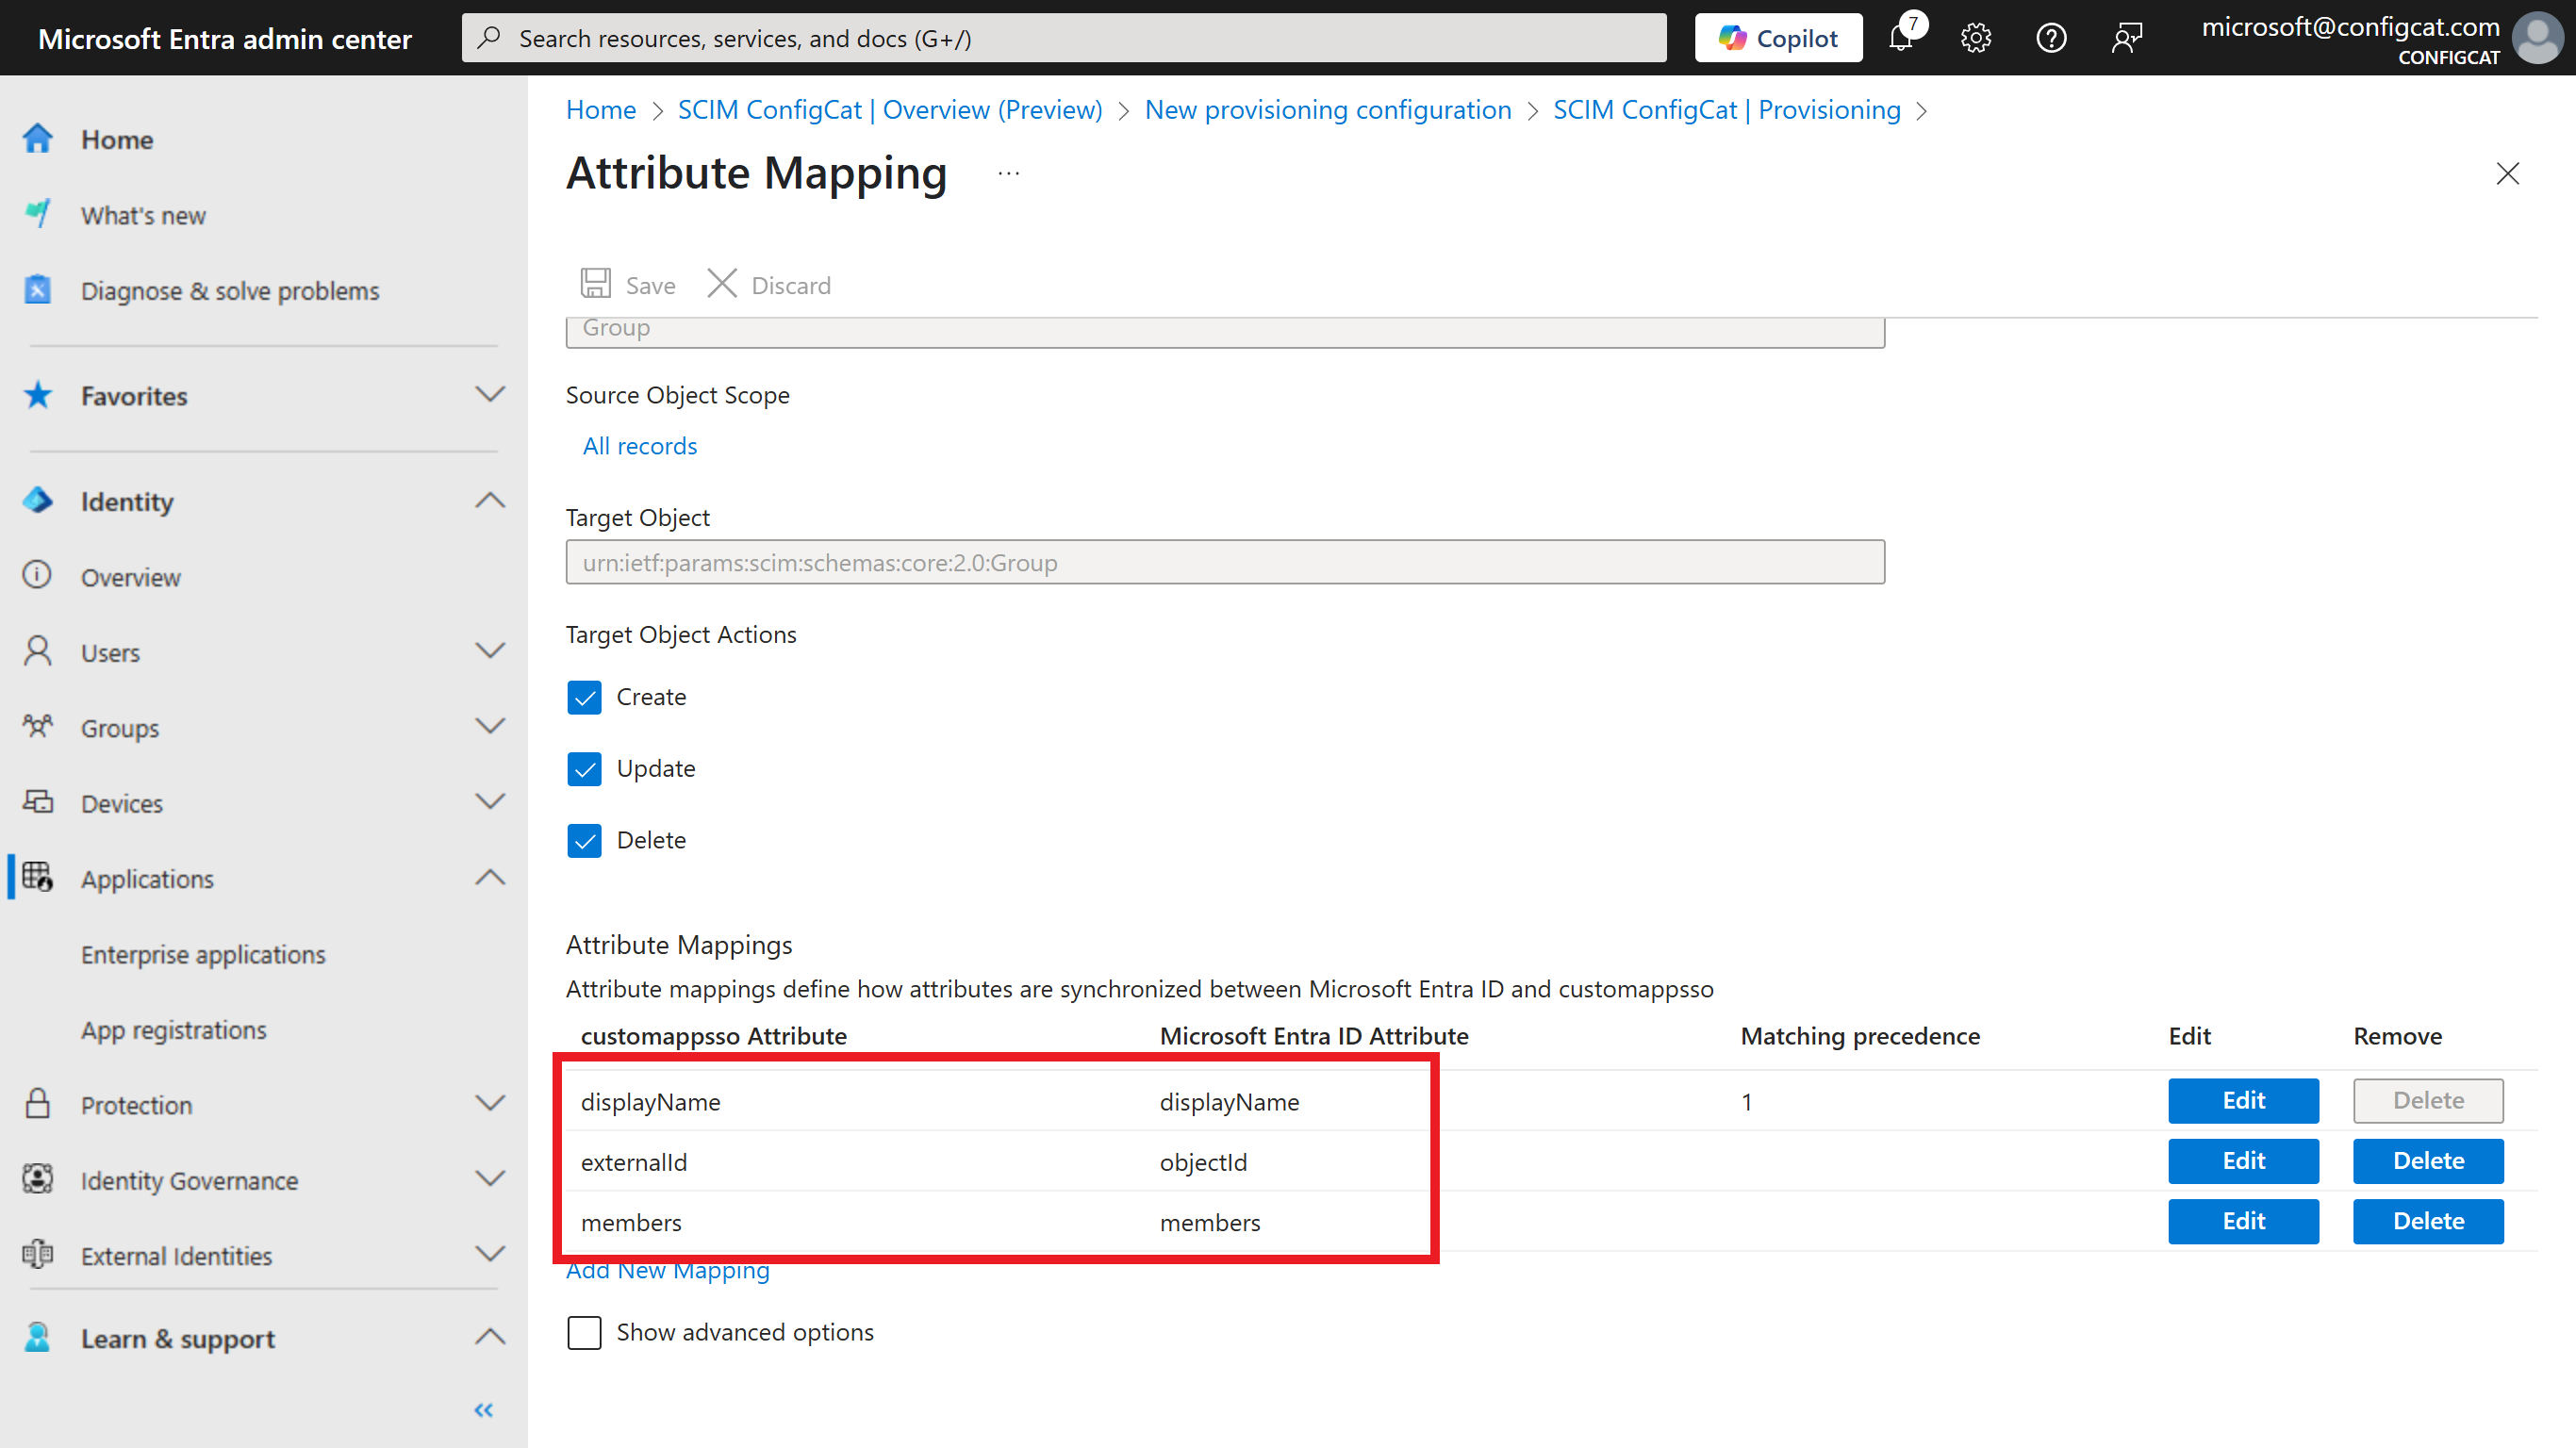
-
3. Assign Users/Groups to the Enterprise Application
To start user provisioning with Entra ID, you need to assign groups to the Enterprise application.
-
Select
Users and groupson theManagesection of the menu, and clickAdd user/group. Then, you can select the groups you want to assign.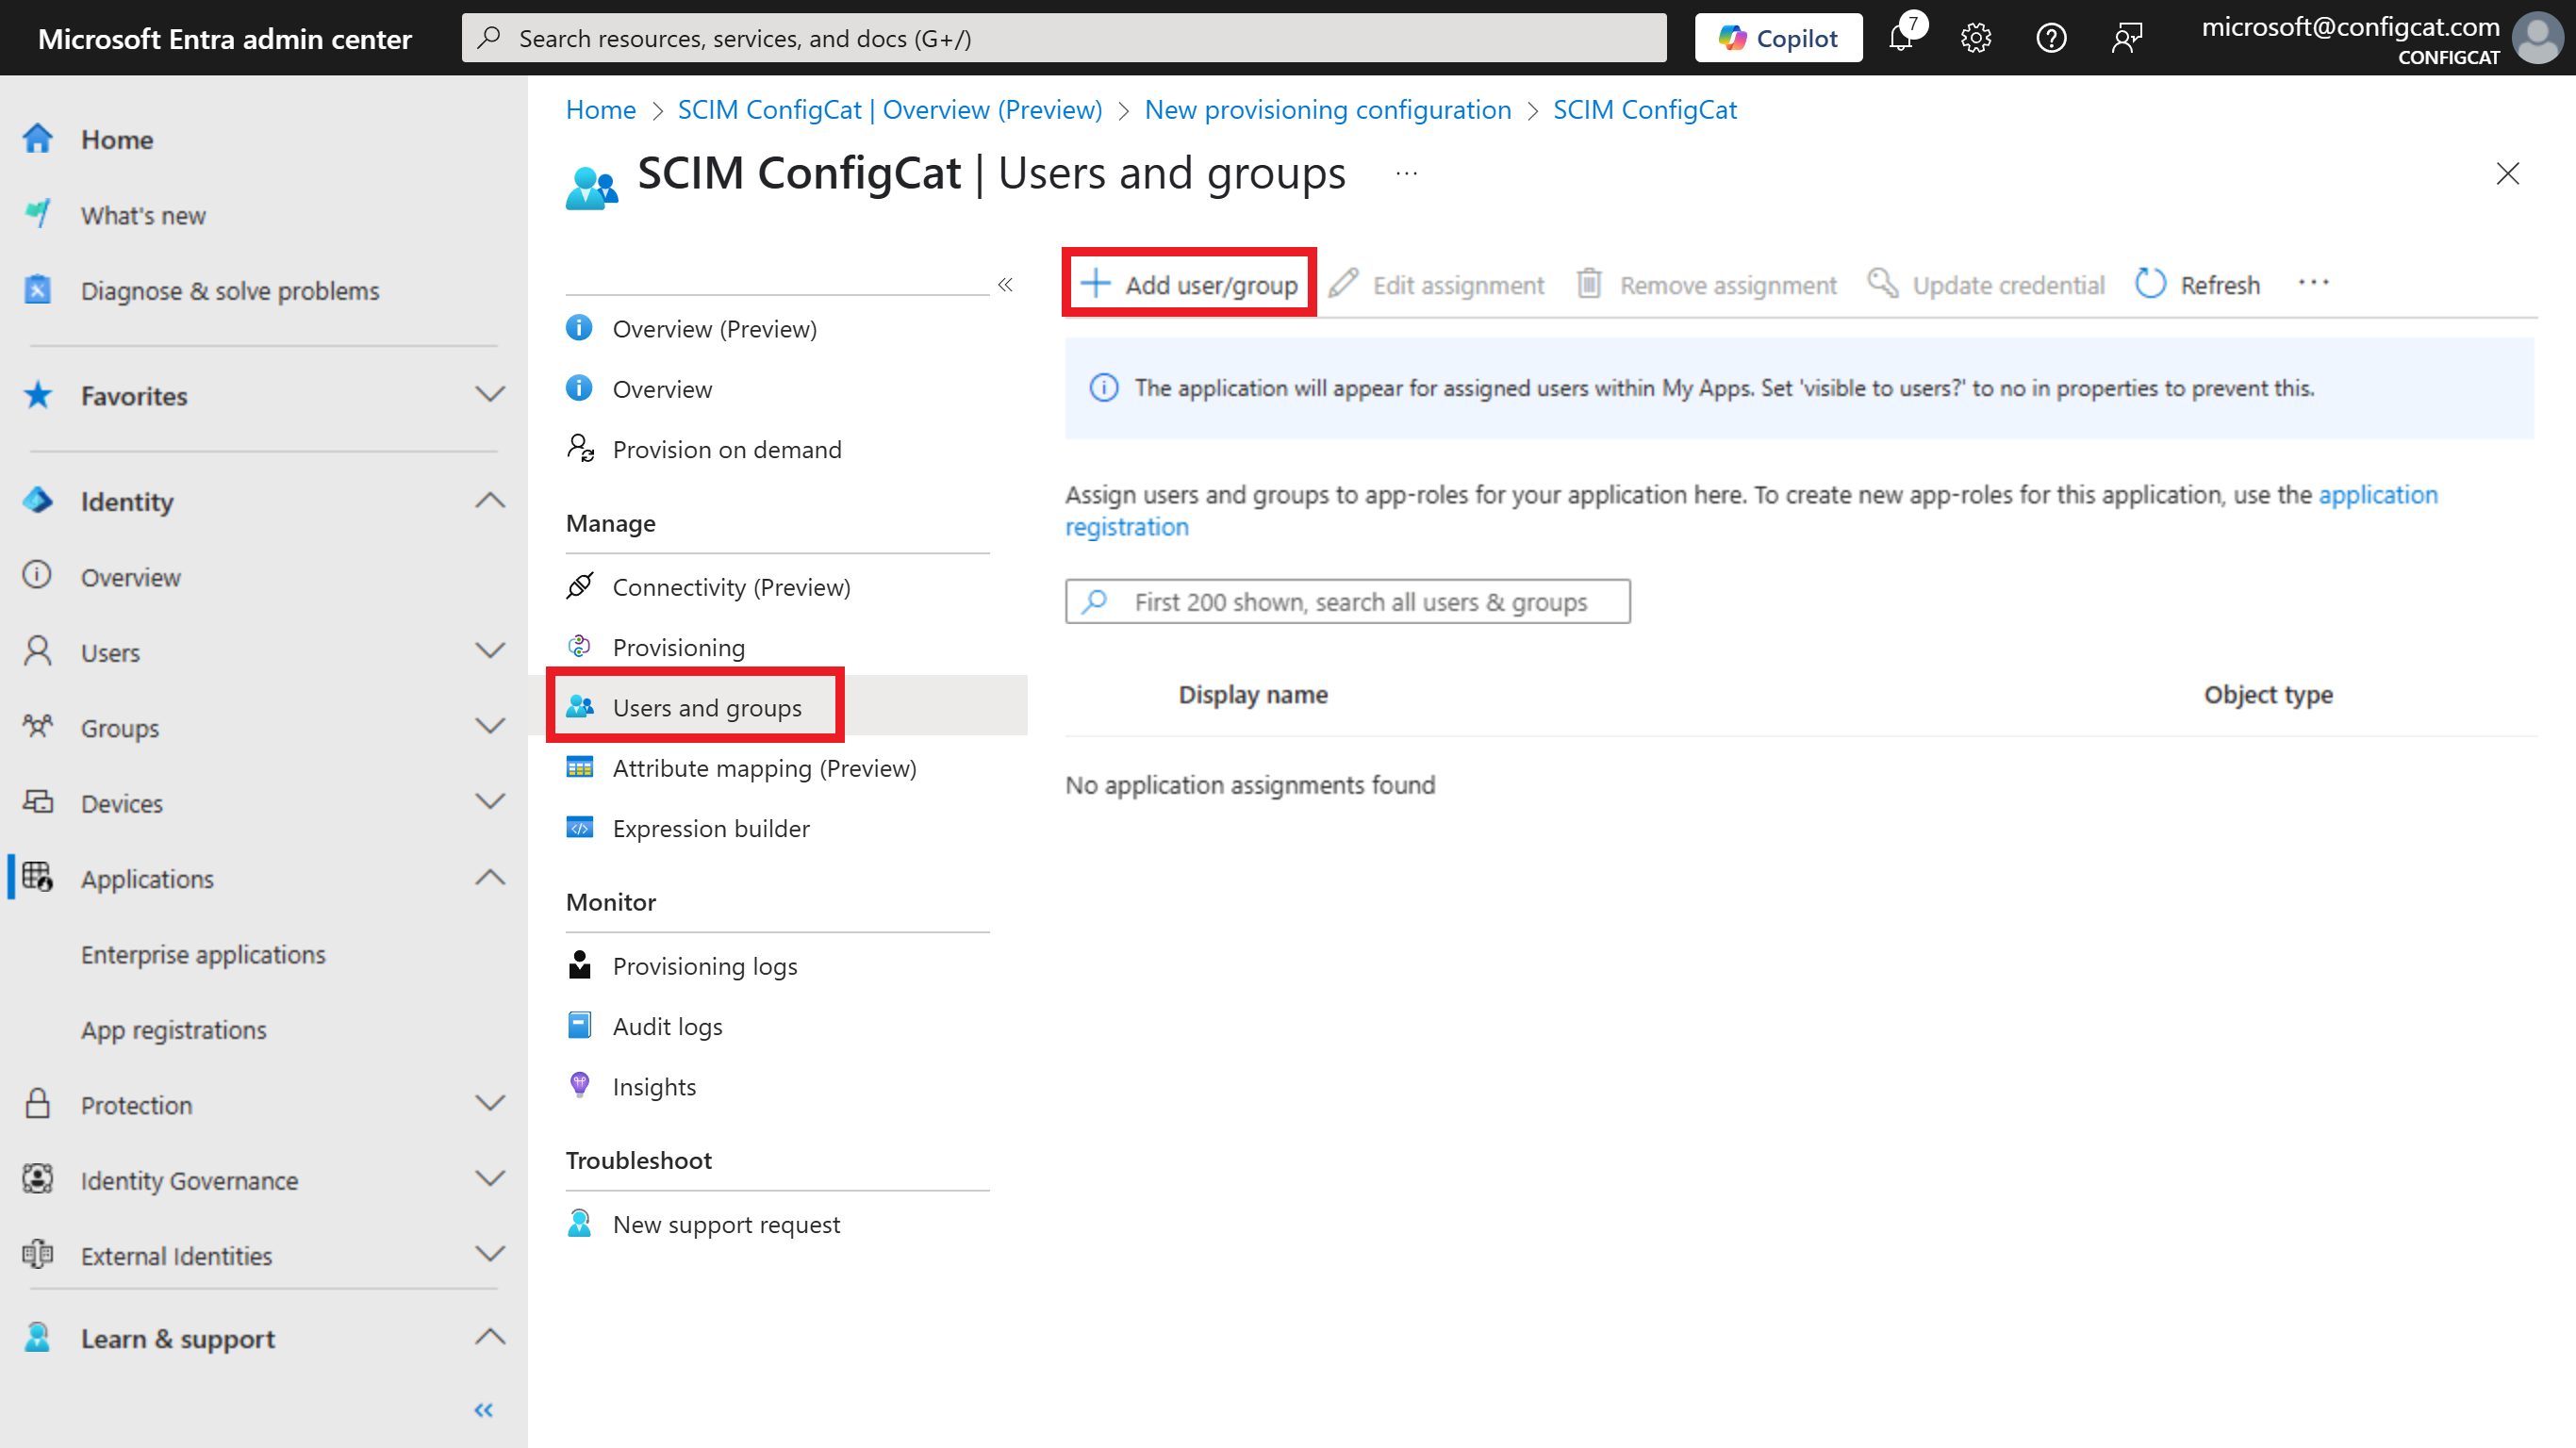
In ConfigCat, you can assign permissions only to groups that are synchronized from your Identity Provider, therefore it's important to select groups for synchronization rather than individual users.
4. Start provisioning
-
Go to the
Overviewpage of the provisioning configuration and click onStart provisioning.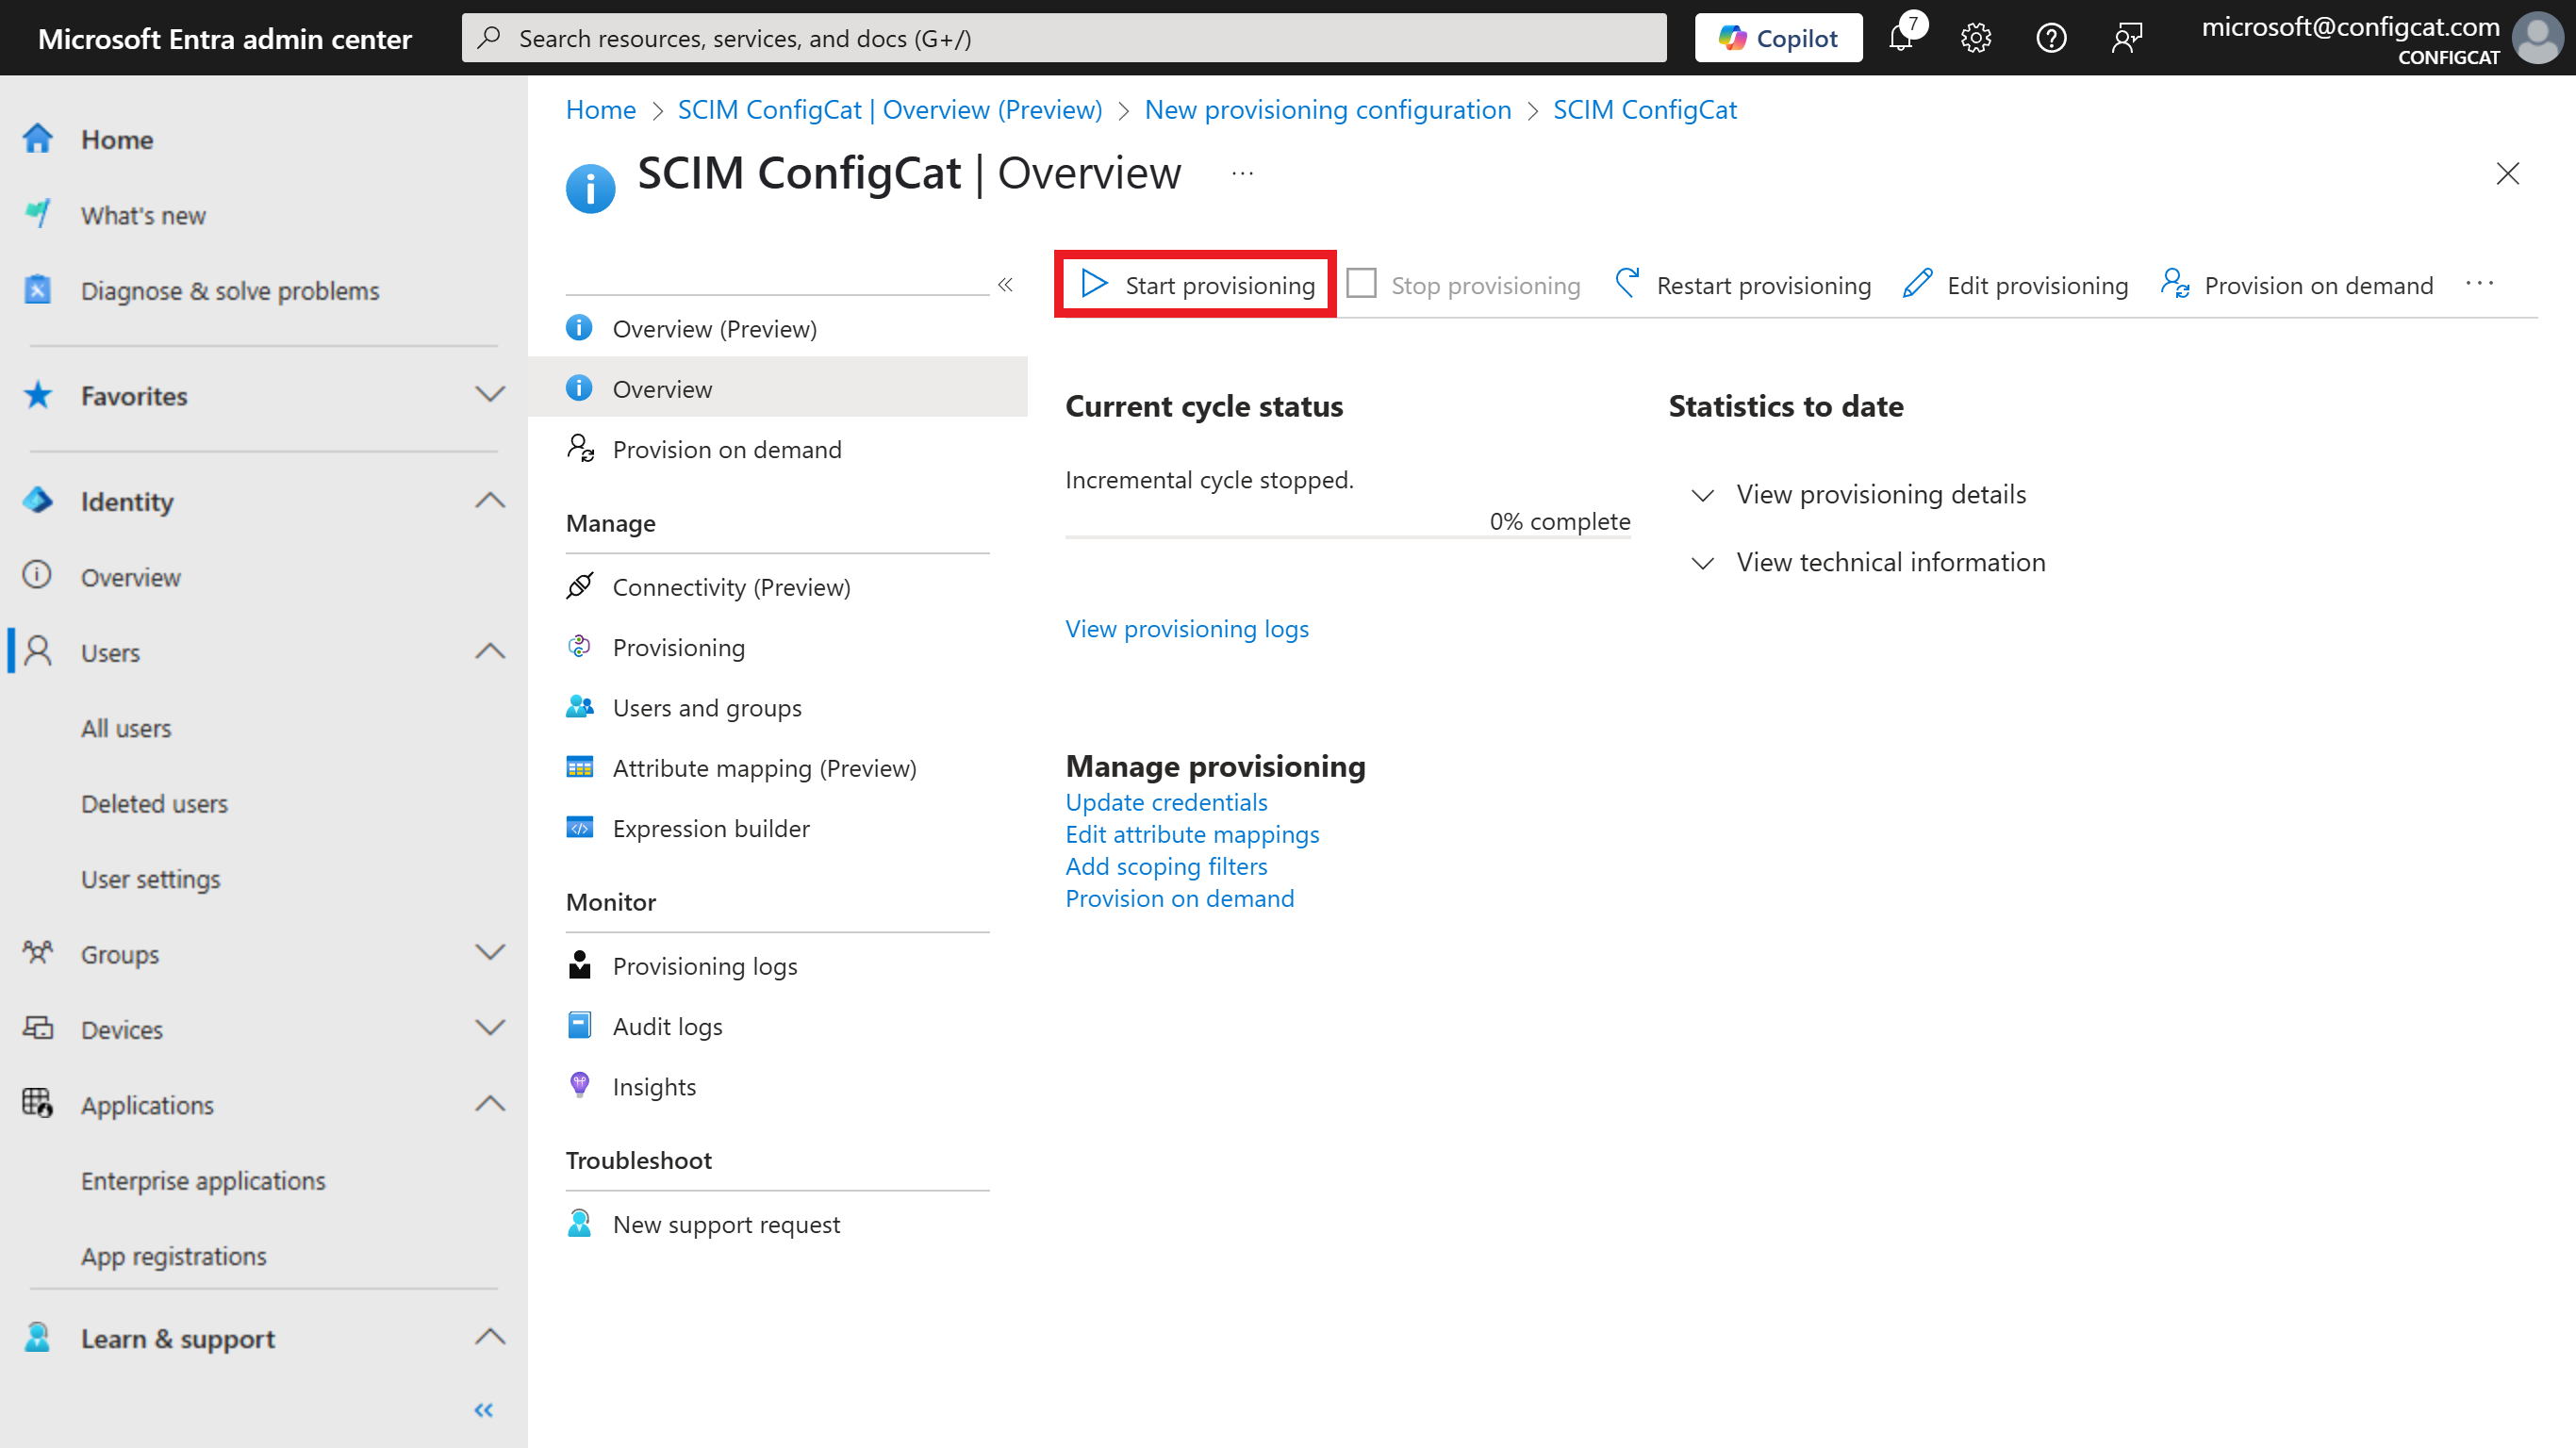
-
Wait until the first provisioning is finished, and you should see each synced group and user on ConfigCat's Authentication & Provisioning page.
5. Next Steps
- Continue with assigning ConfigCat permissions to the synced groups.