A/B Testing an Angular App with ConfigCat

Knowing up front whether a new feature will improve or worsen user experience can be a challenging decision. If we don't adopt the proper mechanisms and processes to test new features, we stand a high risk of introducing new bugs. By incorporating A/B testing into our feature release workflow, we can minimize these situations by testing the new feature with a small sample of users before deploying it.
In this post, we'll put this into practice by A/B testing a pricing feature on a demo Angular website. We'll track the performance of two variations to see which one attracts more clicks.

To understand the concept behind A/B testing, it's helpful to think of each variation as a bucket. The first bucket is called the control bucket - it represents the state of the app without any new improvements or updates, and can be considered as a benchmark when making later comparisons. The second bucket is called the variation bucket and, unlike the control bucket, it includes the new features or improvements that need to be tested.
To simplify the experiment, we'll use a cloud-hosted feature flag management service called ConfigCat to expose the variations to users. To track and analyze the results, we'll use Amplitude data analytics.
Setting up the A/B Test
Before we dive in, let's identify the two variations to test. If you want to follow along, you can clone the sample app.
Variation A
Consider this screenshot as Variation A, where the Pro plan badge is yellow:
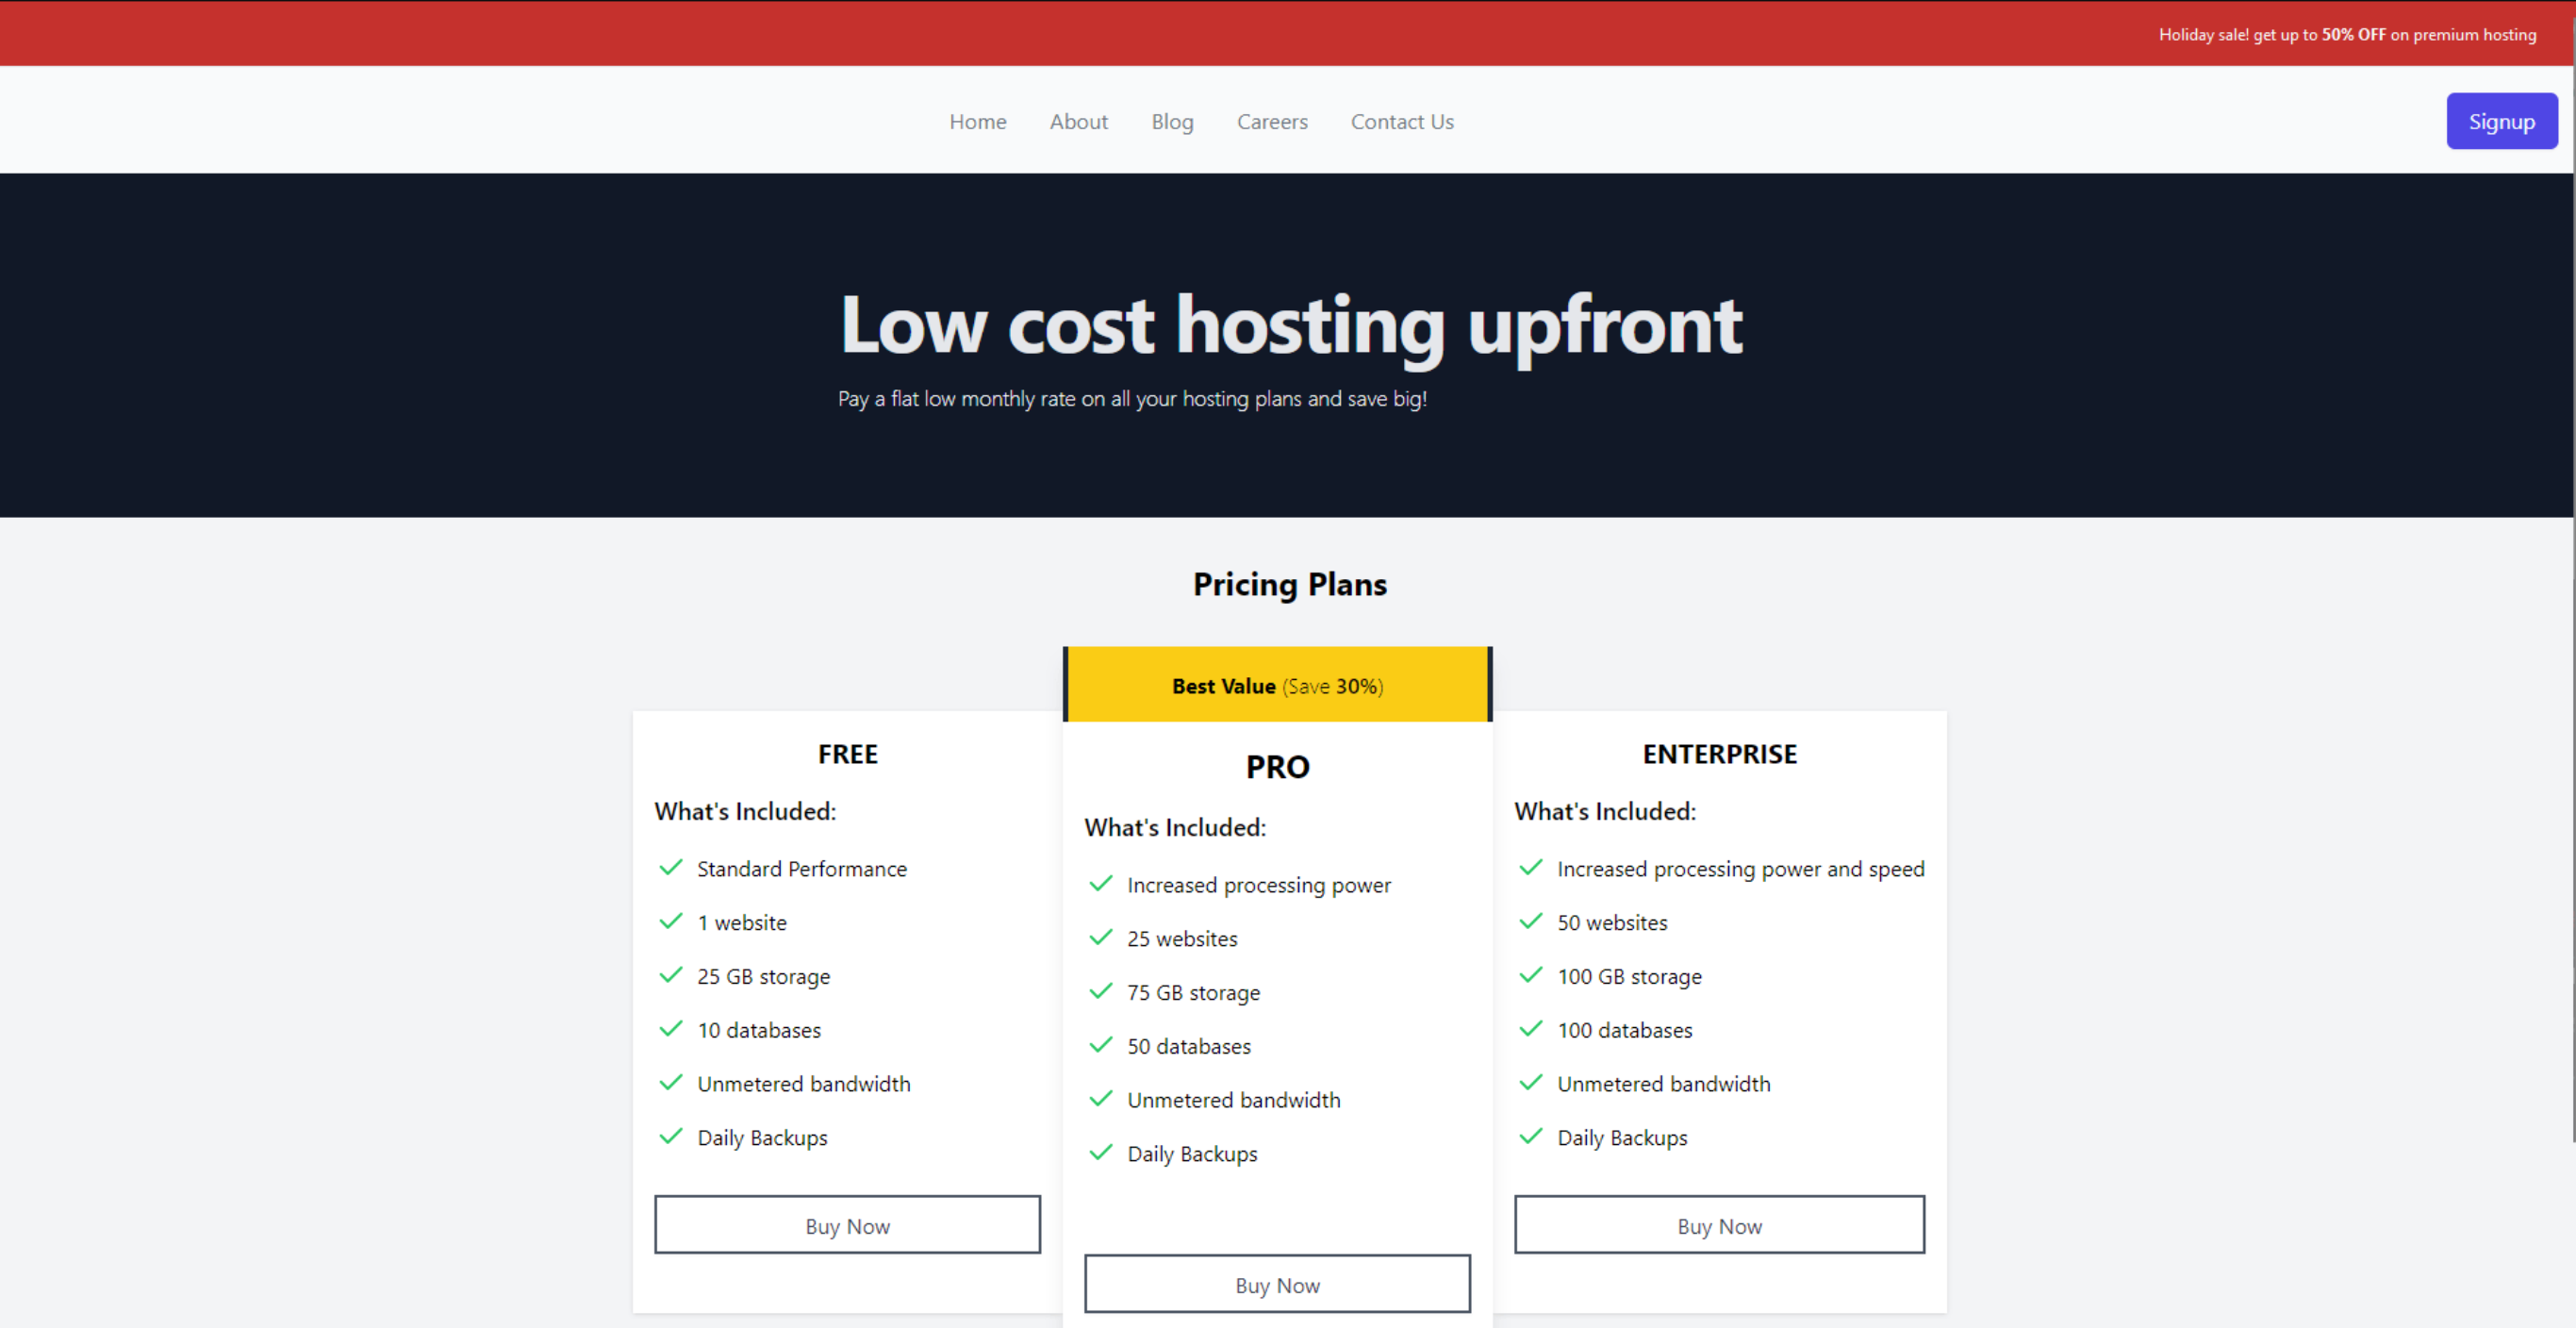
The goal of the test is to see if changing the Pro plan badge color from yellow to green increases the number of PRO plan purchases.
Variation B
Now, here's Variation B, where the Pro plan badge is green:
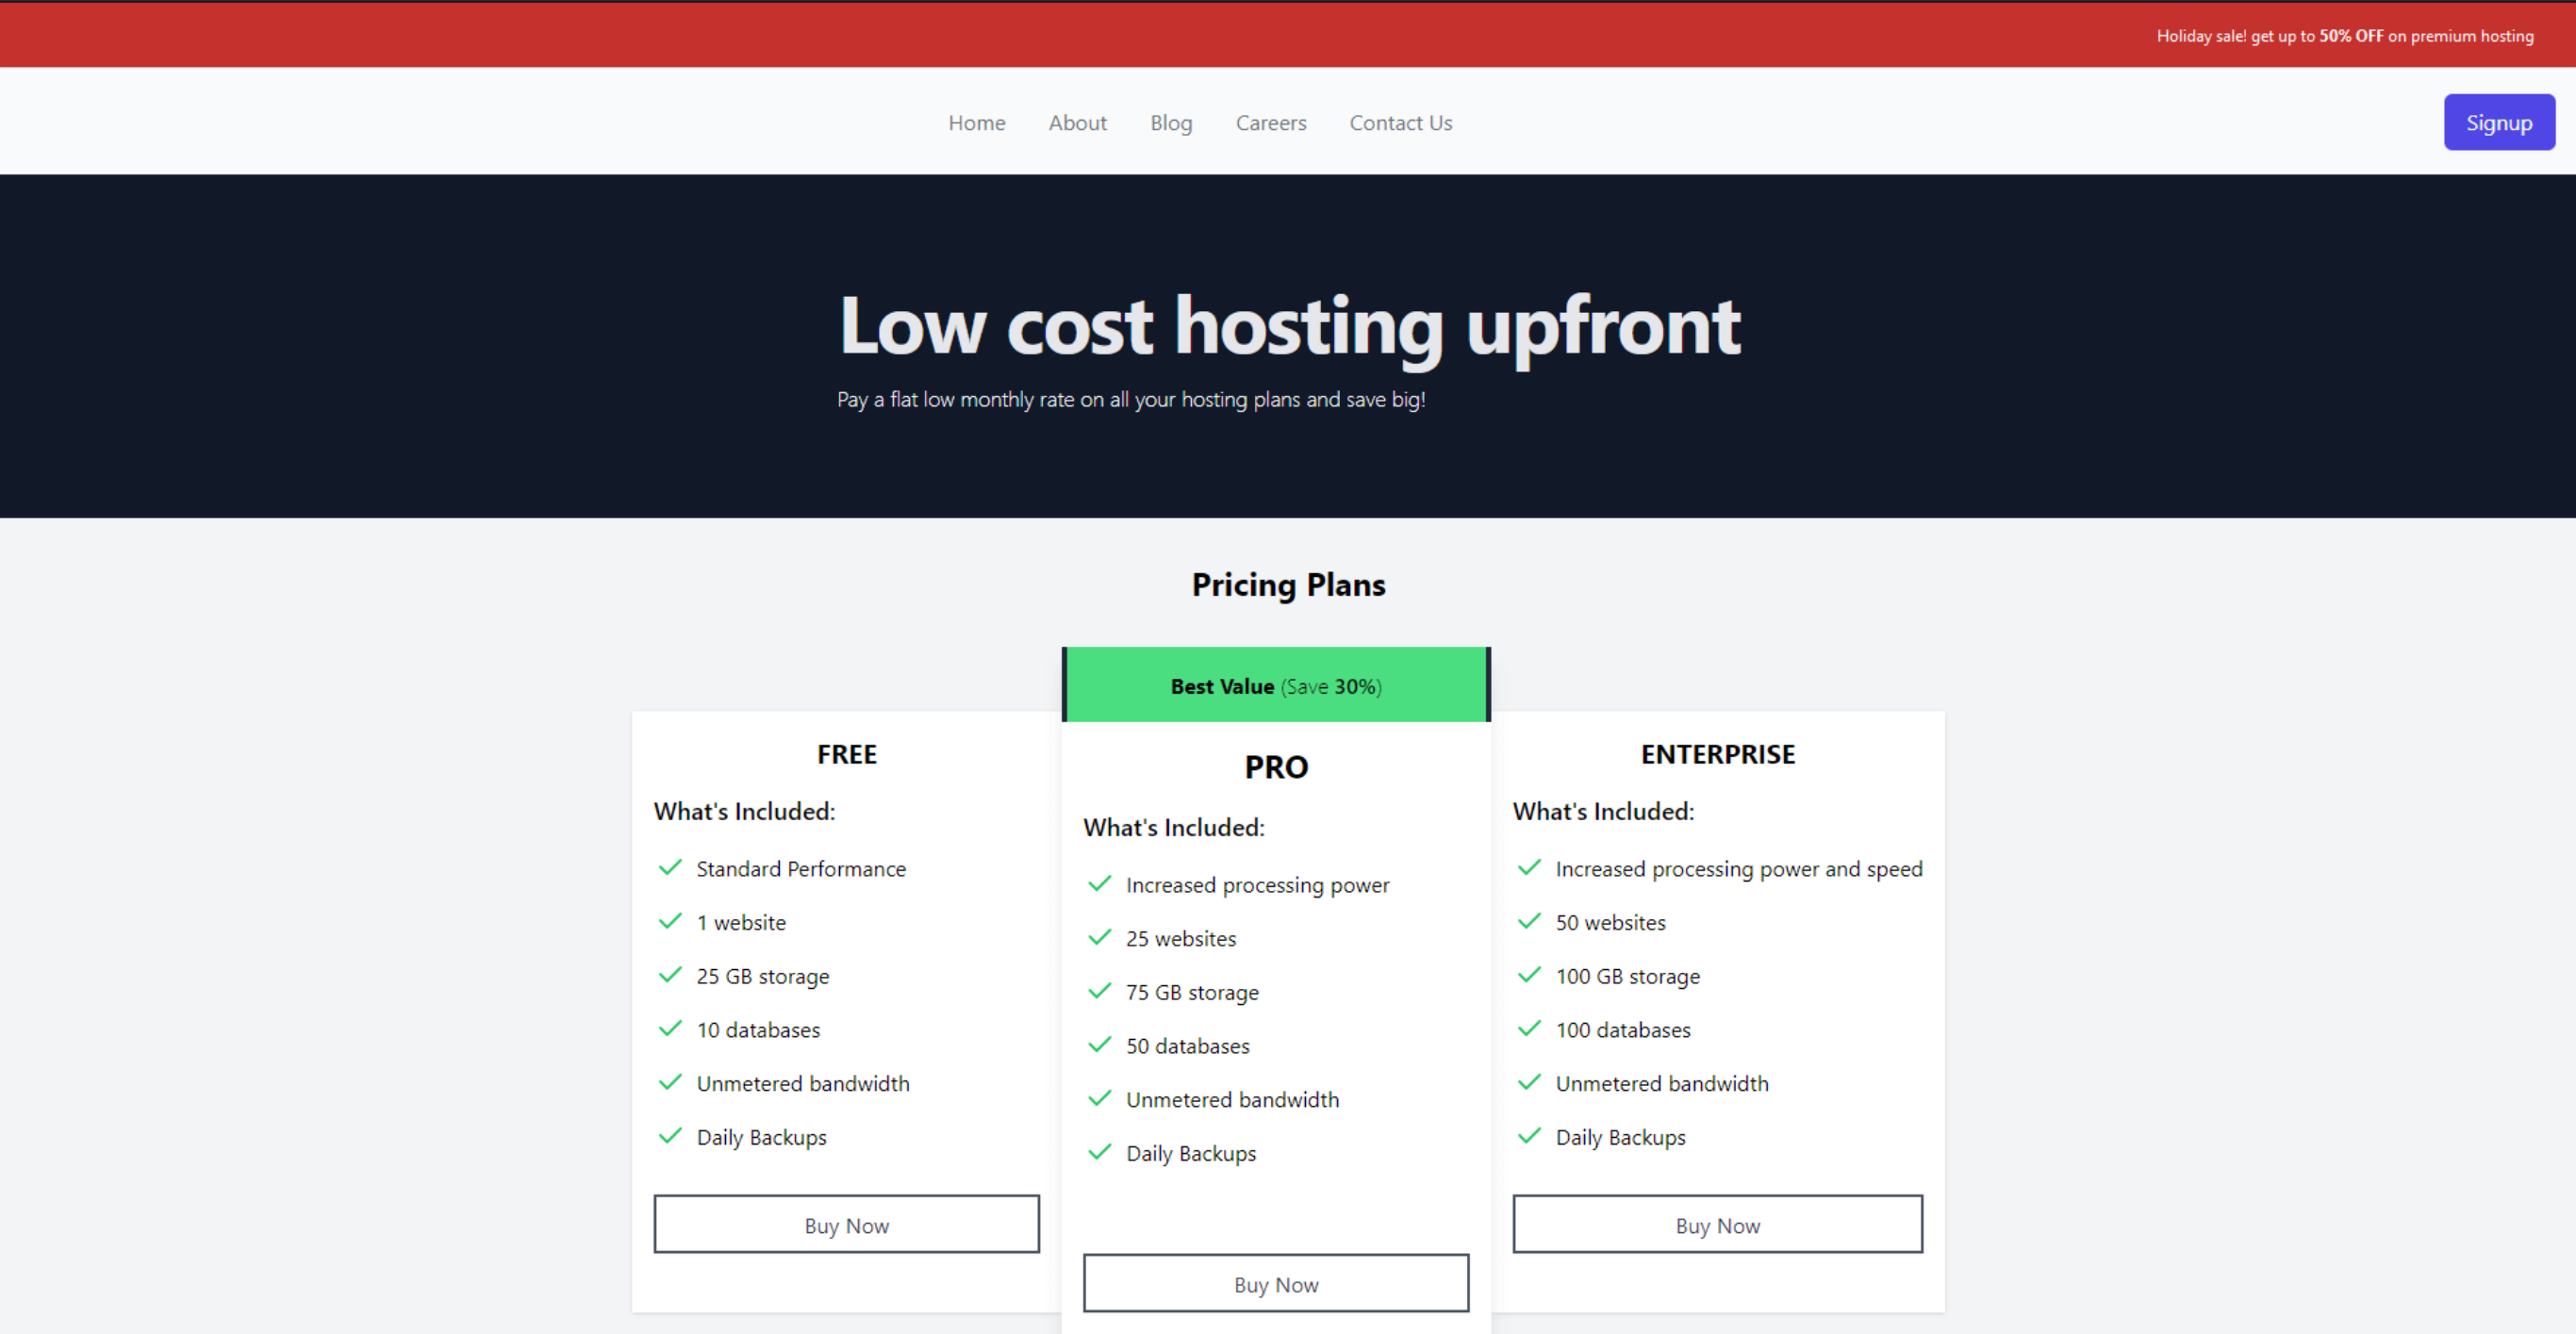
Recent results: Over the past week, Variation A generated 6 clicks on the Pro plan button. We'll toggle variation B on for a week and compare the results.
Creating the Feature Flag in ConfigCat
To start, let's create a feature flag in ConfigCat.
1. Sign up for a free ConfigCat account.
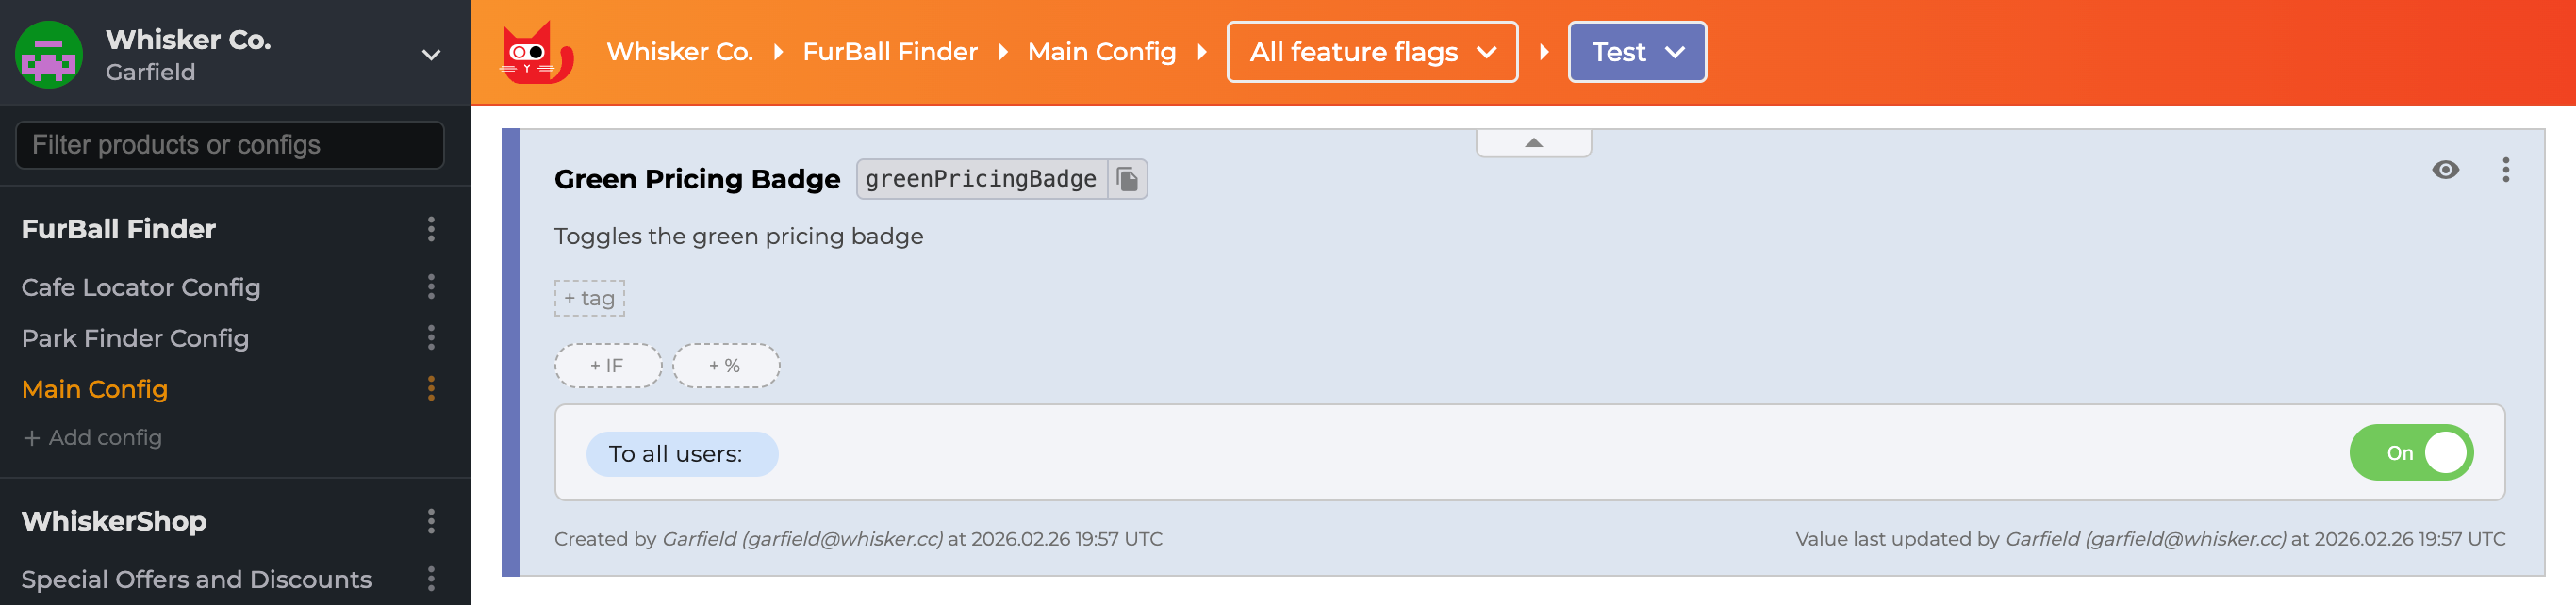
2. In the dashboard, create a feature flag with the following details:
Name: Green Pricing Badge
Key: greenPricingBadge
Description: Toggles the green pricing badge.
With the feature flag ready, let's set up Amplitude to track the number of clicks from variation B.
Setting up Amplitude
Follow these steps to set up Amplitude:
1. Sign up for a free Amplitude account.
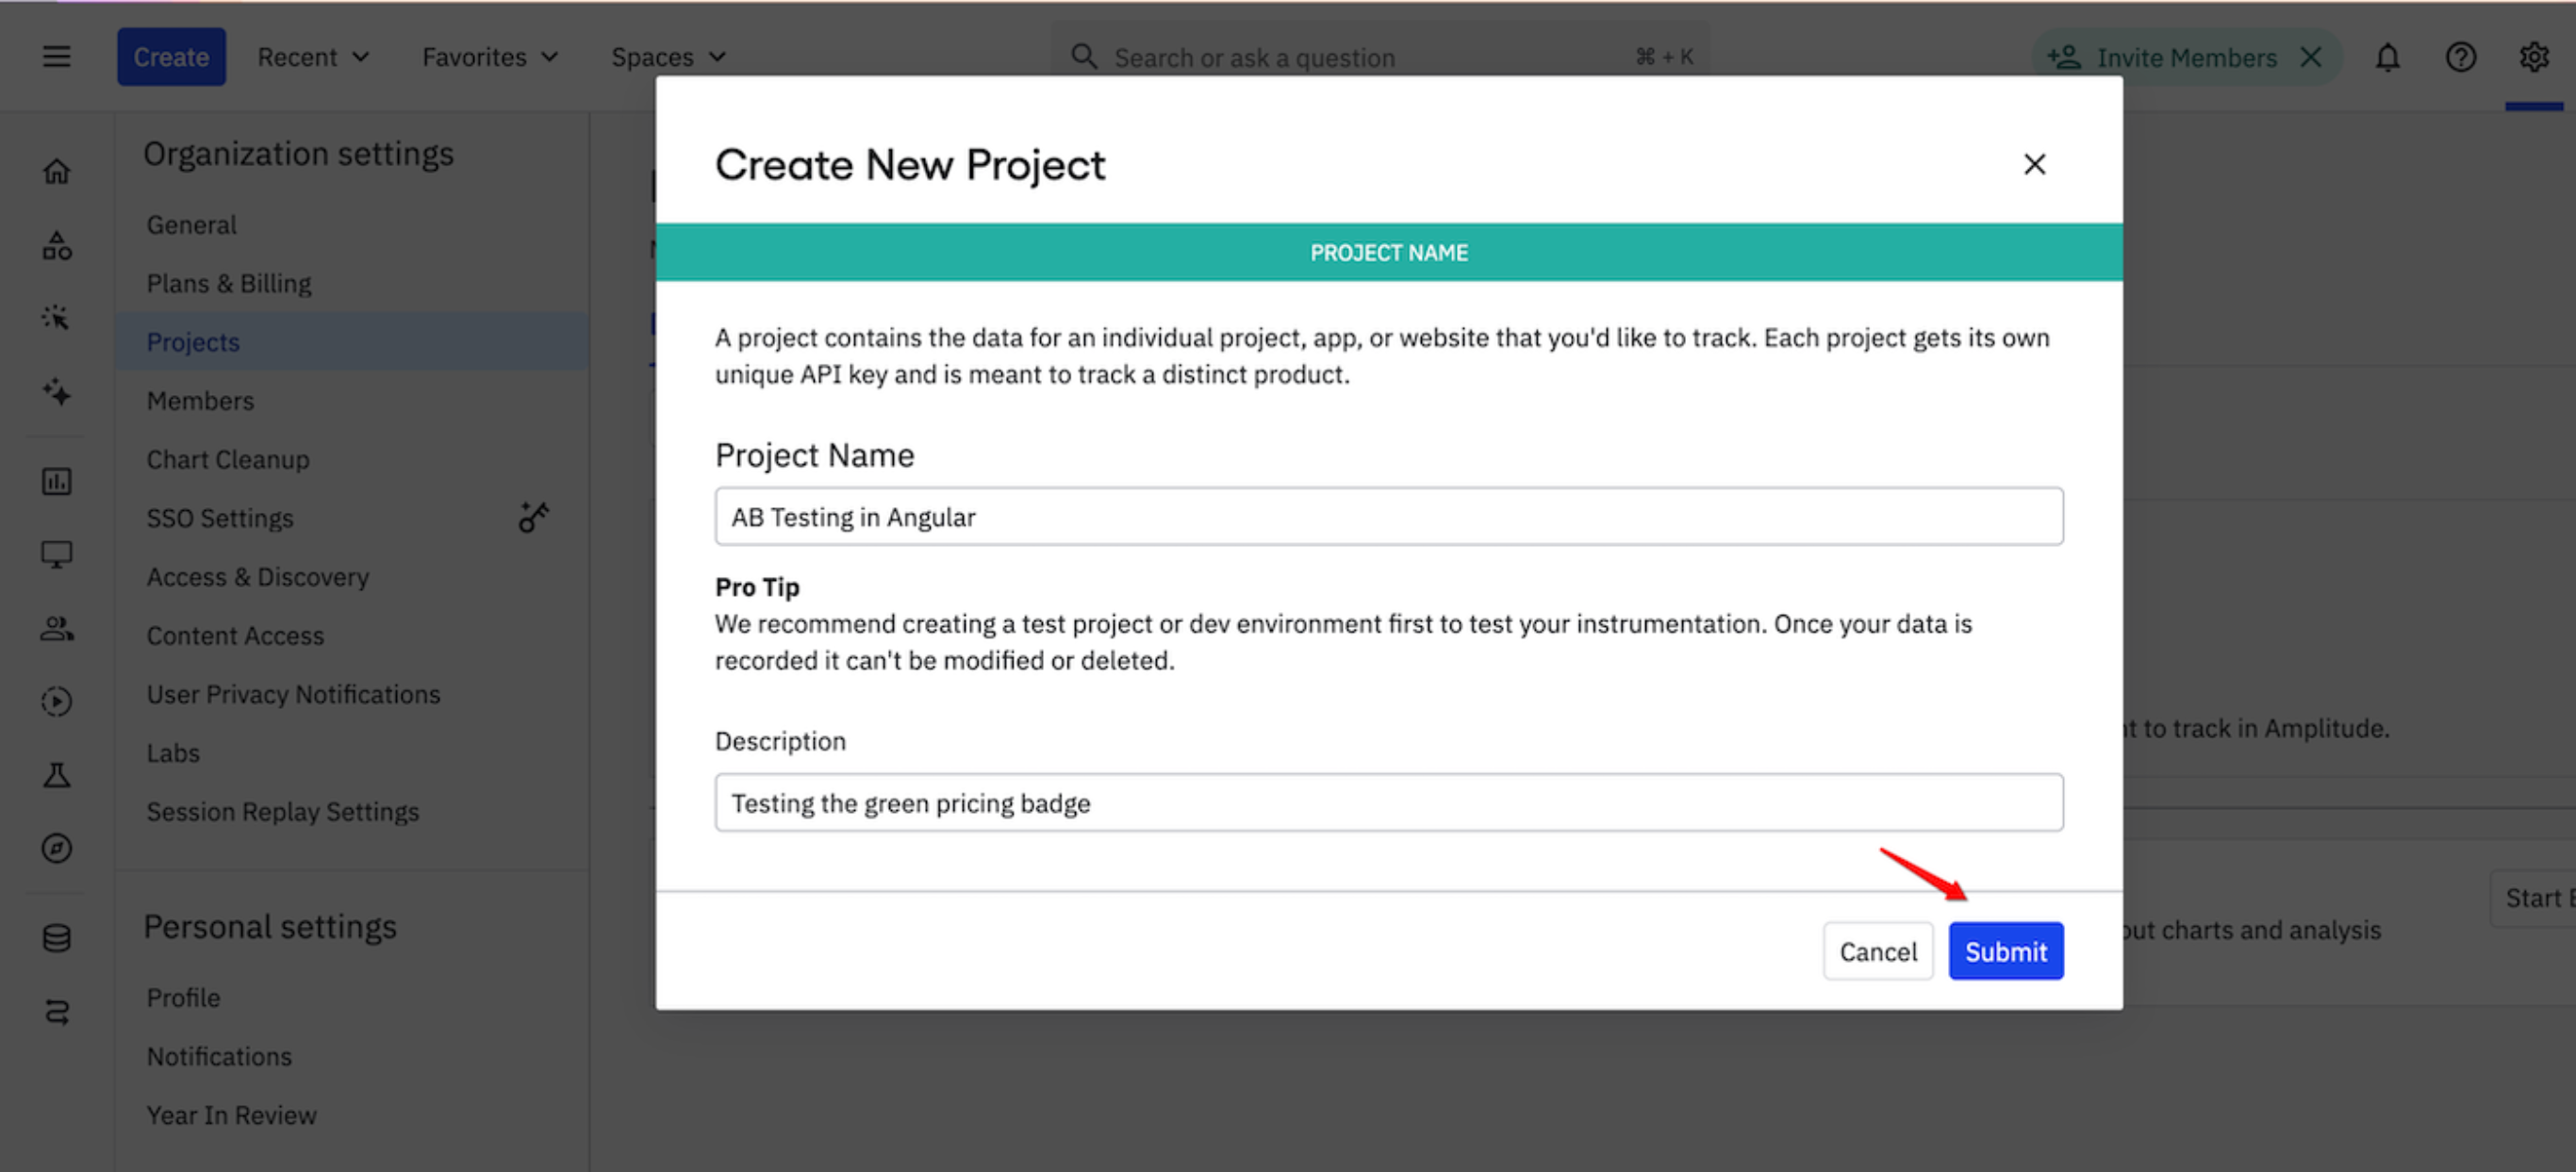
2. In the Organization settings, click the Projects tab and create a new project:
3. Select JavaScript SDK as the data source:

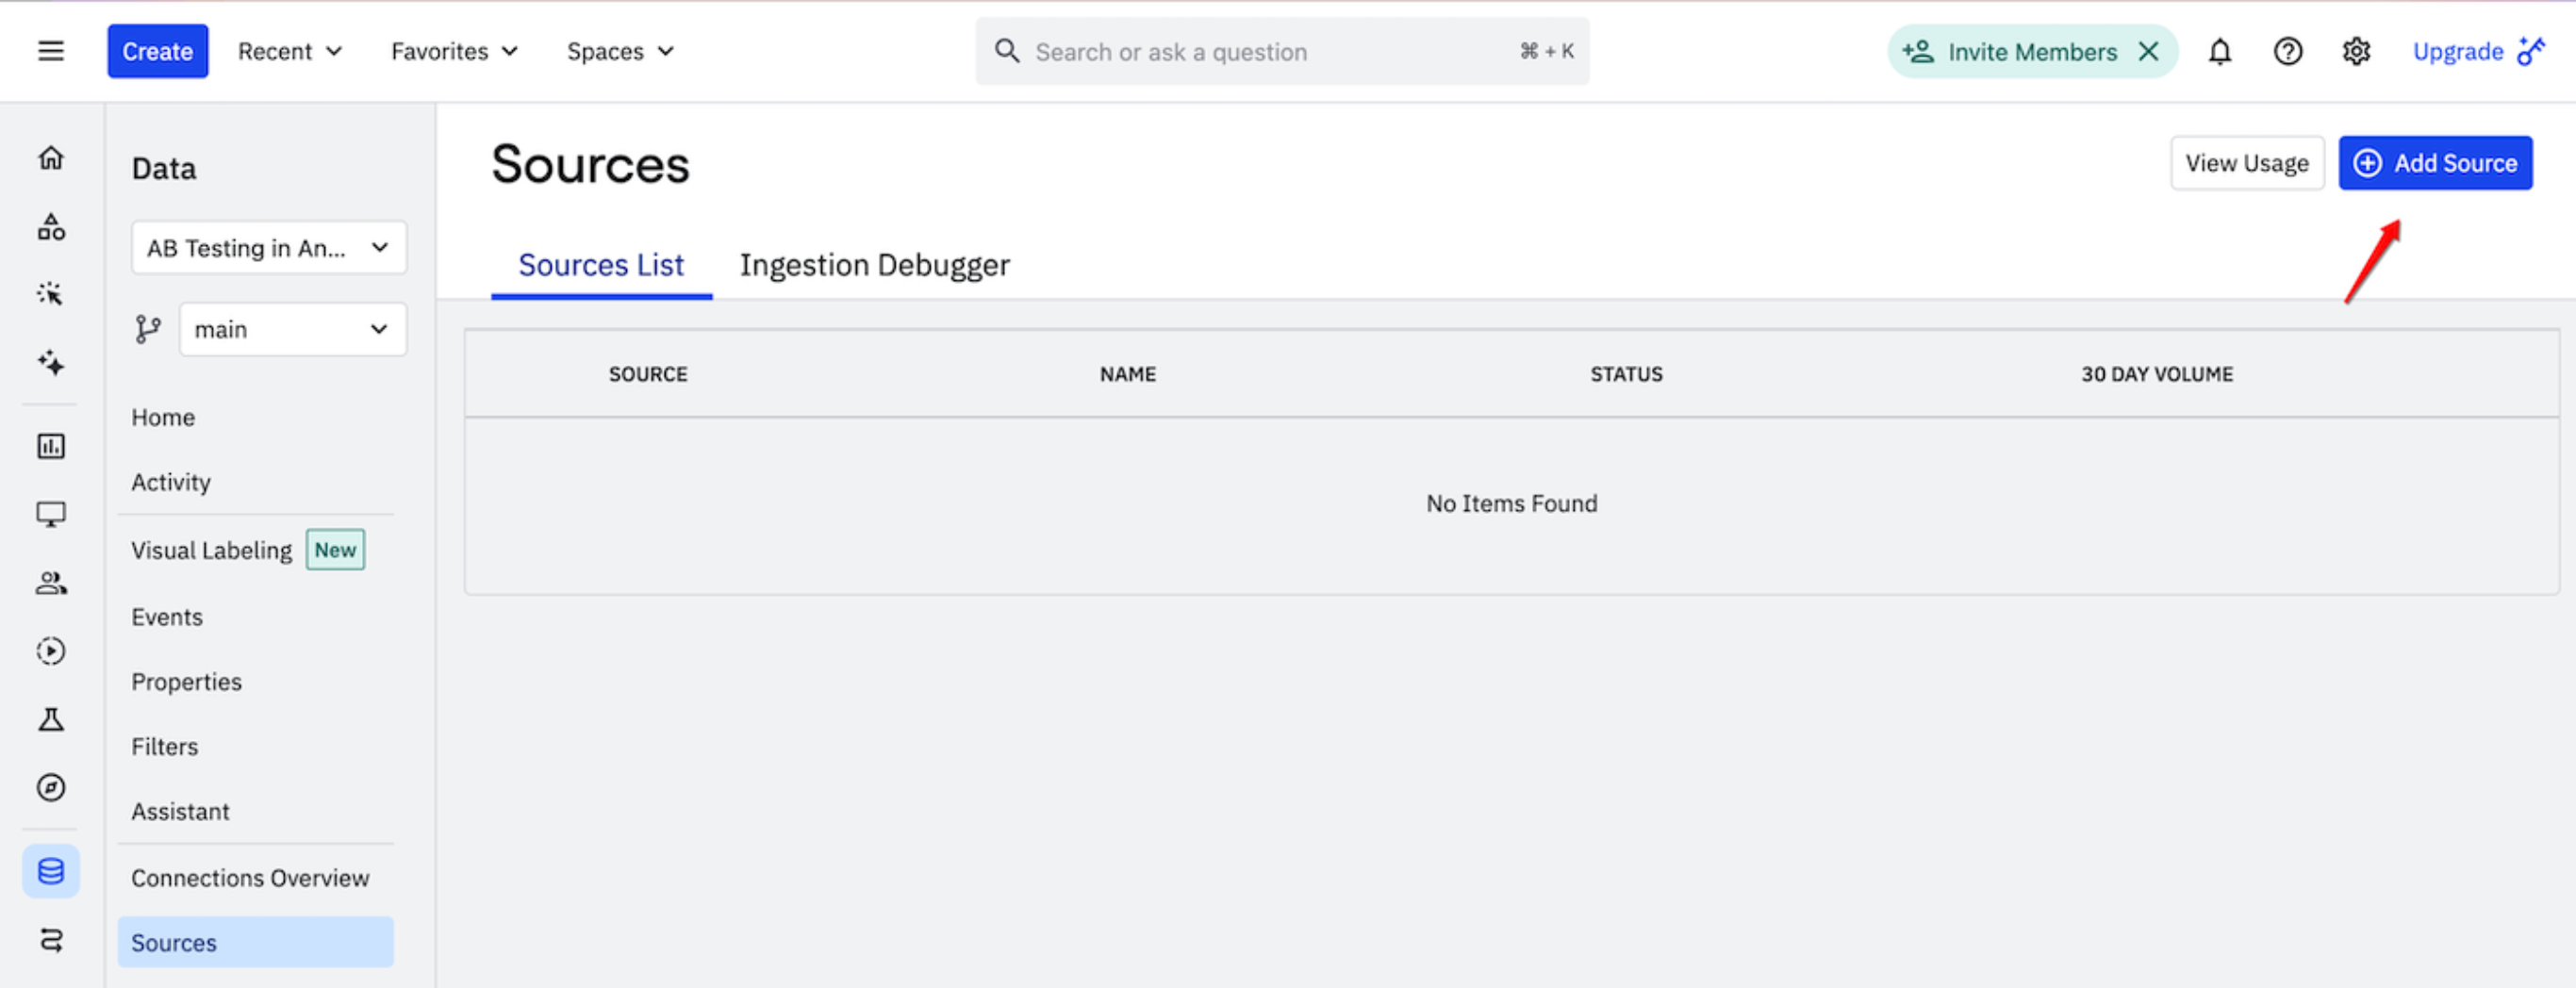
4. Create a new source with the name web:
Afterward, you'll see instructions for integrating the Amplitude JavaScript SDK into Angular:
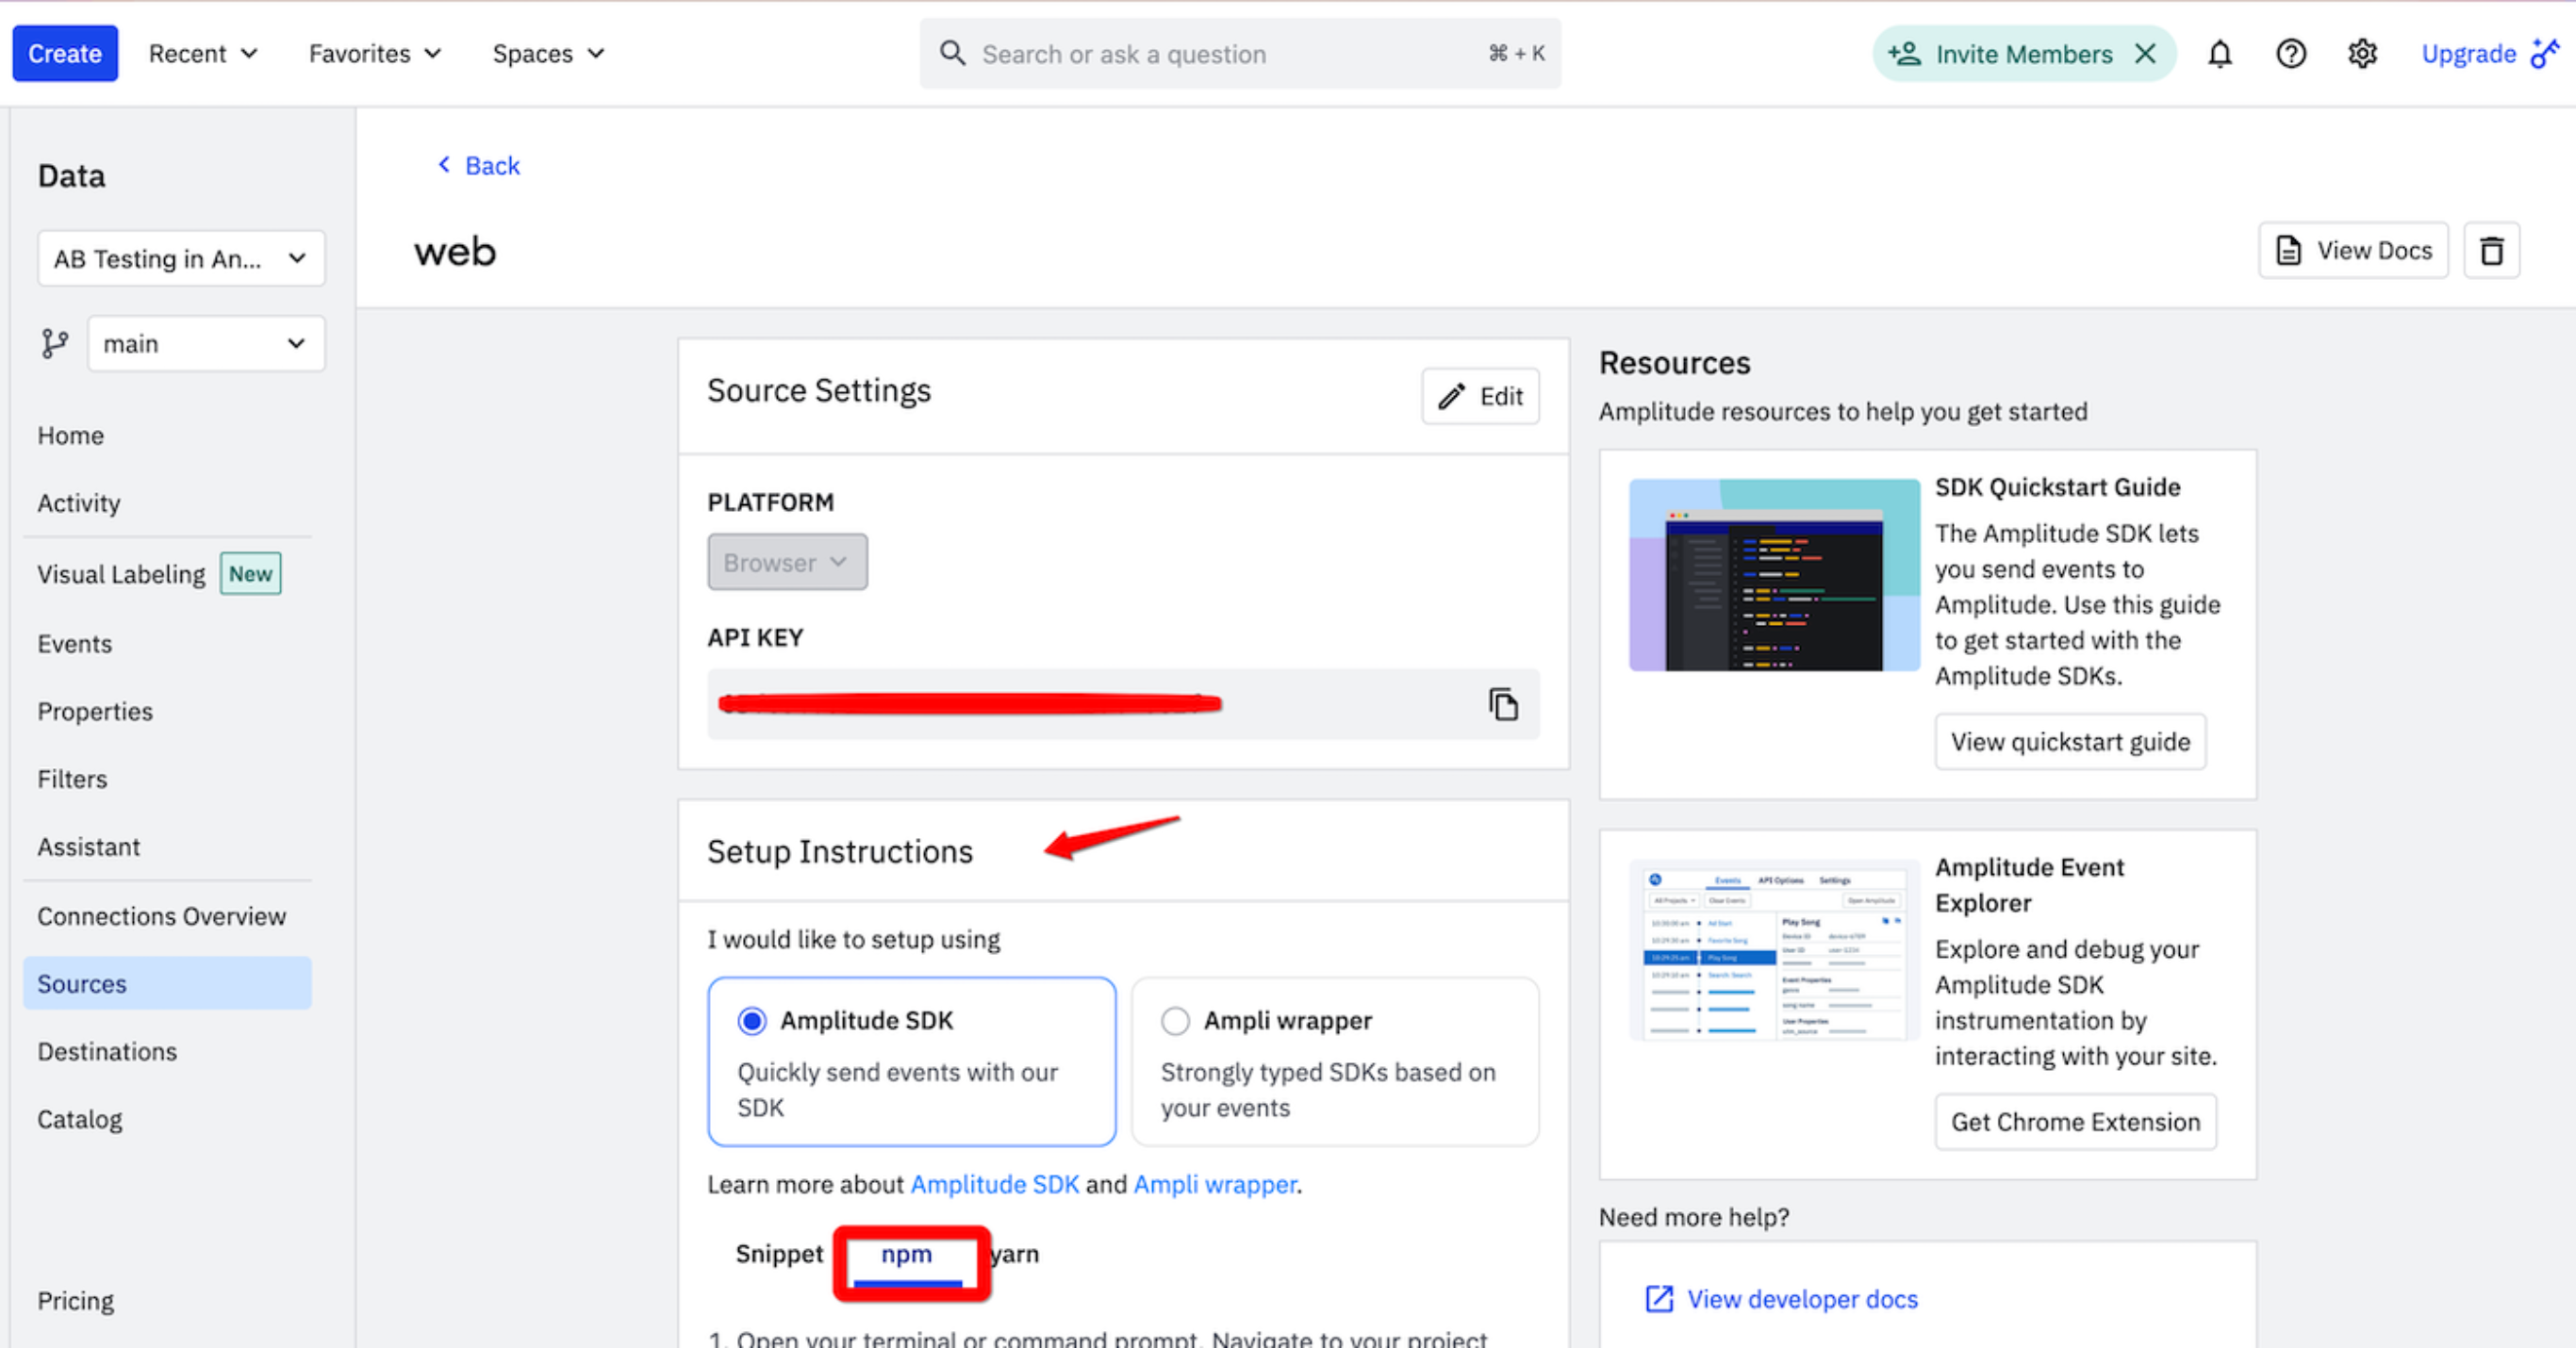
Now, you're ready to integrate and use Amplitude.
Integrating Amplitude & ConfigCat
- Install the Amplitude SDK via NPM using the following command:
npm install @amplitude/analytics-browser
- Generate two environment files and add your ConfigCat SDK Key and Amplitude API Key to them:
ng generate environments
# src/environments/environment.development.ts

export const environment = {
  production: true,
  amplitudeApiKey: 'YOUR-AMPLITUDE-API-KEY',
  configCatSDKKey: 'YOUR-CONFIGCAT-SDK-KEY'
};
-
Create reusable services for ConfigCat (
src/app/services/configcat.service.ts) and Amplitude (src/app/services/configcat.service.ts). -
In
src/app/site-main.component.ts, import and initialize the services using their keys from the environment file, as shown below:
import { Component, inject, OnInit, signal } from '@angular/core';
import { NgClass } from '@angular/common';
import { ConfigCatService } from '../services/configcat.service';
import { AmplitudeService } from '../services/amplitude.service';
import { environment } from '../../environments/environment';

@Component({
  selector: 'app-site-main',
  imports: [NgClass],
  templateUrl: './site-main.component.html',
  standalone: true,
  styleUrl: './site-main.component.scss',
})
export class SiteMainComponent implements OnInit {
  private configCatService = inject(ConfigCatService);
  readonly connectionState = this.configCatService.connectionState();
  isGreenPricingBadgeEnabled = this.configCatService.getValue(
    'greenPricingBadge',
    false,
  );

  constructor(private amplitudeService: AmplitudeService) {}

  async ngOnInit() {
    this.amplitudeService.initialize(environment.amplitudeApiKey);
  }

    // Rest of code...
}
- Add a method called
handleProPlanClickto log the badge color to Amplitude when the Pro plan button is clicked. The logged badge color will depend on the value of the feature flag. When the flag is on, an event propertybadgeColorwith a valuegreenBadgewill be logged. If the flag is off, the valueyellowBadgewill be logged instead.
  handleProPlanClick(badgeColor: string) {
    this.amplitudeService.trackEvent('ProPlanClick', {
      badgeColor: badgeColor,
    });
    window.alert(`Pro plan: ${badgeColor}`);
  }
- Add a conditional class using
[ngClass]in thesrc/app/site-main.component.htmlfile to change the color of the Pro plan badge to green when the feature flag is on:
<div [ngClass]="[isGreenPricingBadgeEnabled() ? 'green-pricing-badge' : 'yellow-pricing-badge']"
        class="pricing-badge">
    <div class="text-center font-bold">Best Value <span class="font-light">(Save <span
    class="font-semibold">30%</span>)</span></div>
</div>
- Attach the
handleProPlanClickmethod to the Pro plan button and pass the appropriate color depending on the value of the feature flag:
<button (click)="handleProPlanClick(
    isGreenPricingBadgeEnabled() ? 'greenBadge' : 'yellowBadge'
    )" class="buy-button min-w-full">Buy Now
</button>
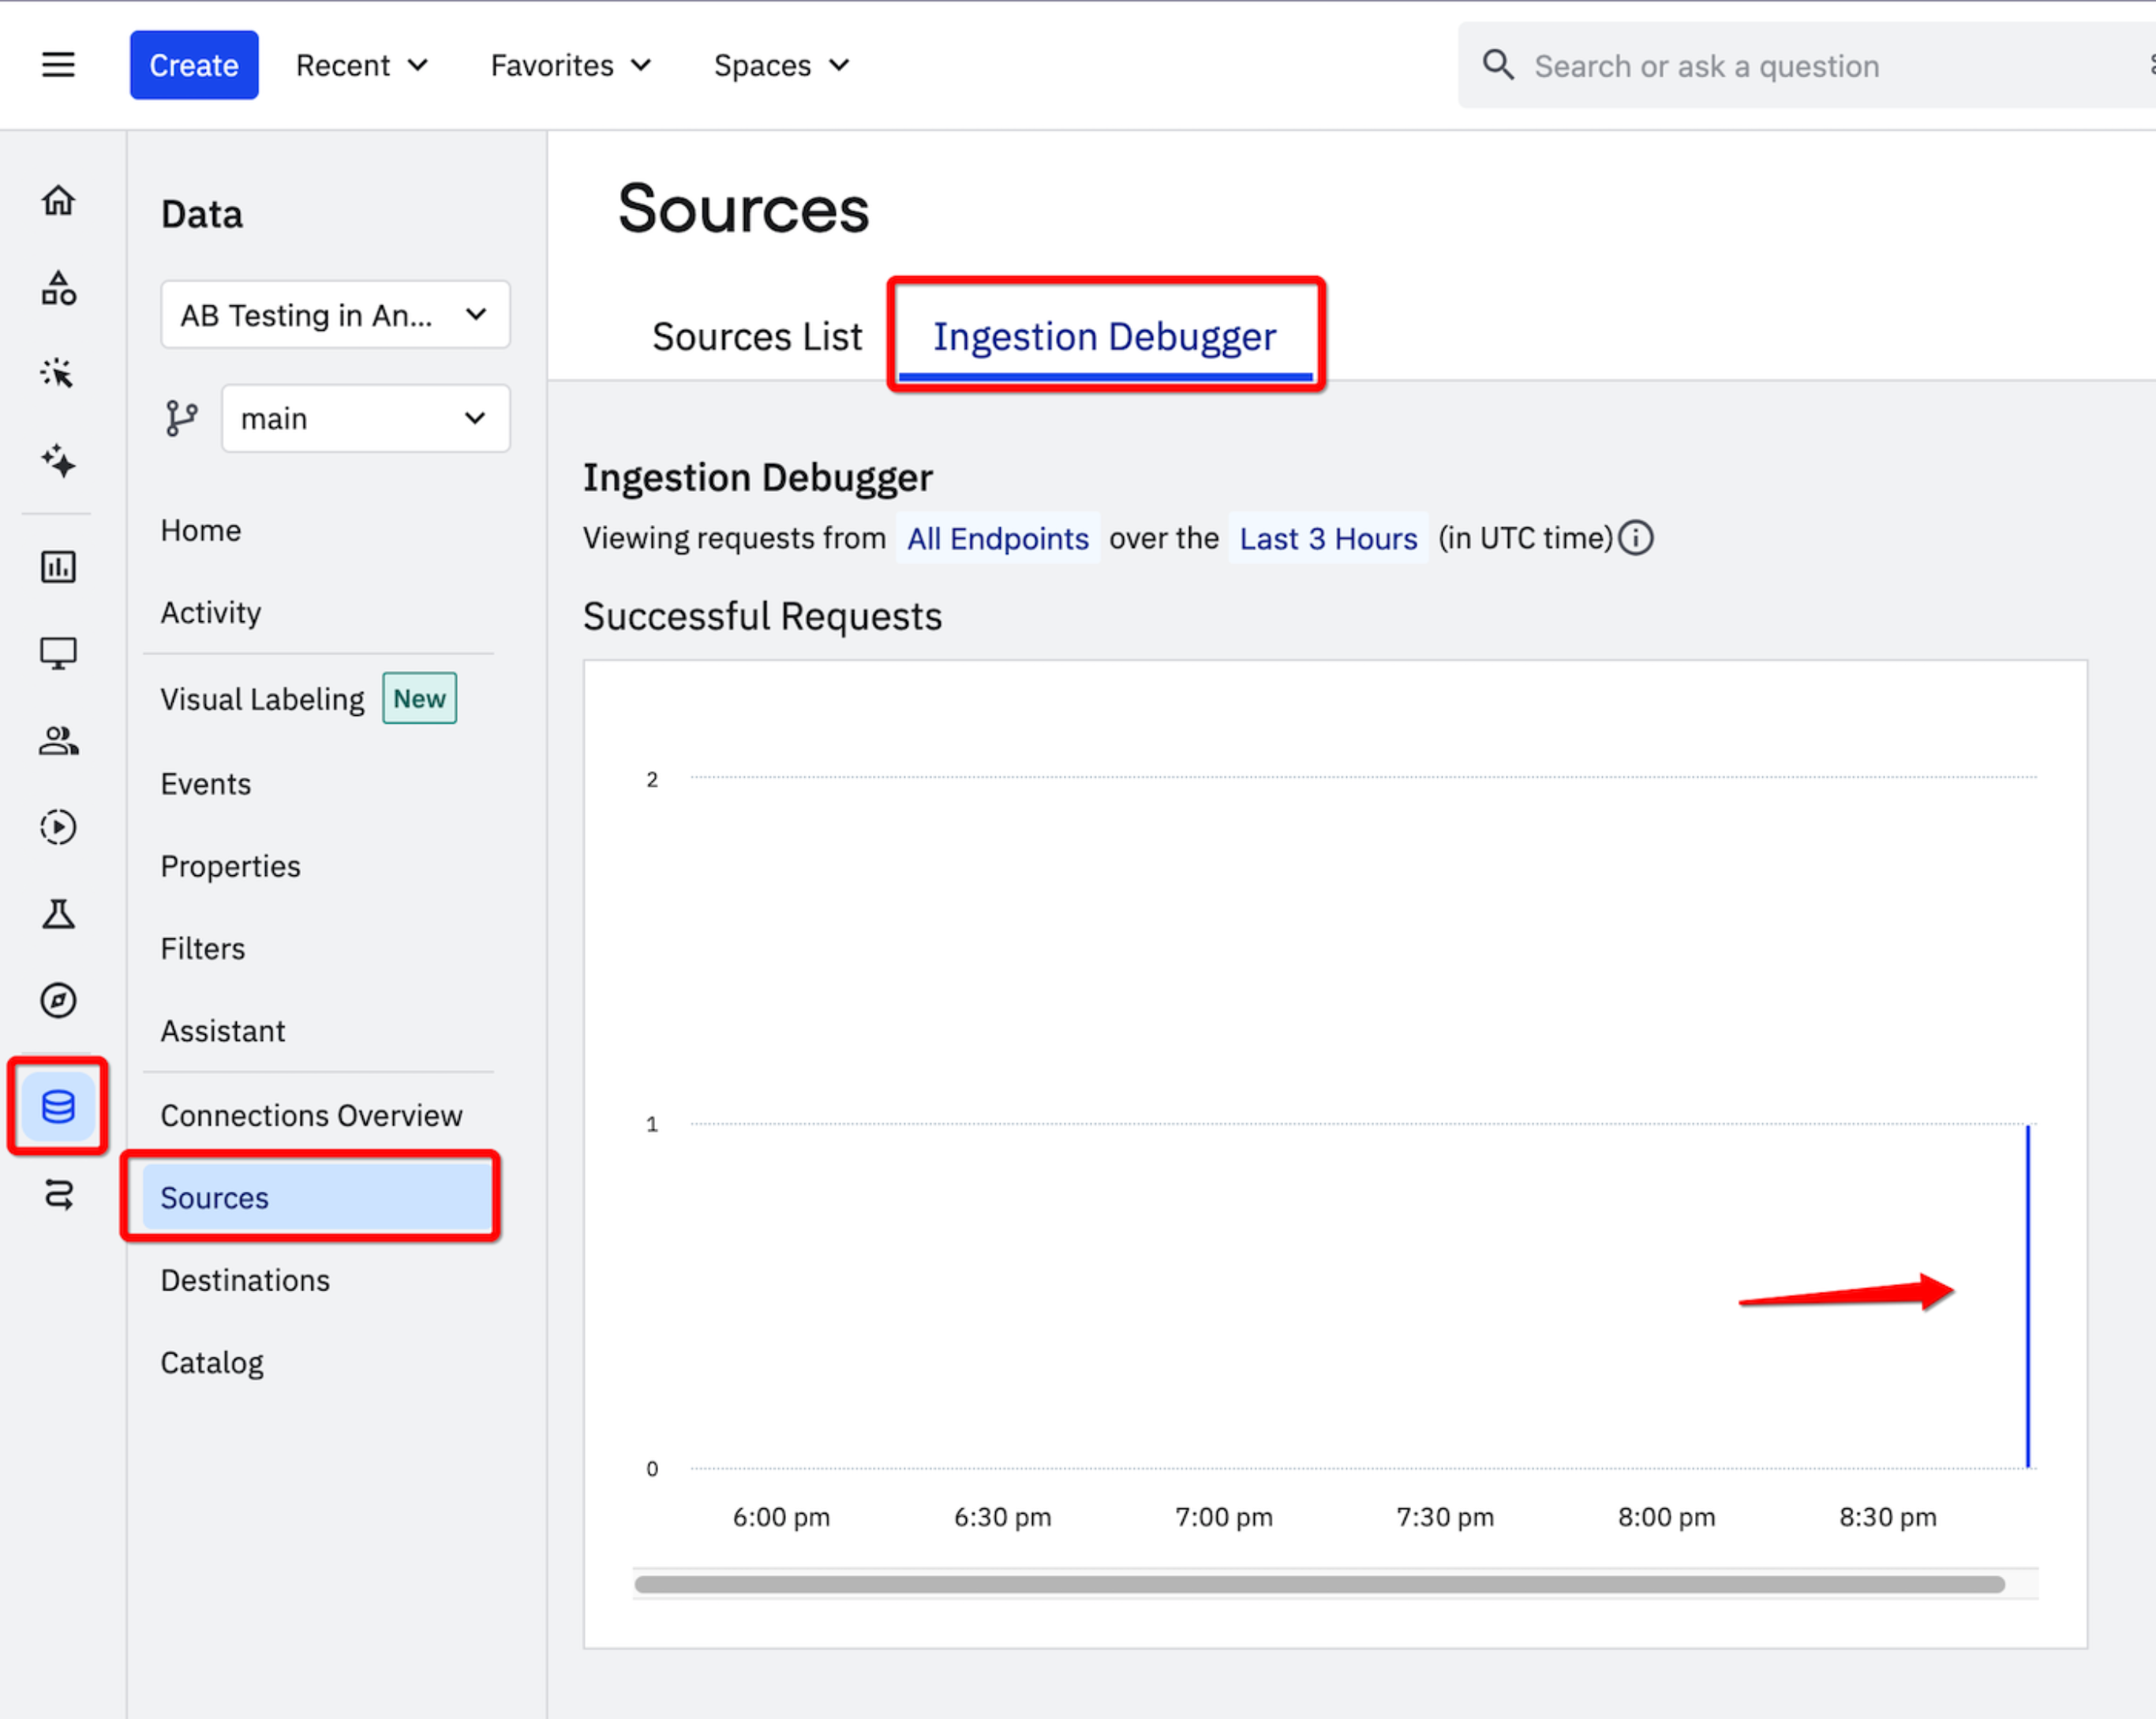
Go ahead and click the Pro plan button a few times with the flag enabled, then disable it and click a few more times. To verify that Amplitude is receiving the events, check the Ingestion Debugger as shown below.
Analyzing the results
To visually compare the number of clicks for both variations, create and configure a segmentation chart.
- Click the Create button at the top left of your Amplitude dashboard. Select Chart > Segmentation.
- Configure the chart with the following options to see the results as shown below:
If this were a real experiment, you could decide to keep the green badge, as it attracted more Pro plan clicks.
To log when you enabled and disabled your feature flags during testing, you can add it to your charts on Amplitude.
Recap
Let's take a moment to recap what we did so far:
1. Defined an A/B test objective and identified two variations to compare.
2. Created a feature flag in ConfigCat
3. Set up an Amplitude account
4. Created a data source in Amplitude
5. Integrate Amplitude and ConfigCat into Angular
6. Log the Pro plan clicks to Amplitude
7. Created and configured a segmentation chart to visualize the results of both variations
Conclusion
A/B testing is a great method for measuring the impact of a new feature before deploying it to your entire user base. By using ConfigCat and Amplitude, you can manage feature flags and track the results effortlessly. With ConfigCat's dashboard, toggling features becomes a breeze, and you can quickly run tests without redeploying your app.
Sign up for a free ConfigCat account today and start experimenting with feature flags!
For more awesome posts and other announcements, follow ConfigCat on X, Facebook, LinkedIn, and GitHub. It's alright. Your feature flags are served.