How to Conduct an A/B Test in Elixir
Instead of relying on assumptions to decide which variation of a piece of software is better, you can let your users guide the decision through a controlled experiment. A/B testing involves splitting your user base into separate groups, where each group experiences a unique variation of a product or feature. By measuring the performance of each variation, you can determine which one works better.
To conduct such a test, you need a tool that helps you split your users into groups and display the appropriate variation for each group. Feature flags are an ideal tool for this. Let's walk through the process of conducting such an experiment in an Elixir app.
Getting Started
If you plan to follow along, here are the pre-requisites:
- An installation of Elixir.
- An installation of Phoenix - A framework for building Elixir-based web apps.
- You are familiar with the role of feature flags in A/B testing.
- A ConfigCat account for managing feature flags.
- An Amplitude account for tracking user events and comparing the results.
The Experiment
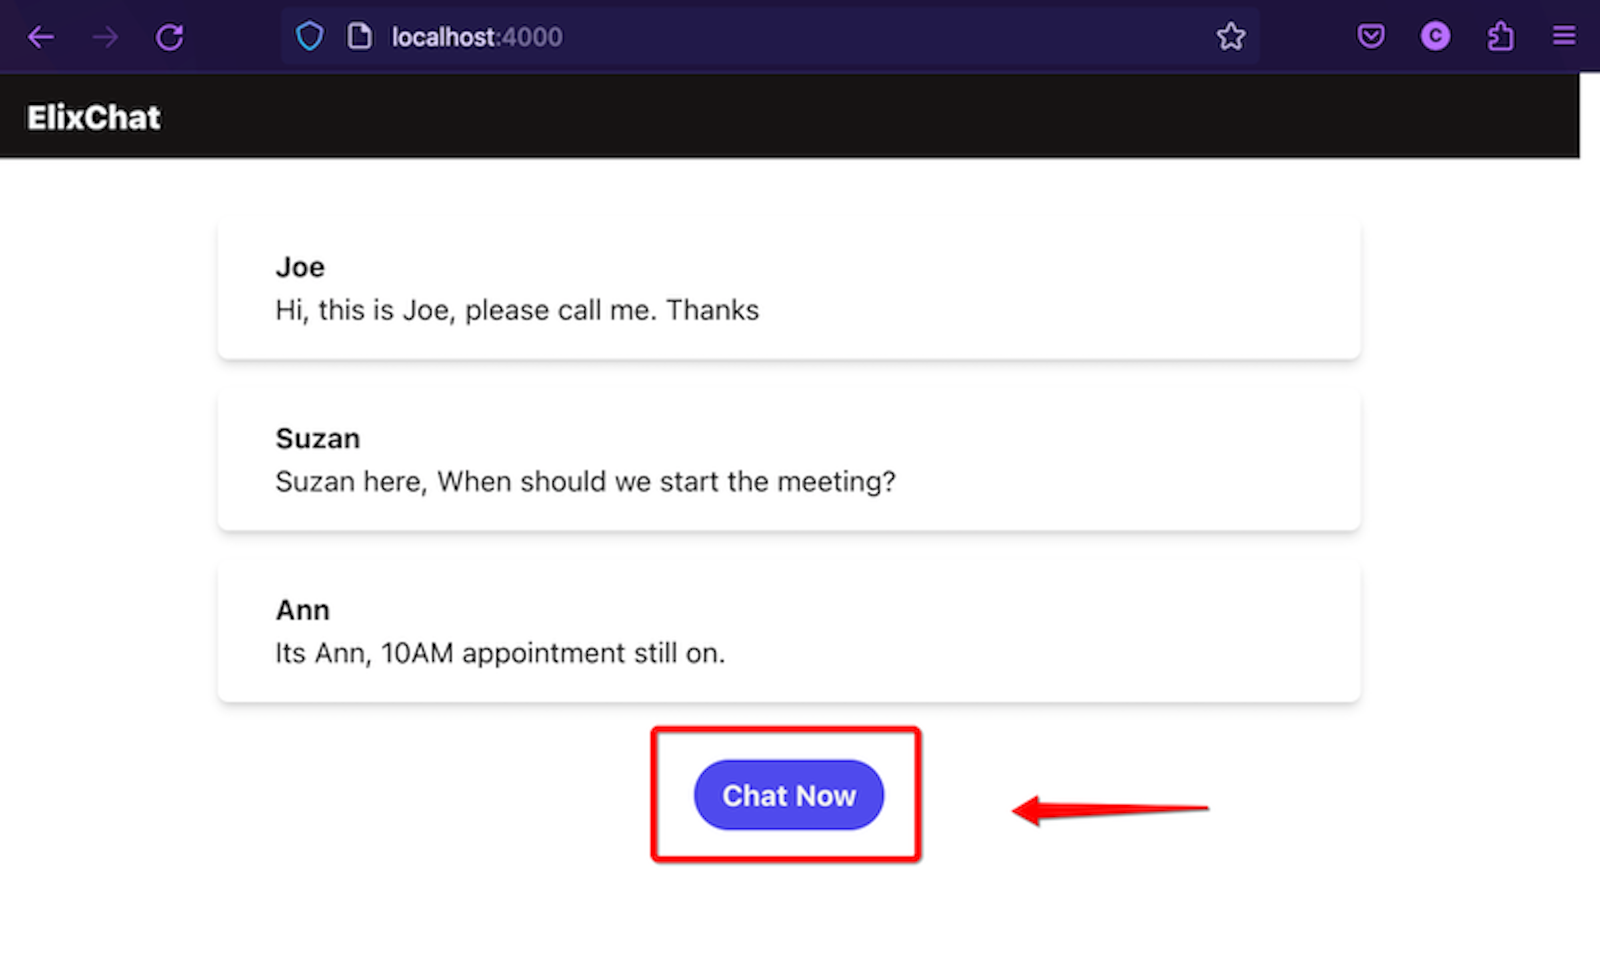
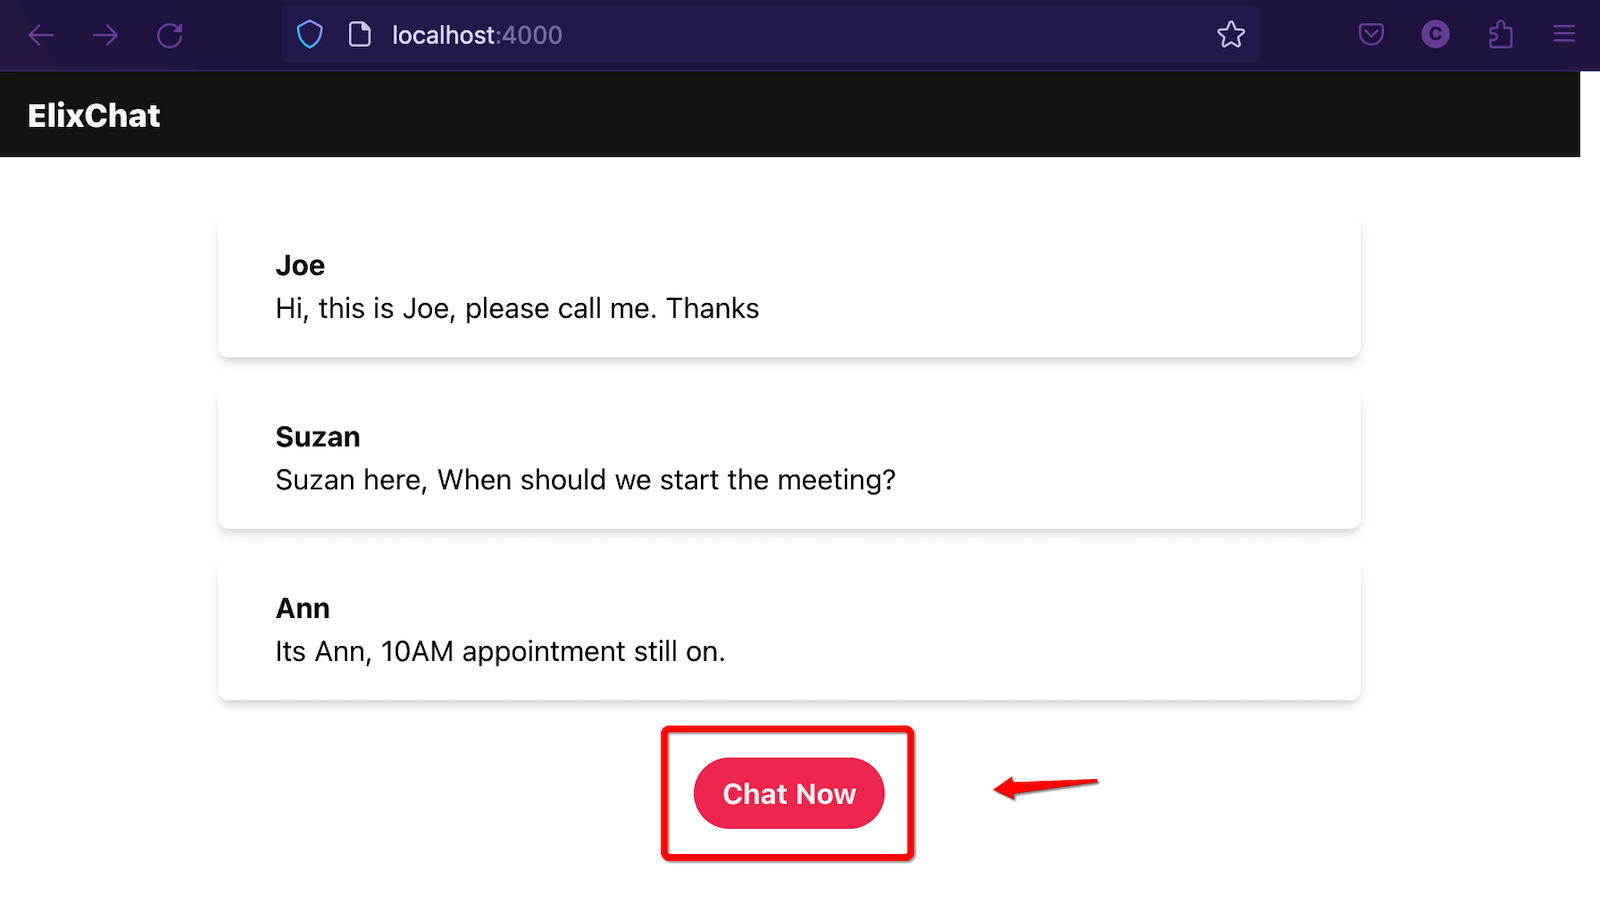
ElixChat, a fictitious company, noticed that many of its users were not initiating chat conversations. Most users remain idle after logging in. The company thought of numerous reasons why that may be the case. One reason could be the color of the button that initiates a chat. After conducting some research, the CTO planned an A/B test with constraints to confirm if changing the button color to red would increase the number of chat conversations initiated.
Constraints for the Experiment
-
Constraint 1: The test should only measure beta users whose email addresses end with
@elixchatbeta.com. -
Constraint 2: Beta users should continue to see variation A (the default).
-
Constraint 3: Variation B (with the red button) should be rolled out after seven days.
-
Constraint 4: The switch between variations must be seamless for the users.
-
Constraint 5: The feature flag should be switched off at the end of the 14-day experiment with variation A set as the default.
Adhering to the constraints
Given the above constraints let's select a feature flag tool, in this case ConfigCat, that allows us to create a feature flag with a targeting rule for beta users. To track the button-click events and analyze the results, we'll use a data analytics platform called Amplitude.
To show you how, I've prepared a sample app in advance, which you can use to follow along or as a reference.
Setting up the Demo App
-
Create a feature flag in your ConfigCat dashboard. Name the flag
Enable Red Chat Buttonand set its default value tofalse. -
Add a targeting rule to the feature flag to target users with an email address ending with
@elixchatbeta.com.

-
Clone the sample app repository and check out the starter-code branch.
-
Create a
.envfile to store the values of your ConfigCat SDK and Amplitude API keys:
AMPLITUDE_API_KEY="YOUR-AMPLITUDE-PROJECT-API-KEY"
CONFIGCAT_SDK_KEY="YOUR-CONFIGCAT-SDK-KEY"
- Add ConfigCat as a dependency to
mix.exs:
defp deps do
 [
    {:configcat, "~> 4.0"}
 ]
- Initialize the ConfigCat SDK client in
lib/elixchat/application.ex:
defmodule Elixchat.Application do
  # ...

  @impl true
  def start(_type, _args) do
    children = [
      # ...

      {ConfigCat, [sdk_key: System.get_env("CONFIGCAT_SDK_KEY")]},

      # ...
 ]
  end
end
-
The Demo app uses a socket and channel to communicate data from the server. In the
lib/elixchat_web/channels/chat_room_channelreplaceYOUR-FEATURE-FLAG-KEYwith your actual feature flag key. -
To target beta users with an email address ending with
@elixchatbeta.com, you'll need to include a user object when querying the feature flag. Here's how:
 feature_flag_value =
 ConfigCat.get_value(
      "YOUR-FEATURE-FLAG-KEY",
      false,
 ConfigCat.User.new("user123", email: "[email protected]")
 )
- Run the server and launch the app in your browser. Toggle the feature flag in your ConfigCat dashboard, and you should see the button color change when the app polls the feature flag.
elixchat % mix phx.server

Generated elixchat app
[debug] [0] Fetching configuration from ConfigCat
[info] Running ElixchatWeb.Endpoint with Bandit 1.3.0 at 127.0.0.1:4000 (http)
[info] Access ElixchatWeb.Endpoint at http://localhost:4000
[watch] build finished, watching for changes...
Adding Amplitude
-
Create a free account on Amplitude
-
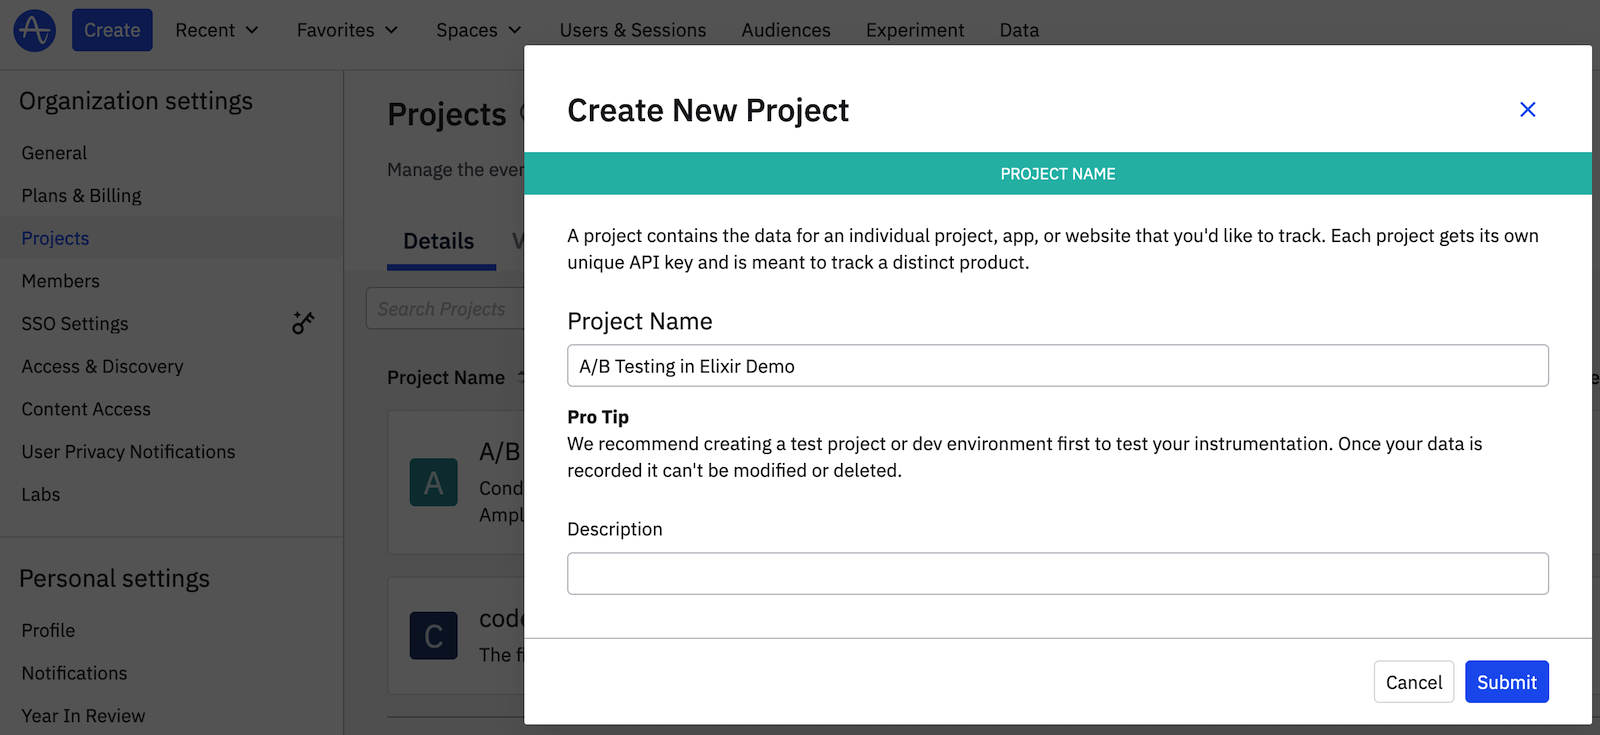
Create a new project. Create a new project by navigating to your Organization settings. Click the gear icon at the top-right corner of the page, select Projects from the left sidebar, and then click Create Project.
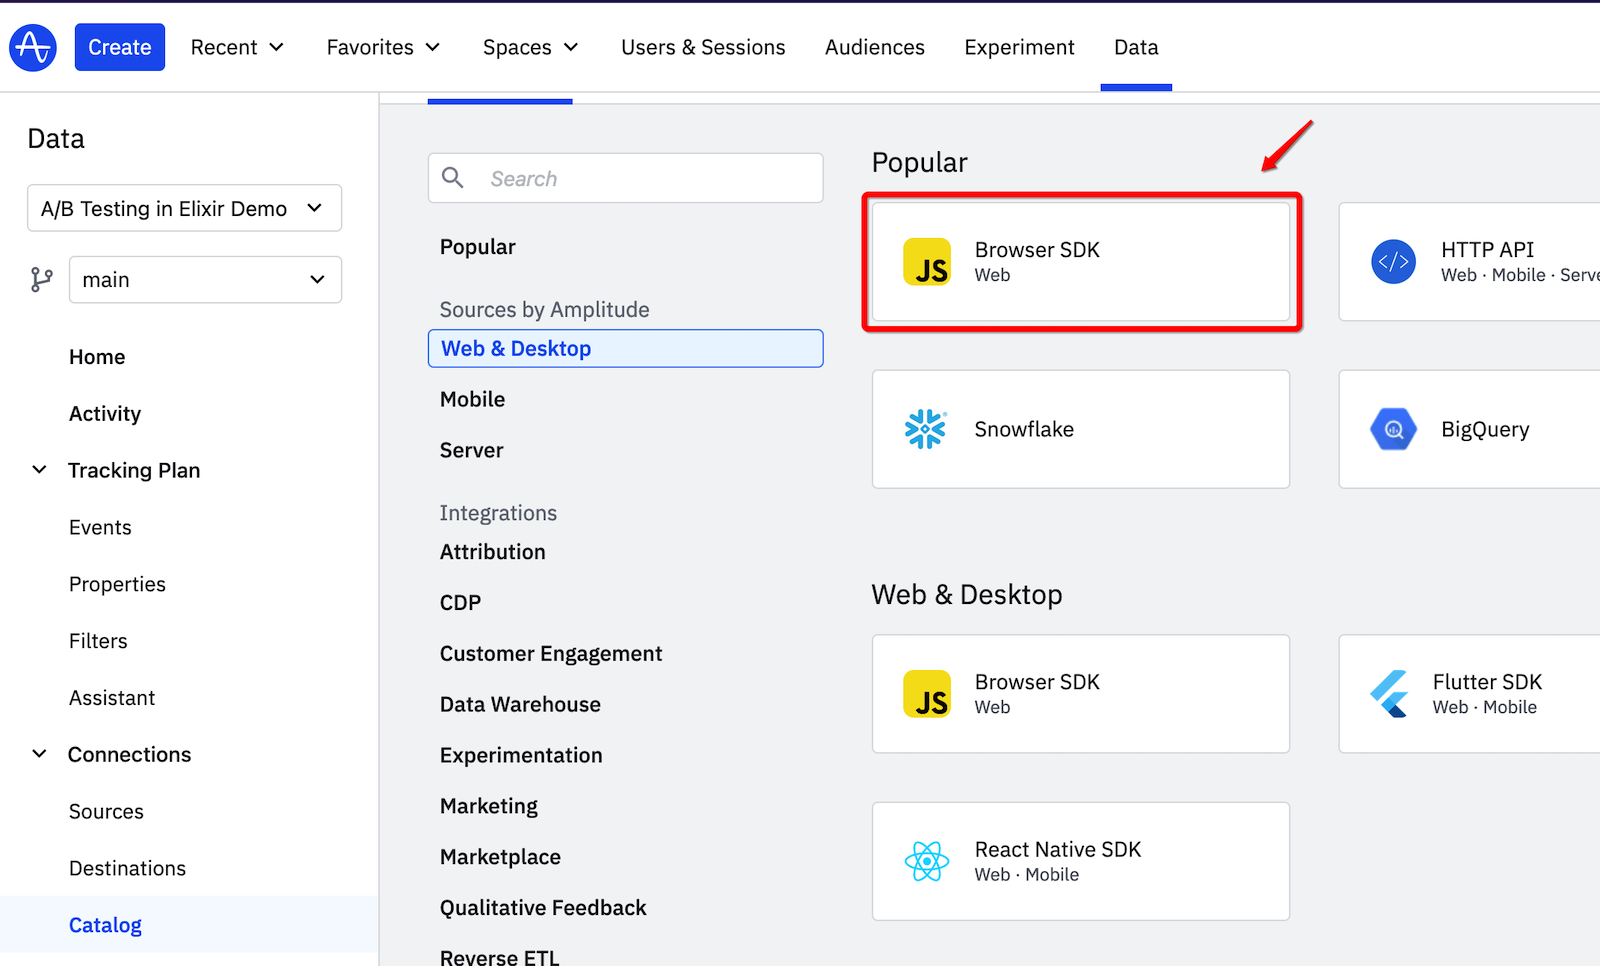
- Select the browser SDK.
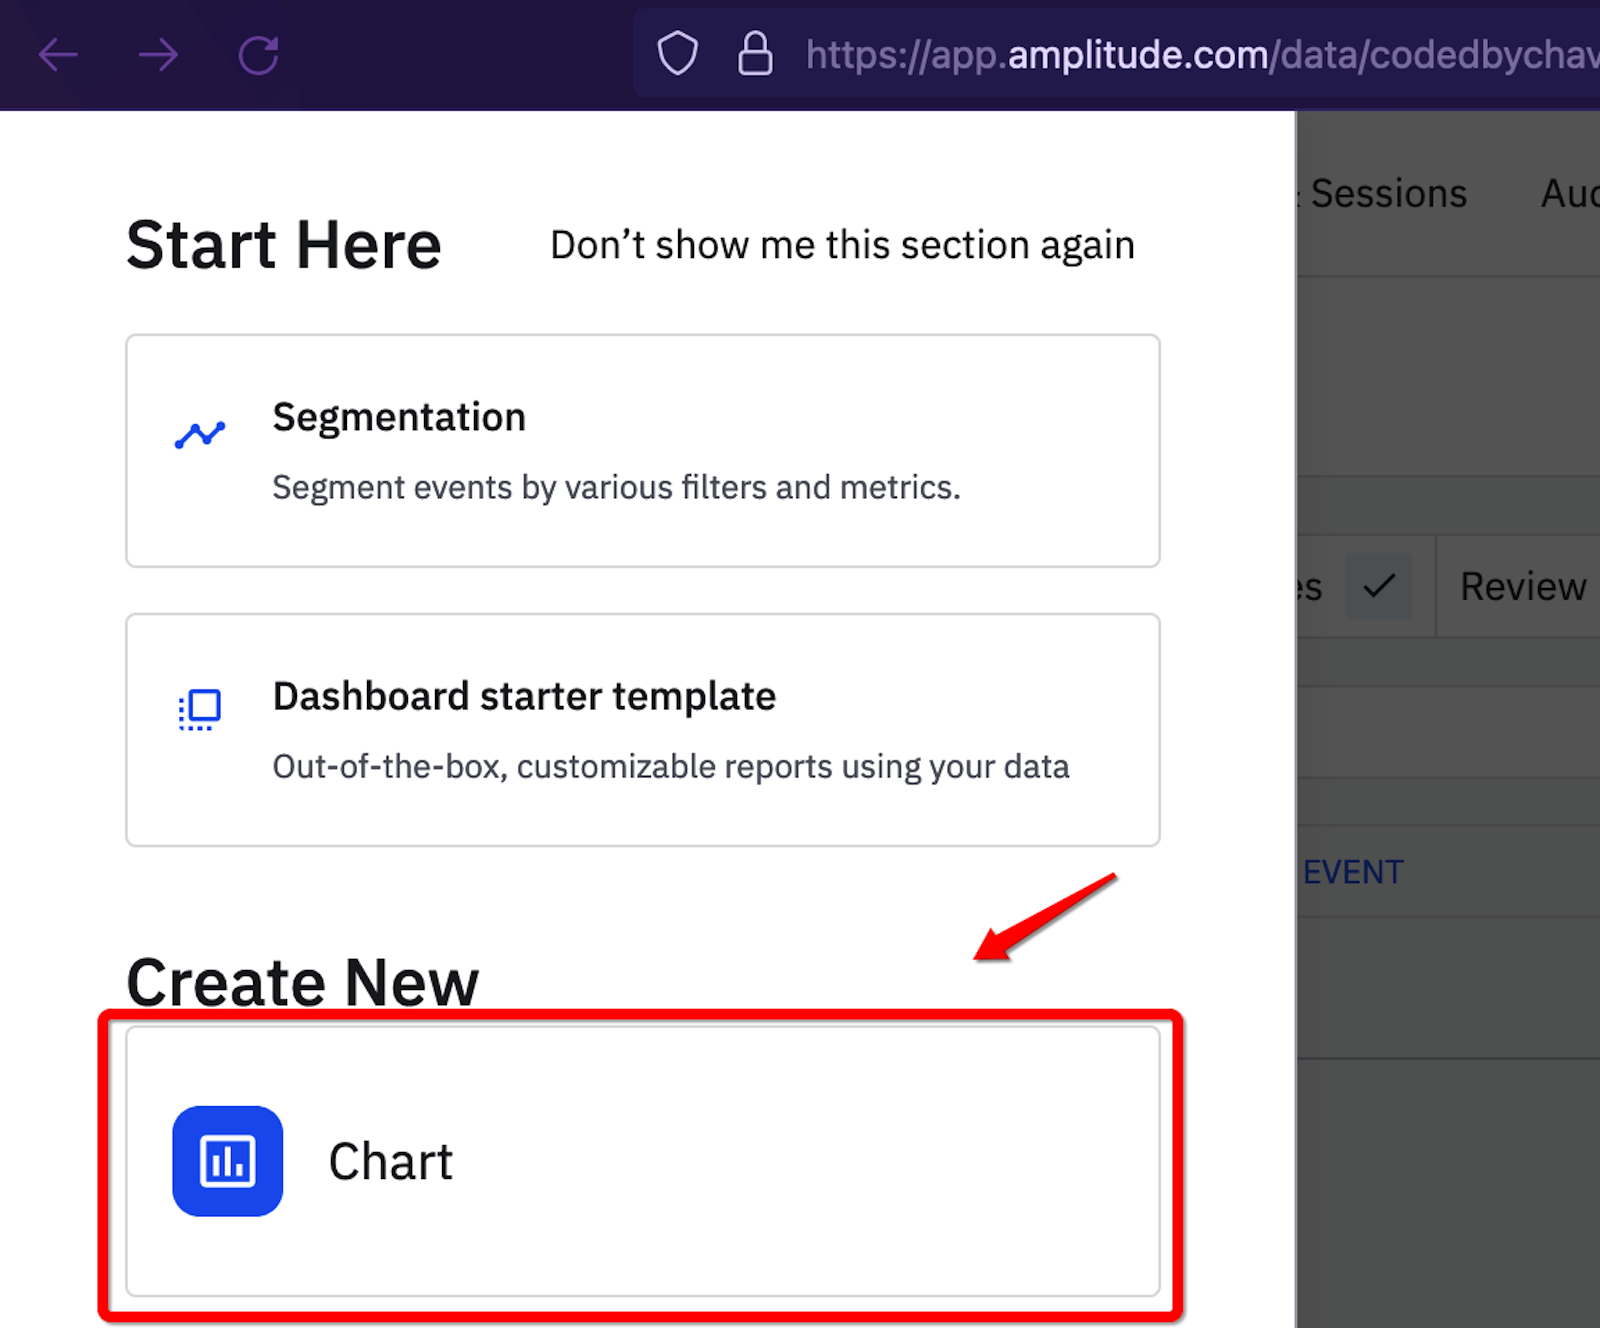
- To view the button-click events from each variation, create a chart to visualize them. Click the Create button in the top-left corner and select Chart.
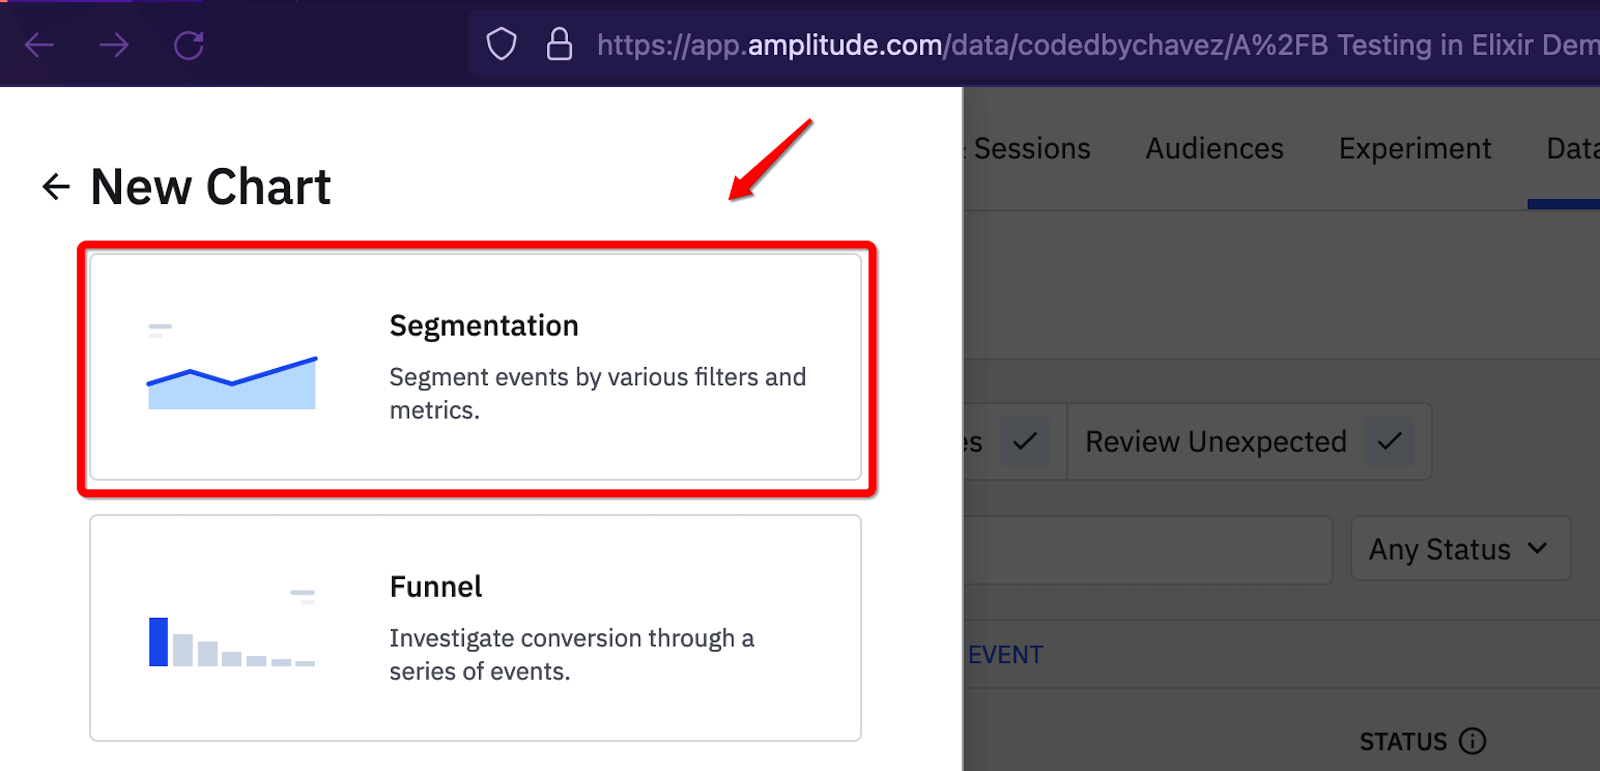
- Choose the "Segmentation" option to display the metrics based on various filters and metrics.
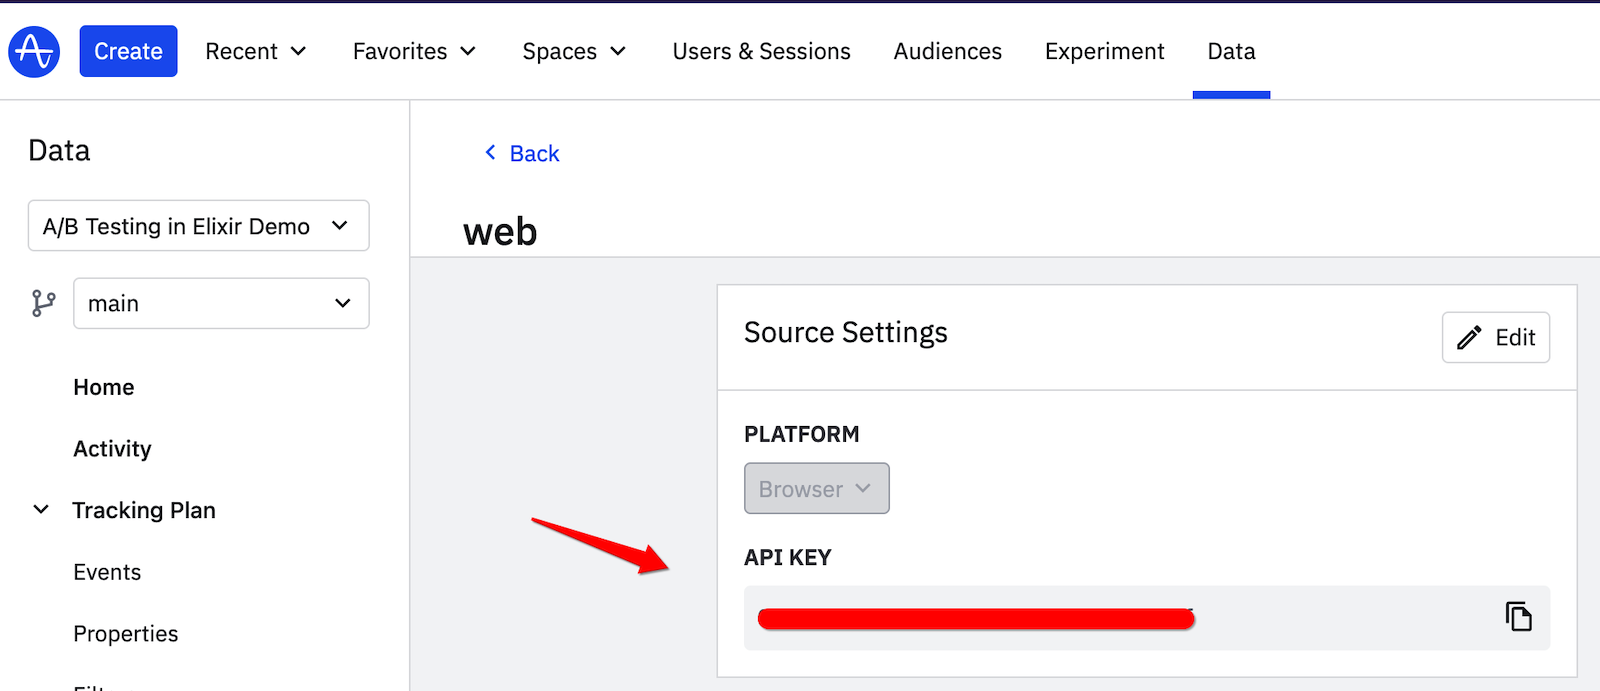
- Copy your project API key from the source settings page as shown below and paste it into the
.envfile we created earlier.
- In the
lib/elixchat_web/controllers/page_html/home.html.heexfile, add the following script tags for Amplitude. You can see the complete code here.
<script type="text/javascript" src="https://cdn.amplitude.com/libs/amplitude-7.2.1-min.gz.js"></script>

<script type="text/javascript">
 amplitude.getInstance().init('<%= System.get_env("AMPLITUDE_API_KEY") %>');
</script>
The first script tag adds Amplitude's JavaScript code, and the second creates a local instance of Amplitude using the AMPLITUDE_API_KEY specified in your .env file.
- To dynamically track button click events for each variation, we'll set up a click event listener that logs the event
PURPLE_BUTTON_CLICKEDto Amplitude when the feature flag is off. When the feature flag is on the previous click event listener will be removed and replaced with one that logsRED_BUTTON_CLICKED. Here's what the code looks like inassets/js/user_socket.js:
// ...
let chatButton = $('#chat-button');

function trackPurpleButtonClick() {
 console.log('trackPurpleButtonClick');
 amplitude.getInstance().logEvent('PURPLE_BUTTON_CLICKED');
}

function trackRedButtonClick() {
 console.log('trackRedButtonClick');
 amplitude.getInstance().logEvent('RED_BUTTON_CLICKED');
}

// Add default click event listener to the chatButton
chatButton.on("click", trackPurpleButtonClick);

// Join the channel
channel.join()
  .receive("ok", resp => {

    // ...

    // Get the feature flag value
 channel.on("feature_flag", payload => {
      const featureFlagValue = payload.value;
      if (featureFlagValue === true) {
        // Set the chatButton color
 chatButton.css('background-color', 'rgb(244 63 94)');

        // Remove the previous event
 chatButton.off("click", trackPurpleButtonClick);

        // Add the new event
 chatButton.on('click', trackRedButtonClick);
 }
 });

 })

// Listen for the feature flag change event
channel.on("feature_flag_changed", payload => {

  // Handle the feature flag change
  const featureFlagValue = payload.feature_flag_value;

  if (featureFlagValue === true) {
    // Set the chatButton color
 chatButton.css('background-color', 'rgb(244 63 94)');

    // Remove the previous event
 chatButton.off("click", trackPurpleButtonClick);

    // Add the new event
 chatButton.on('click', trackRedButtonClick);
 } else {
    // Reset the button color
 chatButton.css('background-color', 'rgb(99 102 241)');

    // Remove the previous event
 chatButton.off("click", trackRedButtonClick);

    // Add the new event
 chatButton.on('click', trackPurpleButtonClick);
 }
});

// ...
Analyzing the results
According to the constraints, the experiment should run for 14 days. The number of PURPLE_BUTTON_CLICKED events logged for the first 7 days will be collected, followed by RED_BUTTON_CLICKED for the remaining 7 days when the feature flag is toggled on.
For demo purposes, I logged events from both buttons in a single day. In Amplitude's dashboard, you can use the compare dropdown to compare a longer experiment duration shown below:
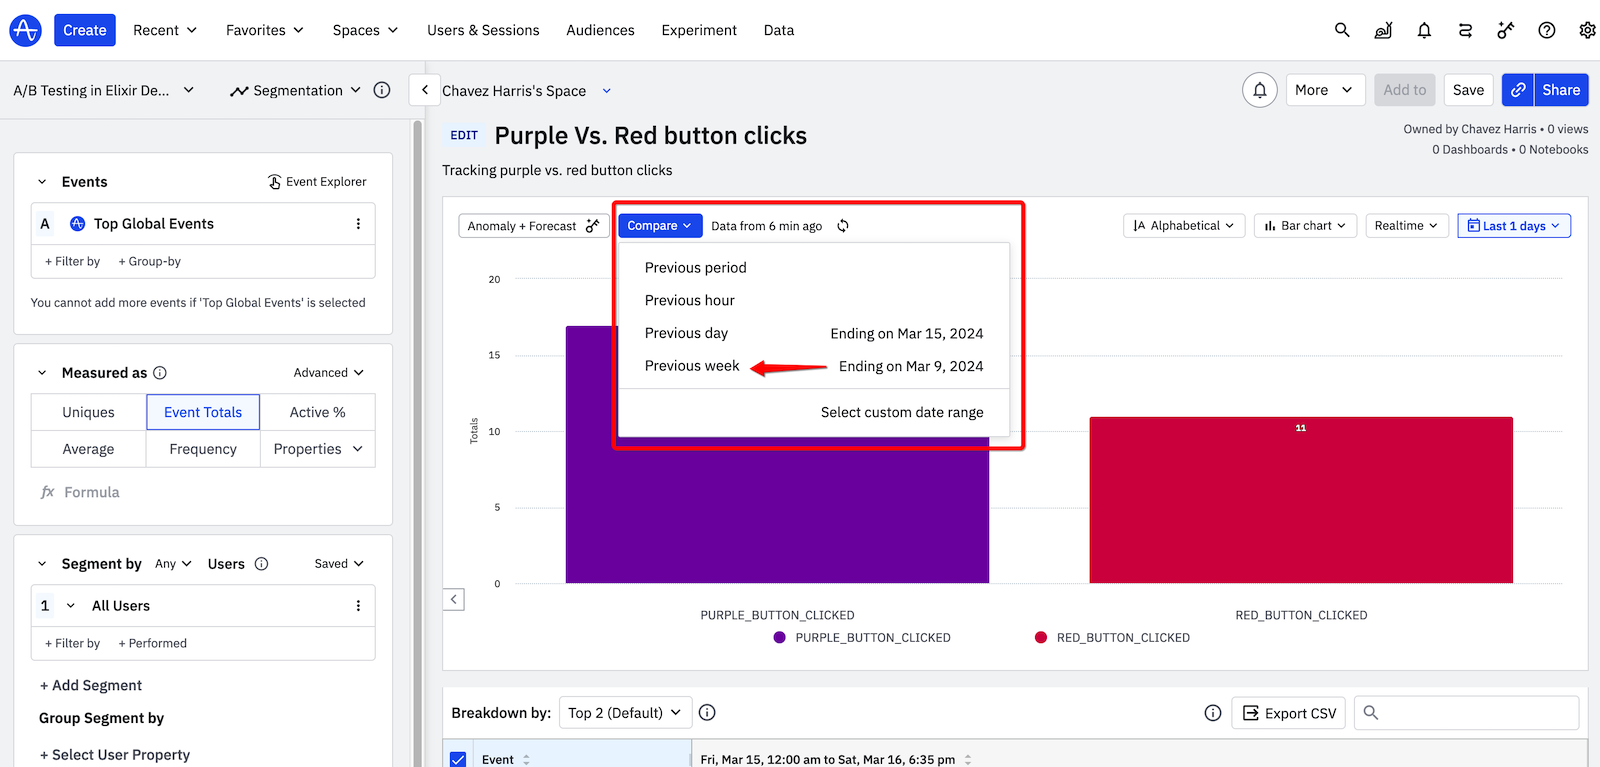
If the data above was collected from a real experiment, we could conclude that changing the button to red did not initiate more chat conversations among users, and we should conduct more tests. For example, a new experiment could compare the current UI to a better one with more colors, fonts, etc.
Conclusion
A/B testing is an effective strategy for deciding between two variations of a product. One key advantage of A/B testing is the ability to test multiple hypotheses. To streamline A/B test experiments, selecting the best feature flagging tool and an appropriate method for analyzing results is essential. ConfigCat feature flags can seamlessly integrate with a wide range of programming languages and frameworks in the software ecosystem.
If you find this post helpful and want to give feature flags a try on your own? You can get started with ConfigCat for free here. Deploy any time, release when confident.
Stay tuned to ConfigCat's newest posts and announcements on X, Facebook, LinkedIn, and GitHub.
