How to Use Feature Flags with Kubernetes

In a previous post, I covered best practices and tips for using ConfigCat feature flags with Docker. While Docker has advantages for easily sharing and deploying containerized applications, it poses challenges when deploying and managing those containers at scale. This is where Kubernetes comes in. Using feature flags, you can control your Kubernetes deployments and services with a simple click without editing your .yaml config files. Let's take a look together!
Kubernetes Overview
If you have been using Docker, you may have heard of Kubernetes. It is an open-source container orchestration platform that allows you to manage and deploy containerized applications as you did with Docker but at a larger scale. While Docker helps developers to share and deploy their applications in containerized environments, its limitations can surface in complex scenarios. For example, you may need to deploy multiple containers across multiple machines and control what happens when one of the containers crashes. What if you need to spin up new containers on the fly to handle increased traffic?
You can think of Kubernetes as a framework of industry standards and best practices for deploying and managing containerized applications. It is platform agnostic and can be used to manage containers from many containerization platforms such as containerd and Docker. Kubernetes can also work with any cloud provider like AWS, Azure, or Google Cloud.
Kubernetes uses configurations from YAML or JSON files that can specify the number of containers to deploy, the container image to use, and the ports to expose, etc. But how can you dynamically change these configurations without editing your config files? Feature flags could help.
Feature Flags and Kubernetes
Feature flags are a piece of code that conditionally hides and displays functionality. When a flag is true, the feature or block of code it controls is rendered and shown to users or hidden otherwise. Feature flags could integrate with many programming languages and technologies, including Kubernetes.
Feature flags also come in useful when you need to minimize the risk of a deployment. For example, in the context of Kubernetes, if you have a container image that is not compatible with the current version of your application, it can be quickly replaced with a compatible one via a feature flag toggle. Other use cases can include A/B testing and controlling how your continuous integration pipeline deploys your application.
Using a Feature Flag Provider
To keep your feature flags organized and easily accessible, you can use a feature flag provider. ConfigCat allows you to manage your feature flags from an easy-to-use dashboard, including the ability to set targeting rules for releasing features to a specific segment of users.
Let's discuss how you can create a feature flag in ConfigCat and use it to toggle between two versions of a Node.js image for a Kubernetes container.
How to Integrate ConfigCat Feature Flags with Kubernetes
Thanks to the open-source nature and wide adoption of Kubernetes, there are many ways to add feature flags. Kubernetes comes with an API that allows you to interact with it from your code. One of its Official client libraries is the Kubernetes Python client library. In the upcoming demo, I'll use this library with the ConfigCat's Python SDK to integrate feature flags with Kubernetes.
Prerequisites
In the demo, I'll use Kubernetes through the Docker Desktop application. To follow along, you'll need to have the following installed on your machine:
- Docker Desktop
- Python 3
- pip
- Git
- A code editor such as VS Code
- Basic knowledge of Python and Kubernetes
Setting up the Demo
To get started, open up a terminal and clone the demo repository with the following command:
git clone [email protected]:configcat-labs/feature-flags-with-kubernetes.git
With the demo cloned, I'll walk you through the steps to build it from scratch to give you a better understanding of how it works. Feel free to refer to the source code above if you get stuck.
- Create a new folder on your computer and name it
feature-flags-with-kubernetes. Then create a new folder calledbackendwith anapp.jsfile in it with the following content:
const http = require('http');

const server = http.createServer((req, res) => {
    console.log(req);
    res.end('Hello from the node kubernetes pod!');
});

server.listen(3000);
- Create two Dockerfiles named
Dockerfile.with-node18andDockerfile.with-node20in the root folder with the following content:
# Specify the base image
FROM node:18-alpine

# Set the working directory in the Docker image
WORKDIR /backend

# Copy the application files to the working directory
COPY ./backend .

# Export port 3000
EXPOSE 3000

# Run the application
CMD ["node", "app.js"]
# Dockerfile.with-node20

# Specify the base image
FROM node:20-alpine

# Set the working directory in the Docker image
WORKDIR /backend

# Copy the application files to the working directory
COPY ./backend .

# Export port 3000
EXPOSE 3000

# Run the application
CMD ["node", "app.js"]
Based on the state of the feature flag, we'll tell Kubernetes which Dockerfile to use to build the image for the backend container.
- Create a file
deployment.yamlin the root folder with the following content. This file is called a deployment file and contains instructions for Kubernetes to deploy a single container with the image specified in theimageproperty.backend-with-node18is the default. I'll show you how to change it dynamically based on the value of the feature flag.
apiVersion: apps/v1
kind: Deployment
metadata:
  name: backend-deployment
spec:
  replicas: 1
  selector:
    matchLabels:
      app: backend
  template:
    metadata:
      labels:
        app: backend
    spec:
      containers:
 - name: backend-container
          image: backend-with-node18:latest
          imagePullPolicy: Never
          ports:
 - containerPort: 3000
- To expose the
backend-containerand make it accessible from outside the pod and in the browser, create a file calledservice.yamlin the root of thefeature-flags-with-kubernetesfolder with the following content:
apiVersion: v1
kind: Service
metadata:
  name: backend-service
spec:
  selector:
    app: backend
  ports:
 - protocol: TCP
      port: 3000
      targetPort: 3000
  type: LoadBalancer
- Point your terminal to the root folder and execute the following commands to set a Python virtual environment, activate it, and install the required dependencies:
python3 -m venv venv
source venv/bin/activate
Create a file called requirements.txt in the root folder. You can copy the contents from the requirements.txt file here. Then install the dependencies with the following command:
pip3 install -r requirements.txt
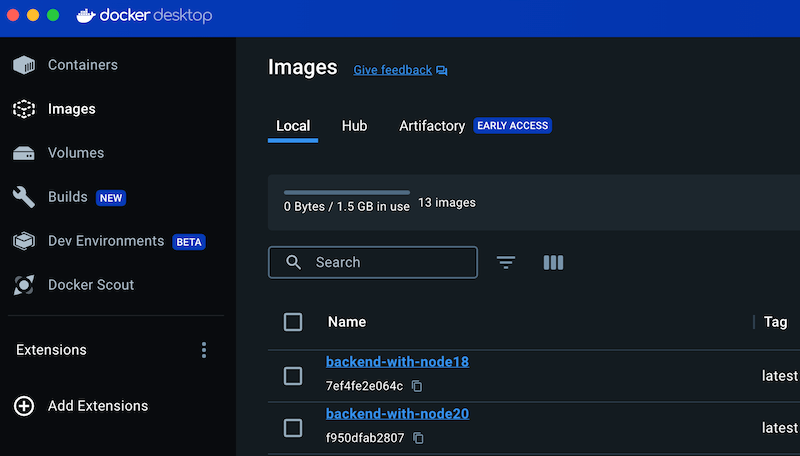
- Build and tag each of the Docker images from the Dockerfiles with the following commands:
docker build -f Dockerfile.with-node18 -t backend-with-node18:latest .
docker build -f Dockerfile.with-node20 -t backend-with-node20:latest .
Both images should now be available in your Docker Desktop application:
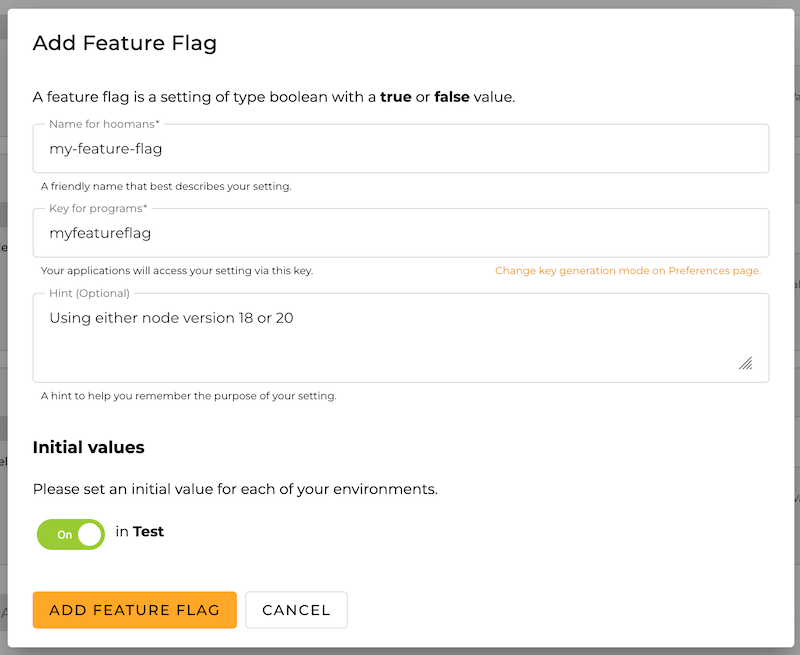
Creating a Feature Flag
- Create a free-tier account on ConfigCat and create a feature flag with the following details:
- Copy your SDK key by clicking on the VIEW SDK KEY button on the top right corner of the dashboard.
Setting up the Kubernetes Script
-
In the root folder, create a file called
kubernetes-script.pywith the content here. This script will create the deployment and service from the.yamlfiles created earlier and update/patch in the appropriateNode.jsimage based on the value of the feature flag. I've added comments to explain what each line does. -
Execute the script with the following command:
python3 kubernetes-script.py
- If you've followed the steps correctly, you should be able to access the application at http://localhost:3000 and see the following:

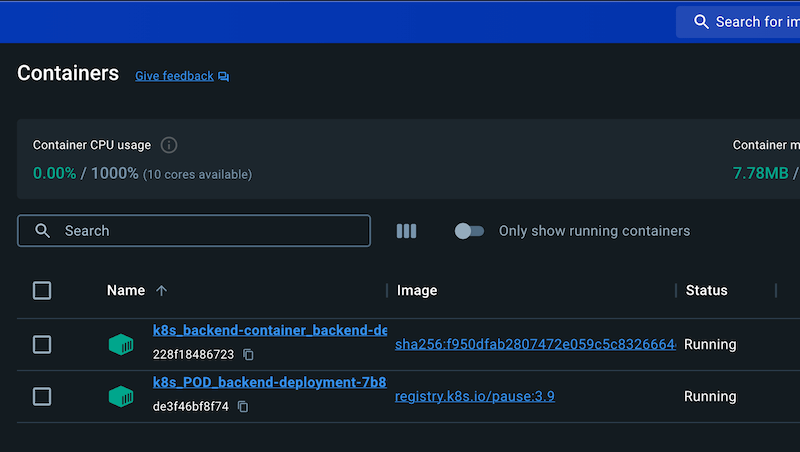
Testing the Feature Flag
To test the feature flag, return to your ConfigCat dashboard and turn on the feature flag. Execute the script again. You should now see that the container is using the backend-with-node20 image noted by the sha256 hash of the image:
That's it! You've made it this far and successfully integrated feature flags with Kubernetes.
Final Thoughts
Kubernetes is platform agnostic and takes a containerized approach to developing and deploying applications further. It removes the limitations of scaling from containerization platforms like Docker. It provides a standardized framework for managing multiple containers across multiple machines and provides fault tolerance and load balancing. In the demo, I've shown you one way of using Kubernetes with feature flags. Rather than editing your .yaml config files each time, you can use feature flags to change your deployment and service configs on the fly dynamically. To learn more about feature flags, check out the ConfigCat documentation.
References
Source Code
You can find the complete code for the demo app here.
Further Reading
If you'd like to learn more, check out the following resources:
ConfigCat supports simple feature toggles, user segmentation, and A/B testing and has a generous free tier for low-volume use cases or those just starting out.
Stay on top of the latest posts and announcements from ConfigCat on X, Facebook, LinkedIn, and GitHub.