Feature Flags in C#10 Using ConfigCat
Improving your digital product over time is a sure way to keep your target audience engaged and your business running smoothly. Rewarding specific users, such as loyal customers, can be an effective way of increasing customer loyalty and brand recognition.
In this article, I’m exploring how feature flags can be used in a C#10 console application for simple user targeting and feature management, while walking you through an easy-to-reproduce example.

What are Feature Flags
Feature flags, also known as feature toggles or switches, are a software approach that allows developers to selectively enable or disable certain functionalities without having to redeploy code. This empowers developers to quickly test features, provide updates, target specific groups, and disable underperforming features.
The Sample App
I run a successful e-commerce website with thousands of buyers every week. I want to encourage repeat purchases, so I thought about developing a membership program to increase buyer loyalty. I’ve decided to give all my members a 10% discount of their purchases to reward them and encourage even more people to sign up.
However, I’d prefer to have the option of discontinuing this feature at any moment if it affects my budget more than I anticipated. Plus, I want to make certain that the function works flawlessly before committing to having it indefinitely.
So, the simplest thing to do was link my feature to a feature flag, which not only allows me to suspend the discount at any time, but also helps me deliver the discount to members only.
You can consult the finished app here.
Setting Up The Application
The first step is creating a C# 10 .NET application, which I’ve done using Visual Studio.
Then, I’ve created the initial setup needed to keep track of purchases and calculate the total amount of a customer’s cart.
using System;

//Item to be purchased
public record Item
{
    public decimal Price { get; set; }

    //can have name, id, description etc.
}

//Handles all the items
public class Cart
{

    public Cart(){}

    public decimal CalculateTotal(List<Item> purchases)
    {

        decimal totalAmount = 0;

        foreach (var purchase in purchases)
        {
            totalAmount += purchase.Price;


        }

        return totalAmount;

    }
}

public class Program
{

        static void Main()
        {

            Cart newCart = new Cart();

            // Simulate multiple purchases
            List<Item> purchases = new List<Item>
            {
                new Item { Price = 100 },
                new Item { Price = 50},
                new Item { Price = 50}
            };


        //Calculate and display the total amount to be paid
        Console.WriteLine("Total Amount to Pay Today: " + newCart.CalculateTotal(purchases));

    }
}
By this point, if you run the application you should see the full amount that the customer will pay for the 3 items.
Connecting a Feature Flag
To create and maintain feature flags, I use the ConfigCat feature flag management system, which has a nice user interface and is very simple to use. ConfigCat supports simple feature toggles, user segmentation, and A/B testing and has a generous free tier for low-volume use cases or those just starting out.
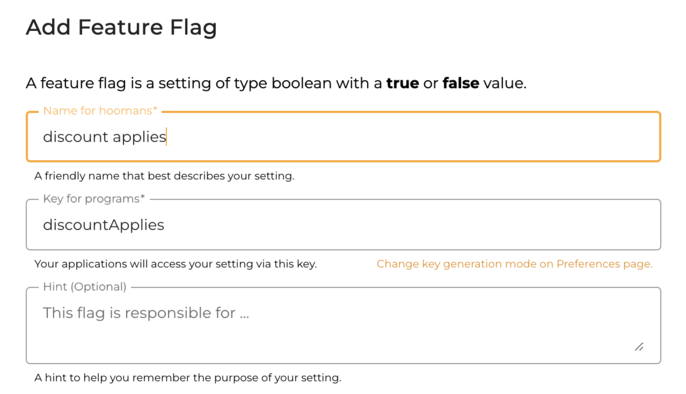
Head over to ConfigCat and create a free account. Once you log in, you can go to your dashboard, where you can create your new flag. Go ahead and create a flag called discountApplies like in the image below.

In addition to setting a feature flag, I want it to be configured so that my feature is only served to members. To do this, I'm employing 'TARGET SPECIFIC USERS' and changing the User's 'Custom' to the Type 'IS ONE OF' Member.

The flag is now turned on for all users of Type Member and turned off for all those who are not part of the membership program.
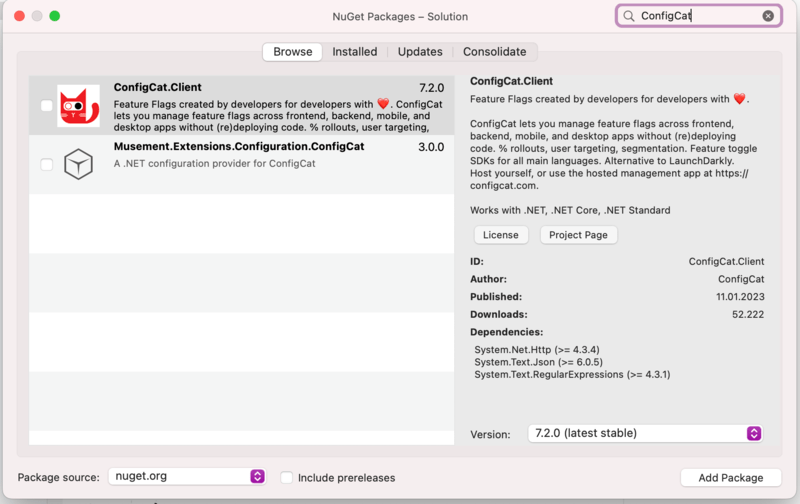
Next, I added ConfigCat in my Visual Studio application. The easiest way to do so is go to Project -> Manage NuGet Packages…, search for ConfigCat and install the package.

Next, import it into Program.cs
using ConfigCat;
using ConfigCat.Client;
In order to track who is a member and who is not, I need a user object. It’s important to note that all users need to have a unique identifier, which in my case is a random ID, but can also be their email or sessionID. I’m also setting the user’s type to Member.
User user = new User("1234") // Unique identifier is required.
            {

                Custom =
                {
                    { "Type", "Member"}, //Member or Non-Member
                }
            };
Next, I created a ConfigCat client and retrieved the flag’s value. Tip: You can locate your unique SDK key in the upper right corner in ConfigCat dashboard.
var client = ConfigCatClient.Get("YOUR-SDK-KEY");

            var discountApplies = client.GetValue("discountApplies", false, user);

            Console.WriteLine("discountApplies's value from ConfigCat: " + discountApplies);
To use the flag, I’ve made some changes to the Cart class.
//Handles all the items
public class Cart
{
    private readonly bool _discount;


    public Cart(bool discount)
    {
        _discount = discount;
    }

    public decimal CalculateTotal(List<Item> purchases)
    {

        decimal totalAmount = 0;

        foreach (var purchase in purchases)
        {
            totalAmount += purchase.Price;


        }

        if (_discount)
        {
            totalAmount *= 0.9m; // Apply 10% discount
        }

        return totalAmount;

    }
}
You can see the full content of the Program.cs file here.
Toggling the Flag
If you run the app now, you should see that the total amount the client needs to pay is no longer 200, but 180 - a 10% discount being applied.
If you change the Type of the user to Non-Member and run the code again, the discount is gone.

Just like that, I’ve tackled both user targeting and having the feature at my fingertips in just a few minutes, with just a few lines of code.
Key Takeaways
Using feature flags to control your application is simple even in C#10, making .NET development easier than ever. Let’s recap the steps:
- Create a C# 10 project and configure the infrastructure
- Sign up for ConfigCat and create a feature flag
- Configure the Feature Flag
- Connect ConfigCat to your application
- Modify the code accordingly and run the app
Feature flags can be used to perform various types of user testing, to avoid redeployment and expedite your development process. If you’re interested in learning more about feature flags, be sure to check out ConfigCat blog, Linkedin, Facebook, Twitter and GitHub.
